
At the Creative Stitches show last month I picked up a couple charm packs that were on sale for a great price. I was super excited to find a pack of Ten Little Things by Jenn Ski for Moda. I needed to make a little boy quilt, and Ten Little Things is the perfect collection for a little boy, regardless of whether you have the panels or not.
I looked for a pattern or tutorial to make a baby/toddler quilt with just one charm pack and a few fat quarters, Moda Bake Shop has quite a few excellent tutorials and freebies, but I couldn’t find one that seemed just right. I decided it was long past due for a tutorial here and drafted one up.
I drafted out what I wanted in EQ7 and started cutting. I chose Kona Snow for my sashing and borders, mostly because you can get a full 45″ long strip from Kona after you trim it, and push it to 45 1/2″ if you don’t mind a little selvage in your seams.
Its the Ten Little Things Toddler Quilt!

Materials
1 Charm Pack
10 Fat Quarters for backing, binding and HST’s
1.5 yards Kona Snow (or other Kona Solid) for sashing and border
1.25 yards batting
The layout sheet is a good visual reference to have on hand for the placement of your squares, the layout of the diagonal strips and the orientation of the filler triangles.
Cutting Chart
Kona Solid
Cut 14 strips 2.5″xWOF
From the strips cut the following lengths;
1-5: 9 @ 5″ (45 total from 5 strips)
6: 3 @ 5″, 2 @ 9.5″, 2 @5.5″7: 2@22.5″
8-9: 1@36″
10-13: 1@45″
14: 2@10.5″
Set the sashing strips aside.
Cut 2 Strips 3″xWOF for horizontal borders
Cut 3 Strips 5″xWOF for Vertical Borders. Cut one of the strips in half and sew one half to each of the remaining two strips, sewing so close to the selvedge that the seam allowances are all selvedge. This will give you the most usable non-selvedge fabric in your border possible. ( I sew my seam exactly on the dotted lines)
Set the Border Strips Aside.
Fat Quarters:
From 8 Fat Quarters cut 1 5.5″ Square (8 total). Draw a line from corner to corner an stay stitch 1/4″ from either side of the line.


This will help keep the quilt from stretching on the bias as it is sewn together. Cut the 8 squares in half to make 16 Half Square Triangles . Set Aside.
Square up the remainder of the 8 fat quarters. Keep all the selvages and scraps.
Charm Pack:
Remove 3 squares from your Charm Pack (or the amount needed to) leaving 39 remaining. Cut 2 of those in half and set aside as Half Charm Triangles. Keep the last charm square for a fun label background.
Instructions
Make your long sashing pieces as follows:
1. Sew the two 10.5″ strips to two of the 45″ strips to make the 55″ sashes.
2. Sew the two 5.5″ stips to the remaining two 45″ strips to make the 50″ sashes.
Set the 9.5″, 22.5″, 36″, 50″ and 55″ sashes aside.
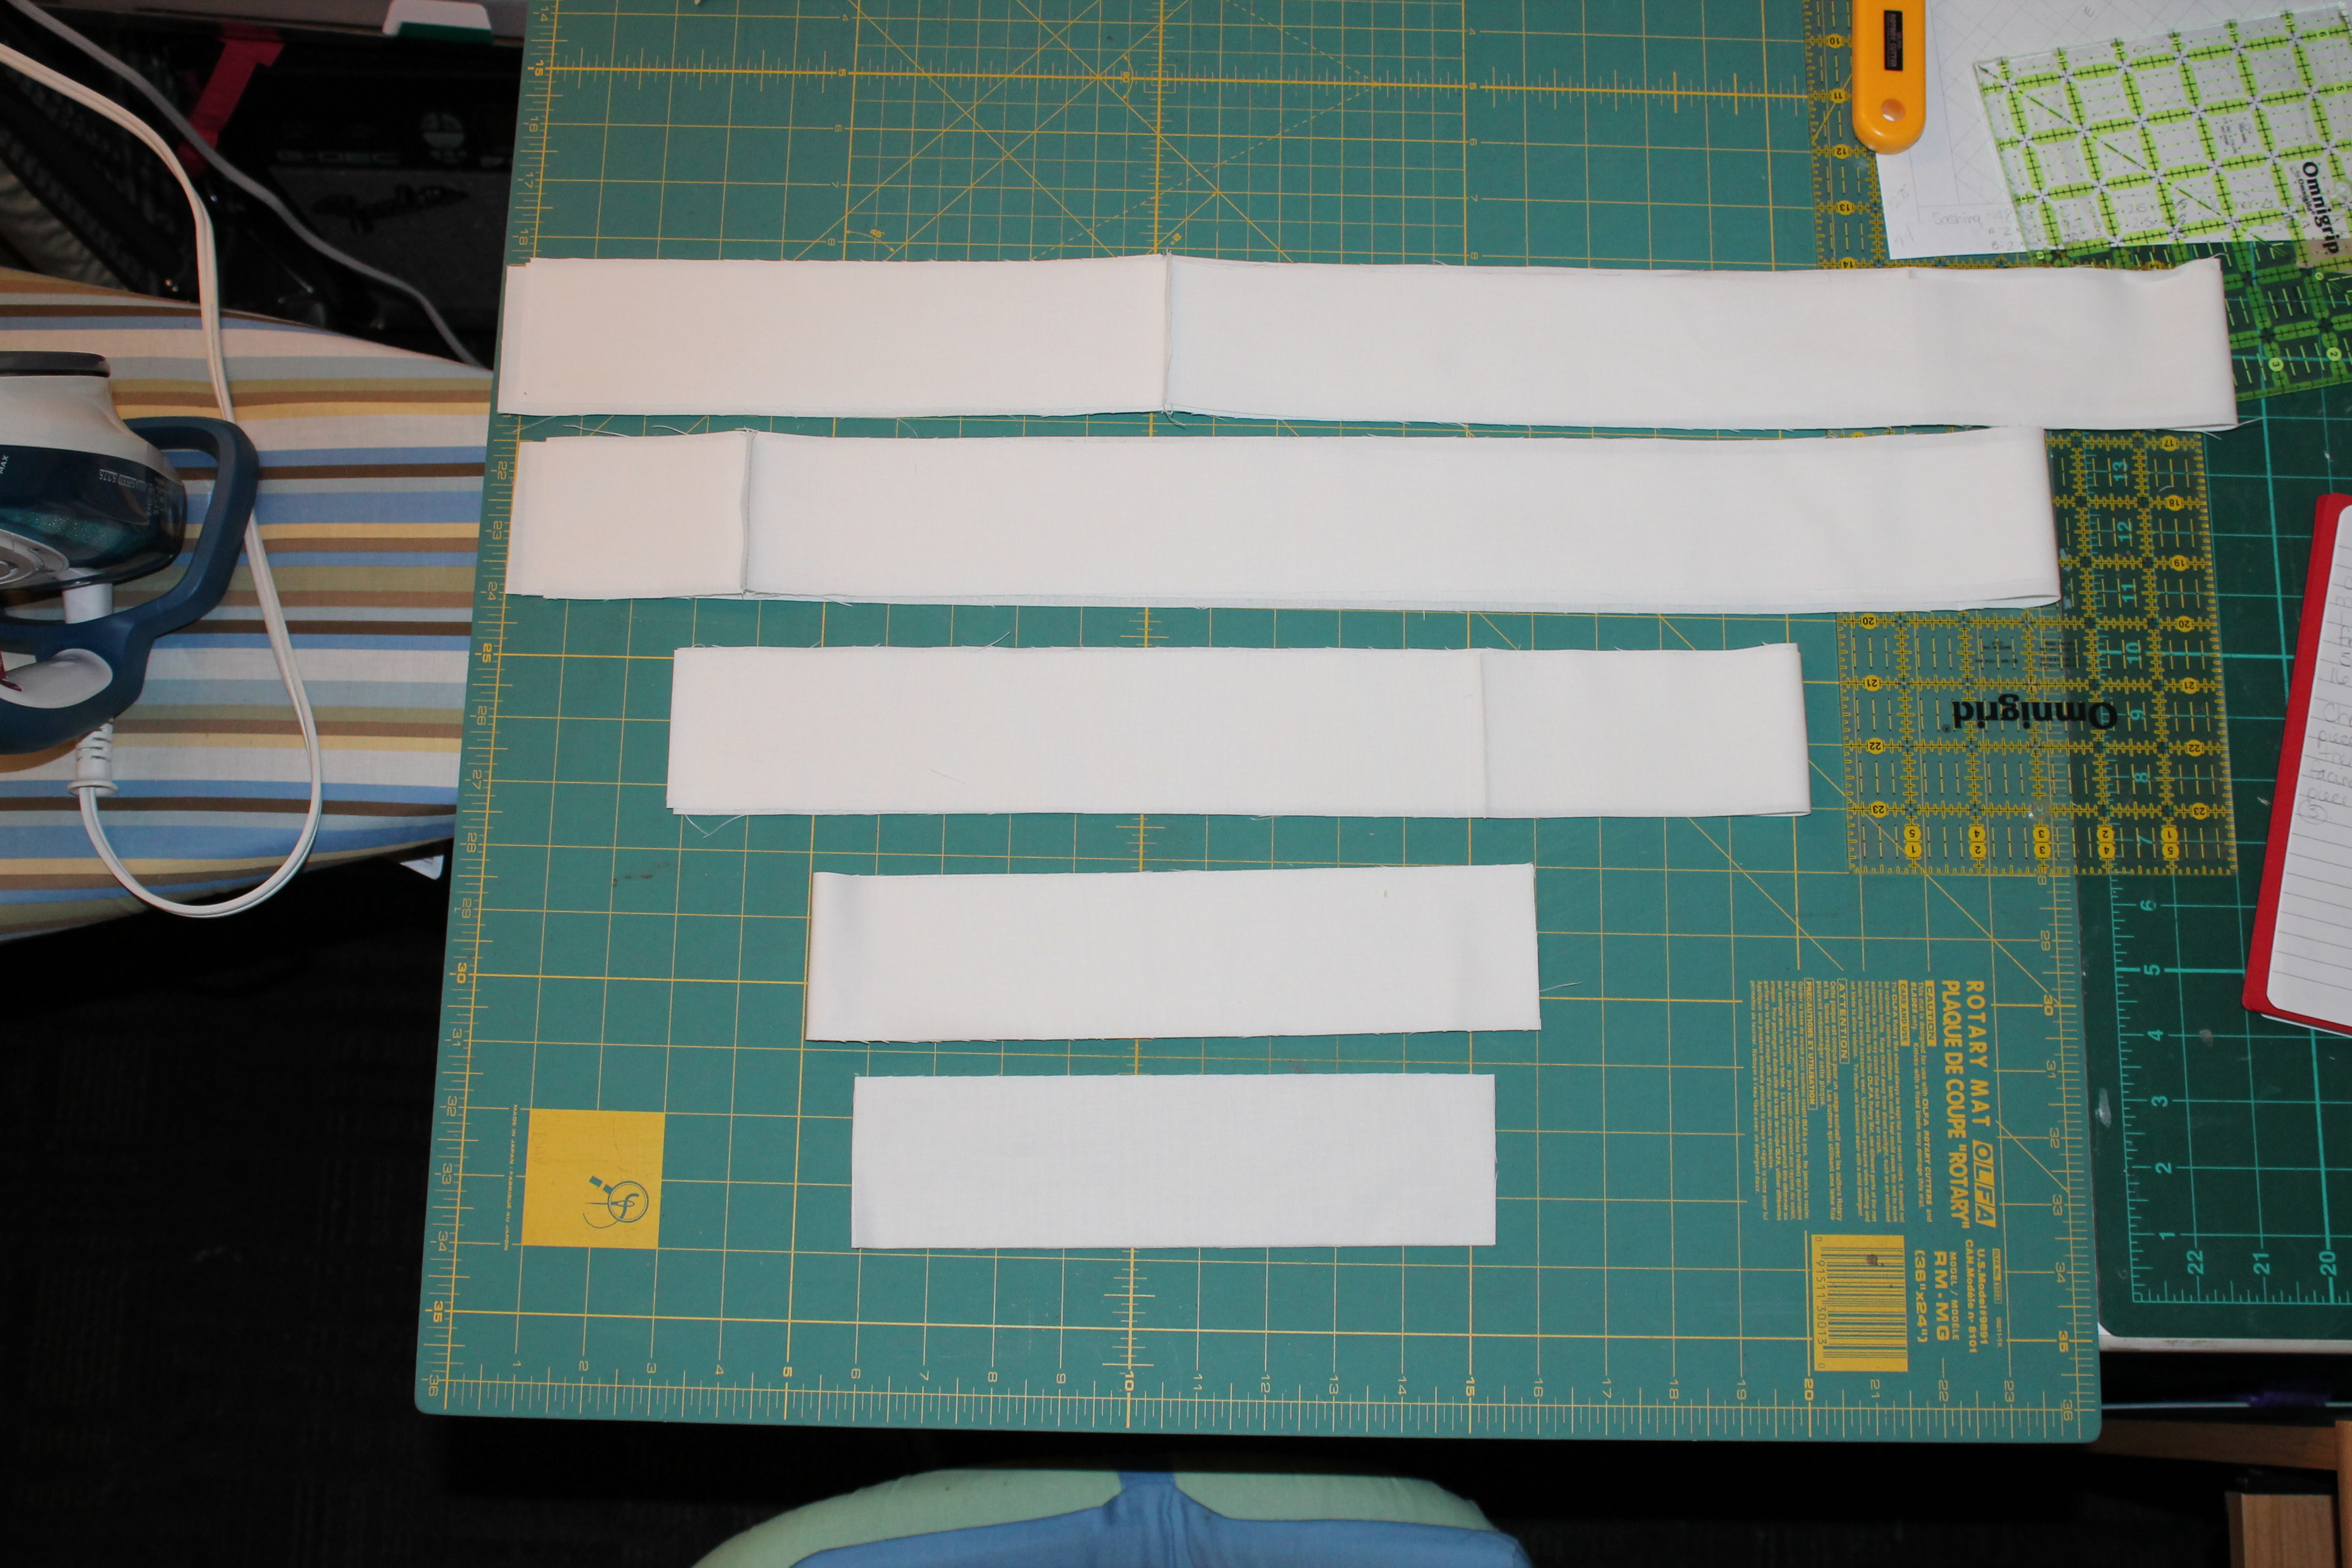
Long Sashing Strips
Using the chain piecing technique, sew the 2.5″x5″ strips to one side of the 39 charm squares. Press seams open or towards the darker fabric.
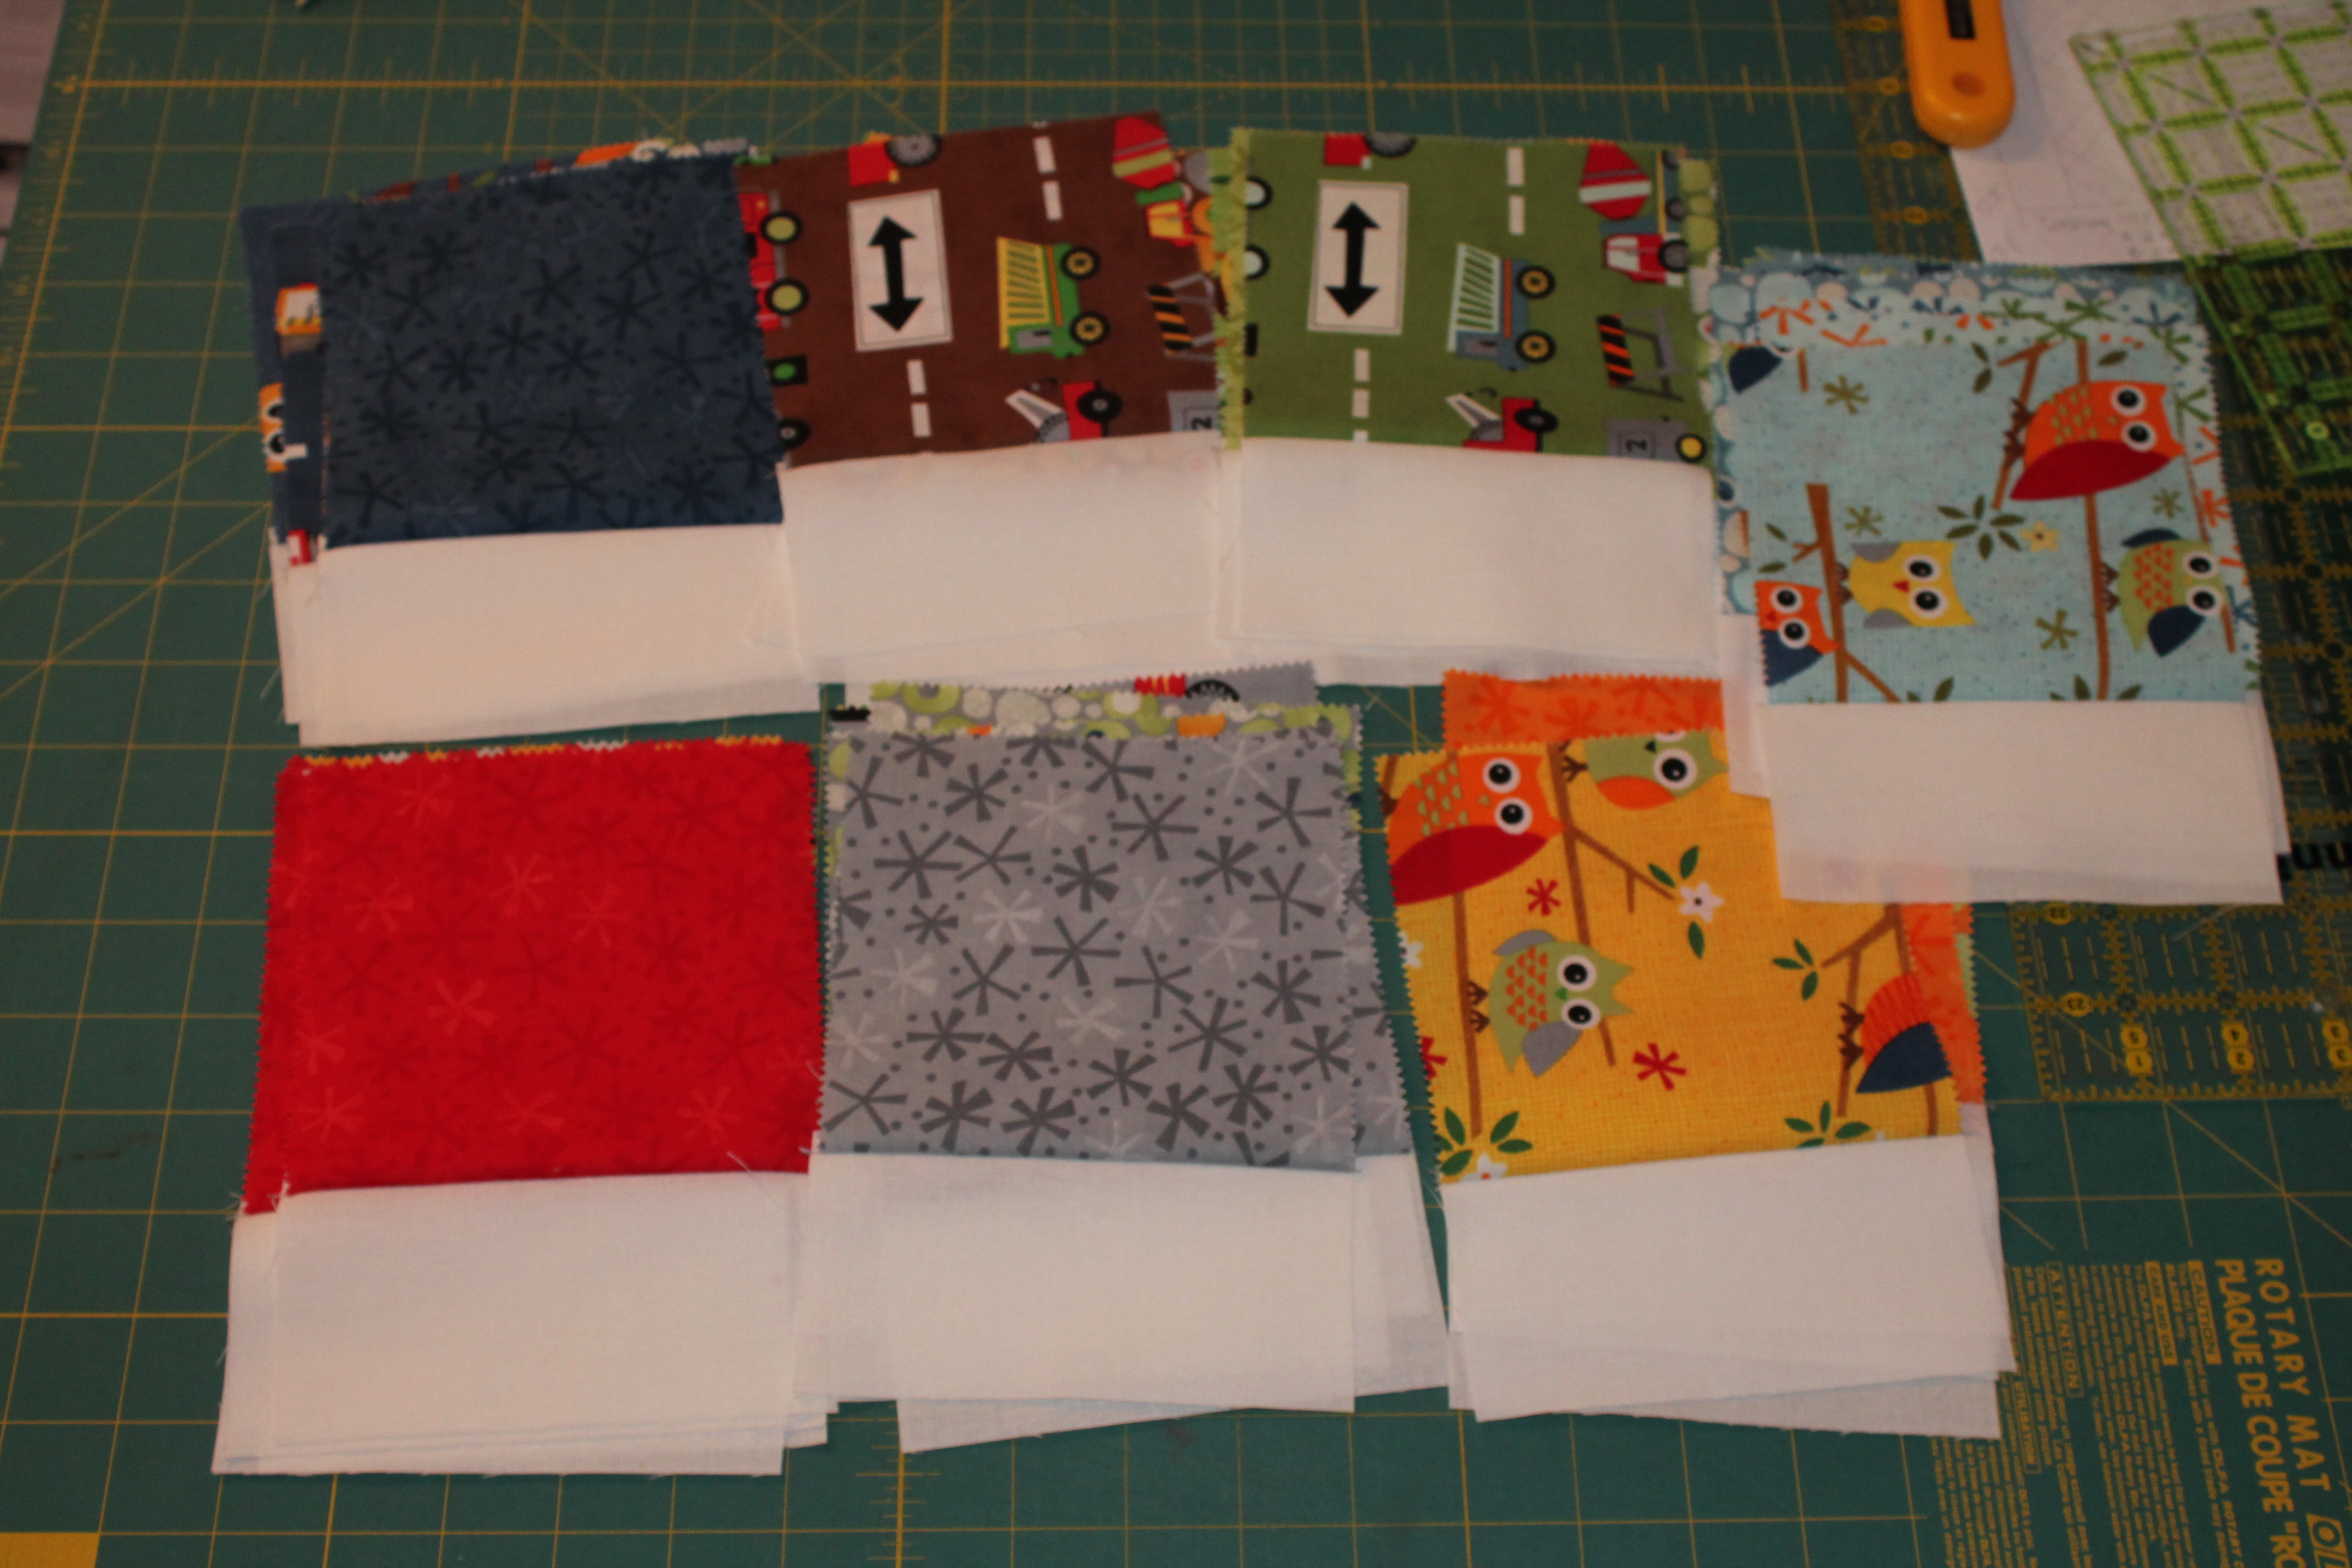
Using the layout page provided plan the placement of your blocks, or, if you wish, make it random. Start sewing your rows.

My “design wall” on paper =)
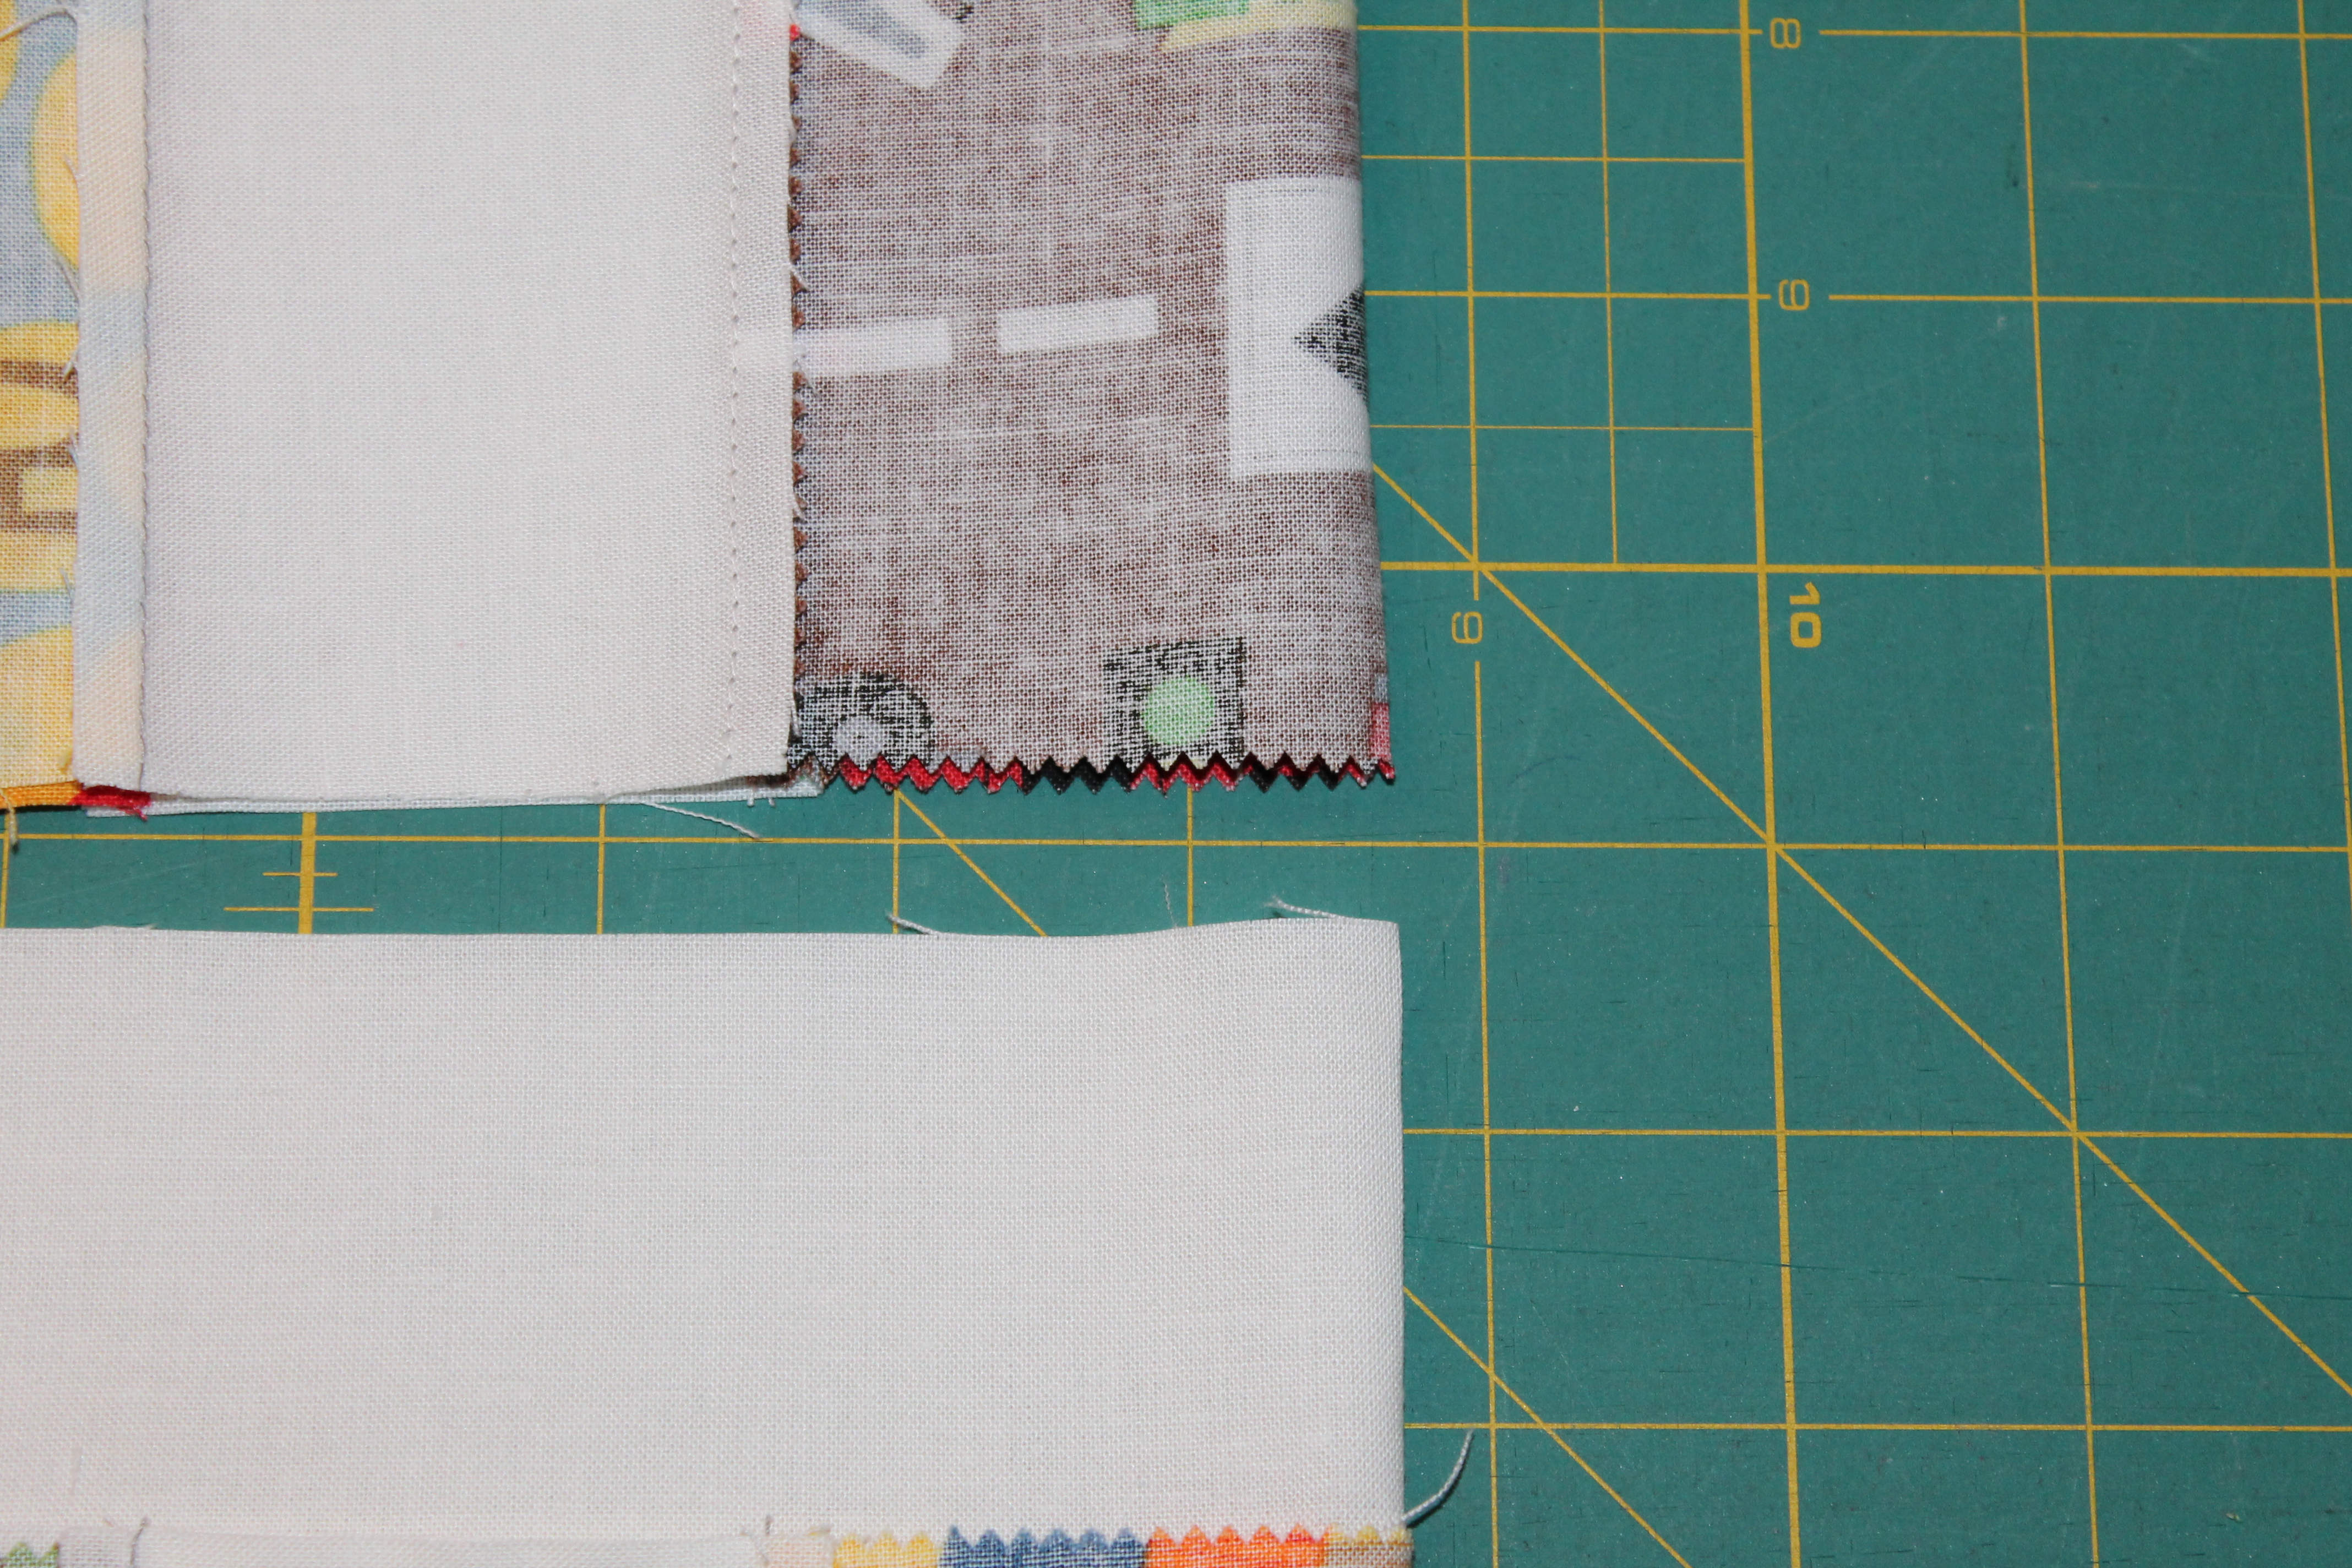
Makes 2 rows of 1 charm square: Sew a 2.5″x5″ strip RST to the charm square on the opposite side of the first sash. Take 2 HST and sew one to either ends of your row so the long angles (hypotenuses) are pointing in the same direction. Trim

Make 2 rows of 3 charm squares: Sew three charm squares RST, square to sash. Sew a 2.5″x5″ strip to the end of the row. Take 2 HST and sew to the ends of your row as above. Trim
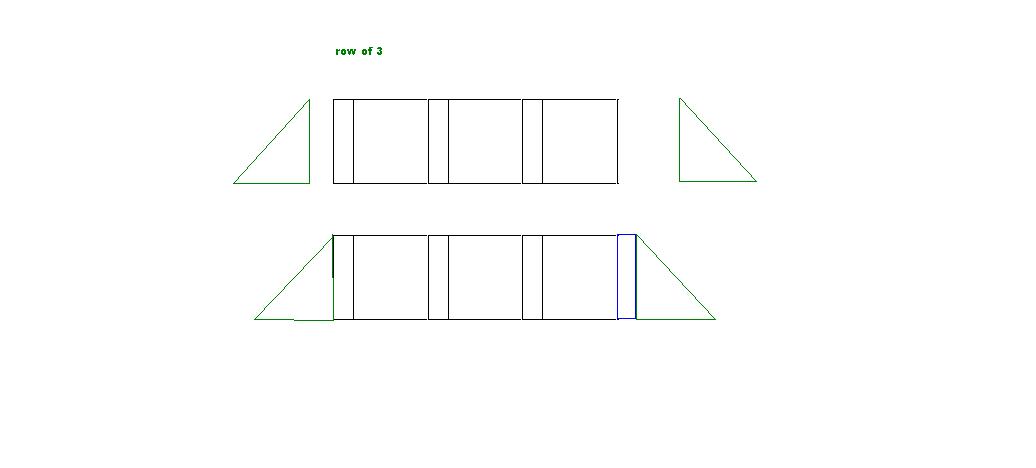
Make 2
Make 2 rows of 5 charm squares: Sew five charm squares RST, square to sash. Sew a 2.5″x5″ strip to the end of the row. Take 2 HST and sew to the ends of your row as above. Trim

Make 2
Make 3 rows of 7 charm squares :Sew seven charm squares RST, square to sash. Sew a 2.5″x5″ strip to the end of the rows.To one of the rows of 7 sew a HST to either side, with the long sides pointing in opposite directions. To the remaining two rows sew a HST to one end, making sure that it is the same end on both rows and that the long angle of each is in the same direction. Take a Half Charm Triangle and sew it to the other side of the row, matching the center of the triangle to the center of the row. Trim

Make 1

Make 2
Sew the sashing to the ‘top’, or shortest, side of your long rows as follows: 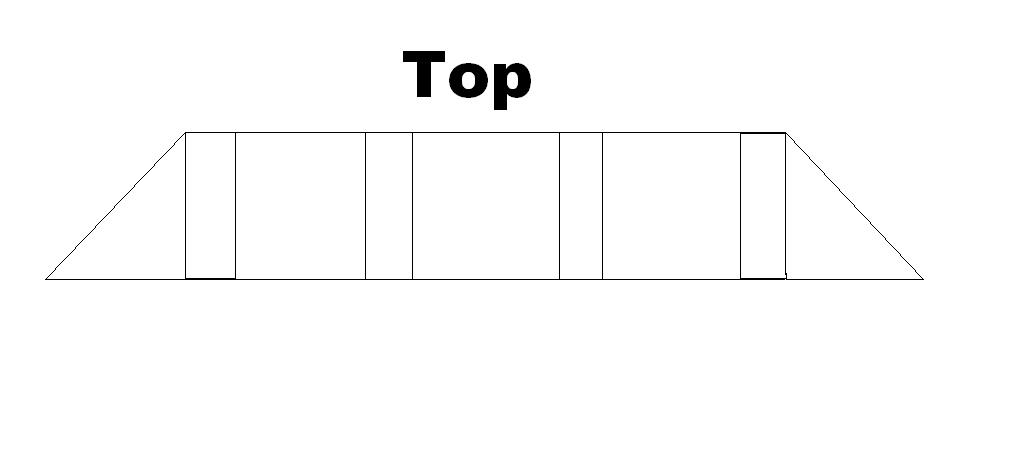
1. 9.5″ sashes to the 1 square rows
2. 22.5″ sashes to the 3 square rows
3. 36″ sashes tot eh 5 square rows
4. 50″ sashes to the 7 square rows with corner HST’s
5. 55″ sashes to either side of the 7 square row with opposite pointing HST’s.
Press the seams towards the sash.
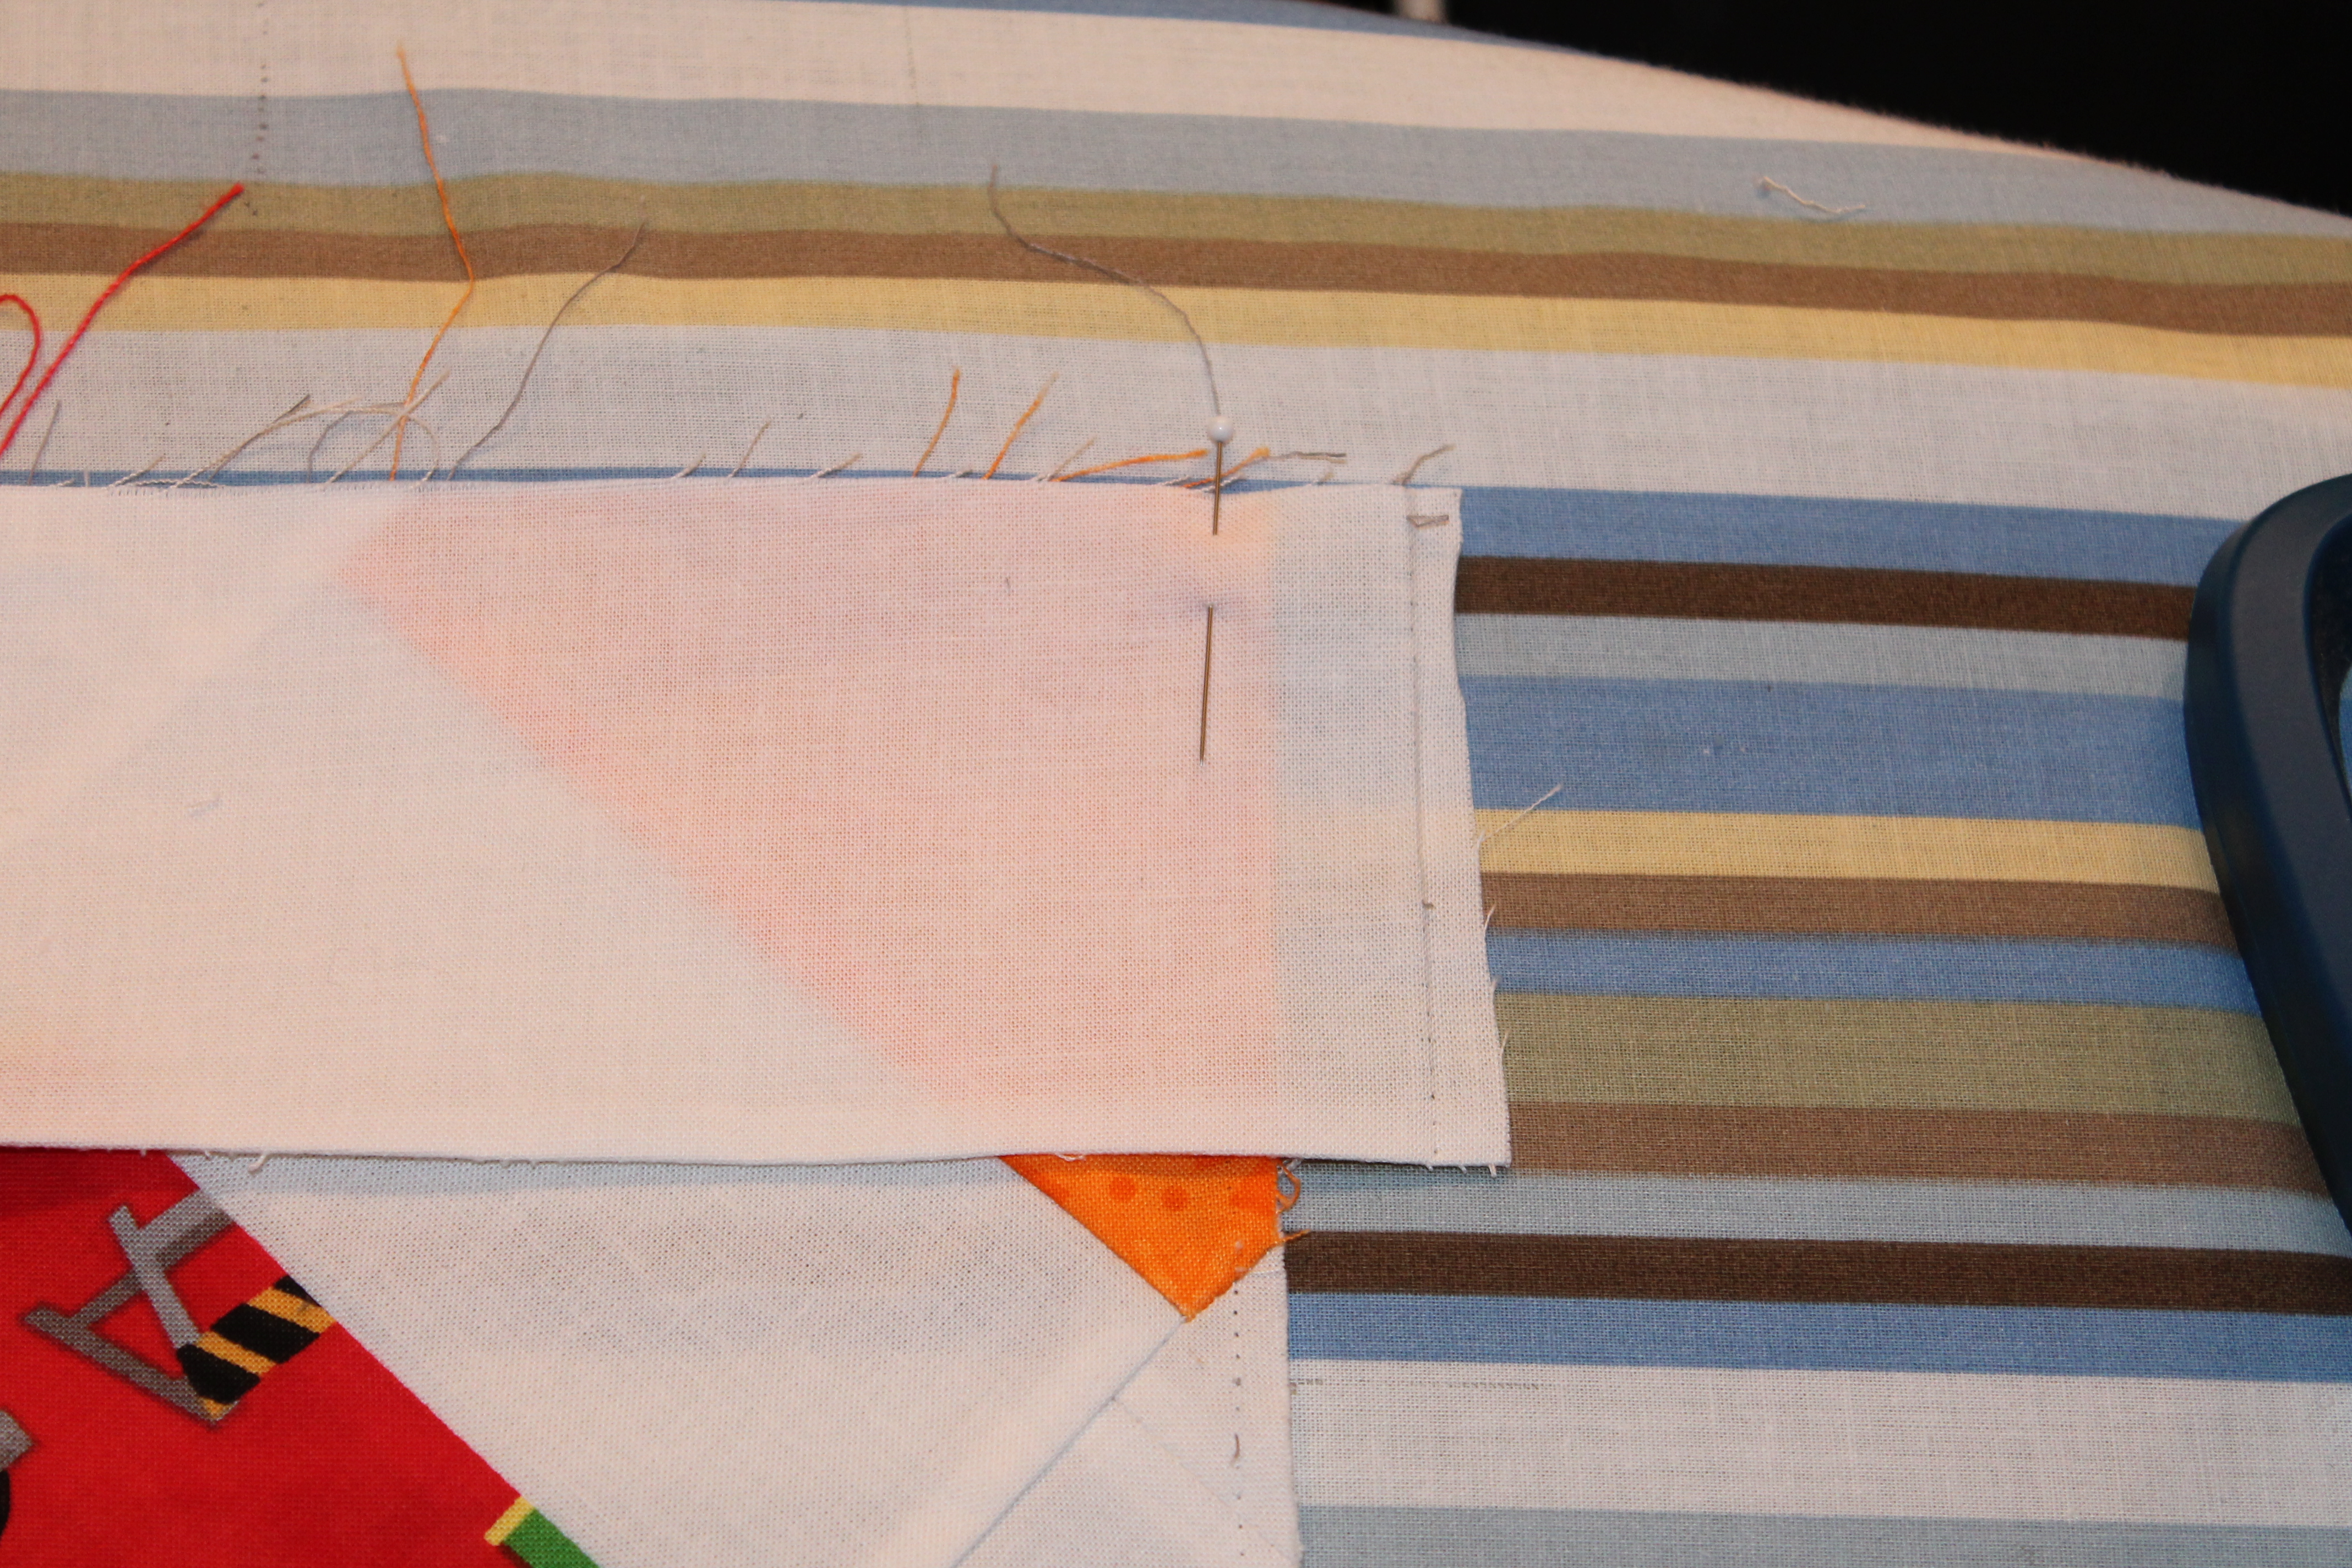
Sew the remaining Corner HST’s to the 9.5″ sashing, matching centers and pinning. These will be trimmed later.

Fold the HST and strip in half to find the center, pin and sew RST.
Start sewing your rows together. You can use chain piecing for this.
Sew your 1 and 3 square rows together, and your 5 and 7 square rows together, setting aside the double sashed 7 row. That row is the diagonal center of the quilt.
Find the center of the row by folding it in half and finger pressing down the sash and square. Match the centers, RST and sash to unsashed edge. Pin.

To make sure that your squares line up correctly in the diagonal, Pin carefully every 5 inches or so, checking that the squares of the row on top match teh squares of the row underneath. Here is a great tutorial from Marje Rhines from AQS newsletter on Aligning Sashed Rows. It is the technique I use and she has some wonderful illustrations to go with her instructions.
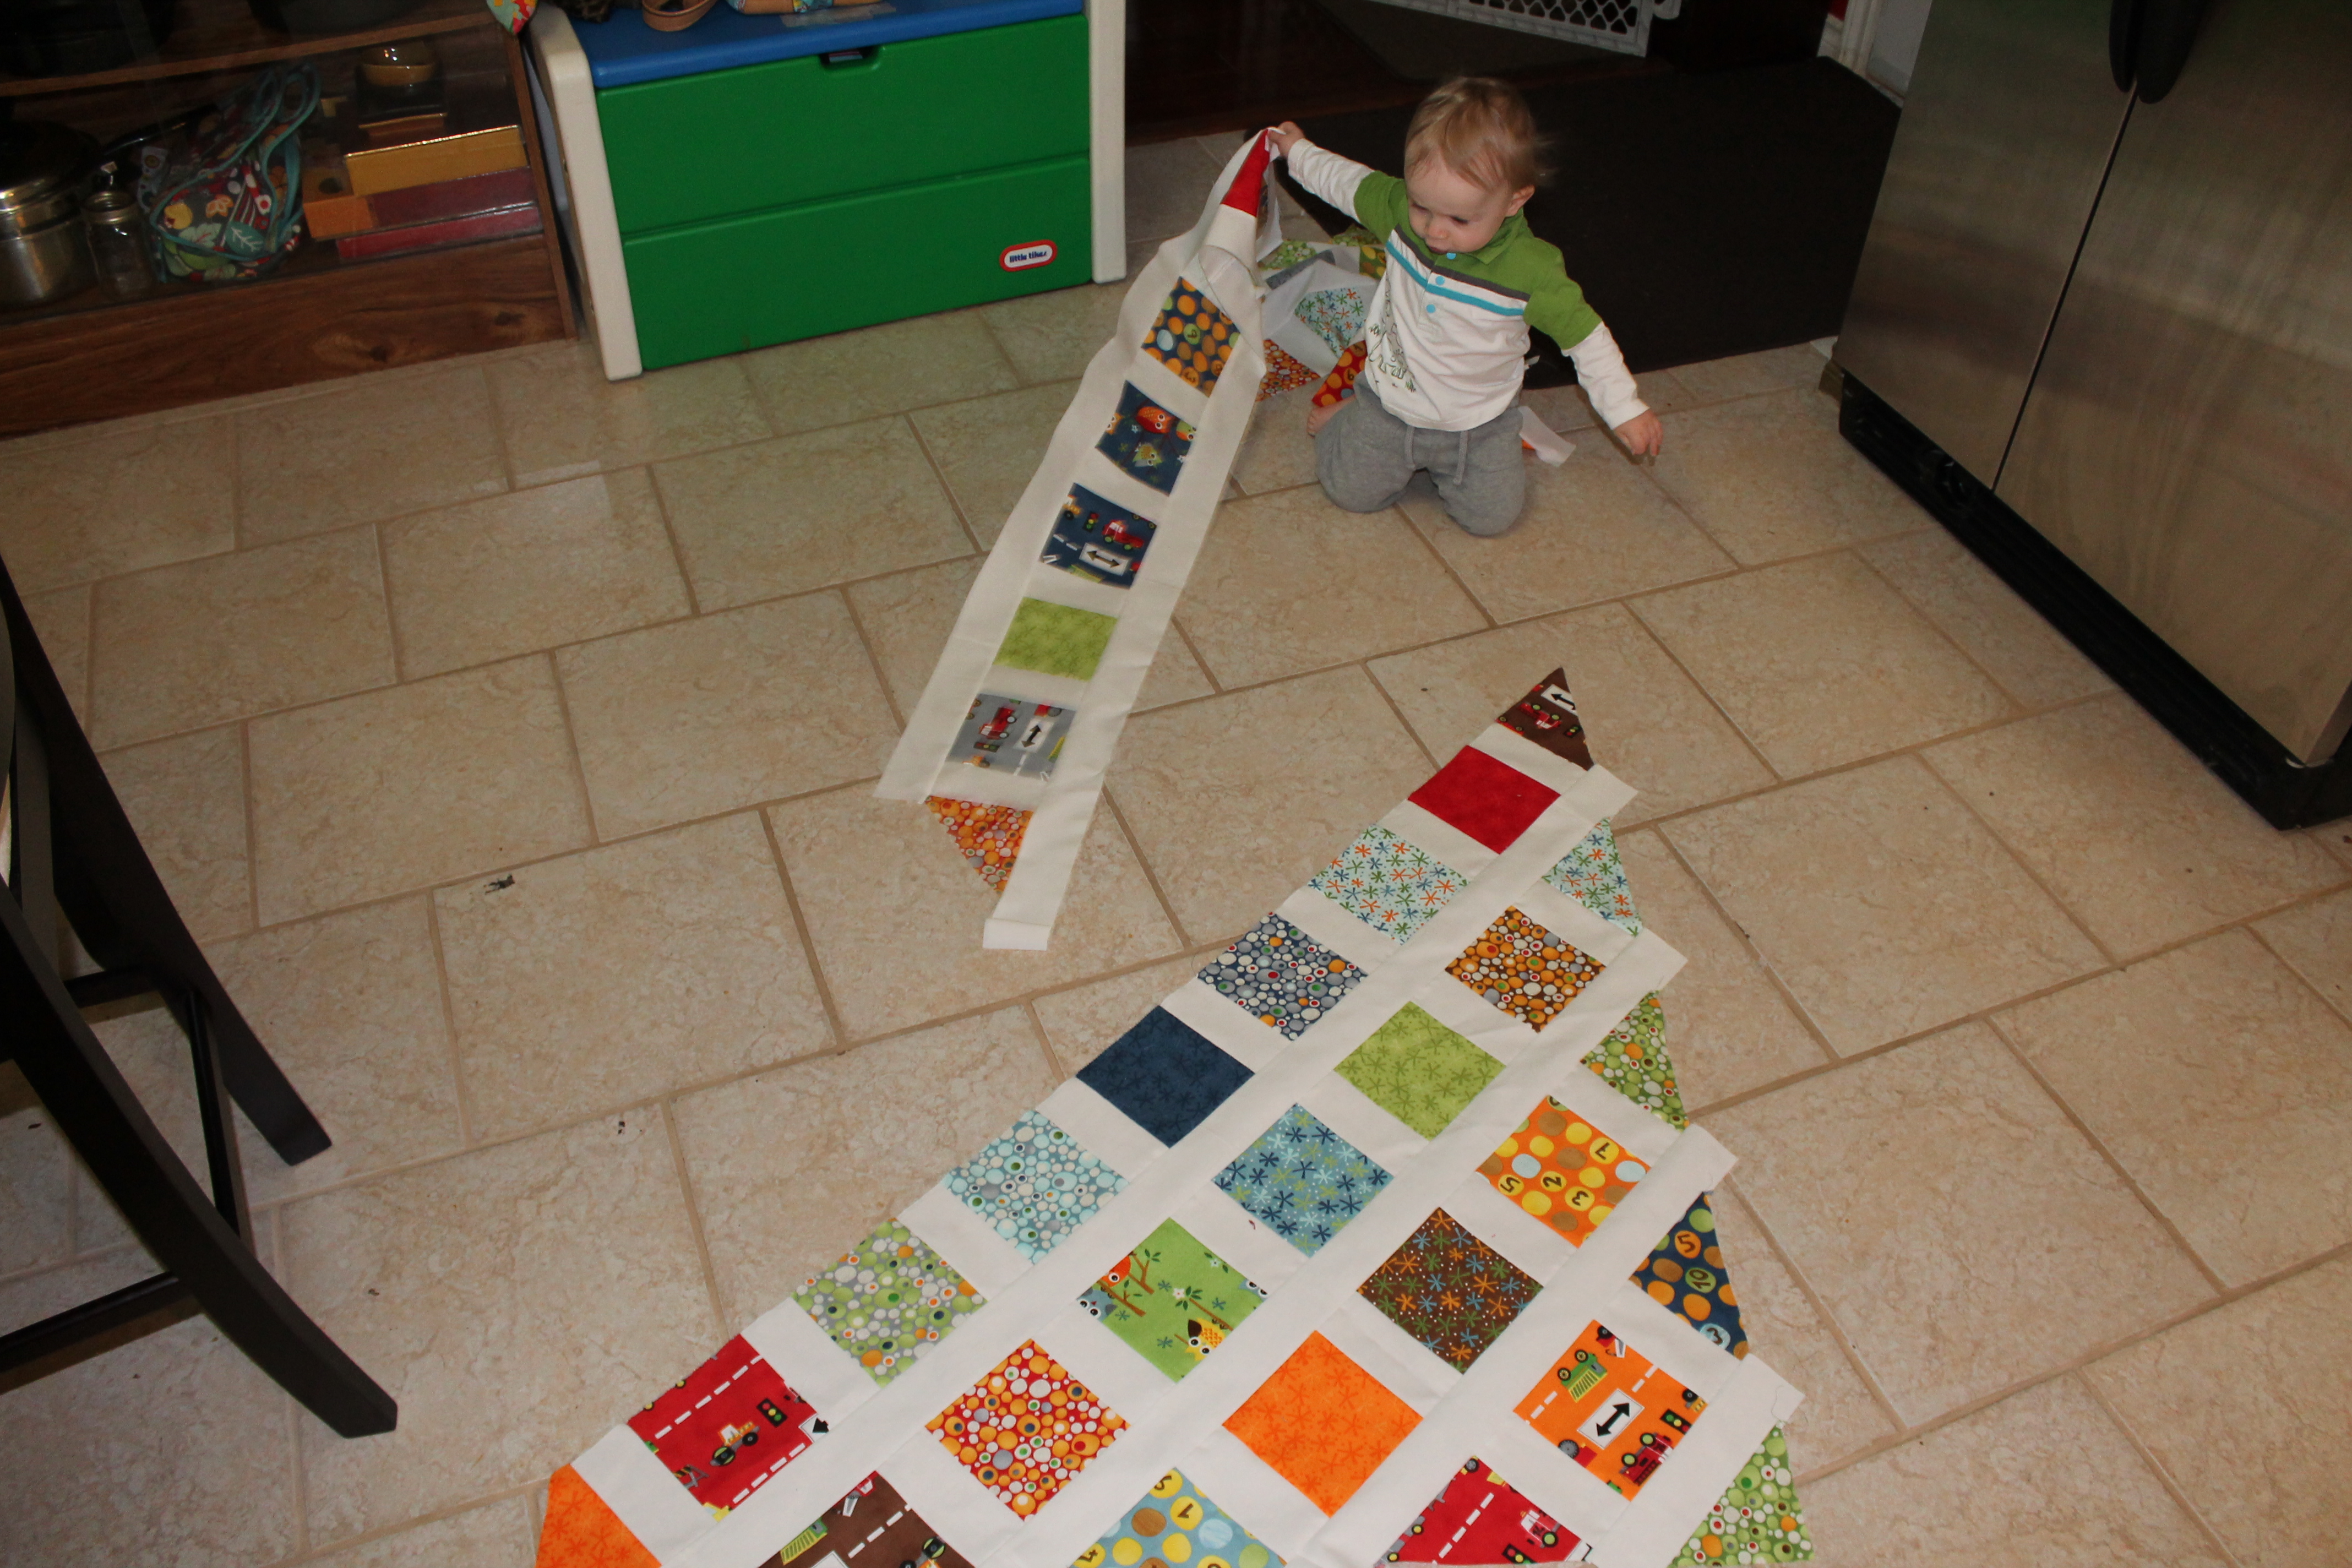
Press your seams to the squares. Sew the 3 row to the 5 row in the same manner as above, pressing to the squares. all your seams should be pressed in the same direction, towards the outer corner. You will have two sections of four rows, from corner to corner, and a middle row. Lay them out on the floor so you can get a visual of how the 3 sections will be sewn together, and correctly align the middle row.

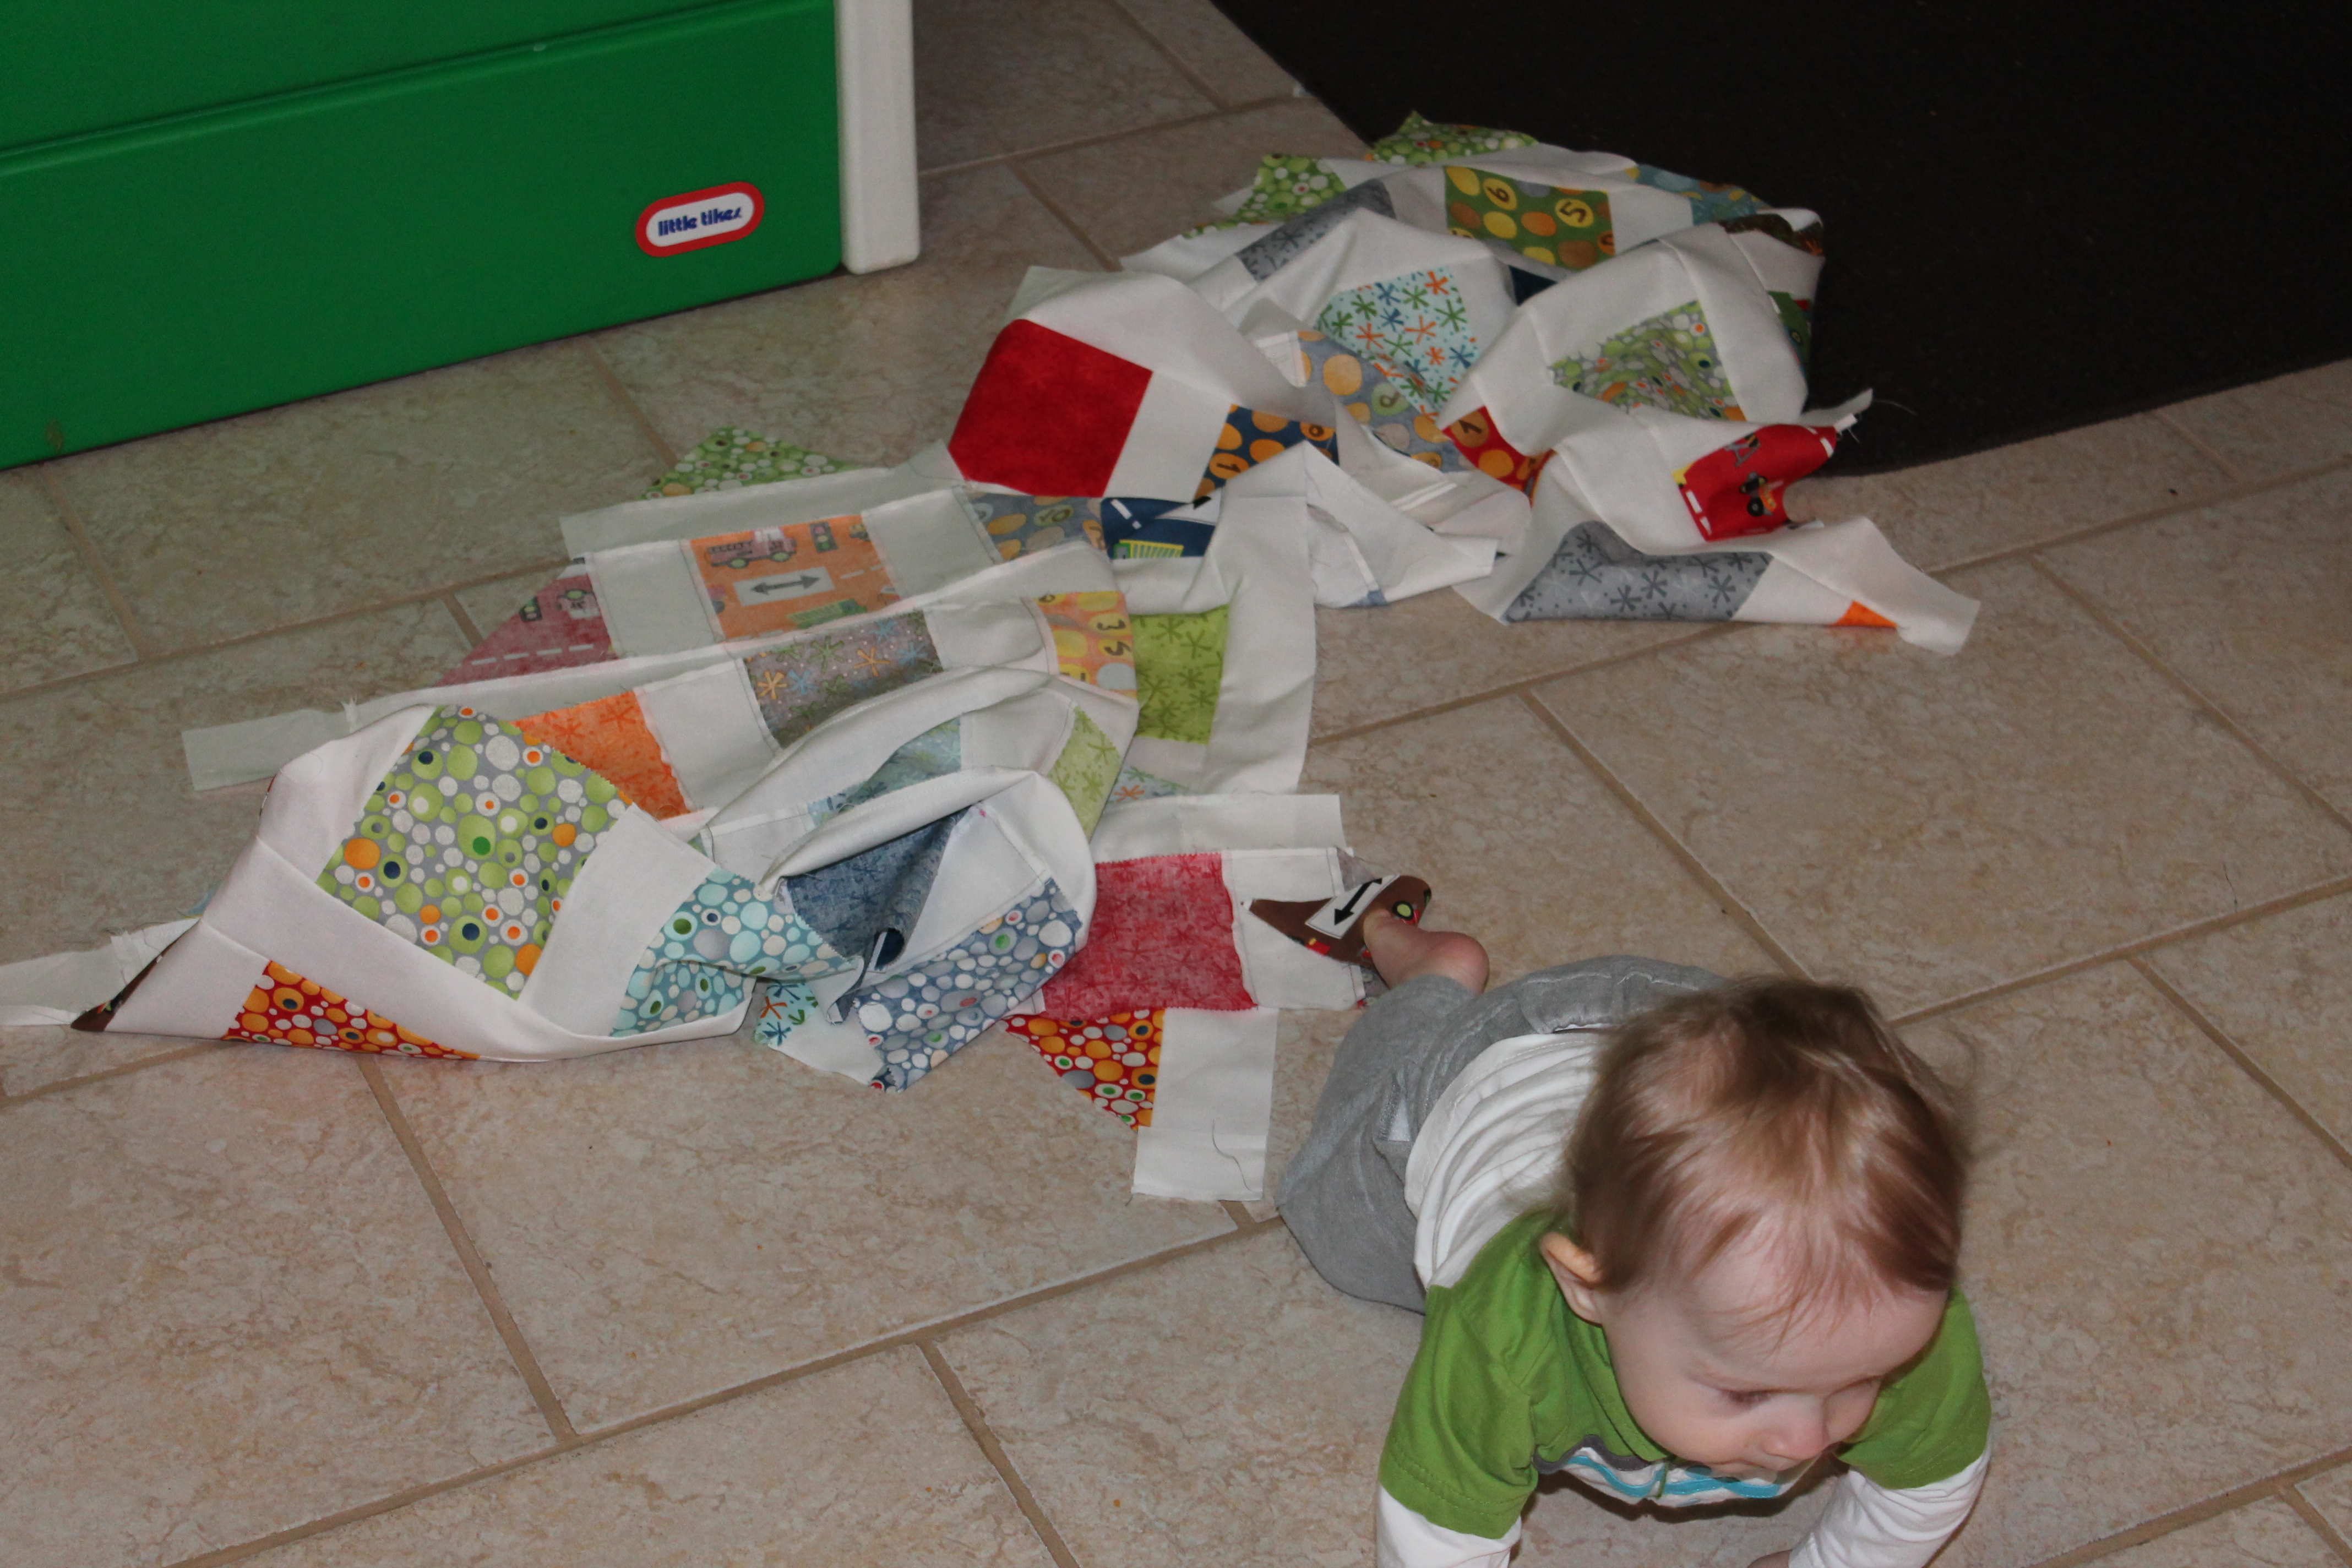
Try to keep it out of “helping” hands……


Match the middle row to the top section of the quilt as shown. The HST of the middle row will align diagonally with the first square of the adjacent row, and the long edge of the HST will align with the long edge of the Corner HST. Pin in place RST, using the same technique as above to align on the diagonal. Press towards the squares.

Match the middle row to the top section
Sew the bottom section in the same manner to create your finished top.
Trimming and Finishing
The quilt now needs to be trimmed and squared before you can add your borders. By stay-stitching the HST’s before sewing them into the rows you have helped prevent them from stretching too much on the bias.
Start by trimming your corners. Take the largest square ruler you have, mine is 12″x12″, and place it on one corner of your quilt. Arrange it so that the 45 degree line on the ruler is lined up with the center of the squares in the diagonal row, and the edges of the ruler with the edges of the border HSTs. Trim along both sides of the ruler.

Trim the remainder of the borders, using the corners as your guide.
Lay your quilt flat on the floor after pressing. If the quilt doesn’t lay flat it needs to be eased back into shape using steam.
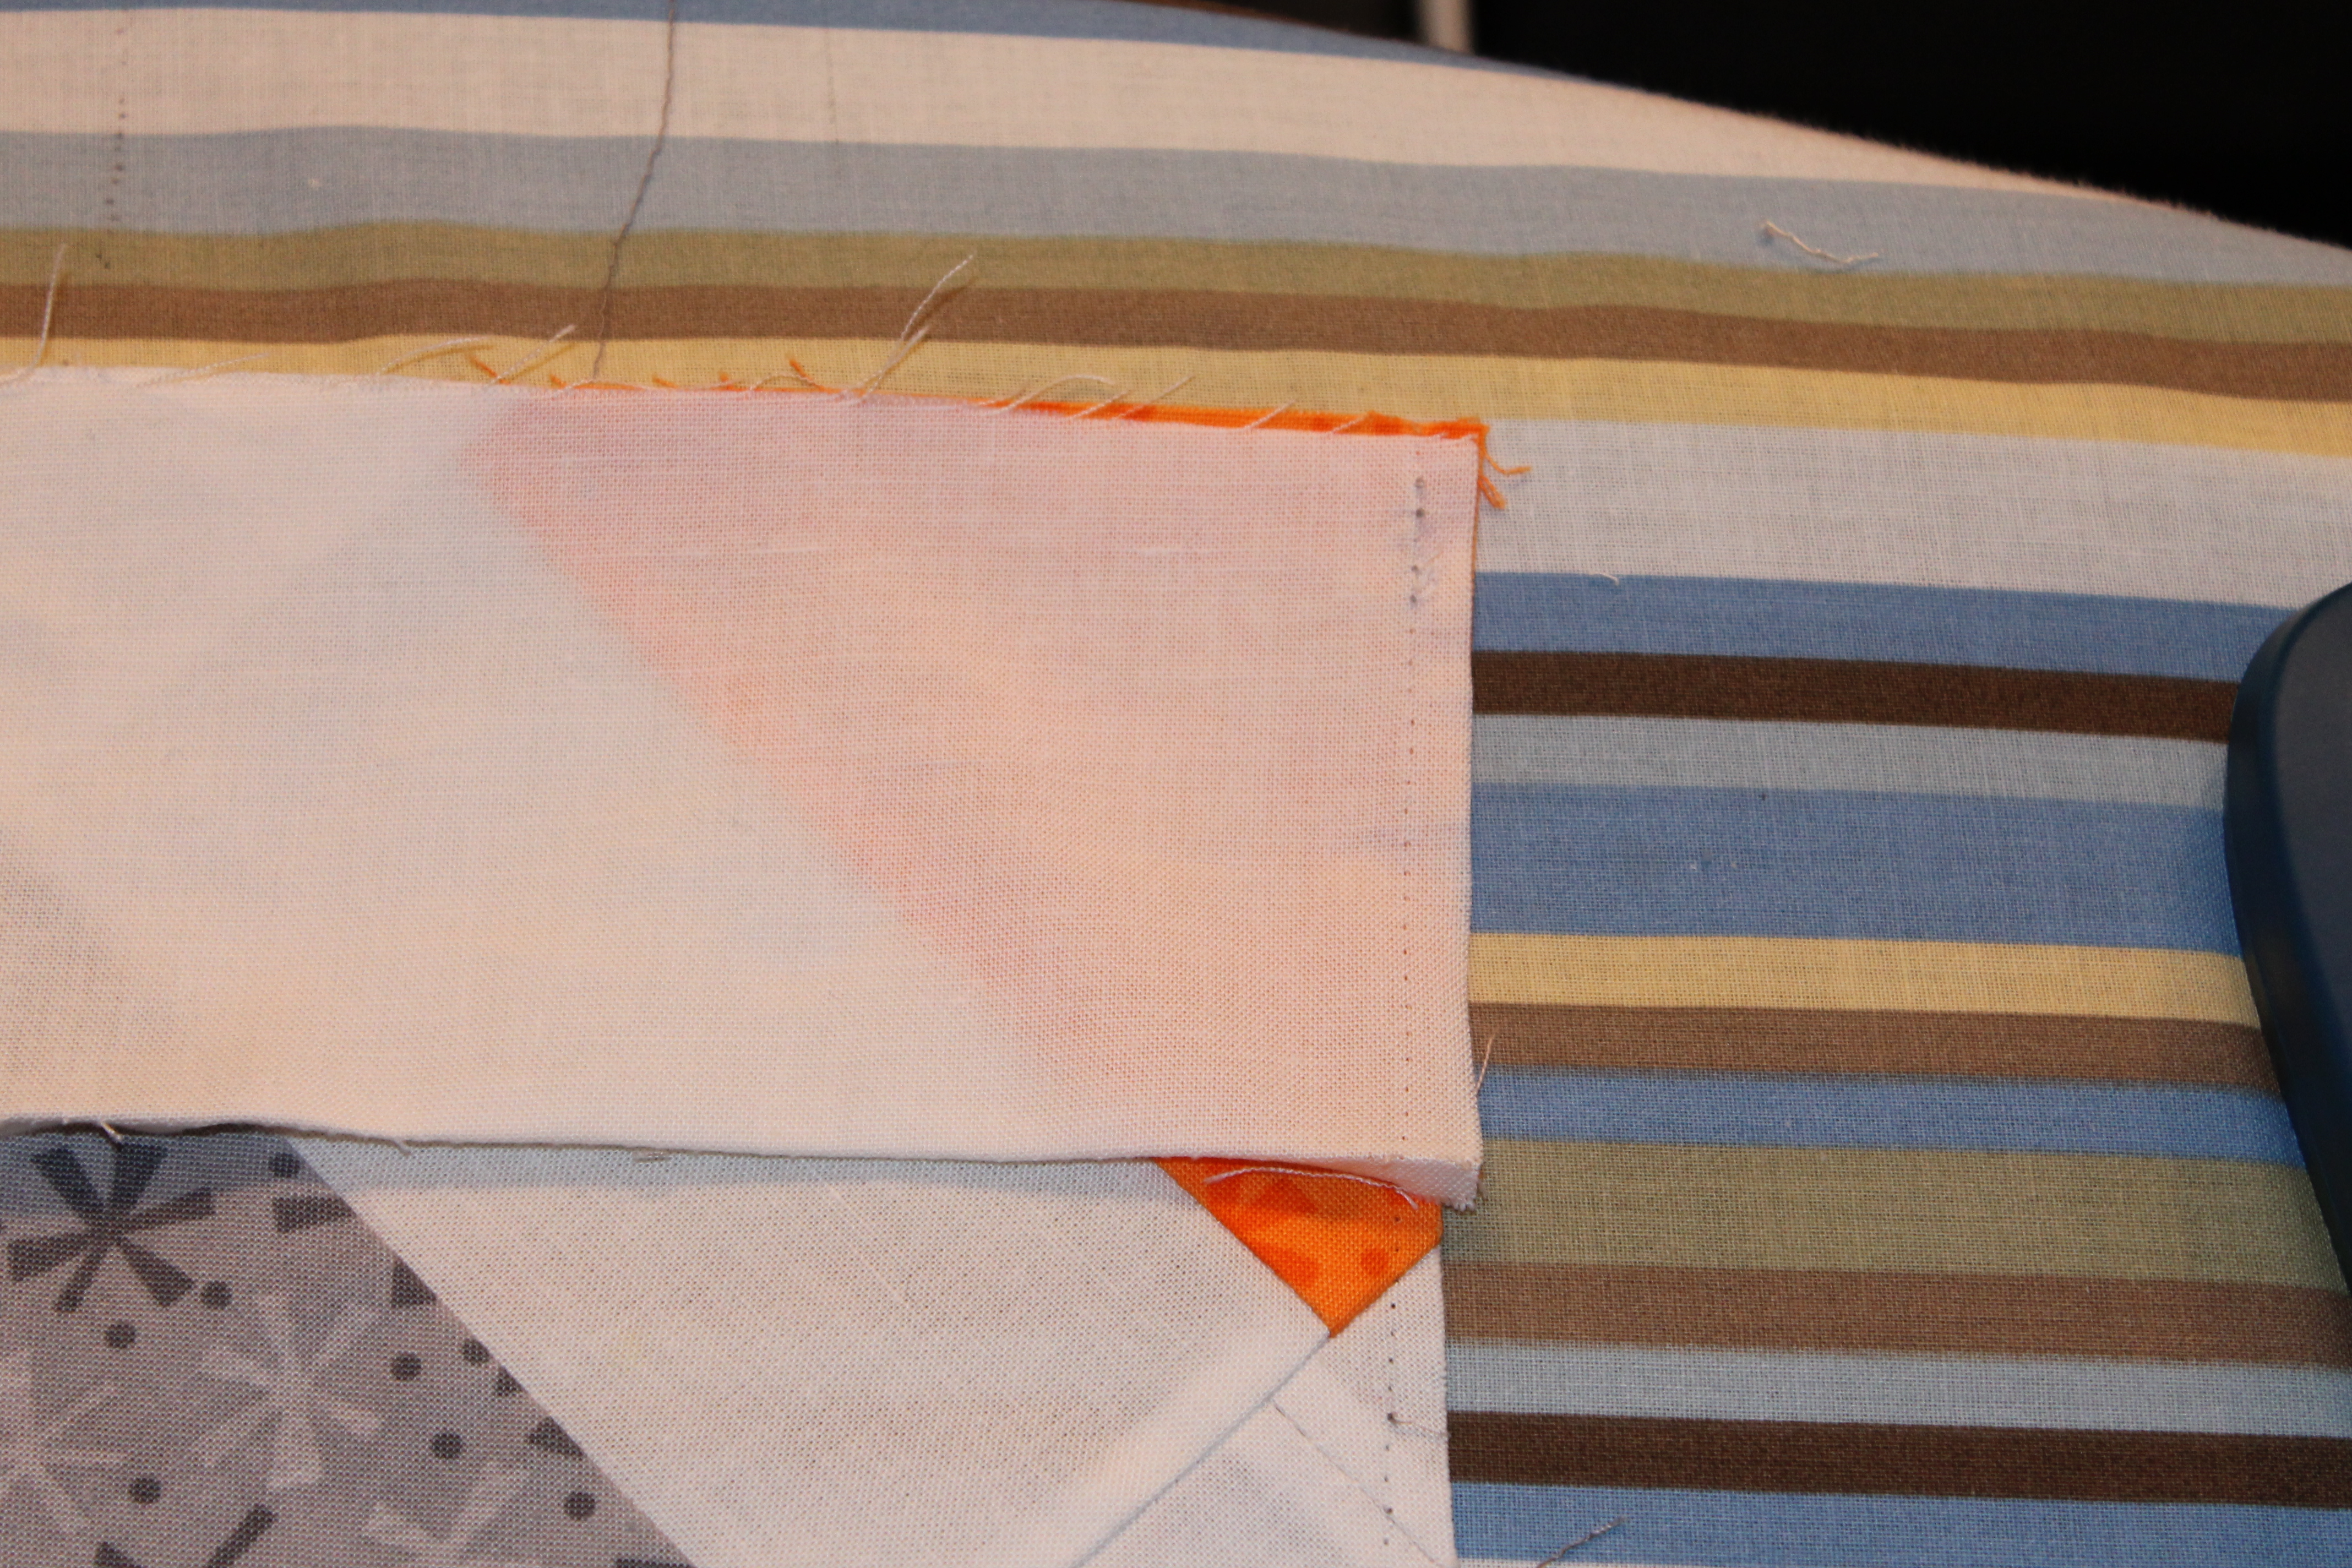
Before Steam-easing: Border strip matches exactly the long sides, but the quilt does not lay flat
After Steam-easing: Border strip extends past the raw edge of the quilt top and the quilt lays flat.
This next step can be done either on your ironing board or on a iron-safe carpet, depending on how confident you are with your easing. Starting with the top and bottom (shortest sides) take your longest ruler and match the corner of the ruler to the corner of the quilt. The corners are the only edges that are on grain. Using the corners as a guide, ease the raw biased edges under the ruler, pushing towards the corners slightly, so the raw edges are aligned with the edge of the ruler. Remove the ruler, spritz with water, and firmly press using full steam for a few sections.

Lift and press the iron instead of running it along the raw edge, this will prevent the bias from stretching back out. Repeat the process starting at the opposite corner on the same side (laying out on the floor is good if possible, because you can use 2 rulers and line everything up and steam all at once instead of in sections.) Pin one of the 3″ border strips RST to the freshly eased raw edge of the quilt every couple inches, and sew with the border against the presser foot and the quilt top against the feed dogs (again, to help prevent more stretching). Repeat for the opposite side, press the seams towards the borders, and trim.
Repeat for the long sides, using the 5″ border strips.
Square and trim your quilt once more, checking to make sure the center of the quilt lays flat within the borders. Your quilt should measure approx 45″x60″ depending on your trimming.
Backing
Piece your fat quarters together to make the backing that is a little bigger than the front. Cut the rest into 2″ strips for your binding. You will need approx 215″ of binding.
Sandwich, baste and quilt as desired!


Love this. Thanks for the tutorial
Your Welcome =) I hope you have fun with it!
This is super cute, Stacey! I’m sure Moda Bake Shop would love it! The on point layout really adds movement to the design.
fantastic quilt and tutorial! sometimes “help” is not so helpful, but cute!! 😉
Disappointed that there were no totals for strips 8&9 to say you needed two 36″ strips and strips 10-13 you needed a total of four strips of 45″. I ran out of fabric, as my WOF was not 45″. True beginners need the totals.
Hi Renee, I’m sorry you ran out of fabric. When you say totals, are you referring to the total yardage required for the sashing? I do have it listed above the instructions as 1 1/2 yards. This was my first full quilt tutorial, I will definitely give it a makeover when I get the chance. Are you able to use any of the trimmed rails from the previous strips to make the last strips 45″?