
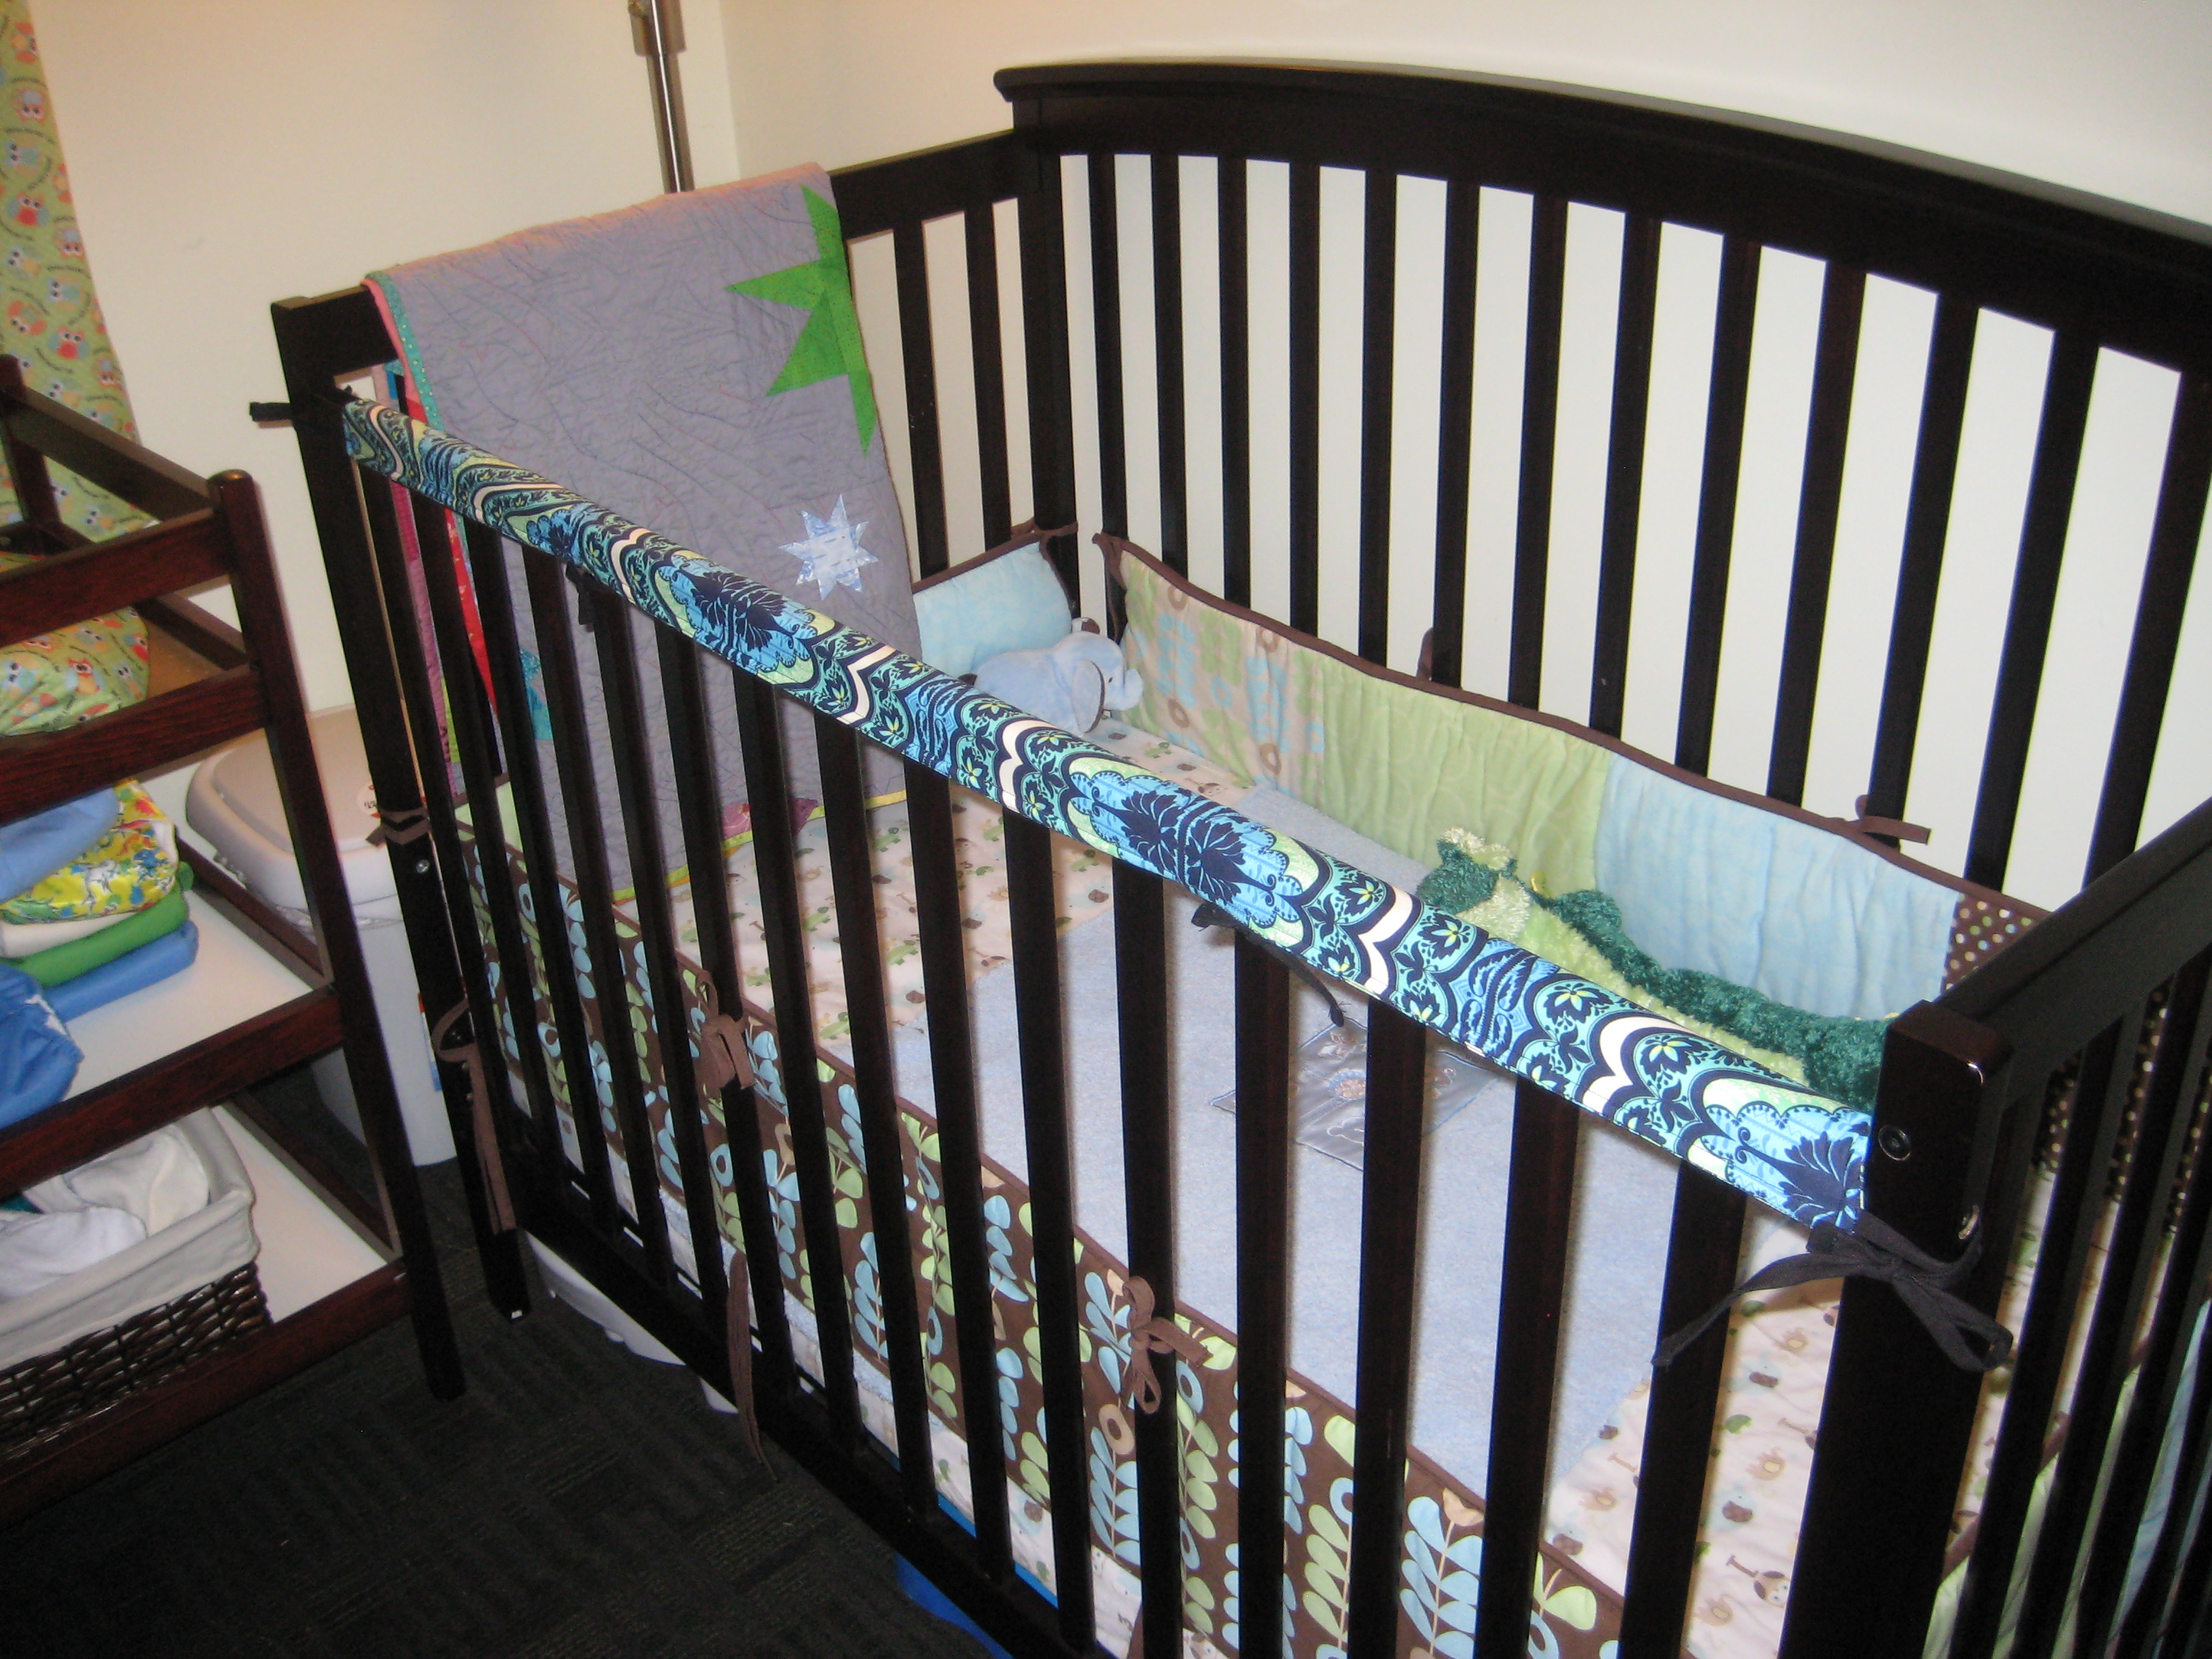
Those of you that are moms will laugh at me when I say this. I never though H would chew his crib. I figured it was something some babies do when they teethe so I made sure there was always a chew toy in his crib. My little beaver has 6 teeth and likes to hang off the rail waiting for mommy to save him from solitary confinement, so in the space of about a week my crib went from pristine to this….
 And not just this section, the whole darn length of the rail! What is he doing in there?? It really can’t taste good. Or be very good for his teeth, though I guess babies need to file those sharp little chompers on something other than Mommy’s hands, or the cat……
Presenting the Crib Rail Cover Tutorial!
My bumper pads were the inspiration for this project. Its took me a week to get around to it (in which more chewing ensued). I put H down for a nap, sealed the last envelope for the 3×6 Bee blocks, and pulled out this gorgeous Amy Butler Lark print in Gypsy Cobalt I bought a while back with nothing in mind, and a half yard of Kona Black. As I drafted out the sizes, I realized I forgot to measure H’s crib! Yikes! It was either wait until he woke up and try to find time again to sew later, or sneak into his room with a tape measure and be as quick as a bunny! You can guess which option I chose.
Okay, on to the instructions!
You will need a half yard of Print for the cover, a package of bias tape (or make your own), and a scrap of batting at 5 1/2″ wide by 53″ long.

Cut 3 strips 5 1/2″ x WOF (width of Fabric) of the main fabric. Sew them together with a 1/4″ seam, and press. From this long strip cut 2 strips 53″ long. Trim your batting scrap to the same size. 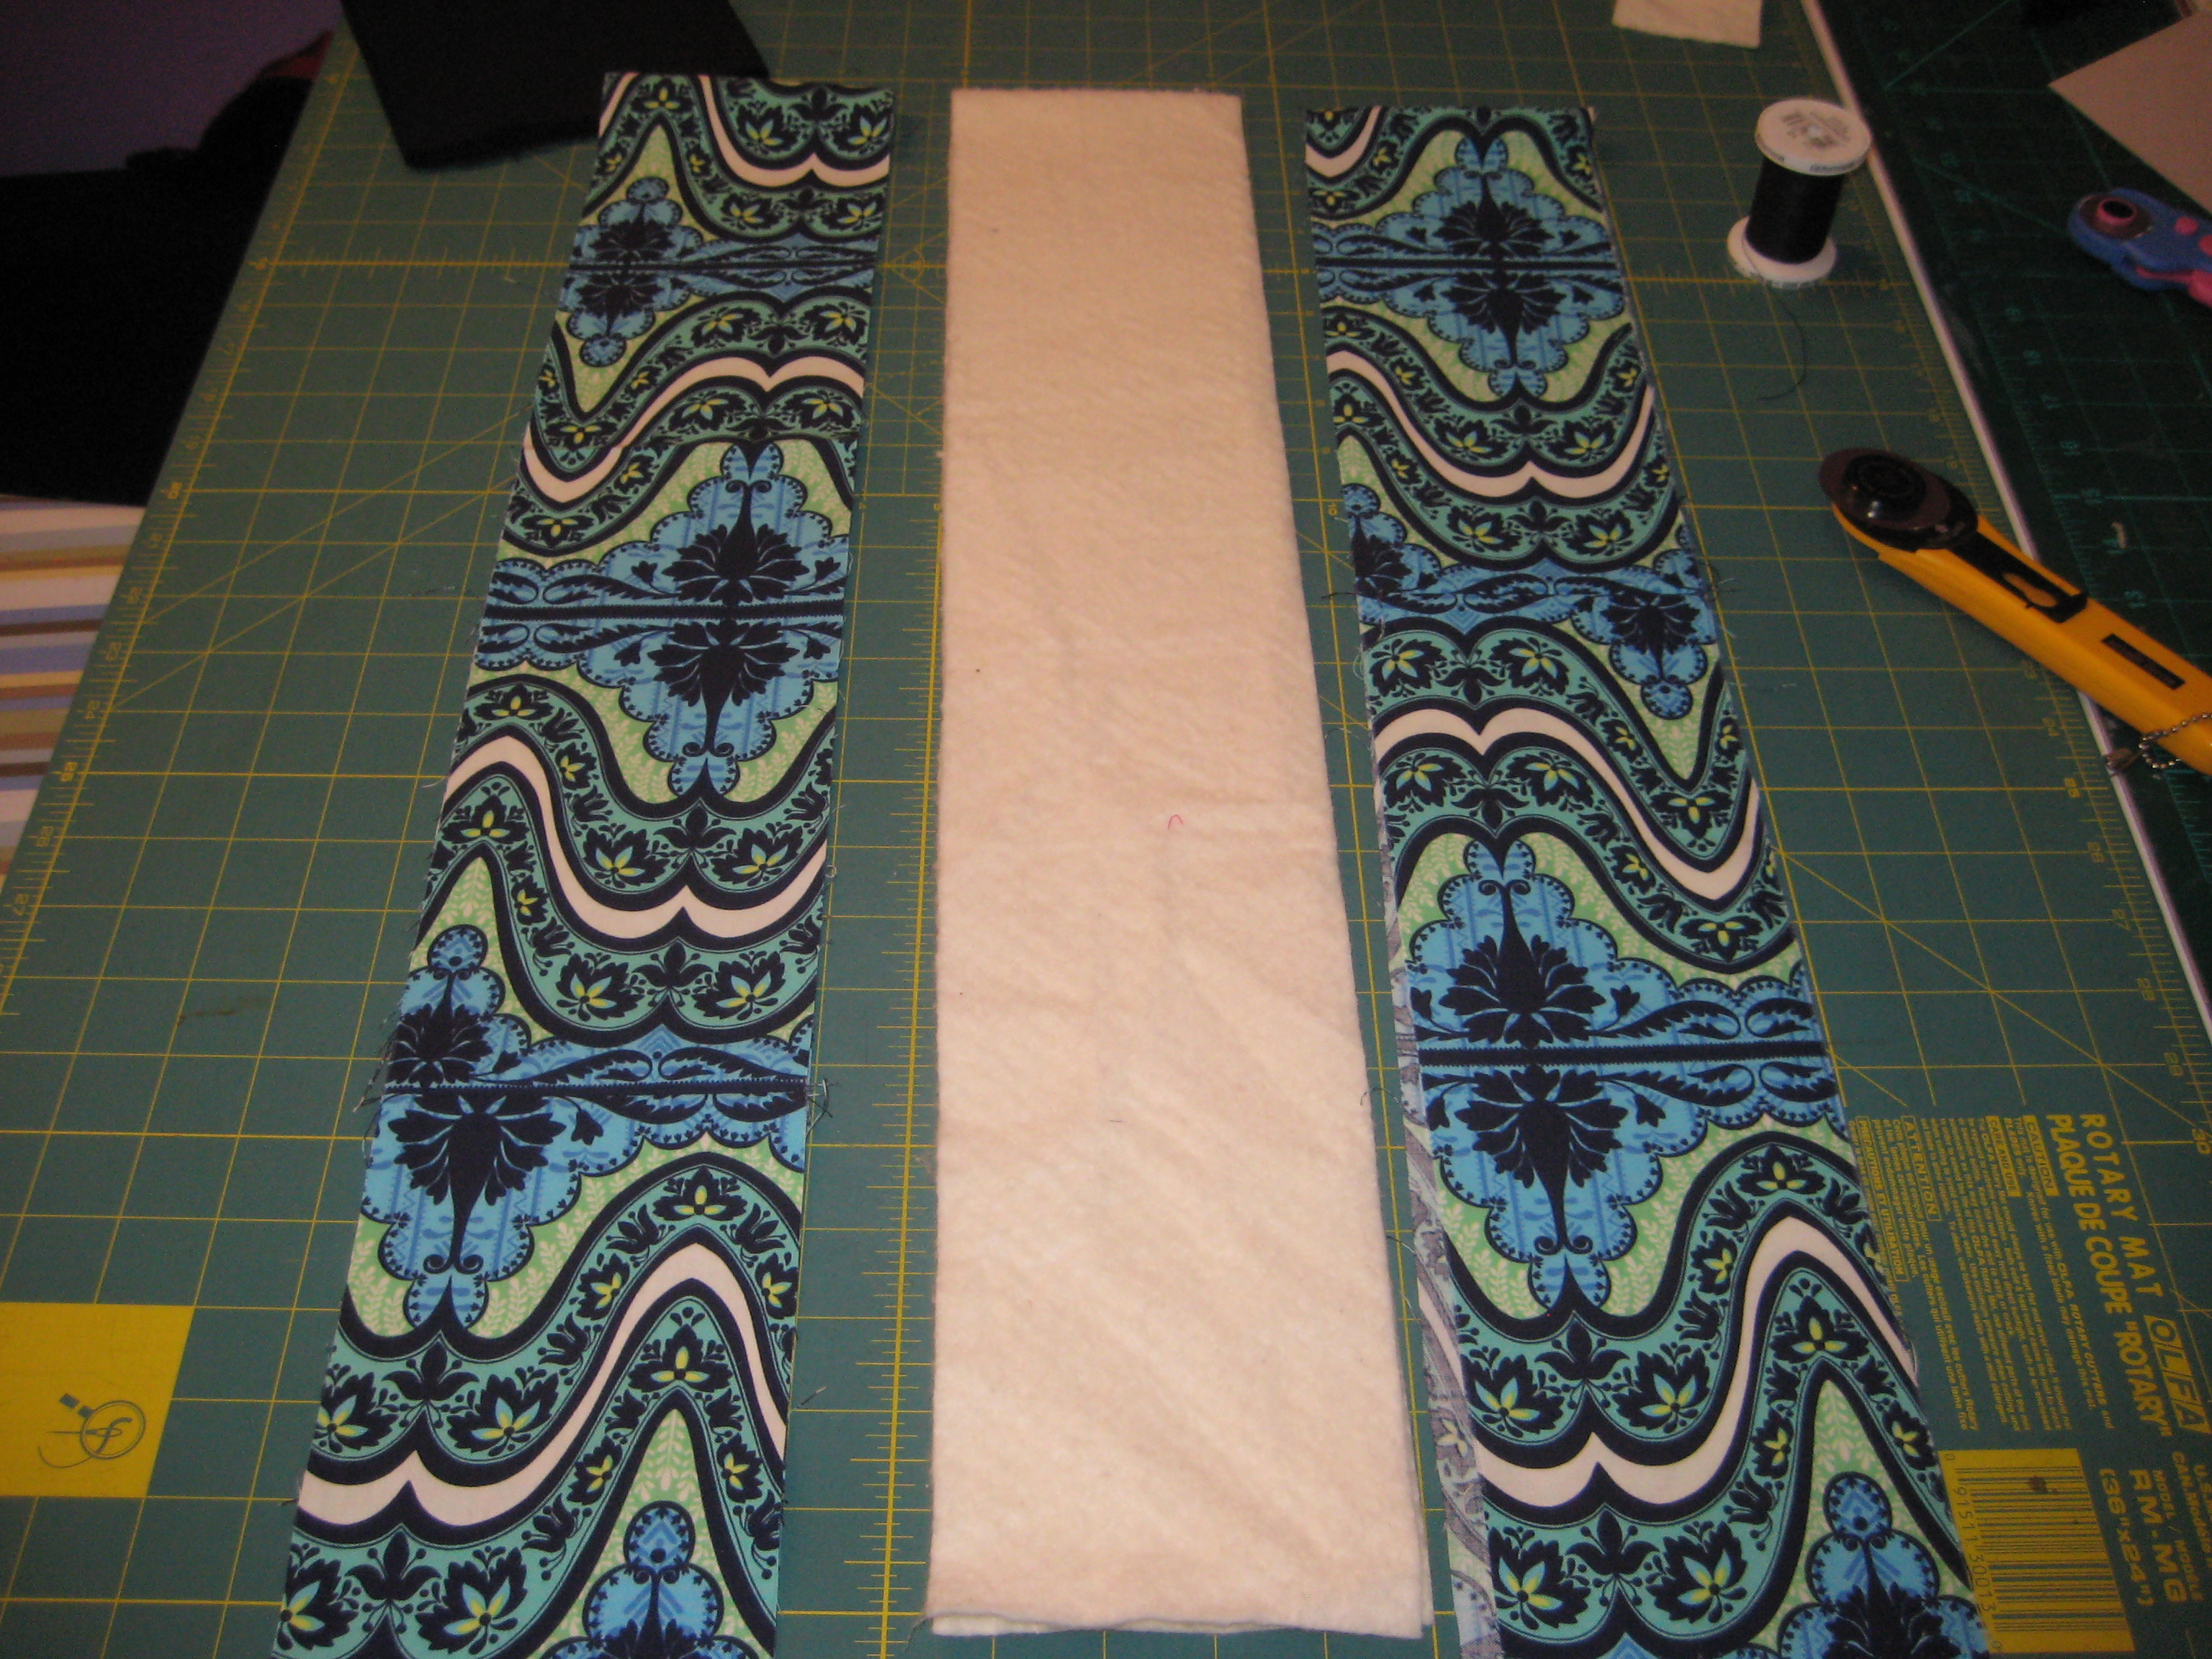
Make your ties.
For store bought bias tape: edge stitch the tape closed across the entire length. Cut 4 strips 12″long and 2 strips 25″ long.
For Make Your Own: cut 3 strips 1 1/2″ wide x WOF. Sew raw edges together with a 1/4″ seam. Cut 4 strips 12″long and 2 strips 25″ long, turn right side out using a turning hook. Press flat.
From here on out the instructions are the same for either.
Fold the raw edges of the tape under 1/4″, then under again. Stitch across to finish the edges of the tape.
*Helpful Hint* take a thick pin and pin straight through the layers of bias tape, just catching the folded edge so the tape lays flat. Use the pin to push the fabric under your presser foot and keep your stitching even.

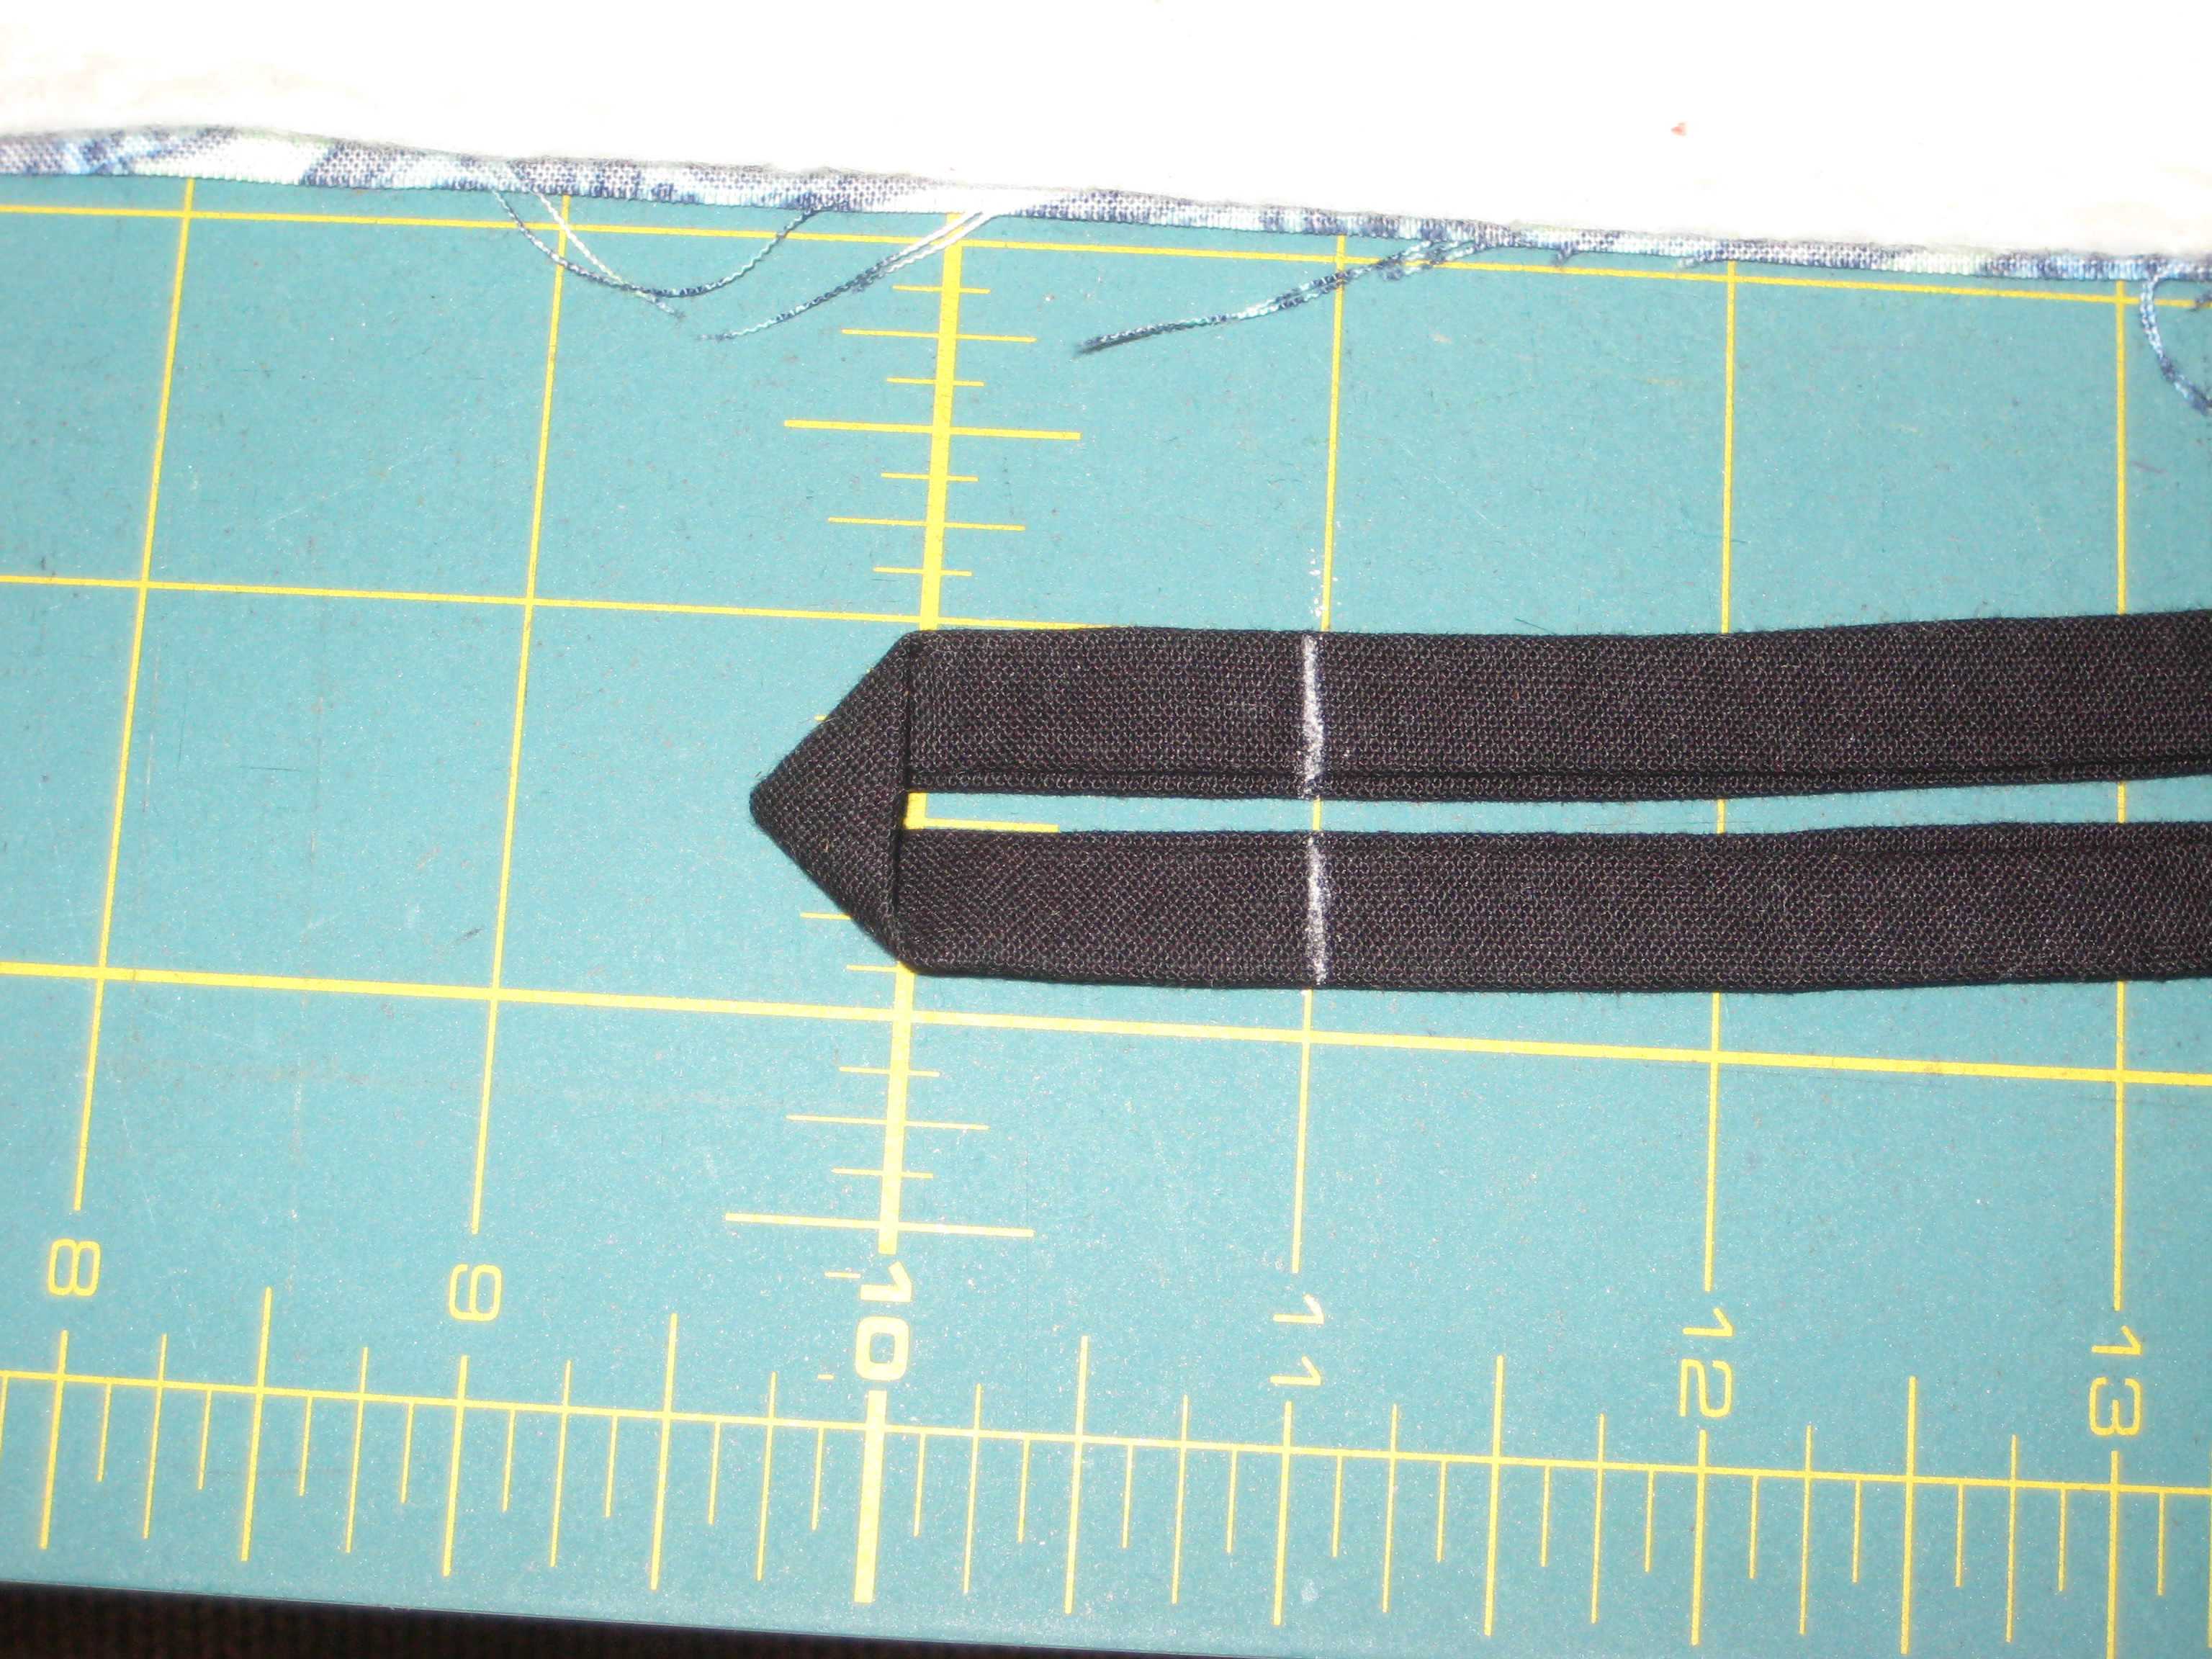
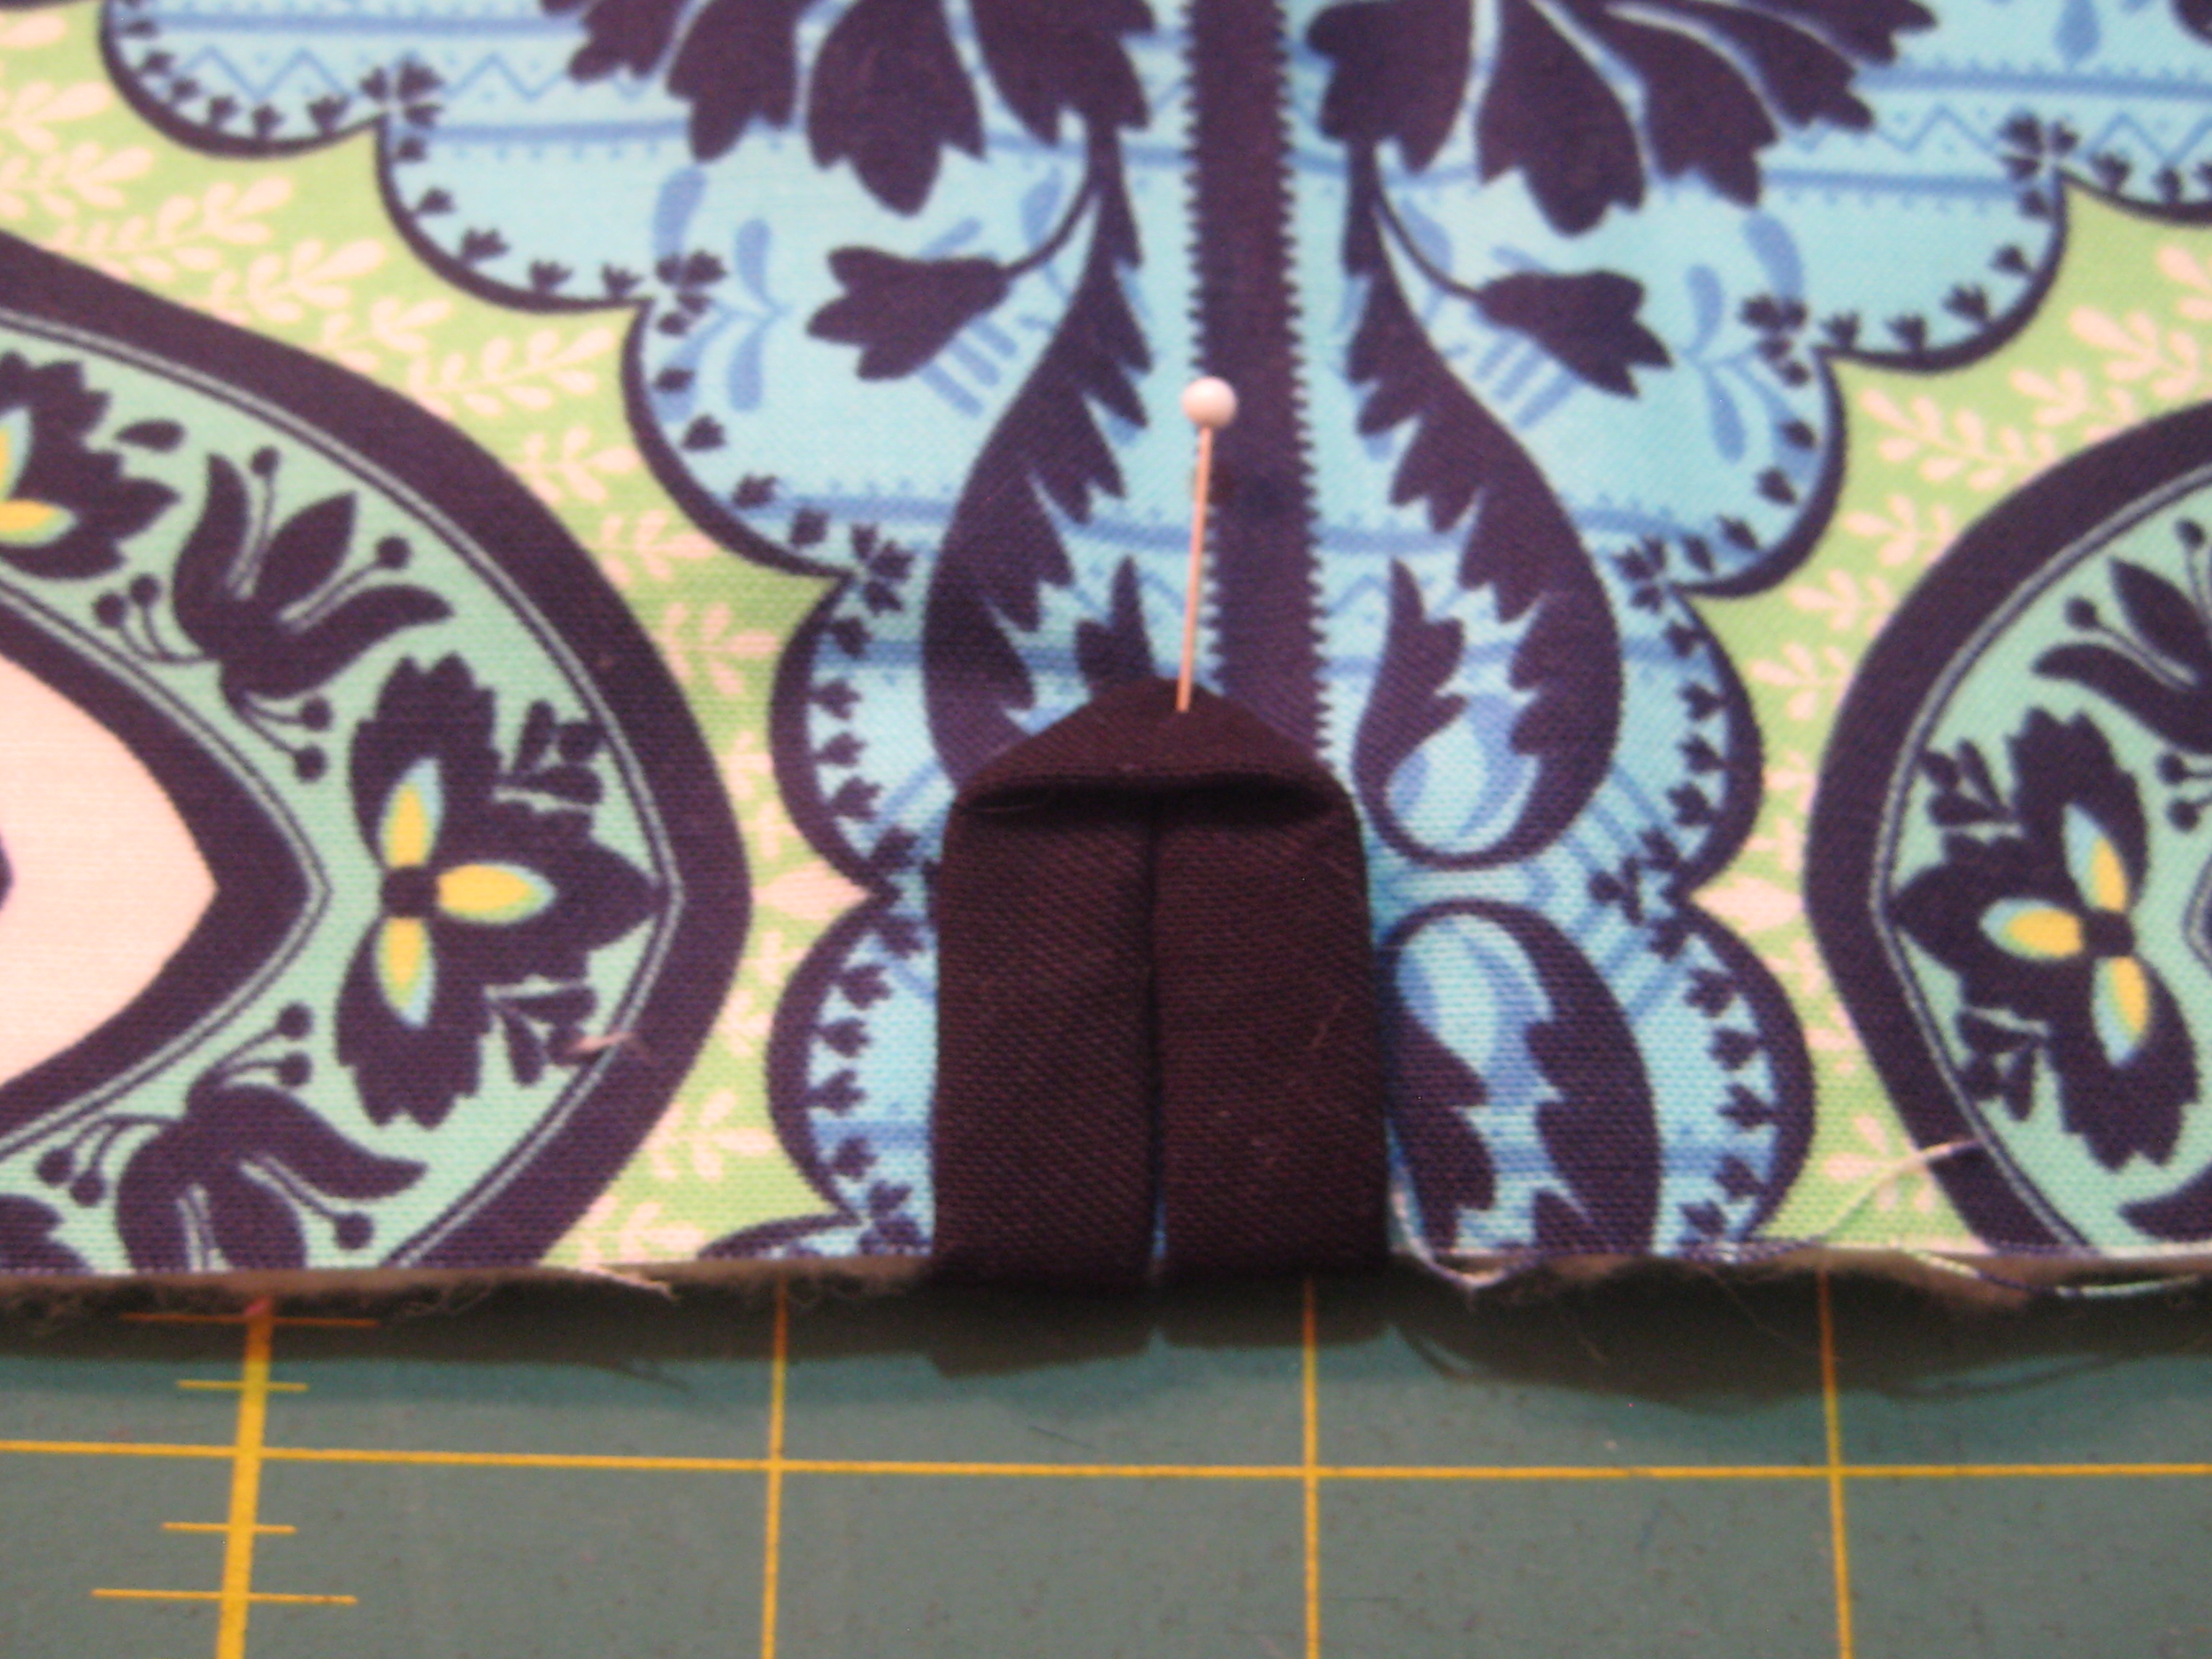
Fold the tie in half lengthwise, matching the seam side by side as shown. The fold will form a little triangle. Measure and mark 1″ from the bottom of the triangle. Set ties aside.
Take your first fabric strip and place it right side up onto the batting, matching the raw edges. Baste the short edges using a 1/4″ seam. Treat this as a single piece, with the print as the right side and the batting as the wrong side. This is the bottom strip.
On the wrong side of the strip mark 14″ in from the ends, making sure to mark evenly on both sides of the long raw edge. Place your folded ties at these marks, with the fold at the top, matching the mark to the raw edge and the seams on either side of the pin. Pin and baste. Repeat for second tie.


Your strip should look like the picture above.
Now turn the bottom strip right side up. Fold the tie over the raw edge and pin to keep it out of the seam as shown. Be careful not to curl the raw edges of the strip.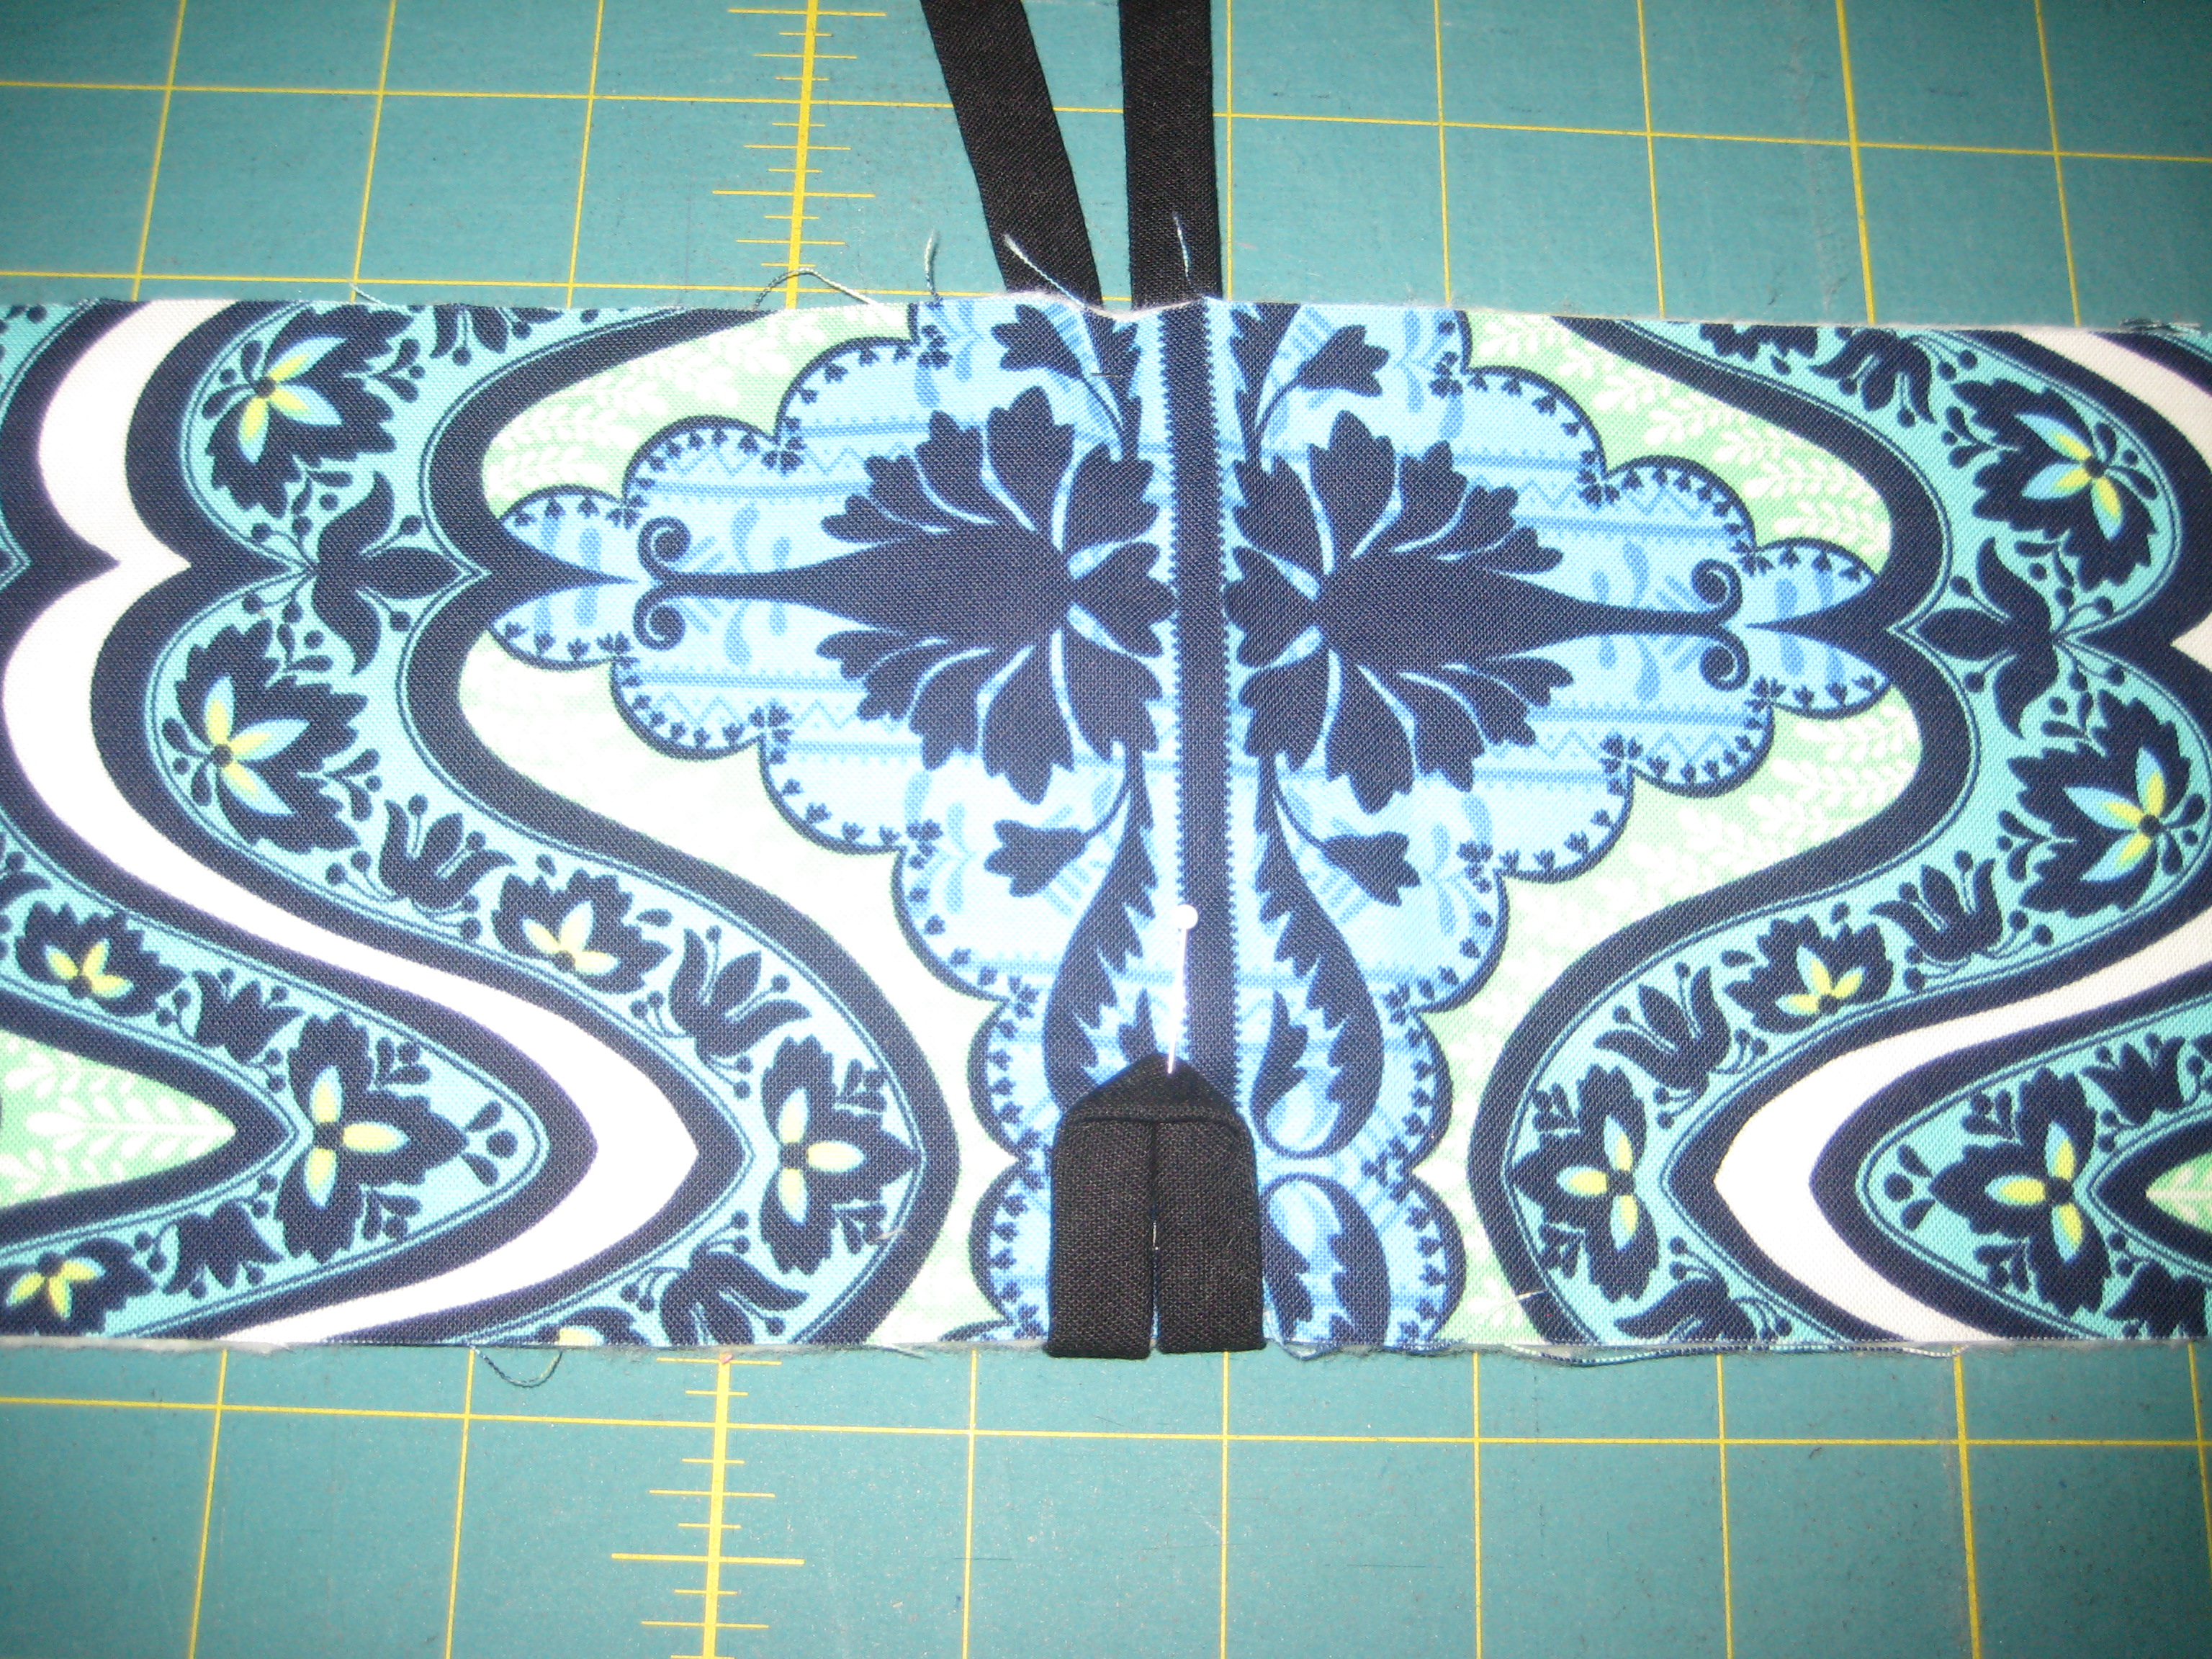
Now fold the tails into the center of the bottom panel as well, again taking care not to curl the raw edge of the strip. Pin in place as shown. Repeat both steps for the second tie.

Take the 12″ ties and pin them to the right side of the bottom panel, raw edges matching the raw edge of the ends, with the seam of the tie 1″ from the corner as shown. Baste them in place and pin the tails to the panel.
*Please note I sewed the seam and forgot to put in my end ties, so there are no pictures for this step. Just make sure the raw edge of the ties match the raw edge of the short end and the long tails are pinned to the center of the bottom panel to keep them out of your final seam. 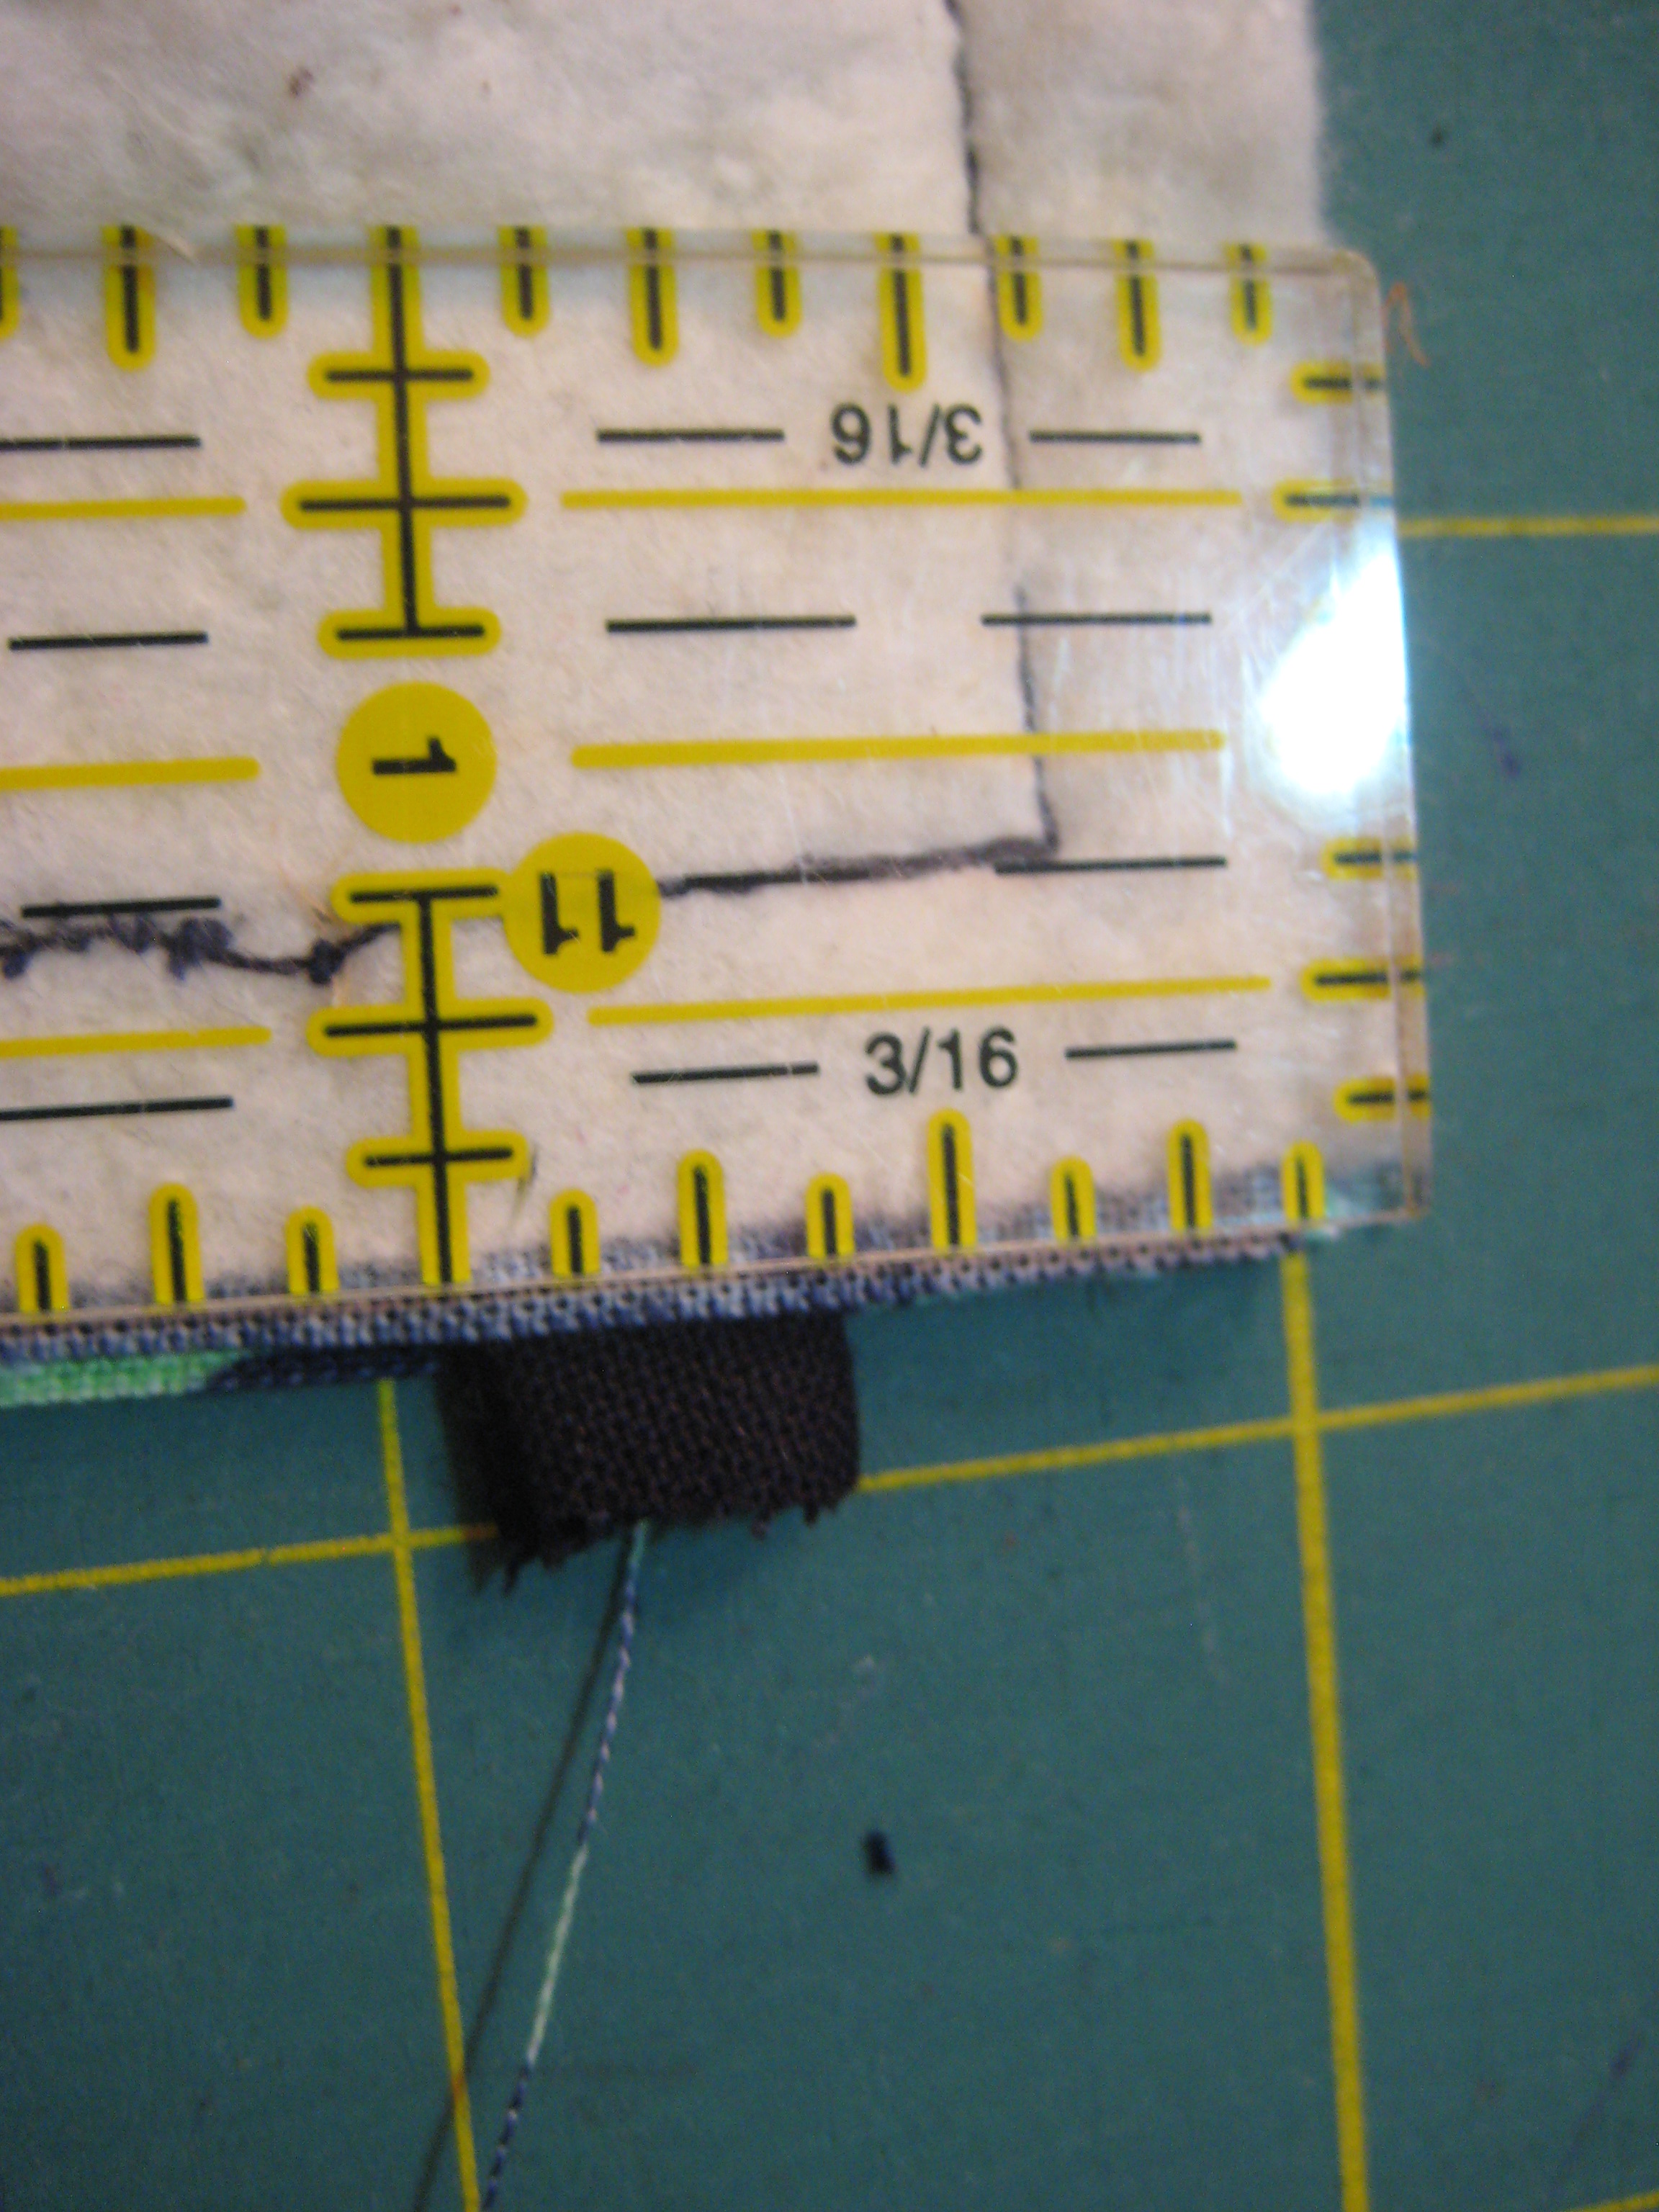
ASIDE:
If your like me and forget to add ties to something you are sewing, instead of ripping everyhtign apart, here is a quick little tip for you. Measure and mark where your ties were supposed to go. Open the seam only as wide as the width of your tie. Take your turning hook and feed it into the center of the tie, gathering at the handle until the hook reaches the seam. Use the hook to push the tie into the seam until the raw edges line up. Remove the hook and stitch over the tie ends! Phew!


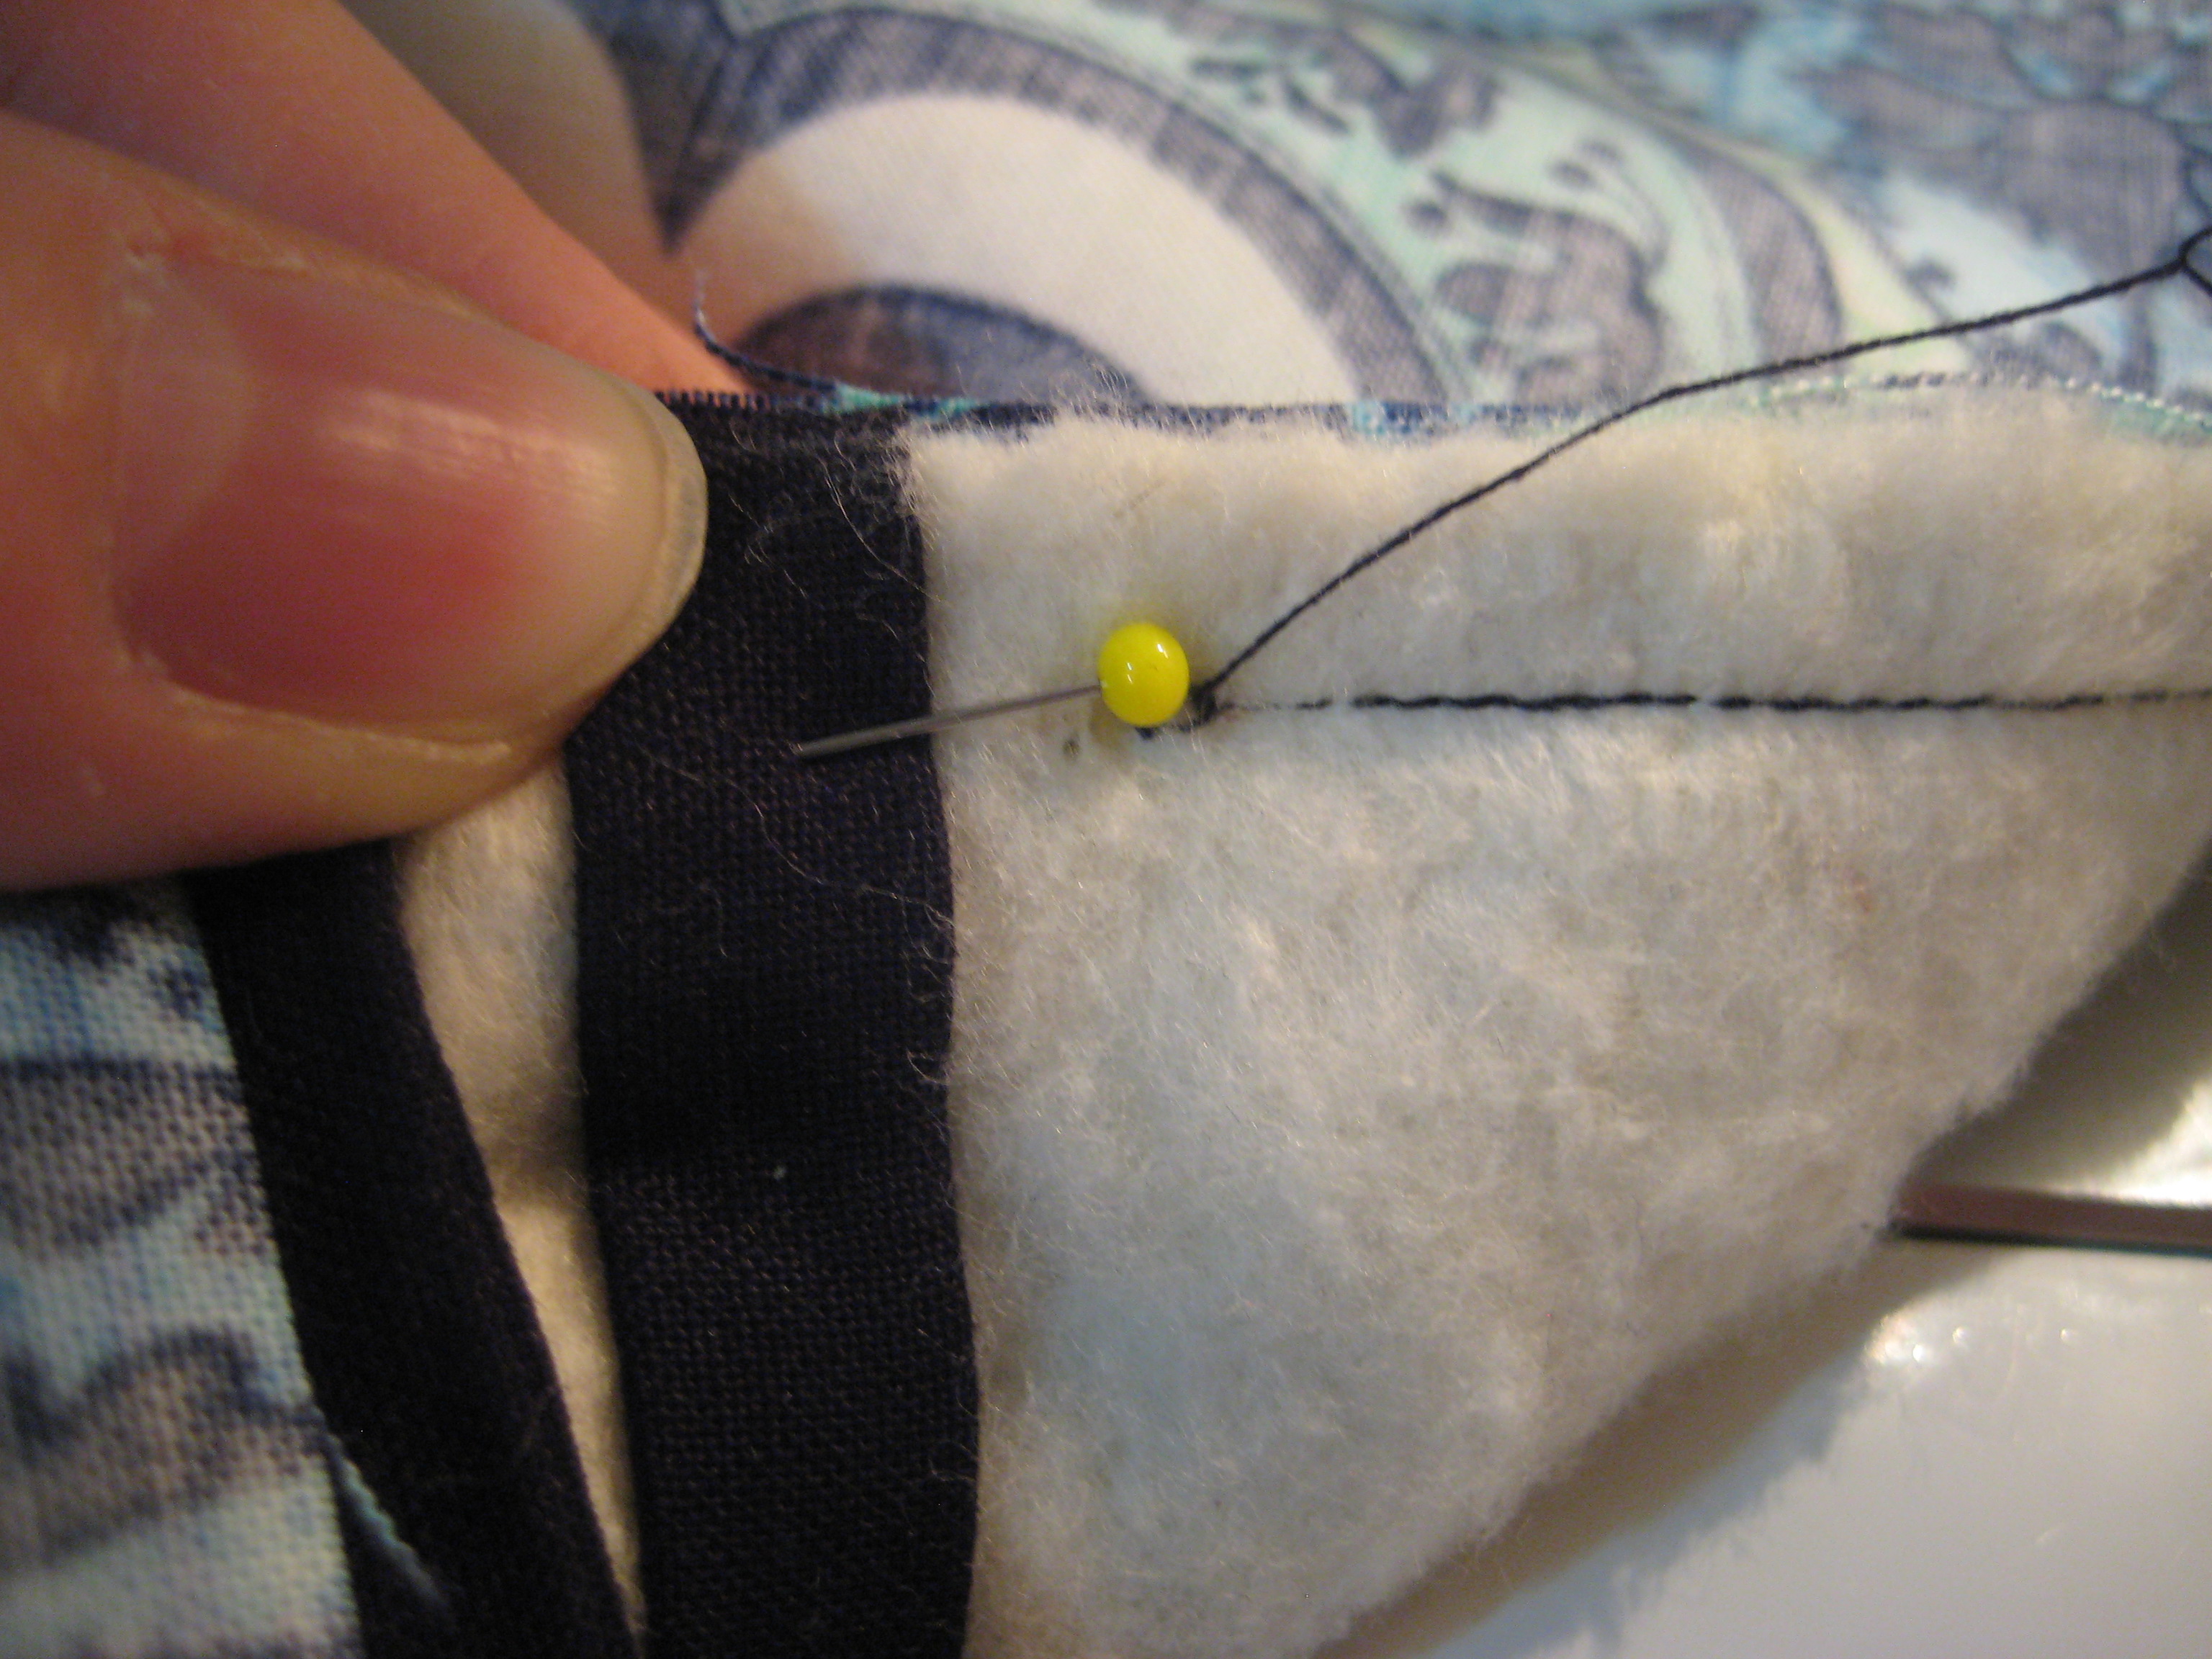
Now take your 2 panels and place them Right Sides Together. Sew a 3/8″ seam all the way around, leaving a 4″ gap for turning. Trim your corners.

Keep an eye on where your pins are on the inside. I broke 2 needles because I put them too close to the seam allowance!
Whoops!
Turn the panel right side out. Be careful of the pins, remove them as you find them. Your hands will thank you.

Push the corners out and press the entire panel flat. Your ties will be through the main seams. This will prevent the ties from ever coming out from the body of the panel and your determined little beavers from pulling all your hard work apart! Genius!

Stitch 1/8″ around the edge of the panel, closing the gap used for turning. Stitch a second seam 1/4″ to the inside of the first to make a nice finish.

Voila! Your finished Crib Rail Cover!
To attach, put the cover over the top of the rail so that the loops are to the inside of the crib and lines up with a vertical rail as best as possible. Take the tie tail and pass them through the loop under the horizontal rail (one on either side of a vertical rail if they lined up) then back around the vertical rail and tie. This secures everything. Then tie the ends to the edges of the crib. Again, I forgot to take pictures and I don’t dare while the little guy is sleeping, so you will now all be subjected to my talented Paint diagram. Yay me!

You get it right? Good. I will put up full pictures if/when I remember =)
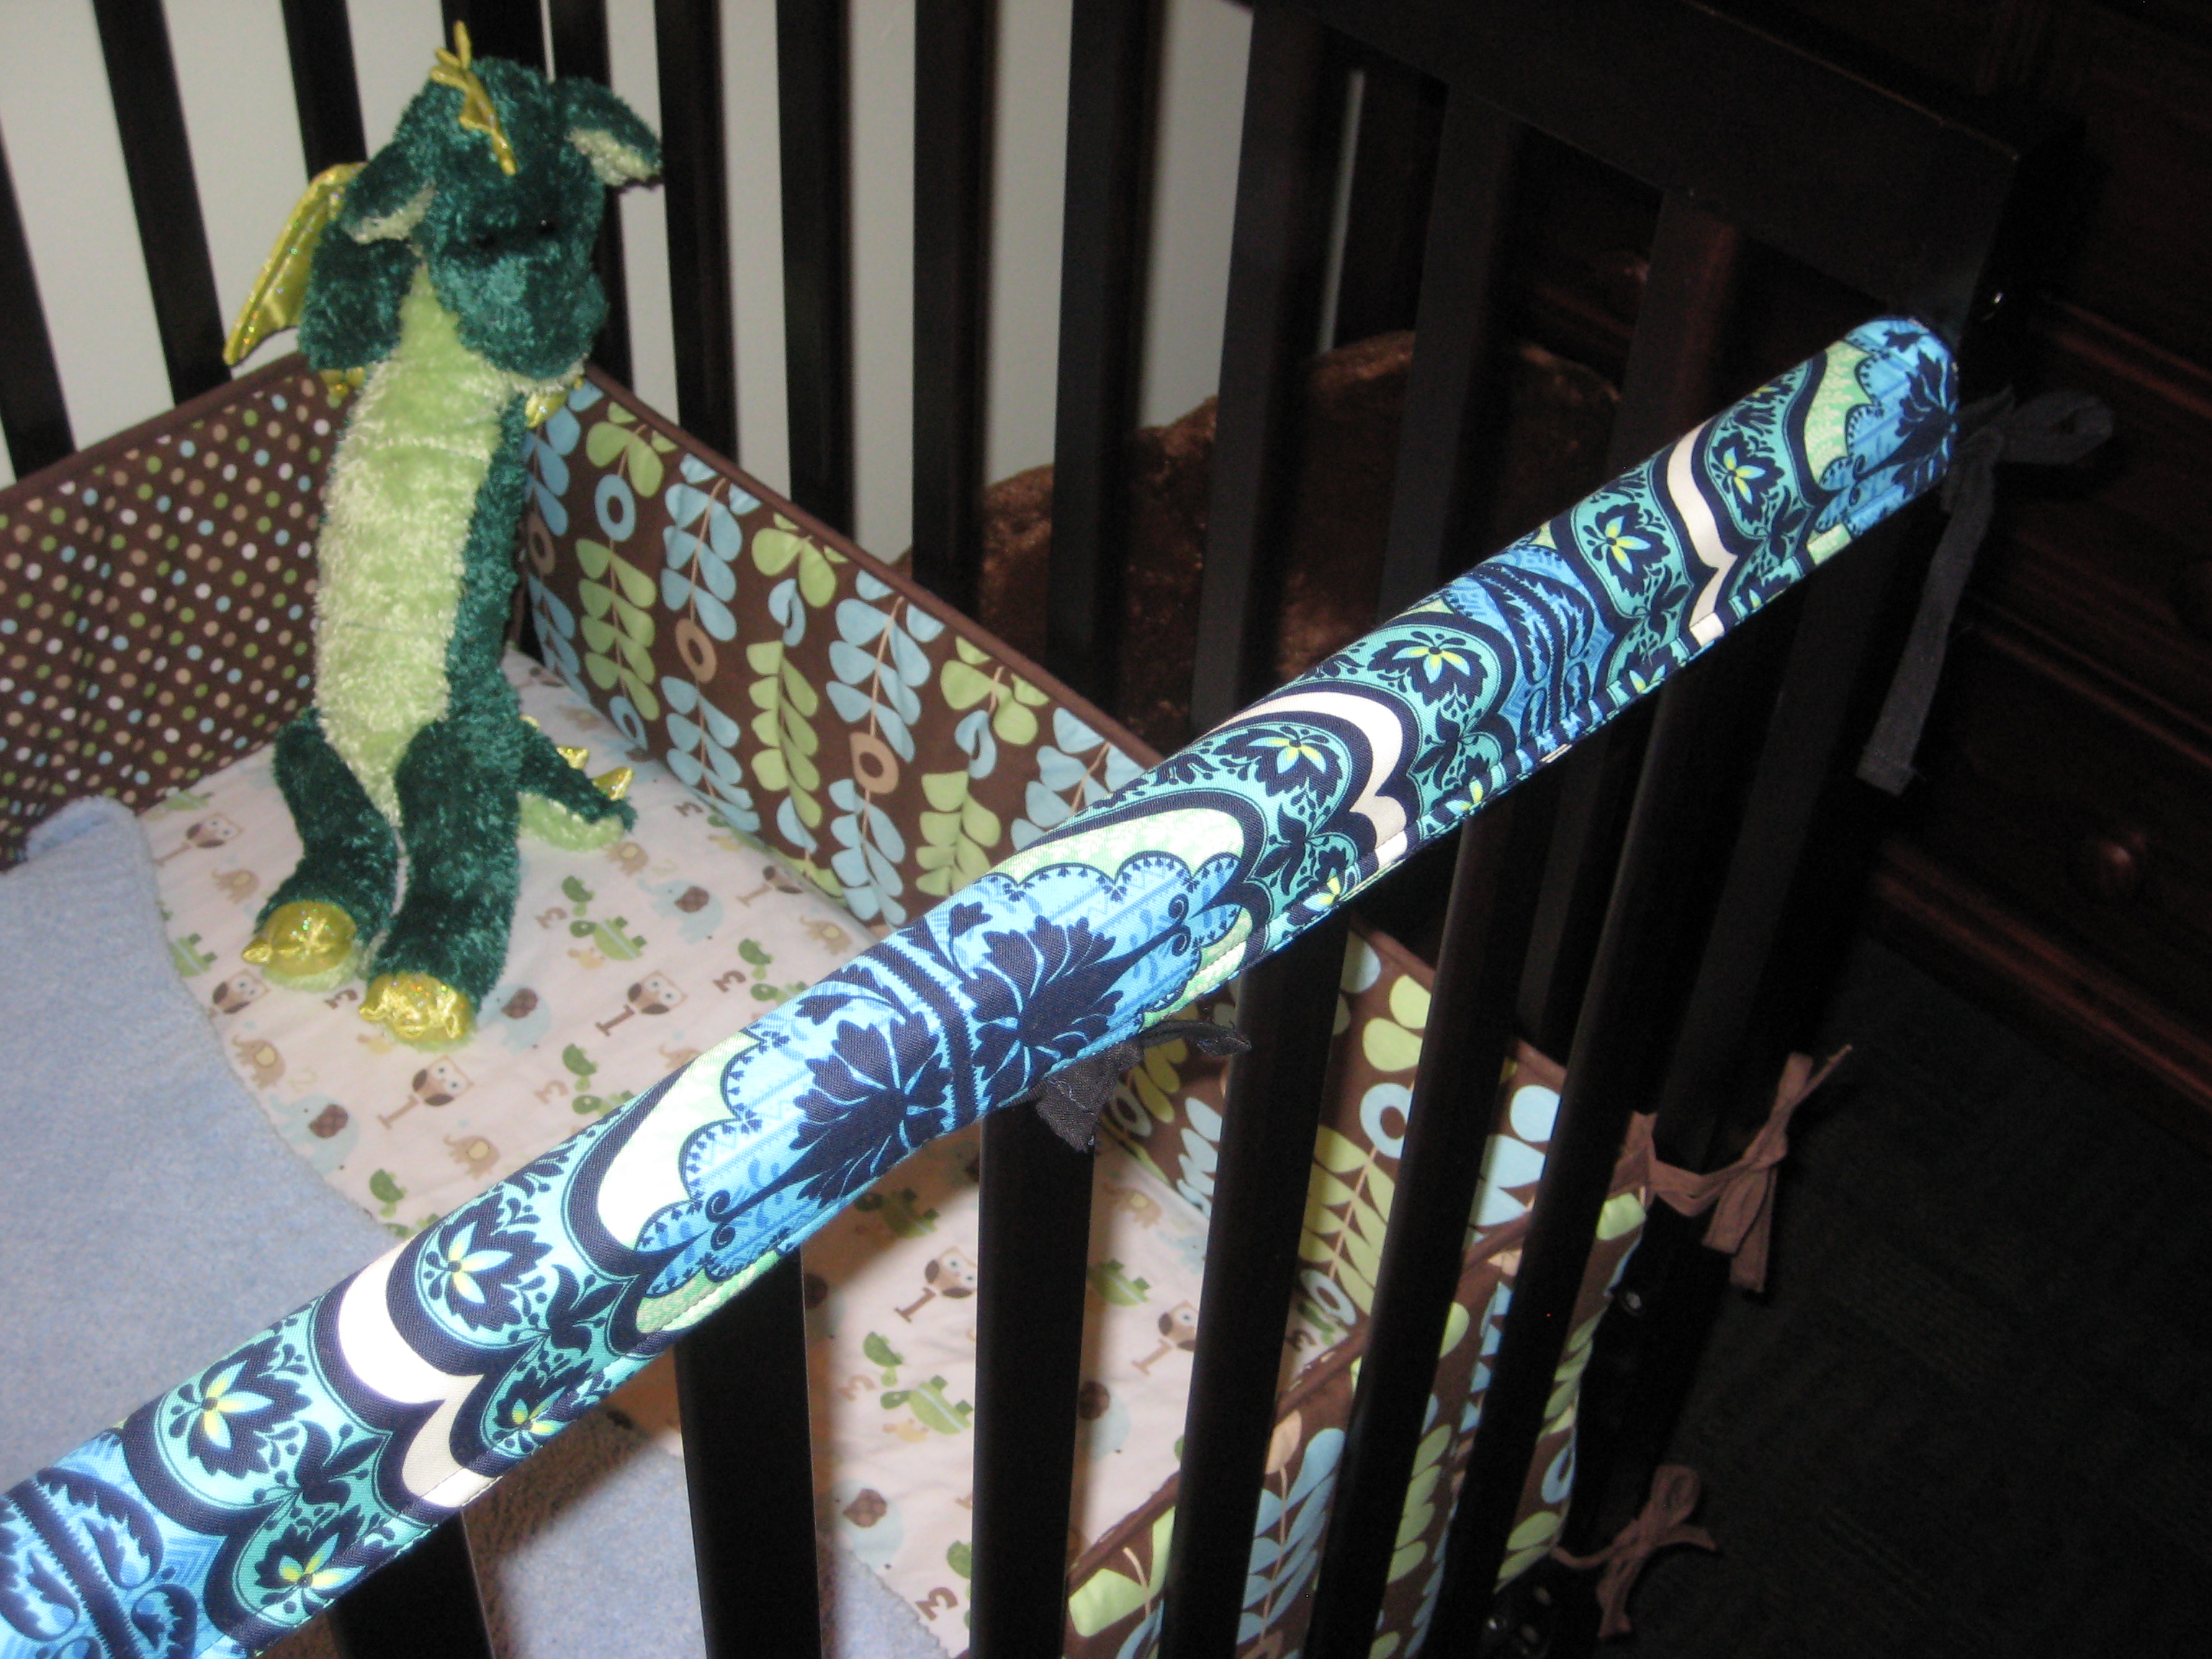
Enjoy your newly protected crib and as always,
Happy Quilting!
