August Recap

Well, it is well into September now, I guess its time to finish up with August =)

The last couple weeks have been busy around here, but not much sewing getting done. I have a few nifty things in the works that I cant wait to share with you, but you will have to be patient!

Monday night is the monthly Vancouver Modern Quilt Guild meeting. I am excited for this one, it is in our new venue at teh Trout Lake Community Center. For those of you who have been to or live around Vancouver, BC, its a lovely spot in East Vancouver with parks, playgrounds, and a big bright new center. This month we are having a brown bag tote swap. Members who want to participate make a tote bag, put it in a brown paper bag, and put it on the table. Then you randomly chose a bag. No partners, no worries, just make a bag and go!

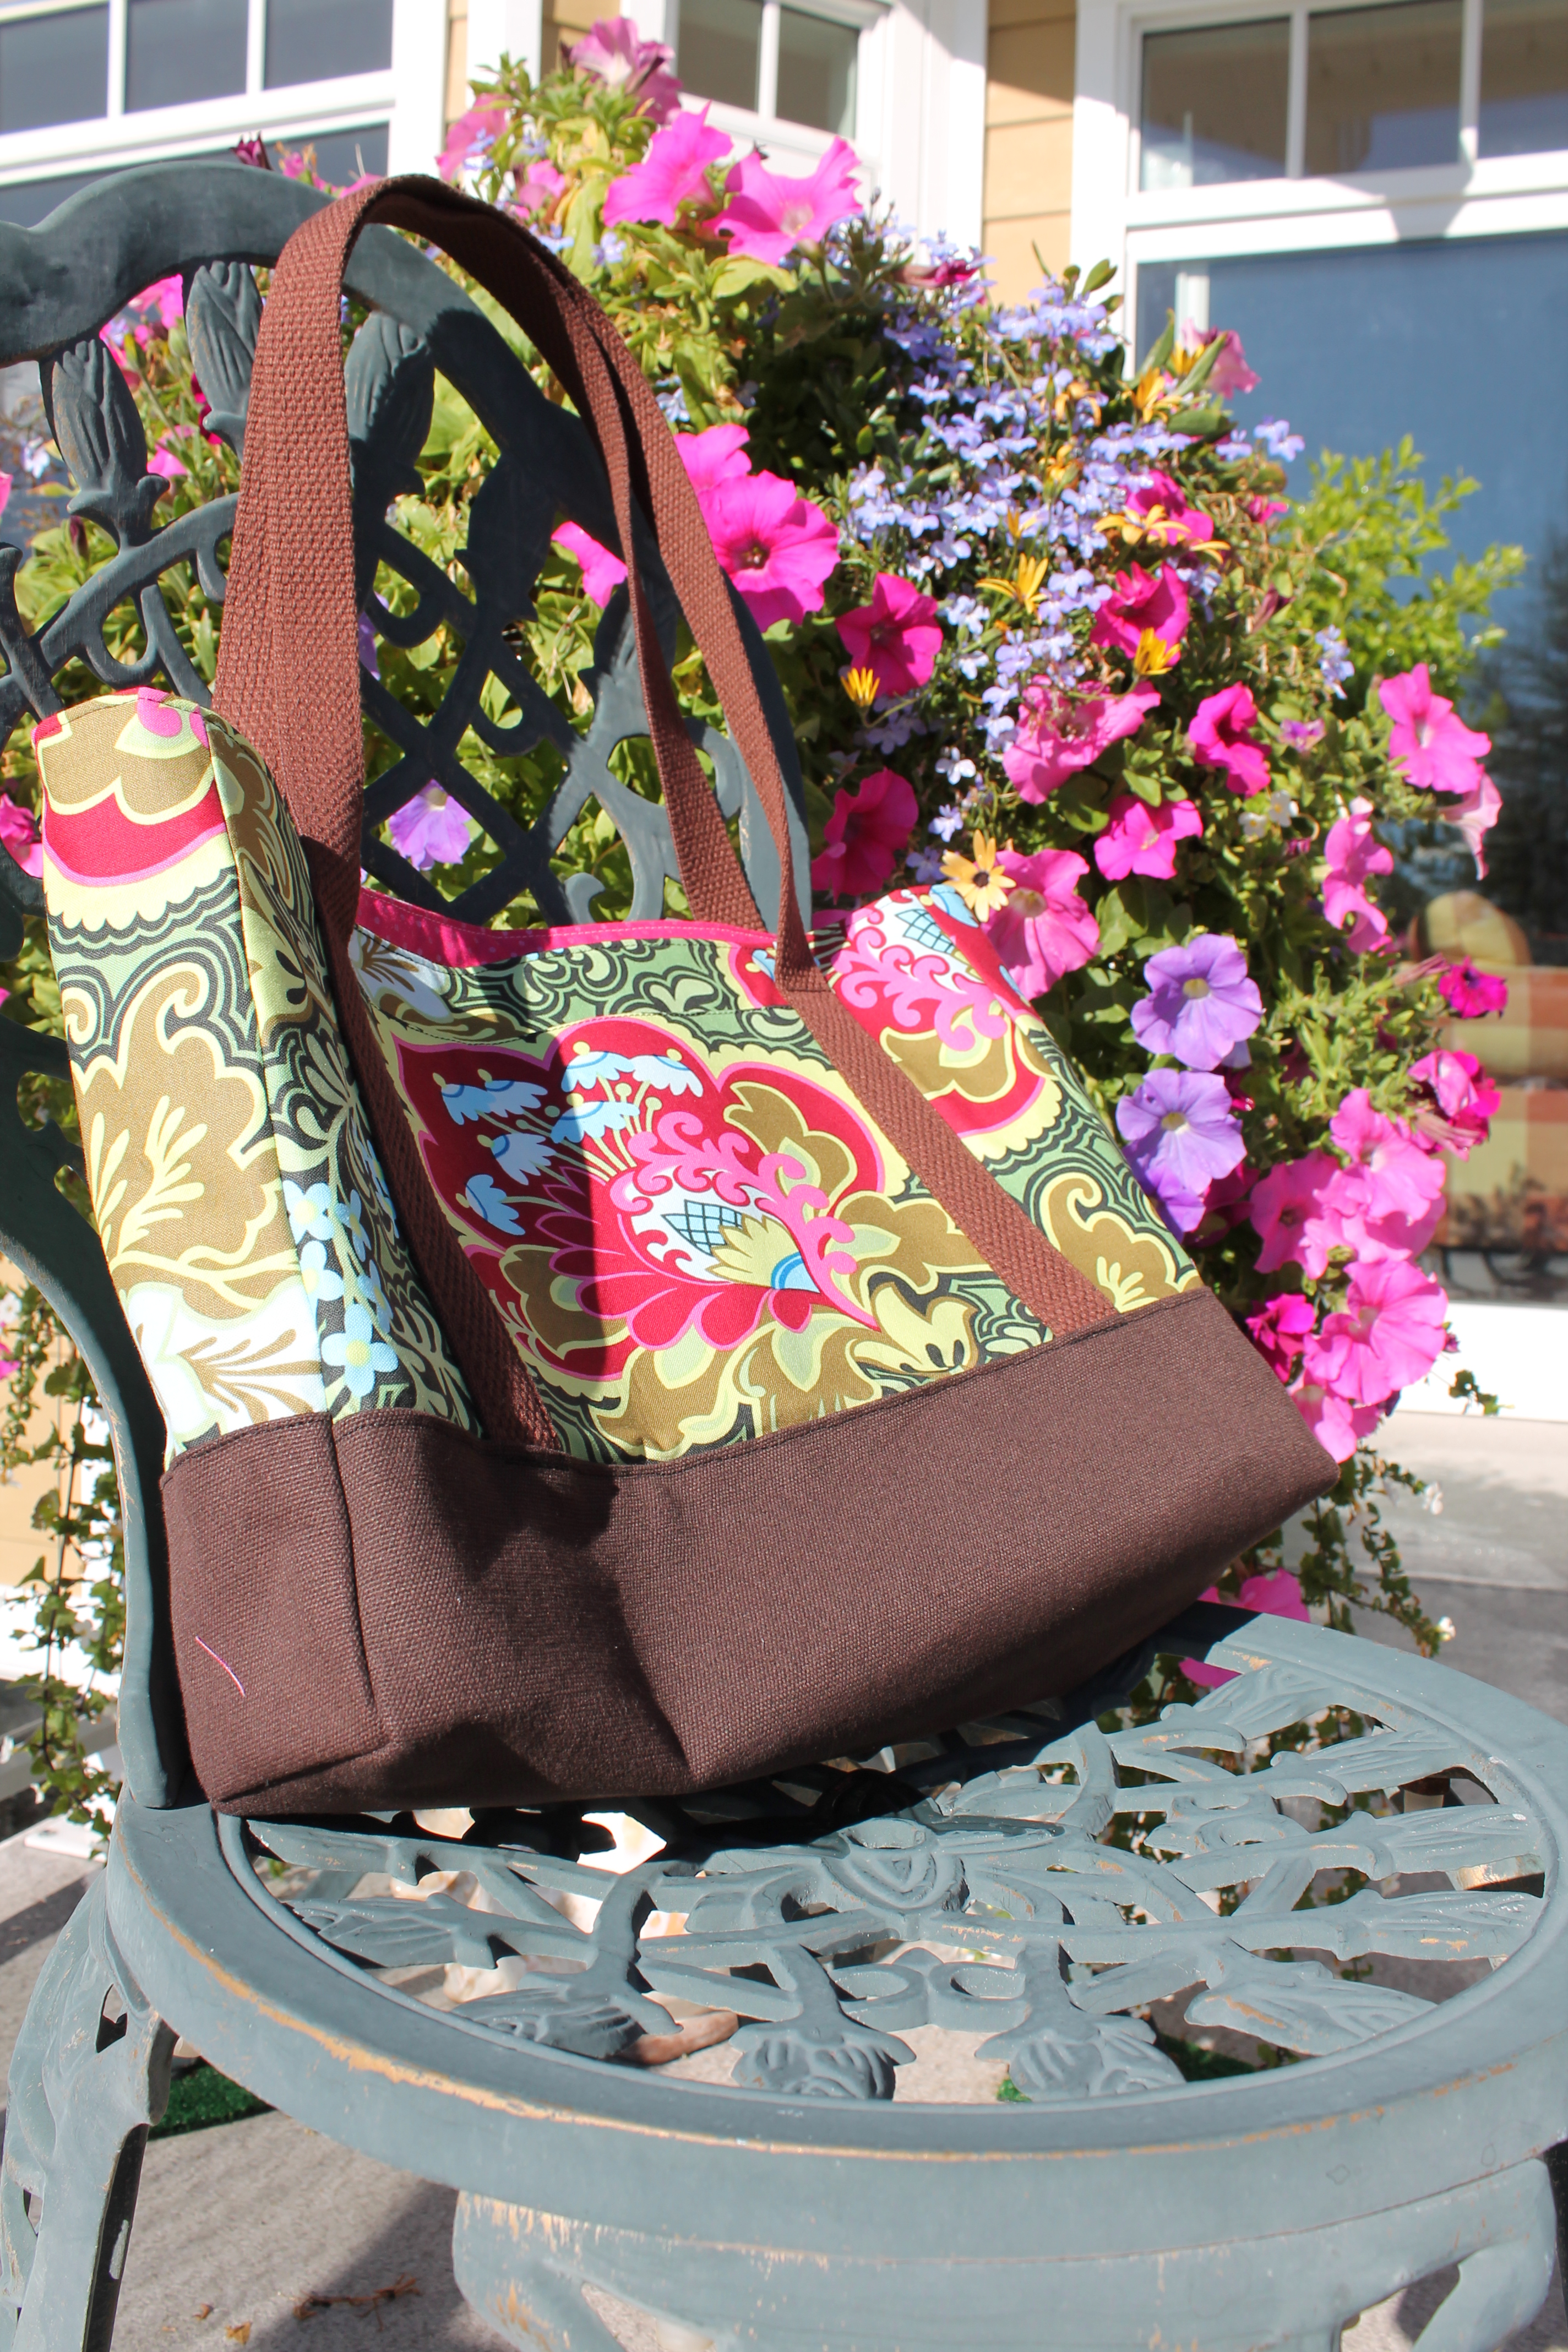
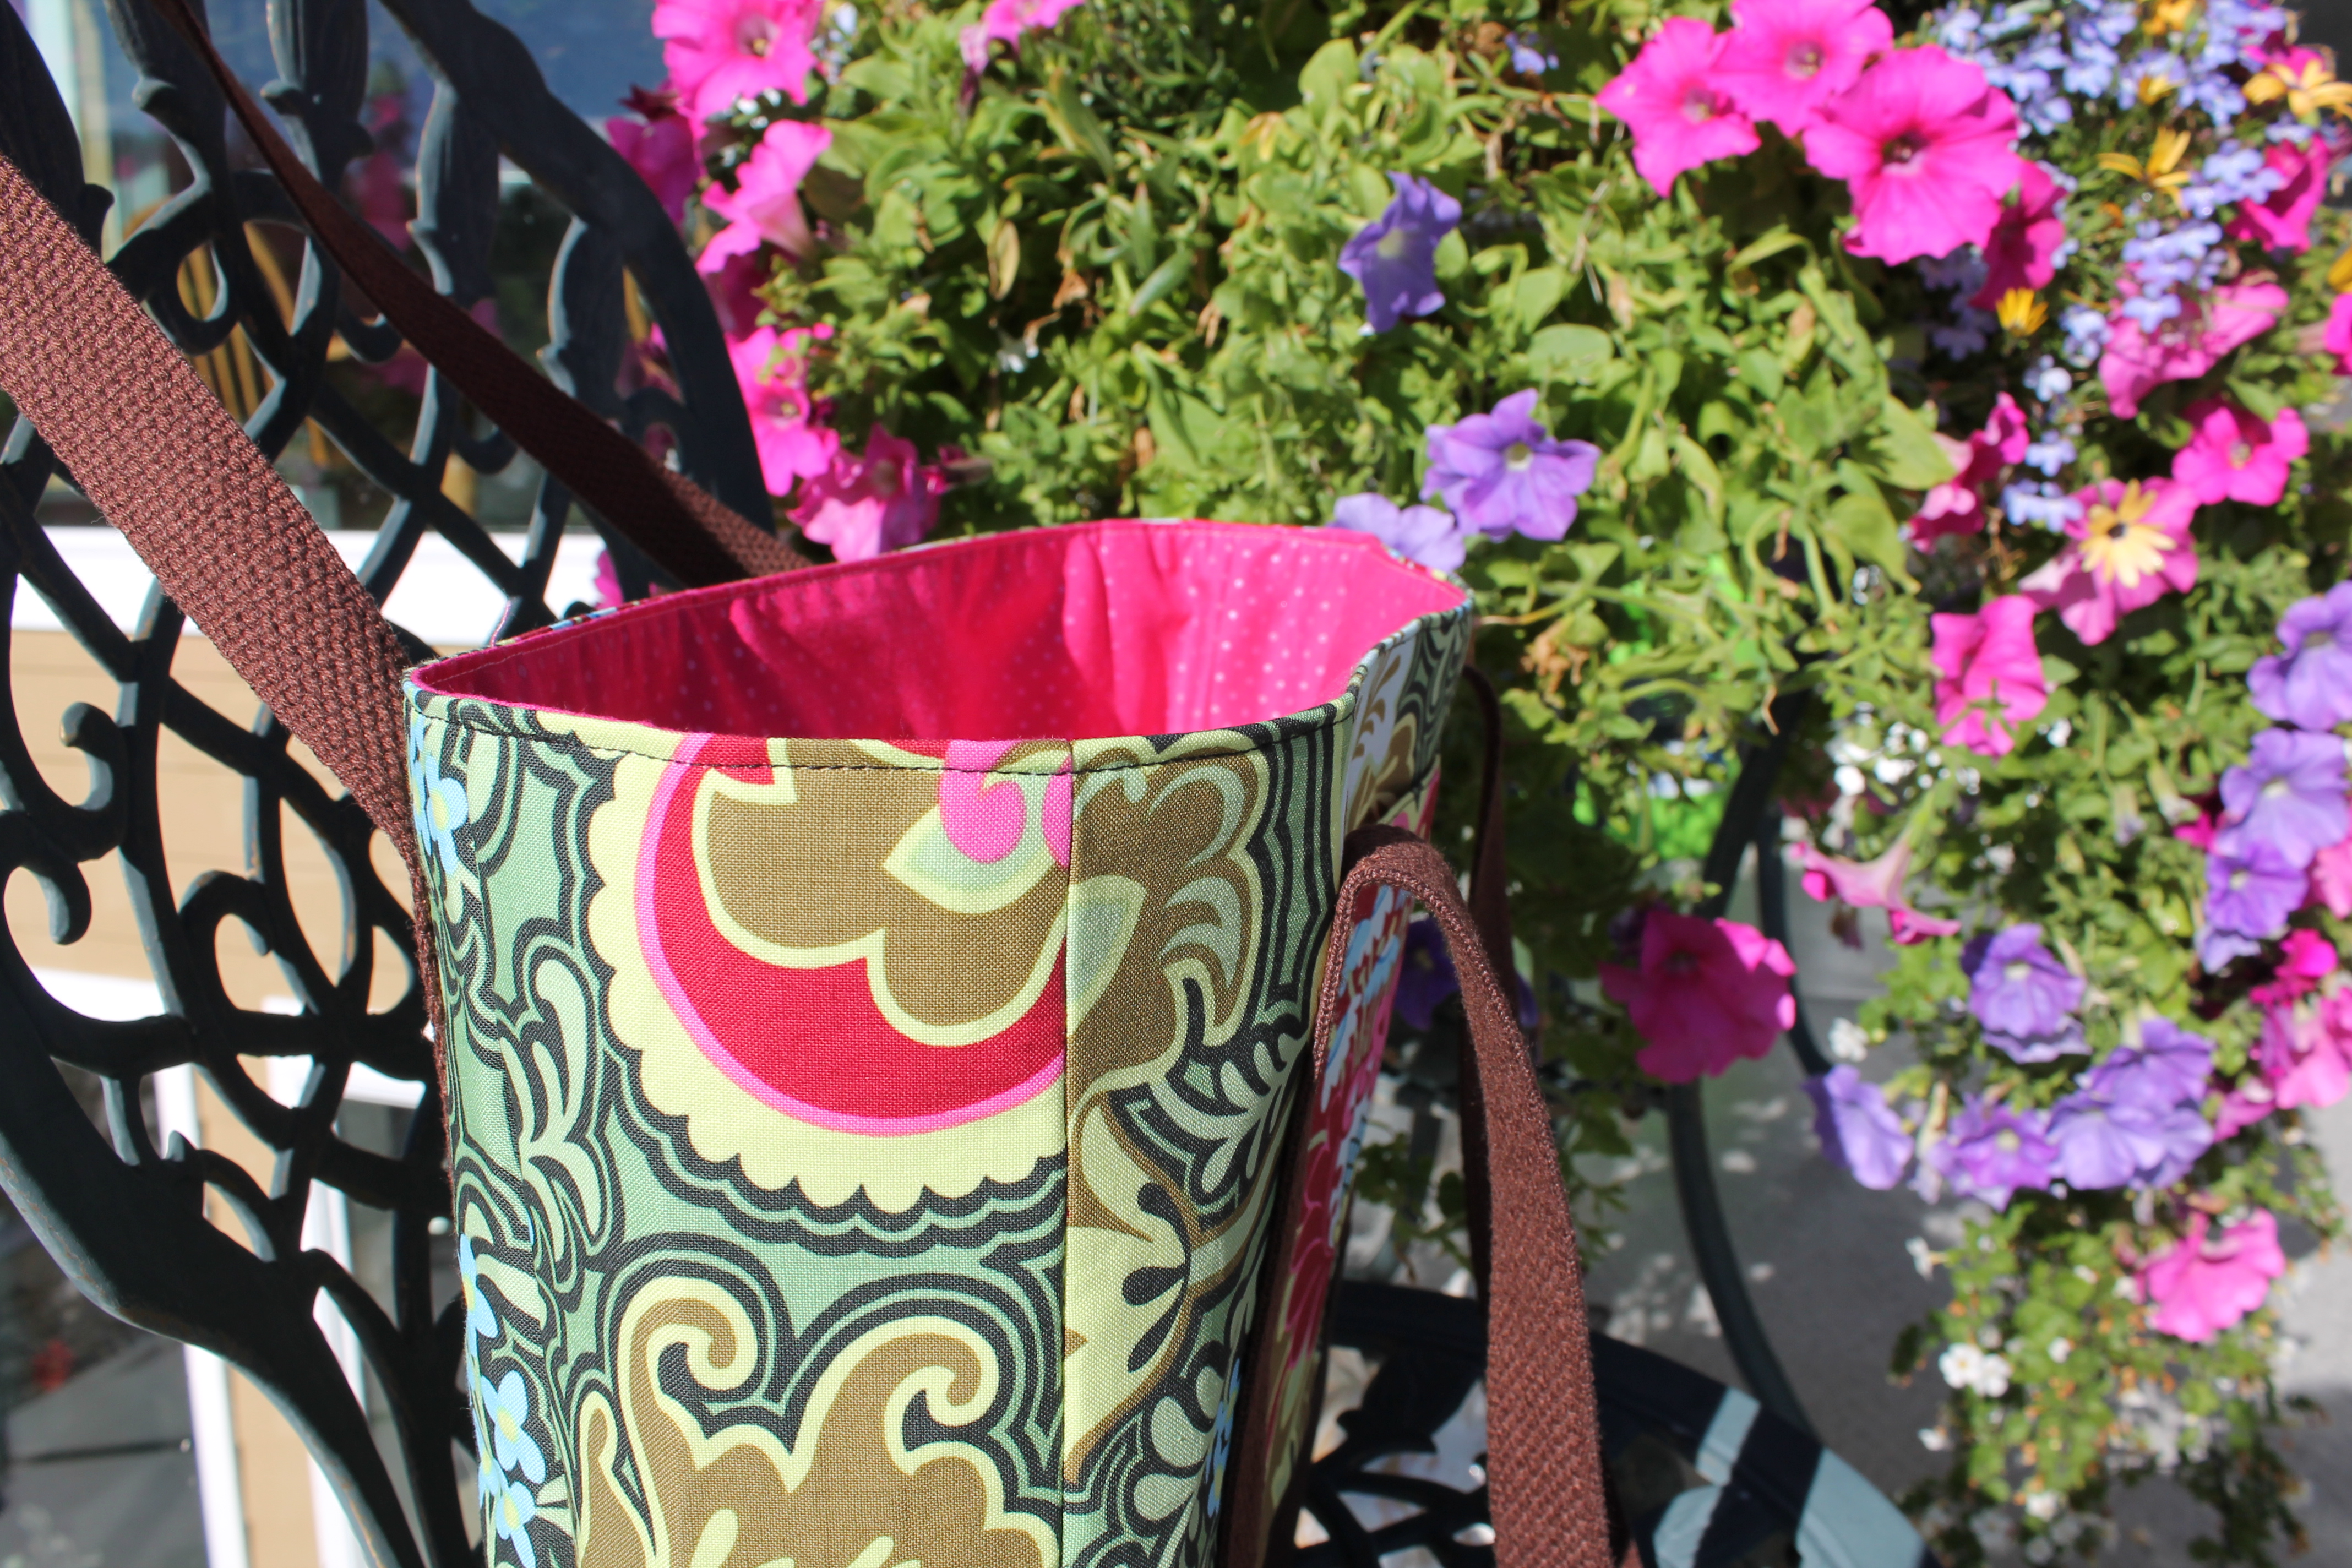
I decided to use the Renegade Tote Bag Tutorial from Renegade Seamstress. I loved how simple it was to put together, but with the right fabric it really wows! Since we were on vacation, I took the opportunity to purchase some new fabrics from the local quilt shops, and I found this beautiful Amy Butler print that screamed “MAKE ME INTO A BAG!” So of course I had to. When fabric screams, you listen! Its the Gothic Rose print from her Belle Collection in Burgundy.

Belle Gothic Rose in Burgundy

Belle Gothic Rose in Burgundy

It paired well with a chocolate canvas and webbing. I still opted for stabilizer even though I was using the canvas, and I am happy with the results. The bag holds itself together well.

August 308

Belle Bag

At this point in our vacation my camera was almost dead, but I did get some lovely pictures on the patio at my parents house. I love this bag so much that I am making a second one. I have just enough fabric left over. The pattern is quite generous.

Belle Bag

Belle Bag

The lining is a bright pink blender that I pulled off a sale rack. I think it is Disco Dots but I cannot remember for sure.

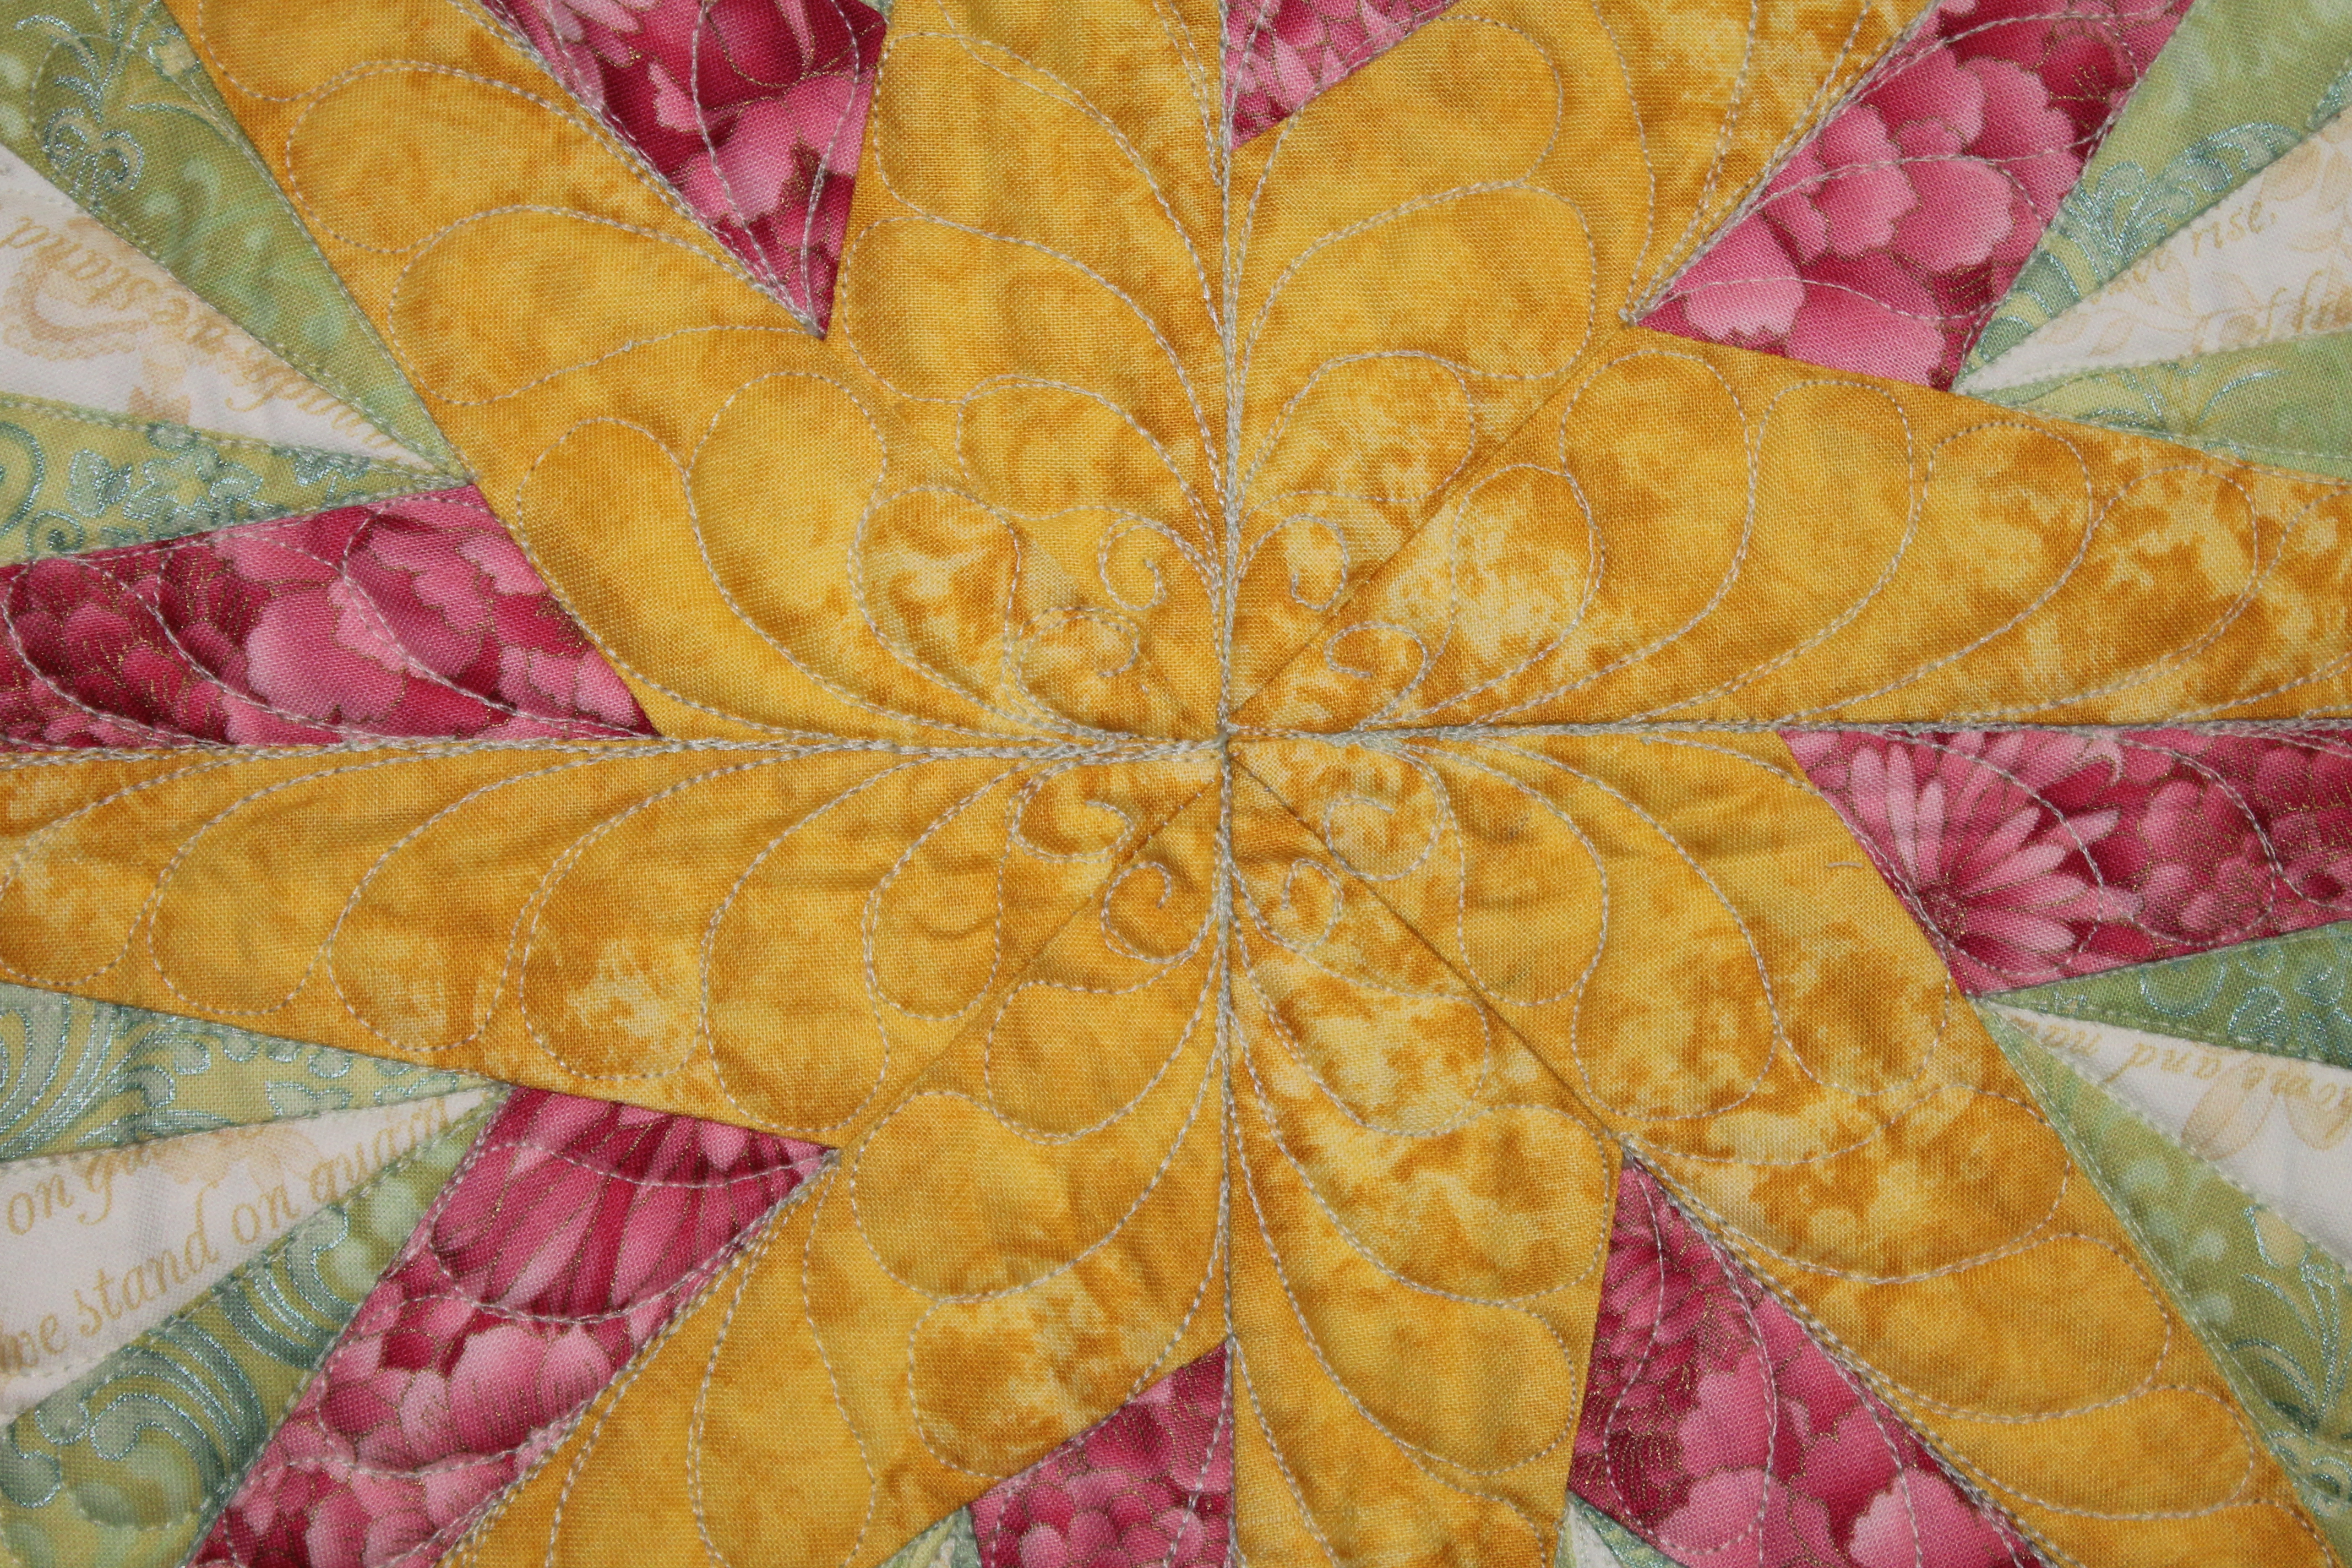
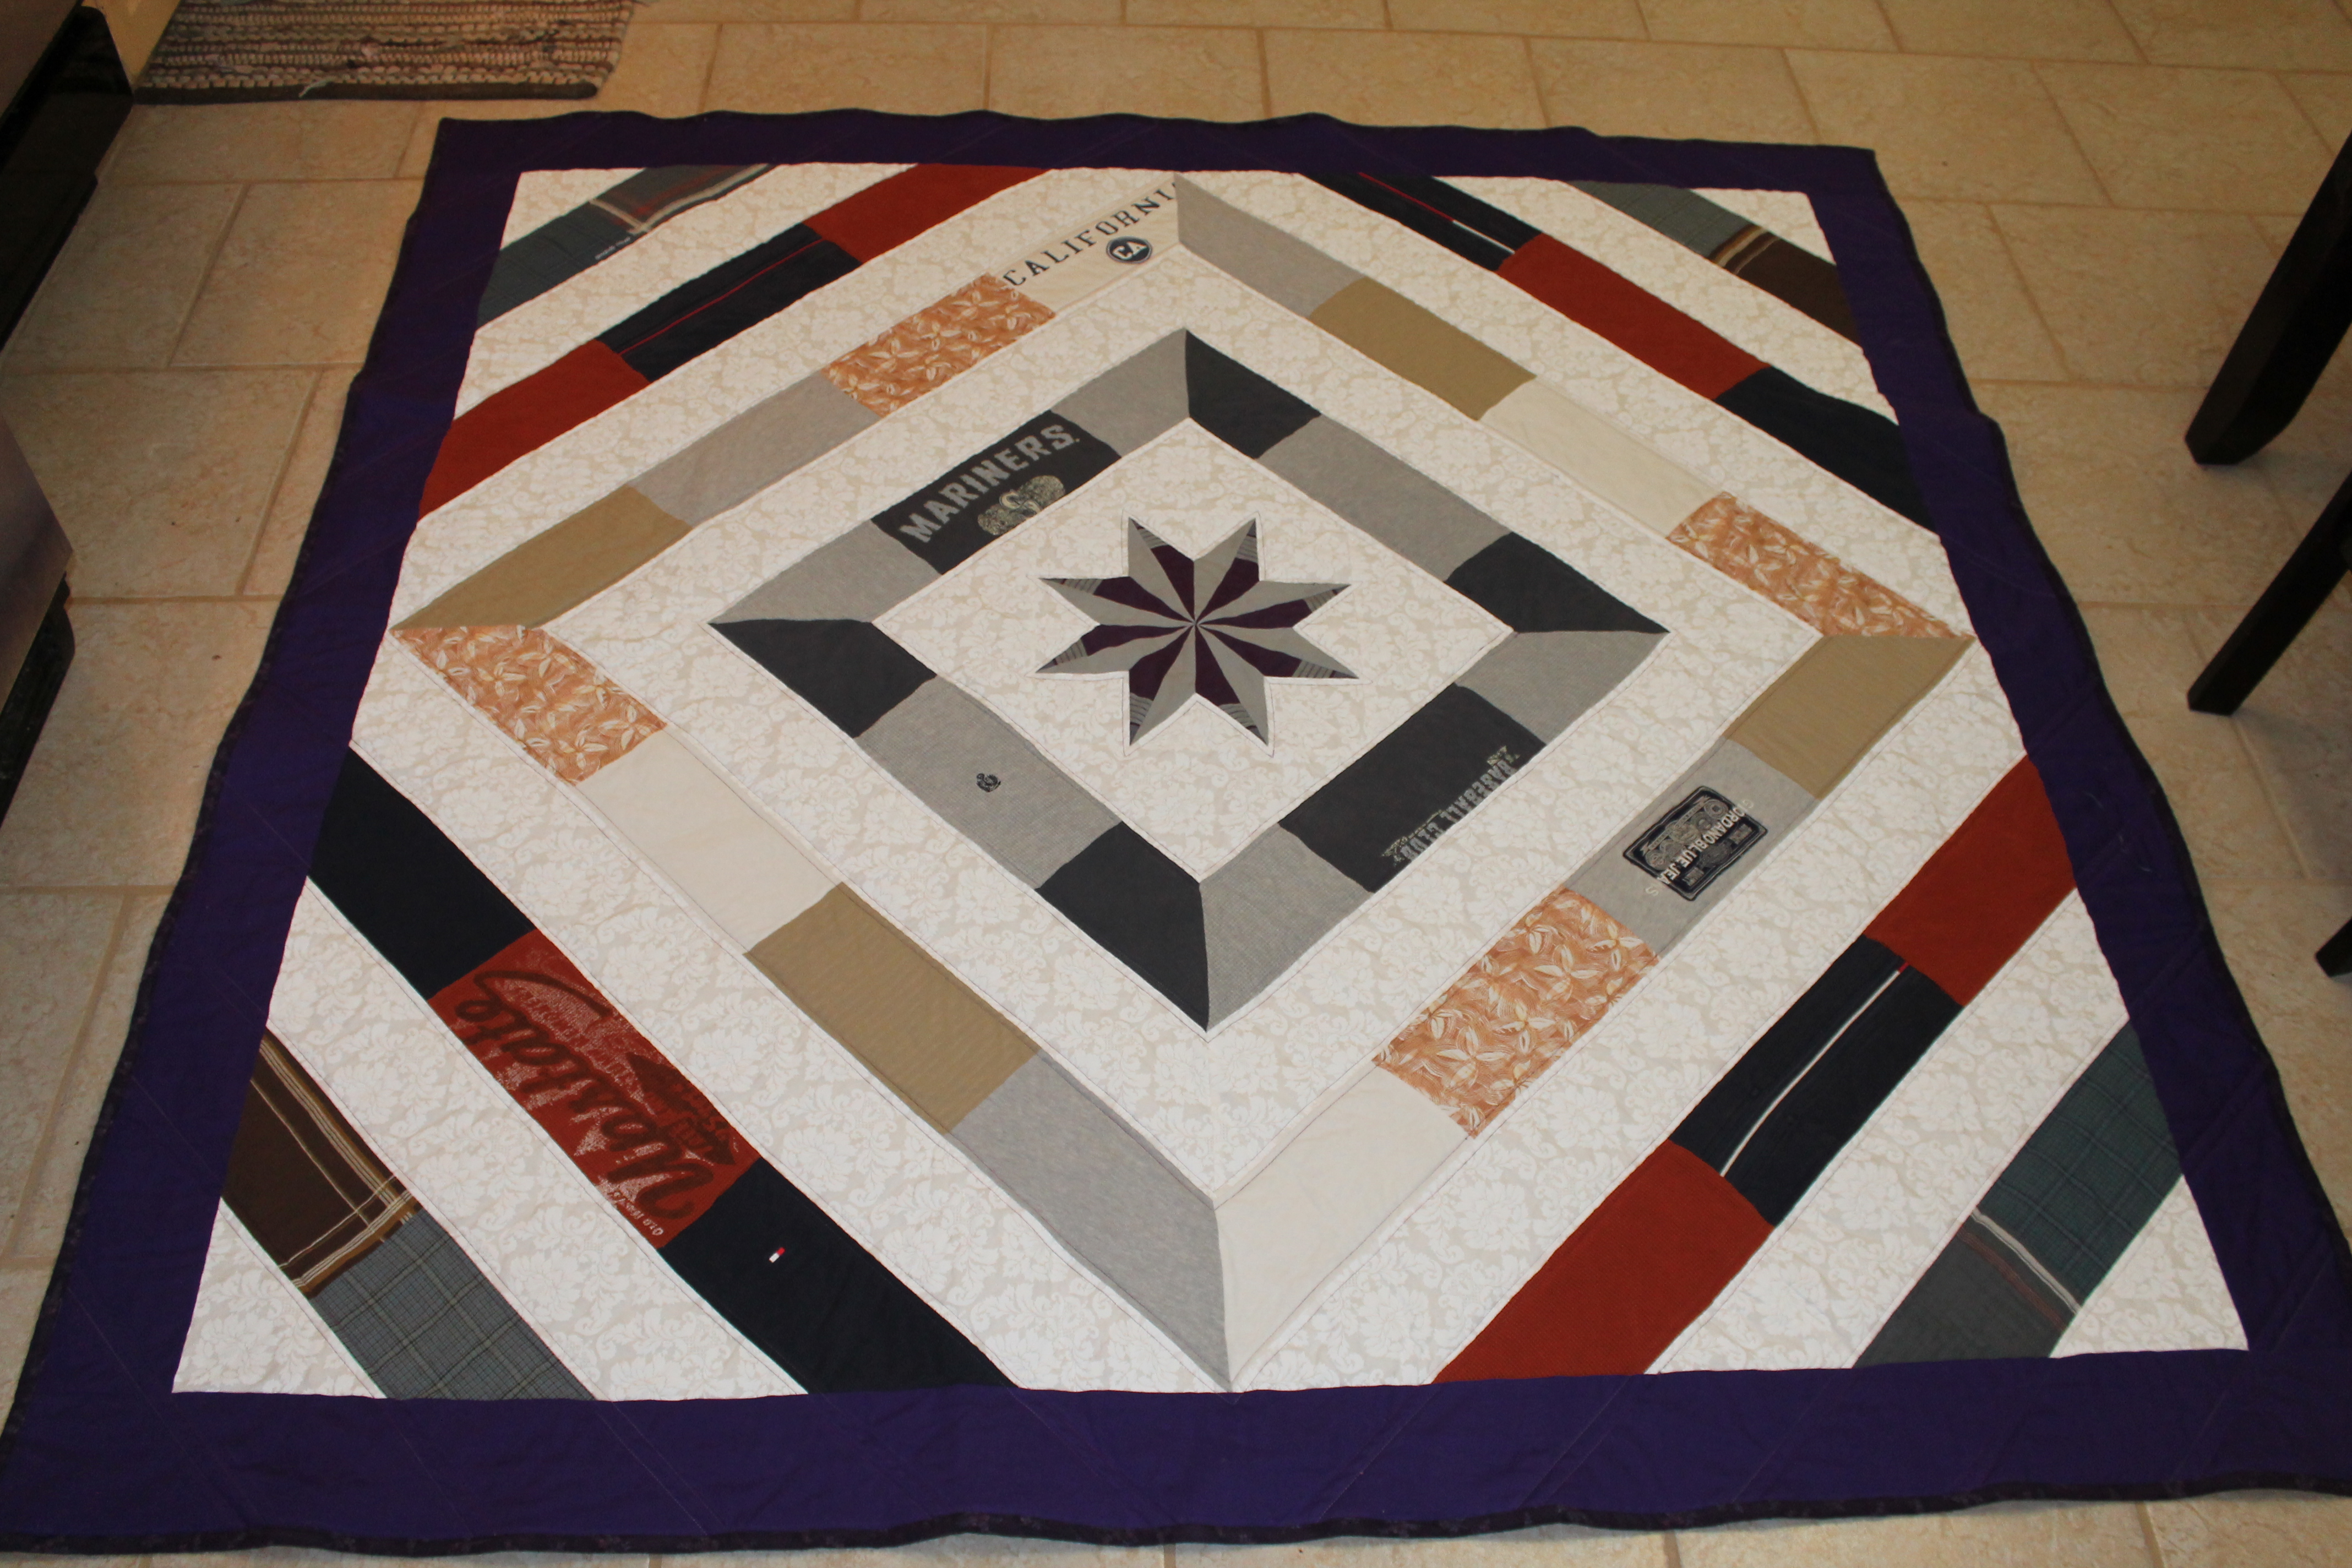
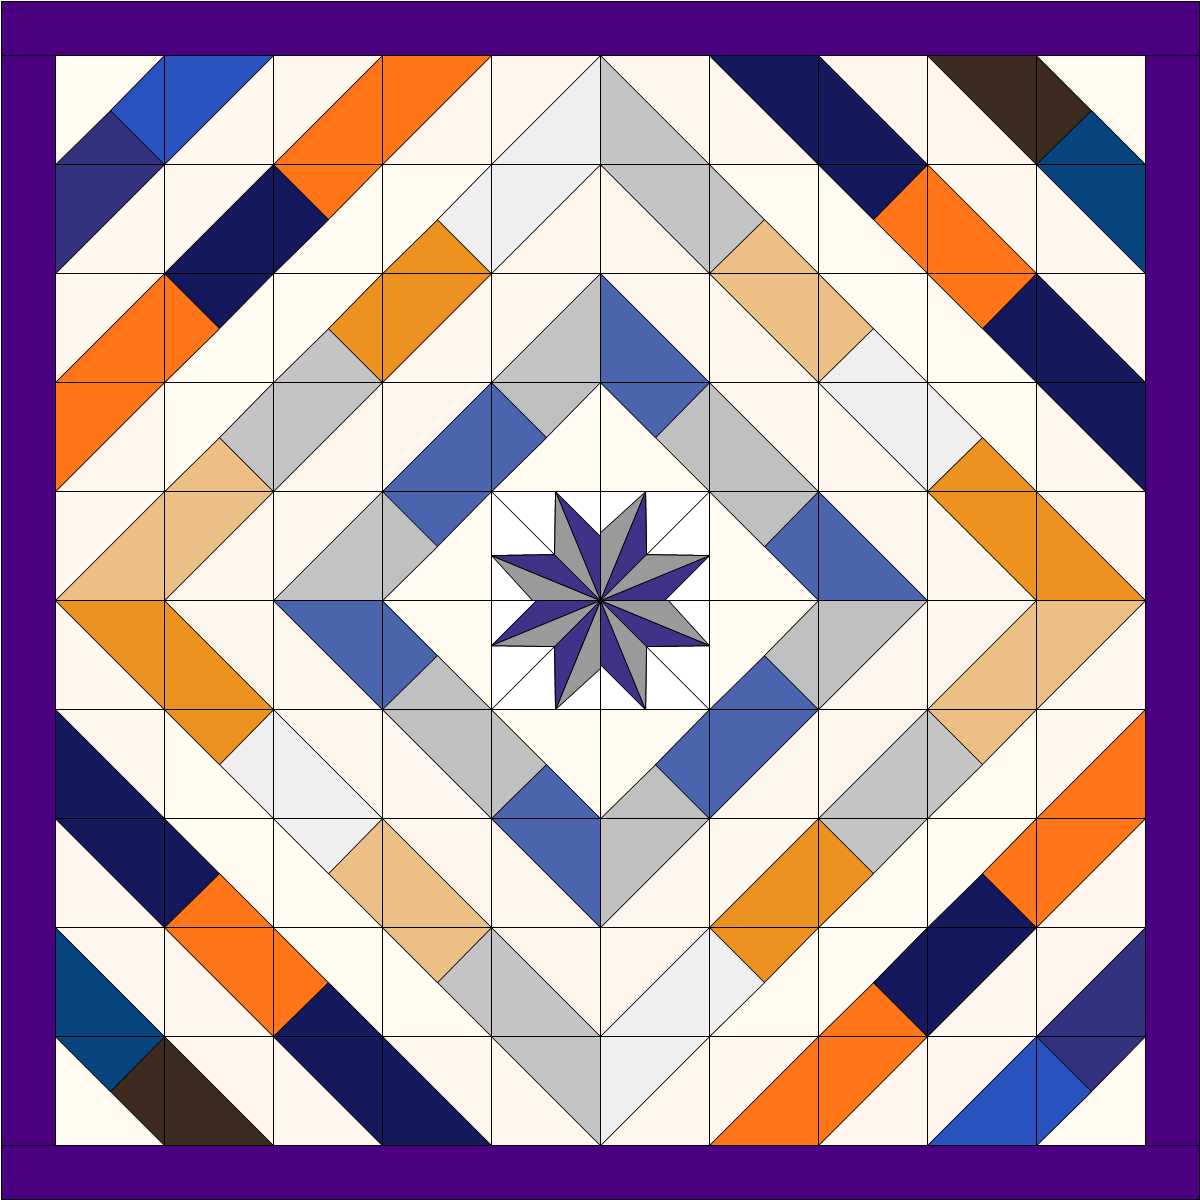
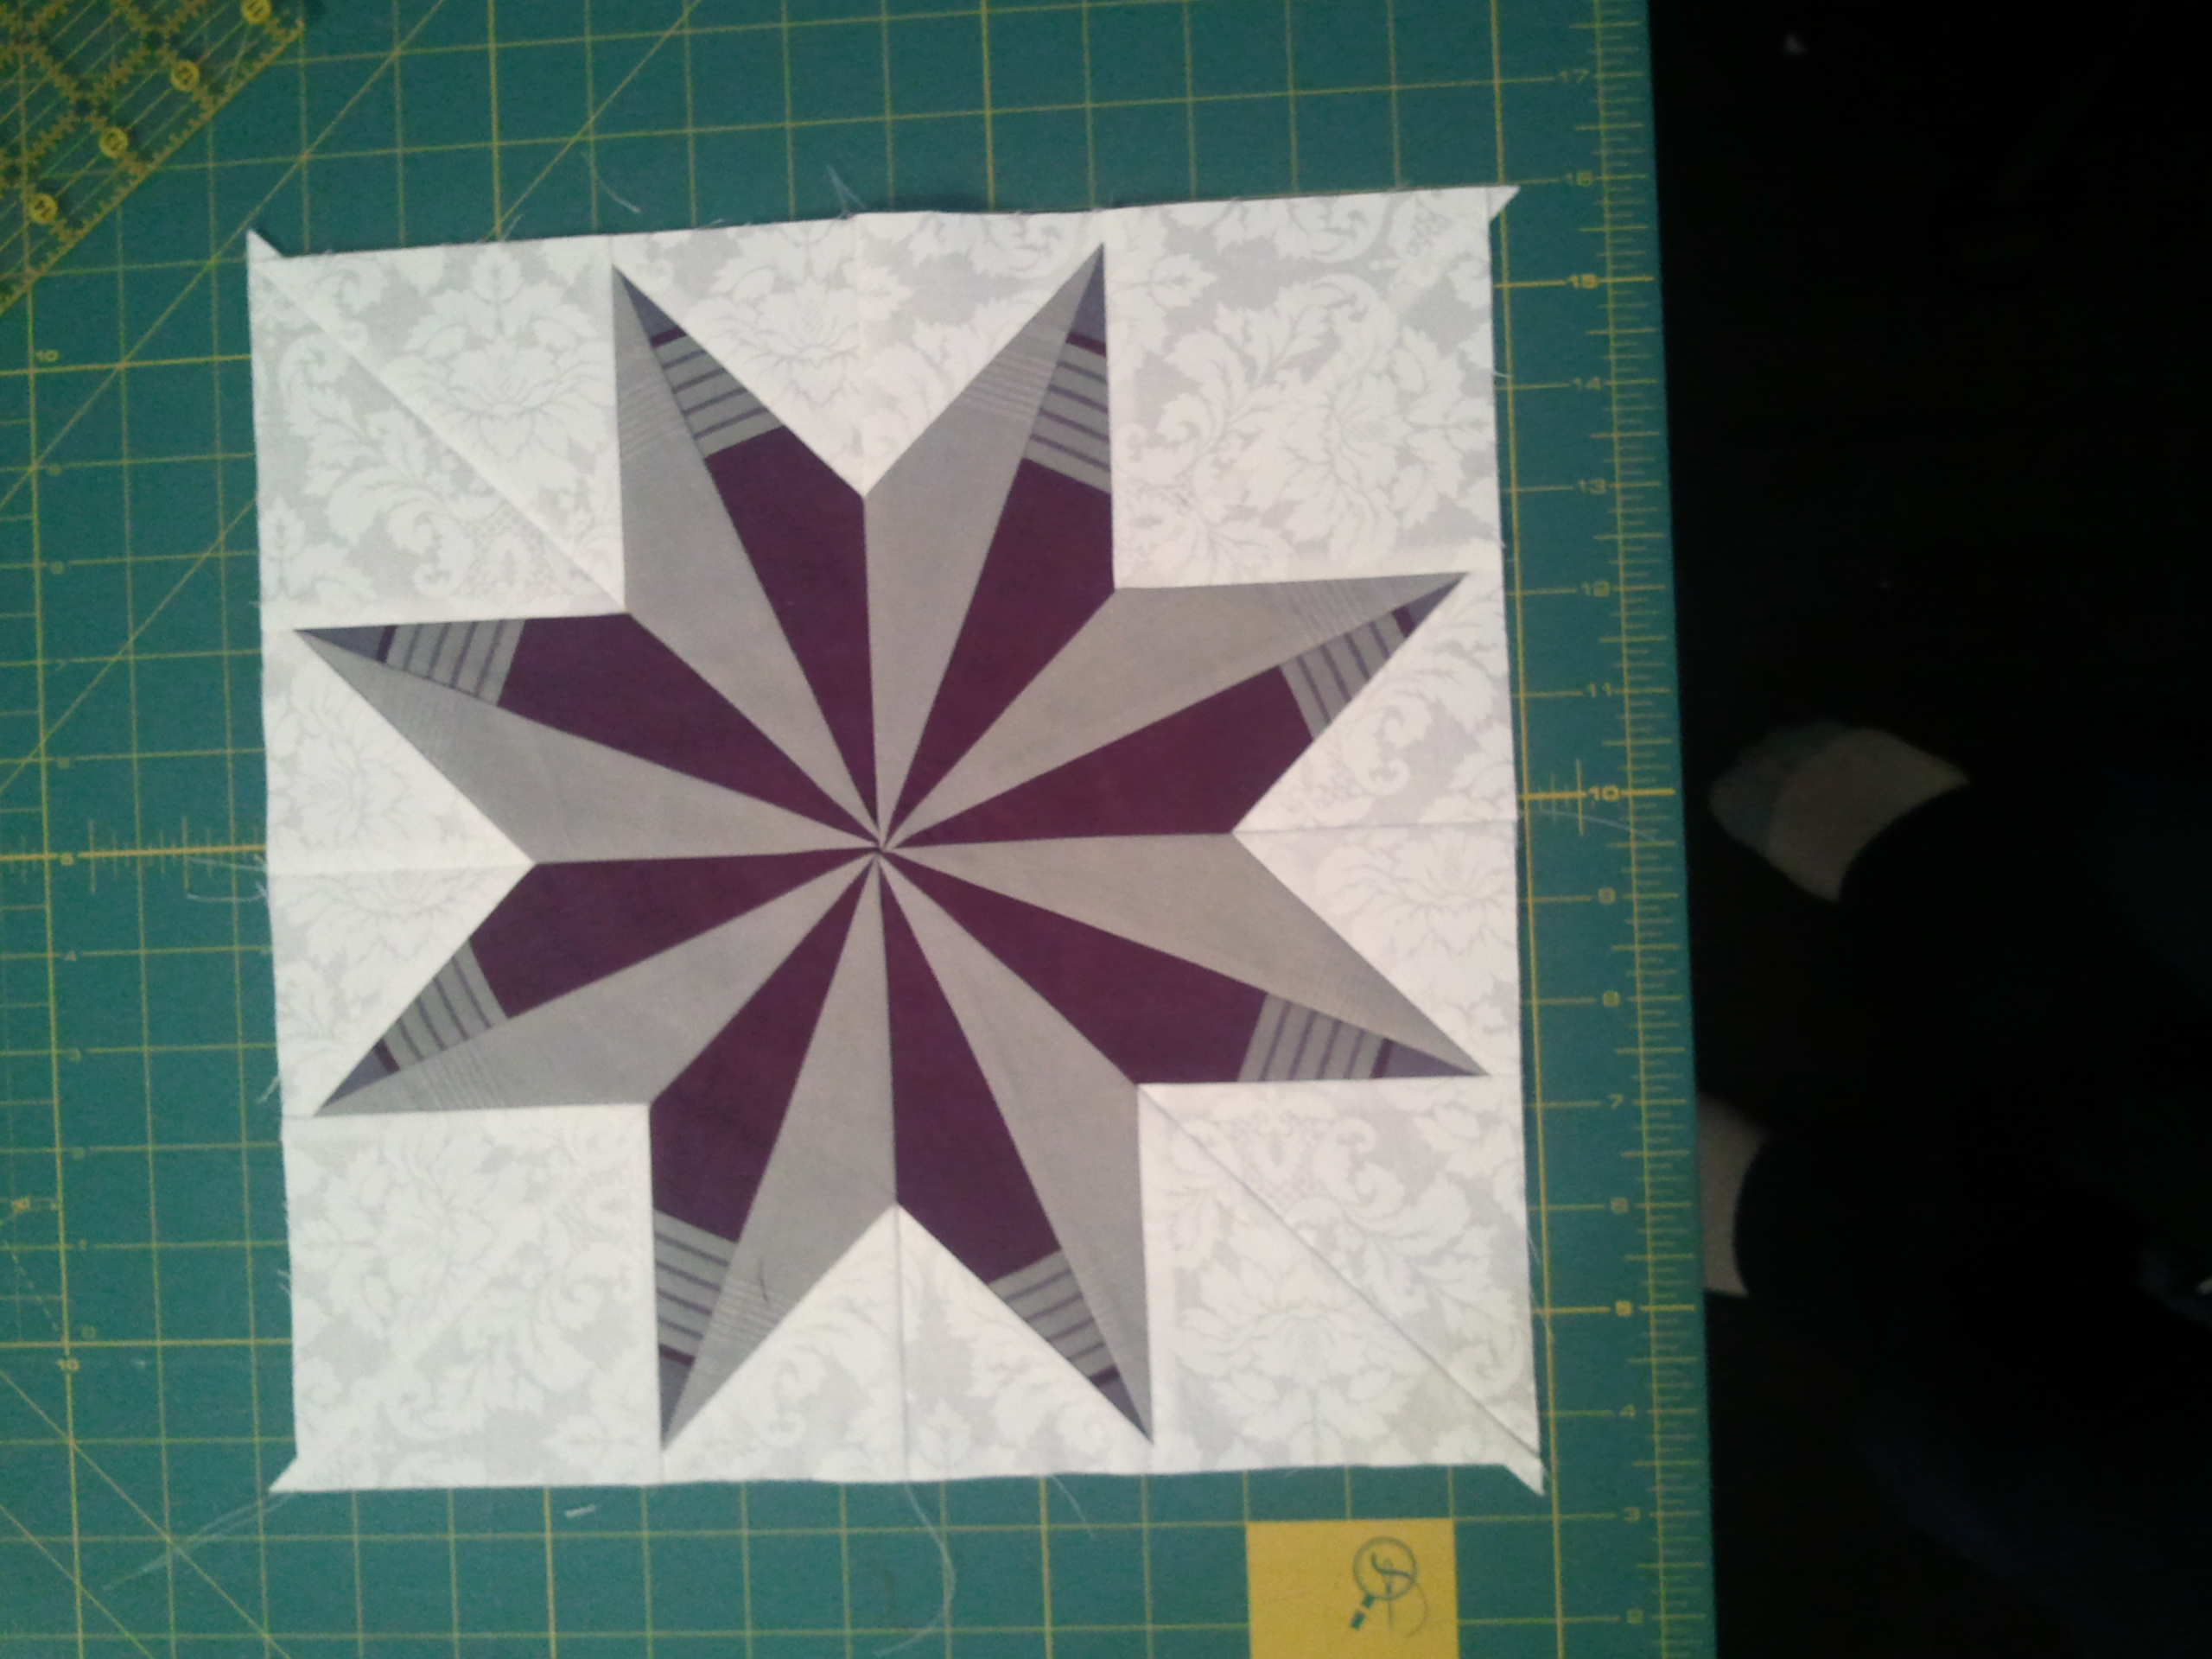
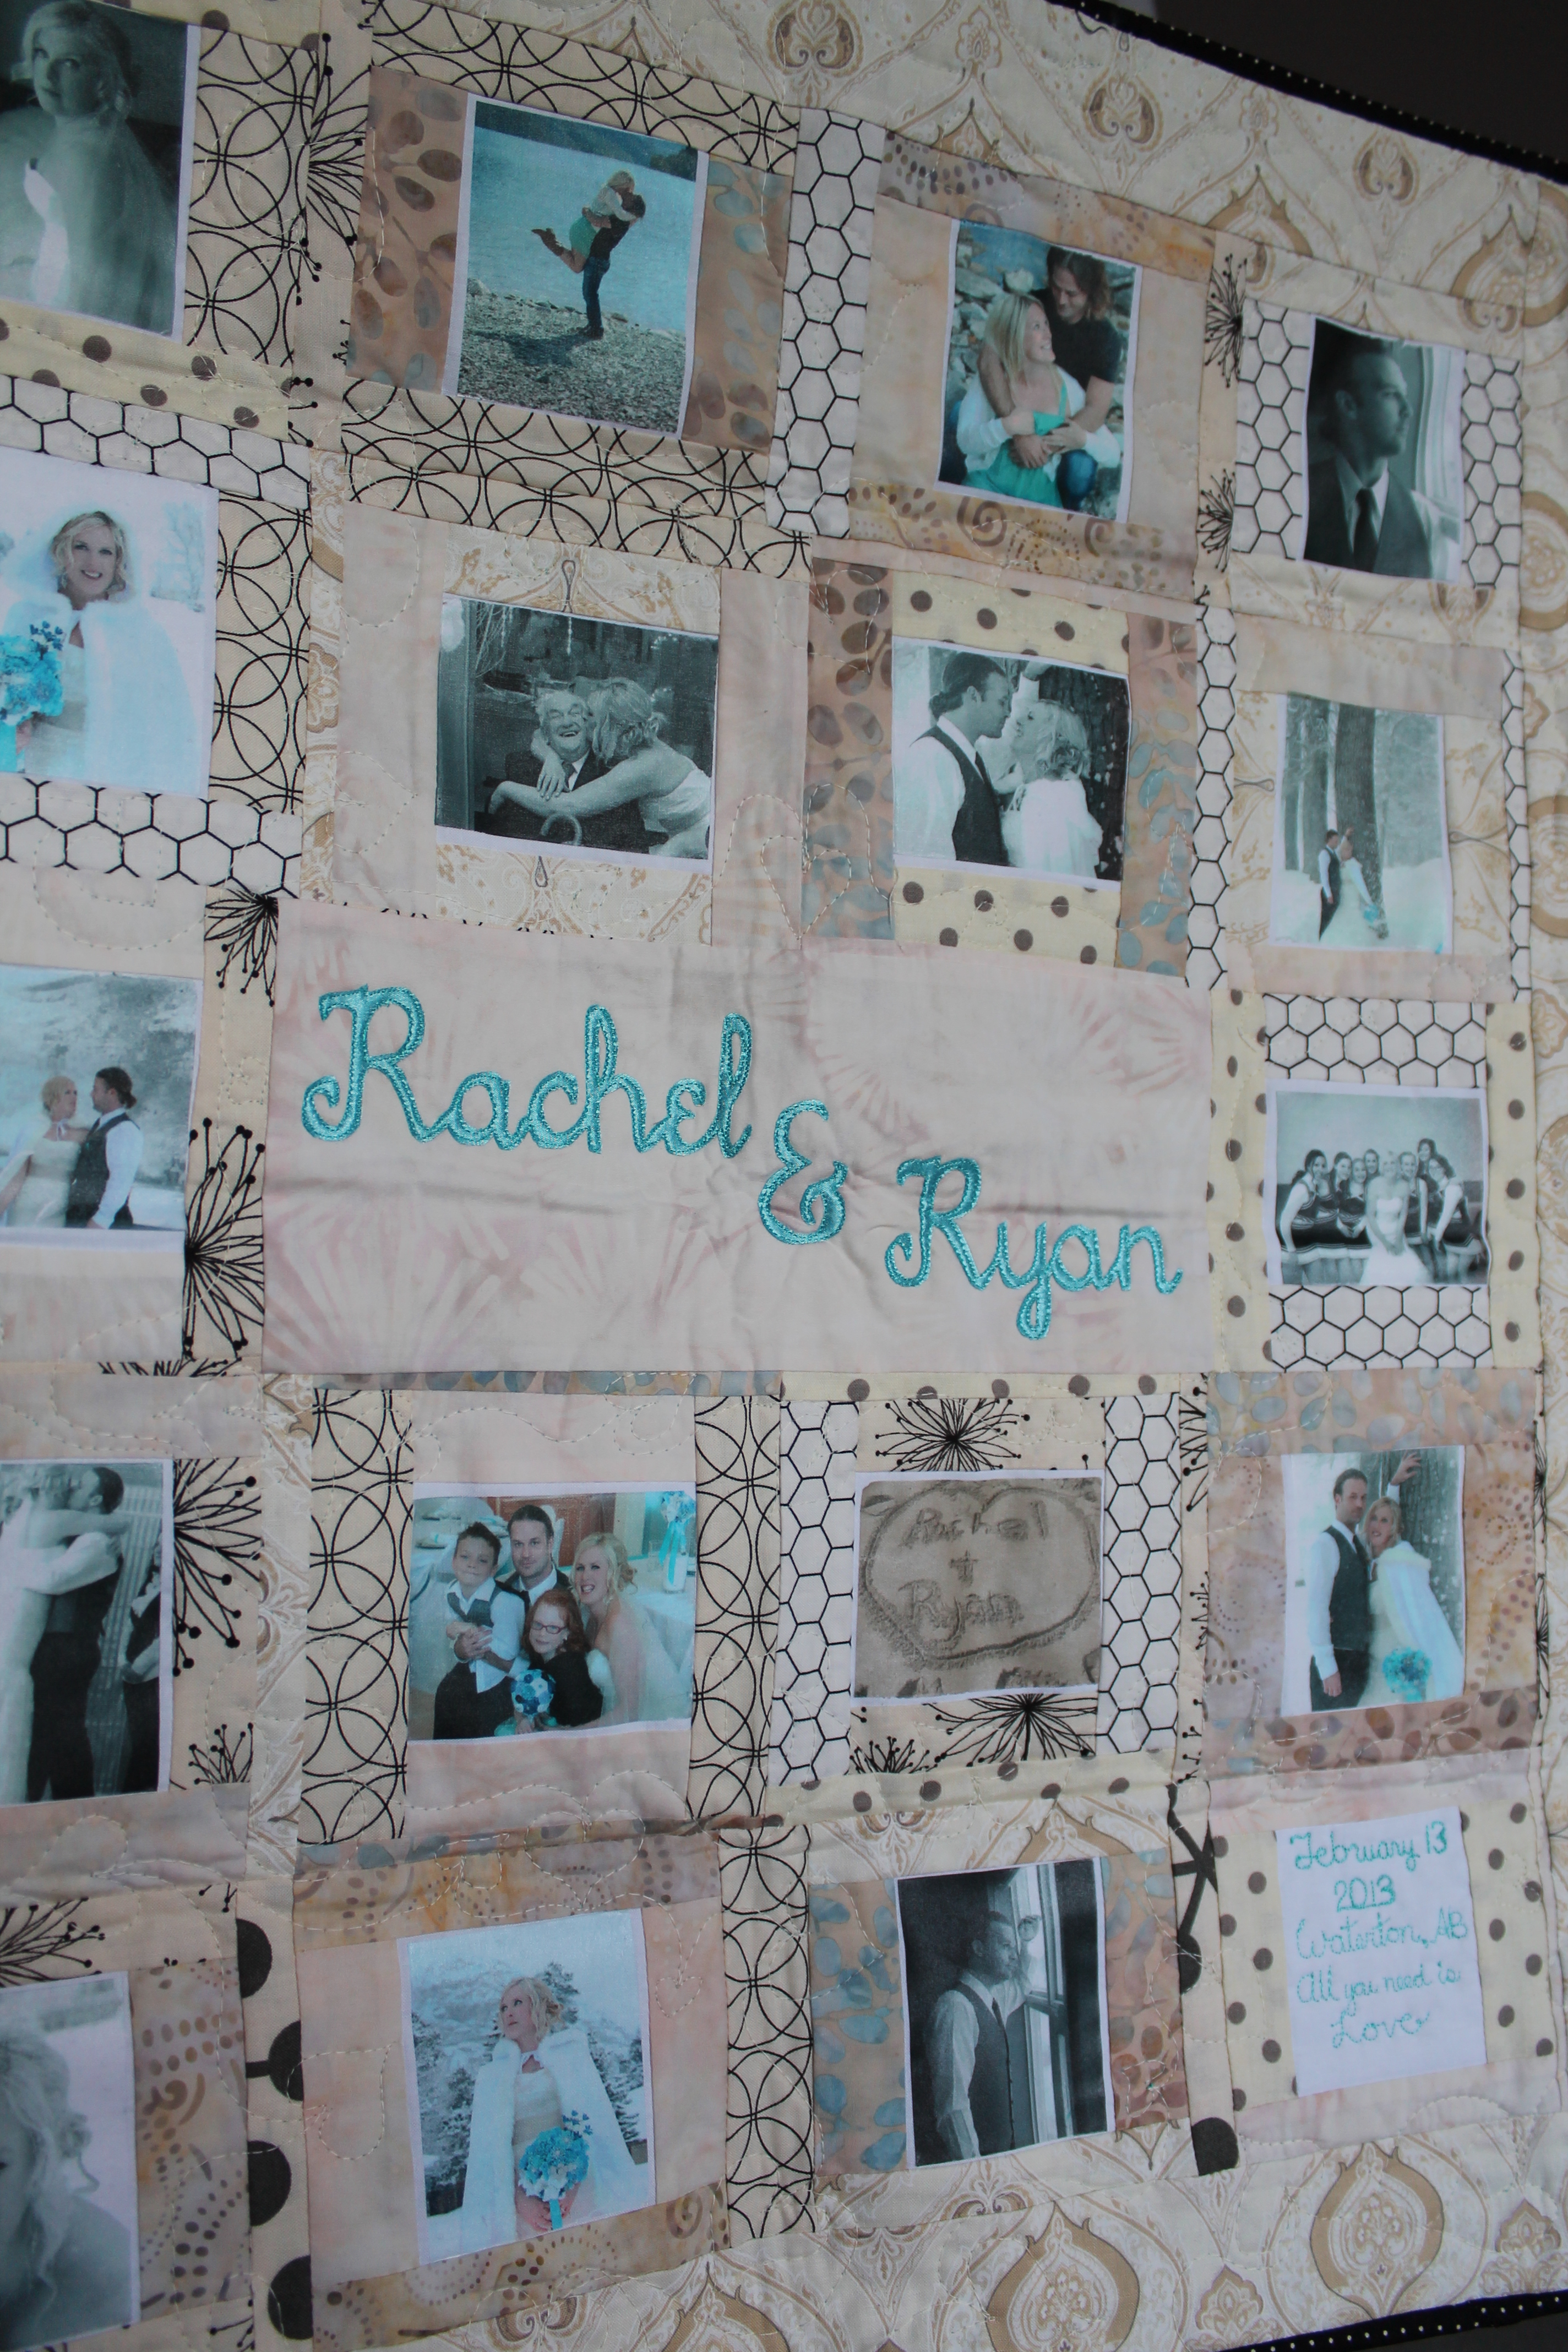
I also FINALLY finished my best friends wedding present. She got married in February and to my regret I was unable to attend. Her photos were amazing and the venue was breathtaking, and so inspiring, that I made her a photo album wall hanging.

Photo Album Wallhanging

Photo Album Wallhanging

I Love all her photographs. the contrast beween the whites and the blues and greys, I loved every minute of making this quilt.

August 227

I also managed to finish up some more City Sampler blocks. They haven’t seen the hot side of an iron yet, but they are done! You can find them in the Tula PInk City Sampler QAL Album.

Keep your eyes peeled in mid-October for a little something fun!

Happy Stitching!

Stacey

A WIP update

The last couple weeks have been filled with some WIP’s that I have finally complete. The Hoffman Challenge Quilt being the most notable, because I actually wrote about it! I also had a couple commissions and a personal quilt going as well at that time. One is at the quilting stage, and the other two are Finished. Phew!

First up is the First Years Memory Quilt

This was a very fun project to take on. I was contacted through a mom group on Facebook, she was looking for someone to make a quilt using her daughters clothes from her first year. The theme was sweet and simple, and I love how the quilt turned out.  It finished at 45×60, the perfect size for a toddler bed.

Isla Kate

Applique from a skirt lining

July 002

The finished quilt.

The clothes were adorable. Its always hard cutting into someones cherished pieces of clothing, but it gets easier when I think about it as transforming instead of destroying. =) Now the pieces will live on a a quilt, and each time she looks at it she will remember a part of her daughters first year.  I try to preserve a memorable part of each outfit, whether it is a bit of applique, some silkscreening, or a tulle skirt with a bow. My favorite block in the quilt is in the center of the 3rd row up. It was a princess dress with a bow and tulle overskirt, and a satin lining. I used the satin lining for the name on the bottom, and then gathered the overskirt into the 6″ block.

 I also finally hung the mini wall hanging I made a couple months ago. It was supposed to be for a swap but my machine tension was all goobered. Once I got the tension issues fixed I took it to the Free Motion Quilting Class that the Vancouver Modern Quilt Guild put on. It was a great class, and not just because I got to go sew on a Sunday afternoon! It was super informative, and I managed to get the tension issues ironed out.

August 054

Compass Star Mini Quilt

The finished size is 24″x24″. I used some of my coveted Kaufman Fusions stash for the green spikes between the Star points, and some leftover ivory text print from the Canadian Cottage line by Robyn Pandolph. The entire color scheme was insired by a pink/green batik in my stash. I used it for the outside corners.

August 058

Quilting detail-spikes

August 055

Quilting detail-star

I designed the quilting pattern myself. I have been practising my feathers, and I am very happy with how it turned out. I used a very very pale seafoam green thread for the quitling, and it worked very nicely with all the colors involved. This one is hanging in my kitchen until my mother comes to visit. Then I am sure it will be found somewhere in her house, which is fine by me =)

Happy Stitching!

Stacey


The Memory Quilt Complete

I have been shoving everything aside lately to finish up the Memory quilt before I head back to work….tomorrow! yikes! Where does a year go?


I am so happy with how it turned out. I couldn’t get pictures to do it justice. Maybe once I learn how to use the camera properly, but for now, here it is!

I designed it in my EQ7 and applied the closest colors I could for the mock up…..


March 015 March 0016

I used a variegated thread from violet to fuchsia for the quilting. I stitched straight lined 3/8″ from the seams, following the strips and extending into the borders to make a large diamond pattern. I also echo quilted around the star in the center.

March 021

Working with all those stretchy knit fabrics was certainly interesting, especially since all the edges ended up on the bias. I had to make very sure that the white strips and the borders were exact measurements and ended up easing some of the clothing strips. The quilt lays flat and is square enough to make me very happy. Lesson learned, next time I am going to back everything is a super lightweight fusible interfacing then cut it out and sew it together. That way the clothes don’t stretch and it can be quilted any way I want.  It doesn’t add much to the overall cost of the quilt, so I highly recommend it for those of you who want to try.

All that’s left is the label and applying the pictures to the border. I picked up some Avery Brand Iron-On T-Shirt Transfers. I found mine at Staples for $0.75 per sheet. I have used them before and they work great! The filigree shows through in the white areas, but it doesn’t detract from the pictures. Just make sure that you print on the best quality setting for your inkjet, and remember to flip the pictures! Oh, and check the ink levels. I wasted 2 sheets that way, one for flipping and one for ink.

March

My test strip using one of the misprints and a scrap of background. Works nicely, just have to make sure I apply pressure for the full 2 minutes.

I have a list of things I want to finish for the year. I was putting off my UFO roll call, but now I think is the time to get it on here. Maybe it will motivate me! I post the list later this week.

If you are interested in a memory quilt, or know someone who is, please feel free to contact me! staceydayquilts (AT) yahoo (DOT) com

For now,

Happy Quilting!

Oh Quilt Con…..

… how I wish I were at you!

Seeing the pictures on my fellow Vancouver Modern Quilt Guild blogs and Facebook makes me wish I were in Texas right now! Especially since its raining and 3 degrees here. *sigh* all the pictures of pretty fabrics and booths and quilts…..

So to cheer myself up I have been drinking lots of yummy yummy coffee and window shopping boots on Amazon.

Oh, and working on a special client order.

I was contacted a couple weeks ago through my mom group by a family that wanted to honor their fathers memory. He passed away a year ago in March, and the quilt is a surprise for their mother. We finished the design process and I have started the quilt. There will be pictures printed on to fabric interspersed into the white background as well.

I love making memory quilts. They are the perfect way to honor someones passing, commemorate an occasion, or save happy memories (I can’t believe you used to FIT THAT) I have been saving all of H’s baby clothes, the ones I simply cannot bear to part with, and when I have enough I am going to make myself a little wall hanging of them. Maybe a large swoon block with each piece a different outfit.

I drafted up the quilt in my EQ7. I really enjoy that program, though for some of my super duper custom crazy paper pieced extravaganzas it gets a little overloaded  I have crashed the program more times than I can count trying to do something super intricate.

Life's Journey Memory Quilt

The EQ version

The quilt will be made in strips instead of half square triangles because of the different clothing weights and stretches. There are quite a few knits and some heavier thermal type shirts, as well as a selection of beautiful handkerchiefs. I have pieced the inner star with fussy-cut handkerchiefs and the very outer borders will be handkerchiefs as well.

Center Star

Center Star-not the best picture as it was taken with my phone, but you get the idea =)

I hope to have the quilt finished an bound by the end of the month. I am heading back to work in less than 2 weeks, and I still have a list of things to finish.

As always

Happy Quilting!