Owl Madness and Mr Random Goodness!

Mr Random has been good to me in the last week! First off, with the Long Weekender Blog Hop, I won a gift certificate to The Fat Quarter Shop =) The fact that I won it 2 days before their amazing Black Friday Sale was as super bonus!! for 25% off I purchased an Art Gallery Fabrics Grab Bag and a Bloggers Choice Bundle. I am super excited for the grab bag, it contains 9.5lbs of Art Gallery fabrics in sized from .5-.875 yards! woot woot!!! I love AGF, especially the Pat Bravo lines. You point out someone who doesn’t like Rock N’ Romance or Indie, and I point out someone who is probably the husband of the person who bought it!

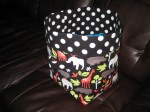
Then this morning, after a particularly harrowing night with my poor teething little Mr Moo Moo ( yes I call him that and it will come up at his wedding!) I opened my email to discover a message from Melissa at Happy Quilting saying I was the winner of this gorgeous bundle of fabrics from Julie at the Intrepid Thread.  I love Intrepid Thread. Julie is very nice and will make custom bundles for you if you cannot fit everything in your shopping cart! The shipping is reasonable too!

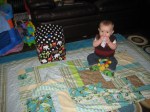
Its been a good week, other than last nights debacle ( we won’t get into that, thank goodness for mom support groups on Facebook!) My friend from Calgary came to visit, and she is getting MARRIED!!!! EEEEEEEEEEEEEEK!!!!!! So we went to look at dresses, and baked cookies =) It is a recipe out of an old Betty Crocker Cookbook from like the 60’s, and they are amazing! Sub out the chocolate chips for Penut M&M’s and you will go into cookie coma heaven. Here is a re-enactment of my morning

Thats pretty much how it went…..

I also recieved an overwhelming response to a recent post on Facebook. I found a bag of some Owl Ornaments that I made last year. I decided to sell some of them in the Mom Swap group. I had no idea what a whirlwind that would become. My little owls are the MUST HAVE item of the season right now. Personalized and a great price ( I definitely undercharges, cest’ la vie!) I wound up selling the 11 I had in less than 4 minutes, and because of FB’s way of ordering posts randomly if they are posted at teh same time, there were people whi should have been ahead of others and why did they get skipped will there be more…….wow. So I decided to make more. I now have a house full of owl ornaments. I have 39 on the go, those took about 4 hours to come in and I had to create a waitlist, which I had to close last night. The waitlist is at 33 owls. Add that to the stocking orders tand the custom quilt order, and I have a busy next couple weeks!!

Owl Madness

Ready to stuff!

Its taking over the house!

Thankfully my husband said he will stuff all the little basssss-….I mean darlings…… when he gets home from work. On the upside I have an excuse to purchase a fancy new SHARP pair of embroidery scissors.

Its time to eat dinner! Peas for the Little Mister and a honey mustard glazed ham steak for mommy! Yum!! the secret recipe?? Dijon mustard and syrup. put in a measuring cup until it looks like it will cover the ham. mix, cover the ham, season with thyme and rosemary, bake for 20 min.

Happy Quilting!!

Fabric Gift Bag/Scrap Bin Tutorial

After making the toy bins for my little guy’s toy ( and saving my feet from the inevitable midnight toy stomp), one very smart commenter thought that a smaller version would make a great scrap bin! I thought that was a great idea, and took it a step further. Presenting the Fabric Gift Bag……

Fabric Gift Bag

…that turns into a scrap bin!!

Scrap bin!

The bin finishes at 5″x5″x5″ ( who doesn’t like perfect squares!)


Supplies

An 8″x20 1/2″ rectangle of the outer fabric and heavy weight woven fusible interfacing

An 11 3/4″x20 1/2″ rectangle for the lining

A square ruler ( no larger than 6 1/2″) or a hard piece of template material 2″x2″ square.

Your various sewing paraphernalia ( scissors, needles, thread, band-aids, coffee…)

Supplies

Instructions

1. Fuse the interfacing to the wrong side of the outer fabric.

2. Match the shot raw edges and stitch a 1/4″ seam across, backstitching at either end.  ( all seams will be 1/4″)

3. Sew the bottom raw edge from the fold to the seam, backstitching at either end. Trim your seams to 1/8″ and set aside.

4. On the short side of the lining make a mark 3/4″  and 1 1/2″ from the top. Stitch from the top to the first mark and stop. Move to the second mark and resume stitching your seam to the bottom. Press this seam open.

Leave this open. This is the TOP

5. Stitch the bottom seam of the lining ( furthest from the opening in the seam), backstitching at both ends.

NOW THE FUN PART

6. Take your outer fabric with the interfacing side out. line up the 2″ square line with the stitched seams as shown and mark a line around. If using the template line up the corner of the template to the stitching lines on the inside. Mark your lines. Repeat for the opposite side, lining up the fold  and the stitched line with the 2″ line.

Lined up for marking

Marked Lines

7. Cut on the marked lines. Repeat the steps for the lining. It should look like the picture below

Cut out

8. Bring the raw edges of the cut out squares together on either side, matching the center fold and bottom seam on one side and the bottom seam and side seam on the other. Sew the raw edges and trim the seam allowances. Repeat for the lining.

Match the raw edges of the square

Match the bottom seam to either the fold or the side seam and pin.

Sew a 1/4″ seam along the raw edges

9. Turn the outer bin right sides out and place right sides together inside the lining bin, matching the raw edges and the side seam. Sew all the way around the top, leaving a 2″ gap for turning.

Turn right side out

Place inside the lining, matching seams, and sew 1/4″ seam, leaving a 2″ gap for turning.

10. Turn the bin right side out through the opening. Use your favorite stitch to hand sew the opening closed.

Close the gap

11. Push the lining into the main body of the bin snugly and finger press into the seams. You will have 2″ extra of the lining folded overto the main body of the bin.  Press the top fold of the lining and the inside of the bin.

Extra fabric. Press the top fold all the way around

12. Edgestitch around the seam connecting the lining to the main bin.

13. Insert a ribbon or cording through the opening you left in the seam of the lining. I used a hook to push the ribbon as far in as i could, wrangled it off, then inserted the hook in the other direction, hooked the ribbon and pulled it the rest of the way through. It seemed like a good idea at 11:30 at night. Your best bet is to use a tapestry or cross stitch needle ( one with a dull end), and use it to pull a ribbon through, or thread it and knot the thread, pull the thread through the cording or ribbon, and then feed it through using the needle.

Find the opening

Feed the ribbon through.

14. Tie the ends together in a slipknot close to the opening, leaving about a 1″ tail. This will ensure the ribbon is hidden when in Scrap Bin mode.

Voila! You are finished your Gift Bag/Scrap Bin!!

Gift Bag Mode

Scrap Bin Mode

Gift Bag Mode: Pull on the end of the ribbon and draw up the band of fabric. Tie a bow!

Scrap Bin Mode: Release the bow and pull the edged of the band taught. Fold down over the main body of the bin.

I hope you enjoy making a bunch of these for your friends and yourself! They come together very quickly and the possibilities are endless! You could always fill one with cookies and send it my way! Yum Yum!
As always,

Happy Sewing!!

Many Happy Changes….and some fun ideas to share!

After a couple months of tweaking and sorting my finished quilts I have finally opened up my Etsy shop. I am very excited and currently have 2 of my original quilts posted for sale. I hate to let them go but I do not have the space to display everything. I would rather have them somewhere they can be appreciated and loved than sitting in my closet only to be pulled out to refold. It makes me feel like Gollum from Lord of the Rings my precioussssssss….

That was just for you Katy!

I am also going through all of my fabric. In an amazing act of kindness and pay-it-forwardness one of the moms on the mom group gave me an Ikea bookcase. It is awesome! It has 20 cubes that are 15″square. I am able to take *almost* all my fabric out of the bins and put them into the shelves. So far I have emptied 9 small bins, 2 bags, and 4 large bins. I have 4 more large ins to go. Over the next few months I will be organizing it all by color and refolding it all into a standard size. I do have 2 organized shelves, one of backing and one of backgrounds in white-black.
I will also be de-stashing. I have some fabric that has been hanging around forever that I am not quite sure what to make with, or larger scraps but I am not much for scrappy quilts. My plan is to thin the herd by stuffing some zip baggies full of fabrics and then selling them as grab bags in my Etsy store. Each bag can hold 1/2-1 full yard of fabric scraps, strips, and fat quarters.

Now onto the fun stuff! TUTORIALS!!!

I have not had much time lately, but I am working on a fabric bin tutorial. In the meantime Maureen Cracknell of Maureen Cracknell Handmade has a wonderful post for organizing her scraps from way back in September. I think this is a great way to keep those pesky scraps in line and organized!

I have to say that her blog is chock full of super fun and inspiring projects and idea. I love reading her blog and following her facebook page . I want to make everything she does!

Until next time,

Happy Quilting!

The Long Weekender Finished!

A quick update for those of you following the Long Weekender Blog Hop.
I finally decided on my fabric. I wanted to use Ty Pennington’s Foliage in Spiced Chocolate. Finding it was another matter altogether! Hawthorne Threads carries both the cotton and the home decor weights, but it was completely sold out in all the colorways. I had considered Amy Butler Love -Paradise Garden in Midnight, but I could not find an accent I was completely happy with. ( I may still make that one, we will see….)
I stumbled across a site called Stitchsteals completely by random chance. I don’t think I could repeat the search that led me to it, but lo and behold, there was the fabric I wanted, and only 5.50/yard! throw in cheap shipping to the USA and a shiny new mailbox across the border, and I had my fabric in my hands in 3 days! Woot! That mailbox may get me into trouble……

Foliage in Charcoal

I also ordered the co-coordinating print Lace in Spice for the inside of the bag and the piping. So much piping! My friend was over the night I planned my cutting layout. I wasn’t too keen using the accent for the handles, and she suggested piping them so it still has a nice pop of color. “What a great idea!” my sleep deprived brain screamed at me, “its only 45″ per handle so that not too much extra!” Right. It did turn out fantastic though. For whatever reason the local stores here either don’t carry cotton cording or they hide it so well you need a bloodhound to sniff it out. I was starting to panic, then I remembered that I have a ball of Bernat Handicrafter cotton yarn in my closet. I measured it and it turned out to be only 1/32″ smaller than what was required. It made a suitable alternate in a pinch.

Piping the bag

The pattern calls for home decor weight, but all I could get my mitts on was cotton. I know cotton sateen is slightly heavier and has a firmer drape to it so I added a layer of lightweight non-woven fusible interfacing to the wrong side of all my pieces. It took a little more time but was well worth the effort. The pieces held their shape much better while sewing and because I used the flimsiest interfacing I could find it did not add any extra bulk. It was as close to home decor weight you could get without actually being home decor.

To make a long story short, after only ripping out my finger once on a pin during the final stretch of hand sewing, I finished the bag! Serendipitously it just happened to be a long weekend so my husband could watch Harry while I sewed up a storm. They kept me company in the final stretches so I didn’t go completely crazy. After the piped handles I needed some support, though you will see that i did indeed add some to the side pockets as well. I had all this extra length and Brain though “well, it really shouldn’t go to waste….”

Mommy’s Little Helper

Without Further ado…..The Long Weekend Bag!

The Long Weekender

Pockets and Handles? Piped!

Fussy-cutting Splendor!

Thanks for reading, and as always,


Happy Sewing!!


Toy Buckets-they save lives!

I picked up a copy of Baby Times a few weeks ago (great book if you have or are expecting babies!) and finally got around to making one of the projects- a Toy Bucket! We have been tripping over Harry’s toys and I needed to contain them somehow. I did not like keeping them in plastic bags or buckets, so this was a perfect solution. the Large one is for the living room and I will make a smaller version for the sewing room.

The Very Hungry Caterpillar!

I have finally gotten around to making some decor for my son’s room- Wall Art! I was inspired by a blog post from Hawthorne Threads. I have had a panel of Very Hungry Caterpillar Encore in my stash for a couple months now, just begging to be used. I can across this post from Hawthorne Threads, and I thought it was the perfect thing for this fabric. I had a 50% off coupon from a local craft store, and I used it to buy a multi-pack of 16×20 canvases. I used my Evil Stapler of Doom to attach the fabric to the frames.

What? Why is it called the Evil Stapler of Doom you ask? Well, apparently it has developed a taste for people. I was opening up the hinge and it bit my finger!

The Offended Digit

You can clearly see this is not the first time this finger has had an unfortunate run-in with my sewing supplies.

The Evil Stapler of Doom

Do not let it’s fun size and friendly colors fool you. This stapler is a finger-eater! *chomp chomp*
I am very happy with the result.

Ta-da!

Harry really seems to like it too! He was my little helper that day.Even tried to drool on my injured finger for me! I settled for some bubbly giggles =)

Given the Drooly Baby Seal of Approval!

I think I need another set of the panels. I have some wall art, a Hungry Caterpillar diaper, I need I mean I think baby’s room needs a quilt too…

Until next time!

Happy Quilting!

Fun for everyone!