That’s right! All of my patterns will now be available as a PDF download.
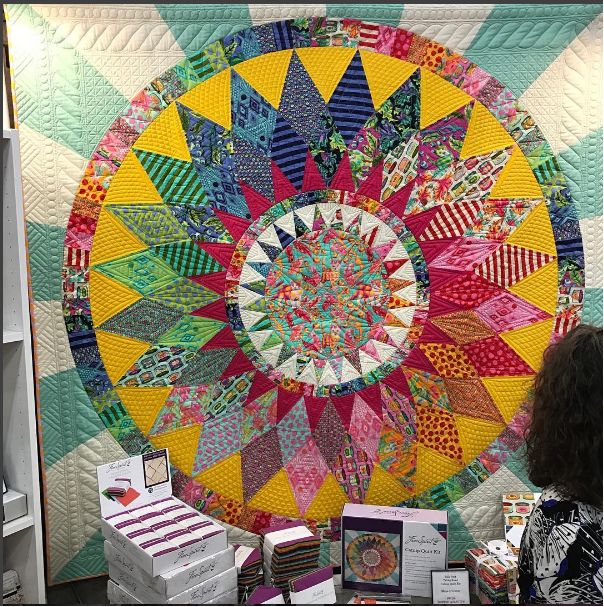
Additionally, the Kaleidoscope pattern now has optional PDF templates and foundations to download. The kaleidoscope templates are quite large, and having them enlarged is a bit of a hassle. That’s not what I want for my patterns at all! So, so address the enlargement issues, the paper version of the pattern will have the option to download the templates in larger format paper to print at home. For those who have already purchased the pattern, I will add the download option to your order.
If you purchased from me at Heritage Festival of Quilts, please contact me directly.
Thank you everyone for your support. I have some new patterns coming this month that I cannot wait to share with you!
The next collection with Tula Pink is called Tiny Beasts, with a new selection of dots and stripes, also of the tiny variety. I really love the collection; not only are the prints excellent on their own, they can also be used like a blender print. The tiny dots and stripes round out the main prints, and of course solids are a quilters best freind!
First is Lend a Paw. This was such a fun quilt to design, I love making gradients and rainbows. the pieces are small, but the quilt is big, finishing up at 91″ x 91″! You’ll have no trouble fussy cutting this one if you want to, even though the cut pieces are smaller you’ll still get the full print in the pieces. I used my favorite print, the trash pandas, as a background feature. You could switch it up with whatever you wanted, from the ladybugs to solids. I used the tiny stripes/dots to complete the rainbow gradient.
Lend a Paw, 91″ x 91″, designed by Stacey Day
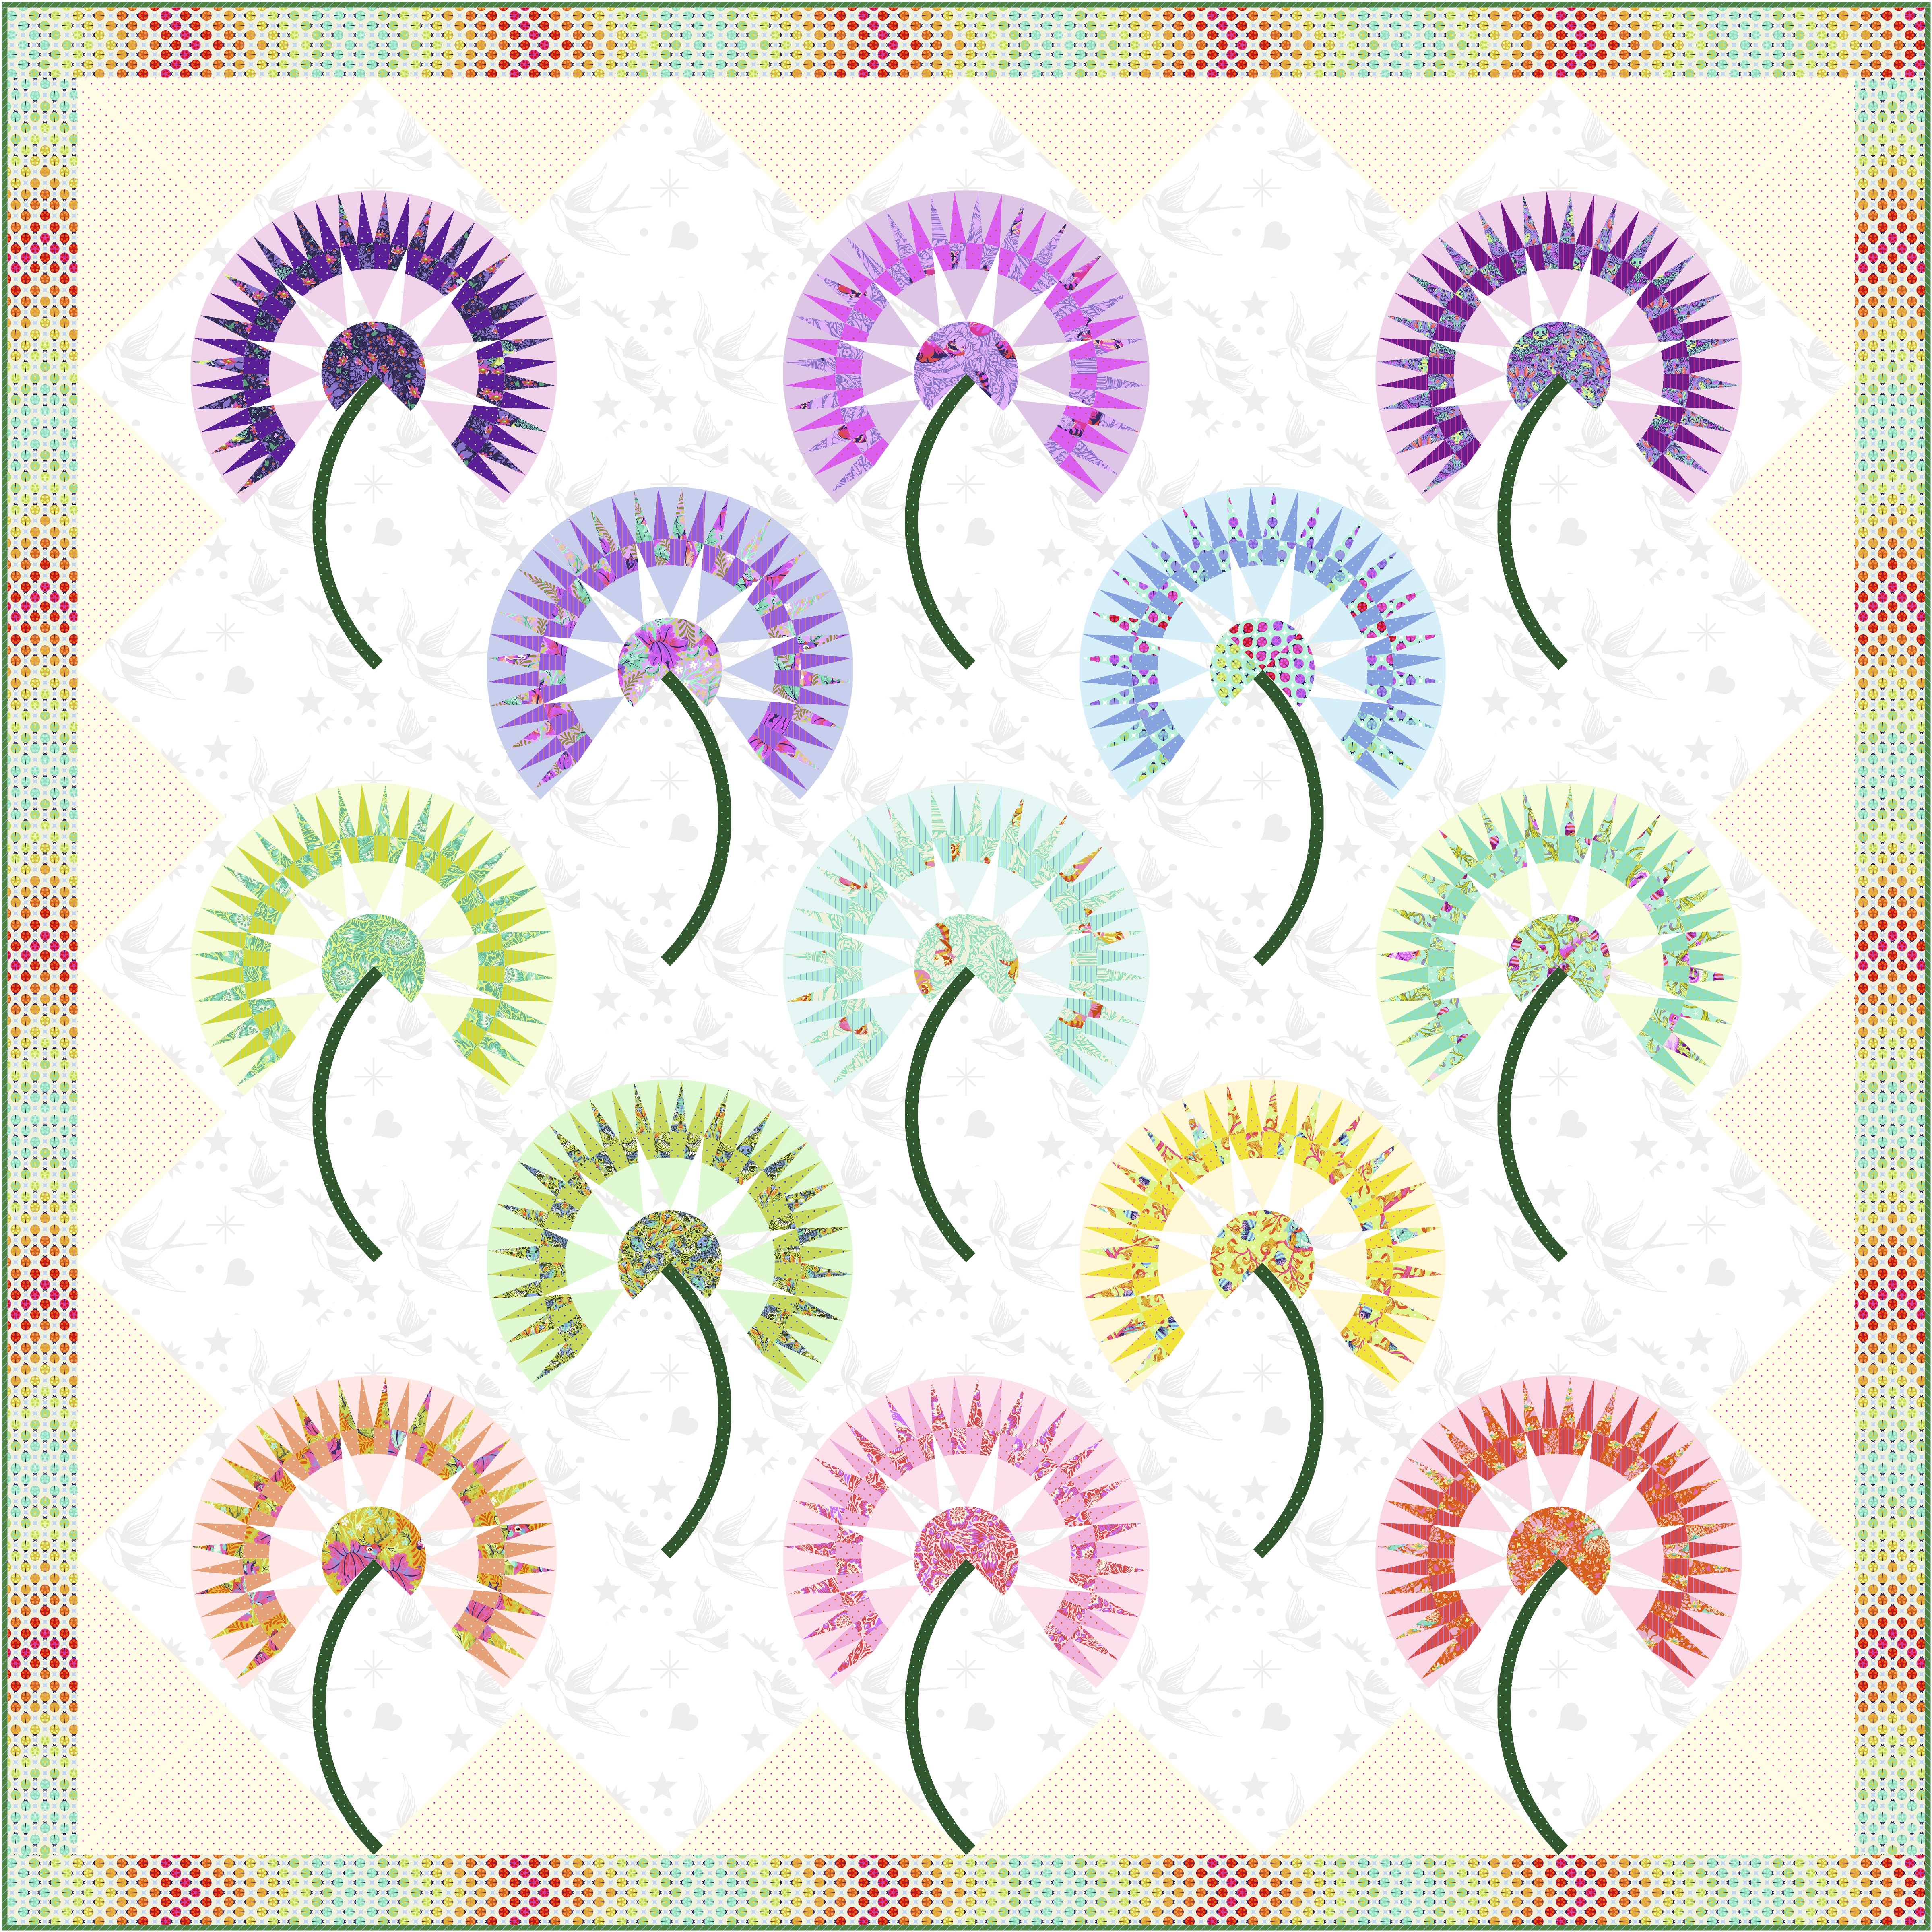
The next quilt is a more advanced quilt. I loved the hedgehog print, I thought it was so creative and clever and cute. Chatting with Tula about it led to an idea of dandelion fluff, which evolved into Just Dandy. This is a foundation paper pieced quilt with some bias tape applique. It is not for the faint of heart. The end result is spectacular. Its already popping up on Instagram in progress or completed, which makes my quilty heart so happy.
Just Dandy, 82″ x 82″, designed by Stacey Day
The final quilt I came up with is called Mini Menagerie. I wanted a large central block that would feature as much of the tiny print as possible. This is regular piecing, no special techniques required! I ended up hand drawing this one to make sure the the pieces all fit together as intended. it reminds me of a sunburst. I think this block will make an appearance again in the future. I want to color it for the upcoming Moon Garden collection, it would feature those large prints really well.
The Daydreamer Collection by Tula Pink has to be one of my favorite fabric lines to date. So much so, that I am still making quilts with it! I just adore the flamingos, the ombre prints, the tiny fruits, the jaguars, the butterflies…. it makes me want to travel where there are sunny beaches and clear ocean water. The collection also saw the release of 22 new solids, Unicorn Poop and Dragons Breath. Most of the quilts have the complimentary solids included somewhere in the design. They do an amazing job of adding resting spots for the eyes, or adding to the rainbow effect for each quilt.
I had a field day designing quilts to showcase Daydreamer.
First up is my personal favorite, Imagination. This is an advanced foundation paper pieced quilt. It has a LOT of pieces and needs a LOT of patience, but the end result is 1000% worth it! just take a look at #tulapinkdaydreamer and #imaginationquilt on Instagram to see how people are just killin’ it with this quilt! @quilting_elissa was the first person to finish hers, and she showcases the quilt to its absolute best. Go check her out!
The Imagination Quilt, 84″ x 84″, designed by Stacey Day
Next up is another personal favorite, Hibiscus. I really wanted to make a floral inspired quilt, one that would showcase the gorgeous border print and make best use of the ombre jaguars. Again, this is a more advanced quilt because of the number of pieces, and the color shift between the blocks. There are no tricky seams or templates needed with this one, just patience and determination. The border has mitred corners, but if you aren’t up for them, traditional straight borders will also go nicely. If you are going to change it, I recommend making the side borders first, then measuring and sewing the top and bottom. Organization is key with this quilt. The Hibiscus is the perfect size for the guest bedroom or the vacation house.
The Hibiscus Quilt, 70″ x 81″, designed by Stacey Day
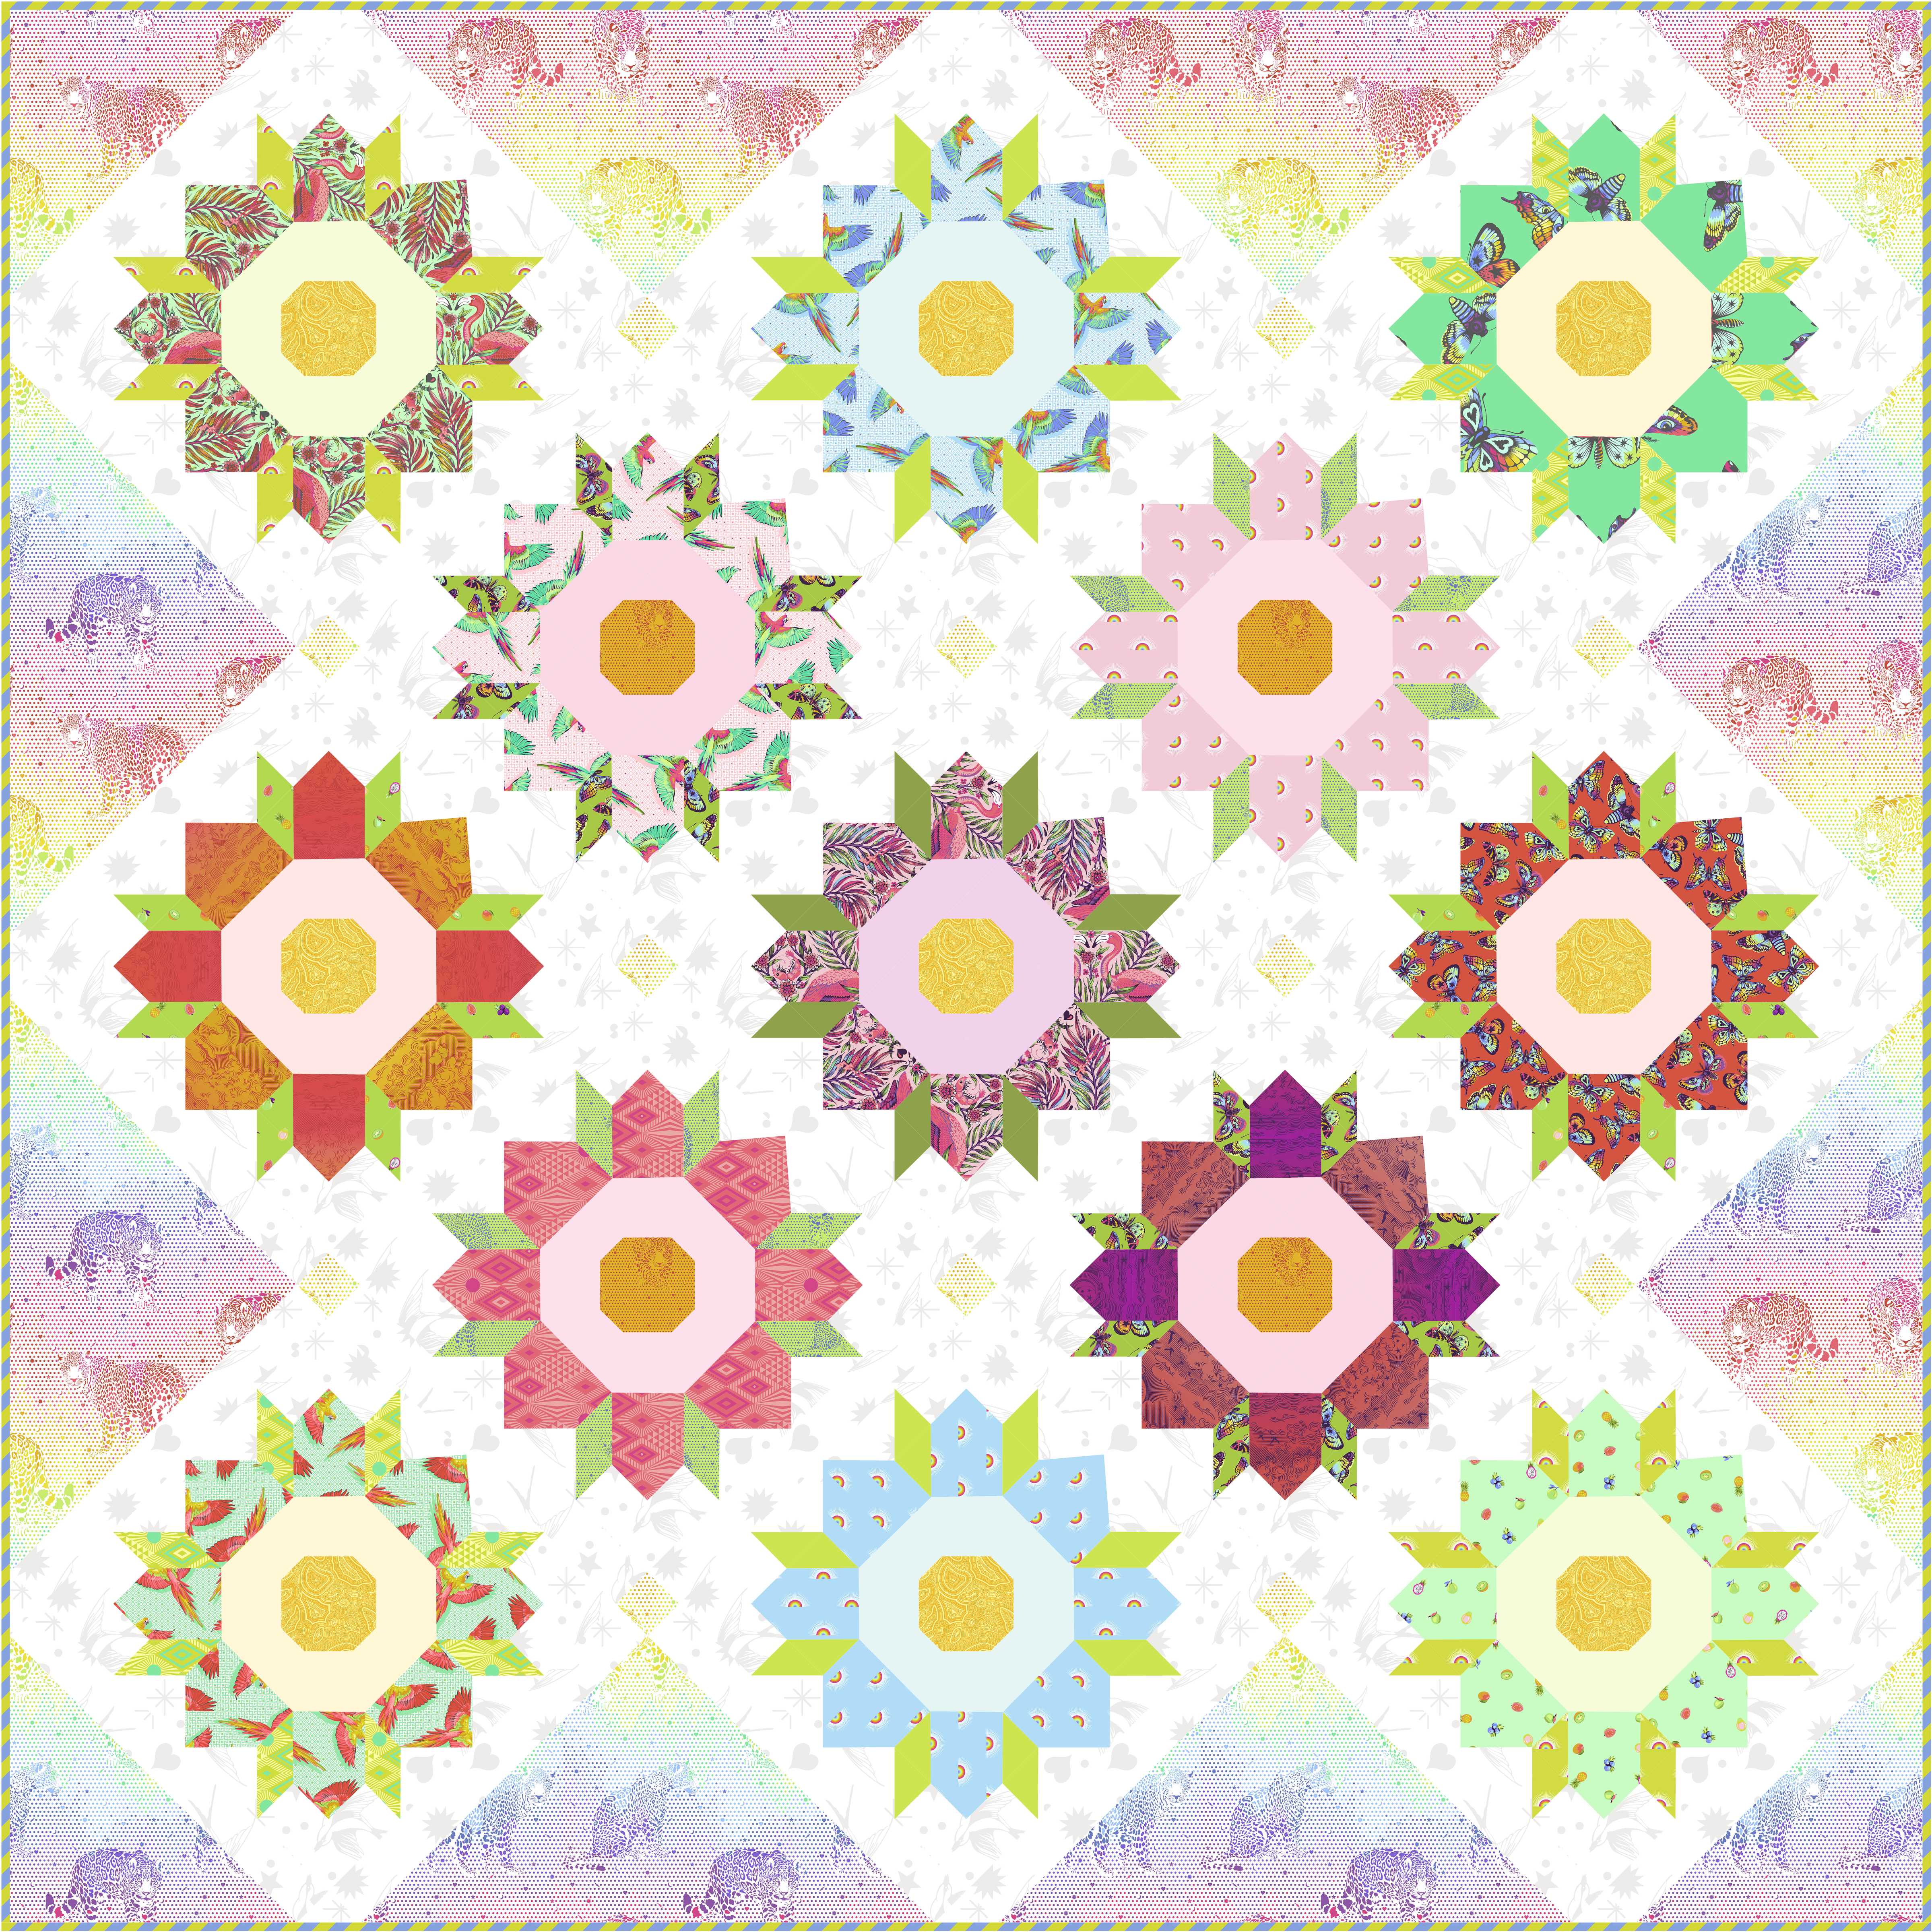
Then we move on to another floral inspired quilt, Chrysanthemum. I was really on a floral kick with this one (its the tropics, need all the flowers!) I would call this one intermediate, but a confident beginner could definitely make it. The units of each block are all stitch-and-flip. All straight seams and no templates. I really wanted to make something that looked complex but was easy to put together, and show off that rainbow jaguar print.
The Chrysanthemum Quilt, 85″ x 85″, designed by Stacey Day
The next quilt, Tumble, has big open blocks to show off the print. Tula had a hand in the final design of this one, she has such an amazing sense of color and design. She rearranged some of the prints and added the gradient sashing, and elevated the original design to its final form. Tumble is confident beginner friendly, with some fussy cutting, and simple to put together. You need to pay attention to the solid placements in the sashes when making it.
The Tumble Quilt, 71″ x 81″, designed by Stacey Day and Tula Pink
Daydreamer also offers some factory cut quilt kits. I am thrilled that one of my earlier quilts made a comeback. This quilt has been asked after for years, it was a kit exclusive with the Tabby Road collection. Tula recolored it for Daydreamer and is again available as a kit exclusive. Say hello to Sunshine Daydream! There is a lot of fussy cutting with this one, for each individual butterfly and the spikes. Paired with the Manatee solid from Freespirit, this is a must-make! Kits are available through your local quilt shop.
The Sunshine Daydream Quilt Kit, 70″ x 70″, designed by Stacey Day and Tula Pink
I also did up a couple fun kids quilts with Daydreamer and Unicorn Poop (my kids absolutely love that name). The duo were published though AQ Magazine, and I’m super happy how they turned out. The first is a baby quilt, made using charm squares. Perfect for the leftovers from your larger project.
46″ x 51″ Sweet Dreams Baby Quilt by Stacey Day
The second is a cute kids quilt with a 3D element-the bottom of each scoop of ice cream is a lift-the-flap style element. The cones are paper pieced, and the cone domes are applique. I used a different decorative stitch for the top of each. For some extra fun factor I took little bites out of some of the cones.
Month of Sundaes, 64″ x 71″, Designed and quilted by Stacey Day
I still have one more Daydreamer quilt in the works, but its a secret for now. I am really excited for its release, coming early next year!
That’s all for now, I still have lots to talk about.
Spring Market was a busy one indeed! I was thrilled to be able to work with the esteemed Amy Butler her new collection for FreeSpirit Fabrics. Each quilt is available as a free pattern, found HERE.
I ADORE both collections and had so many ideas for each. It was so hard to narrow it down to just a few. I am so happy with how the designs turned out.
True Love – featuring Soul Mate by Amy Butler.
True Love came from an image in my head of little cartoon hearts floating above the heads of a couple newly in love. That love is fresh, vibrant, and feels like a dream. There is potential in that love, for something deeper and true, but only time will tell.
Cross My Heart – featuring Soul Mate by Amy Butler
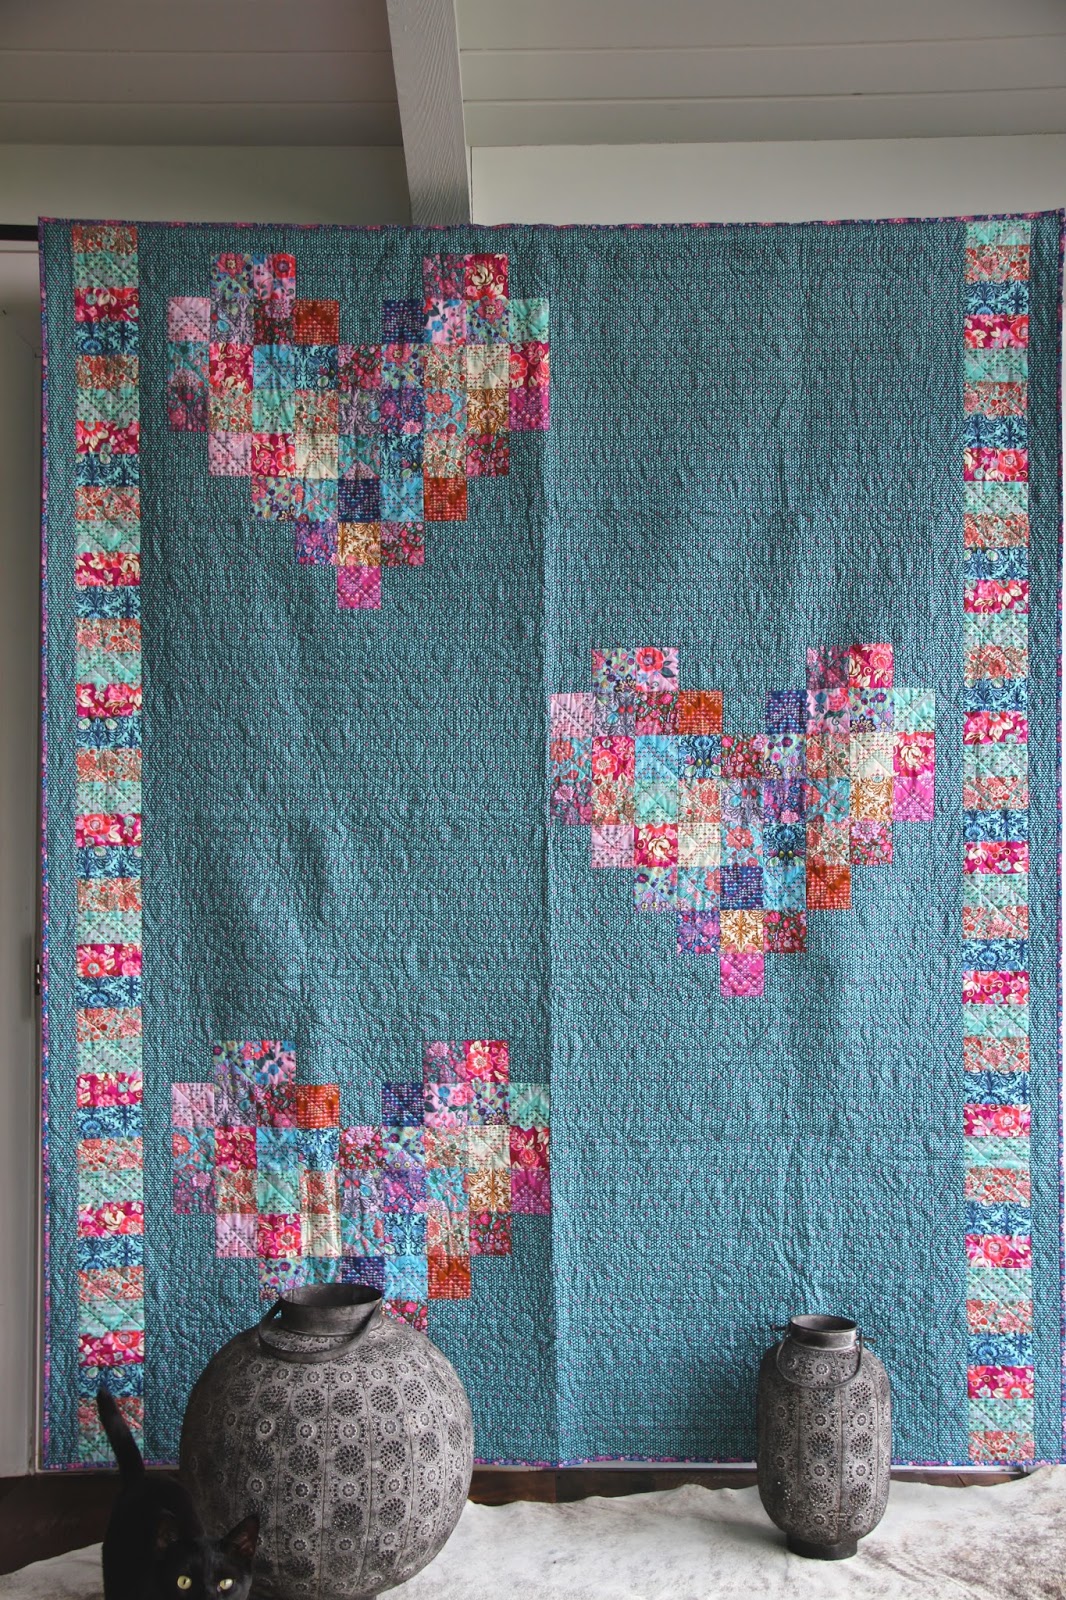
Cross My Heart was the first design out of my brain. I new immediately I wanted to do a cross stitch heart when I heard the collection name. even before I saw the prints. As I colored in each stitch, I imagined a couple who have weathered the test of time. Each stitch is a memory, a milestone, that over time has woven two lives together in a tapestry of love.
You Complete Me – featuring Soul Mate by Amy Butler
Finally, You Complete Me. this is my favorite of the three quilts. Is the feeling when you find each other and realise you fit together perfectly. You are two halfs of the same whole, Soul Mates.
This past Quilt Market in St. Louis looked like a fun one. I wasn’t able to attend in person but I did have a plethora of quiltings hanging throughout.
Today I want to show you my latest for Timeless Treasures and Dear Stella. Each quilt has a free pattern attached to it.
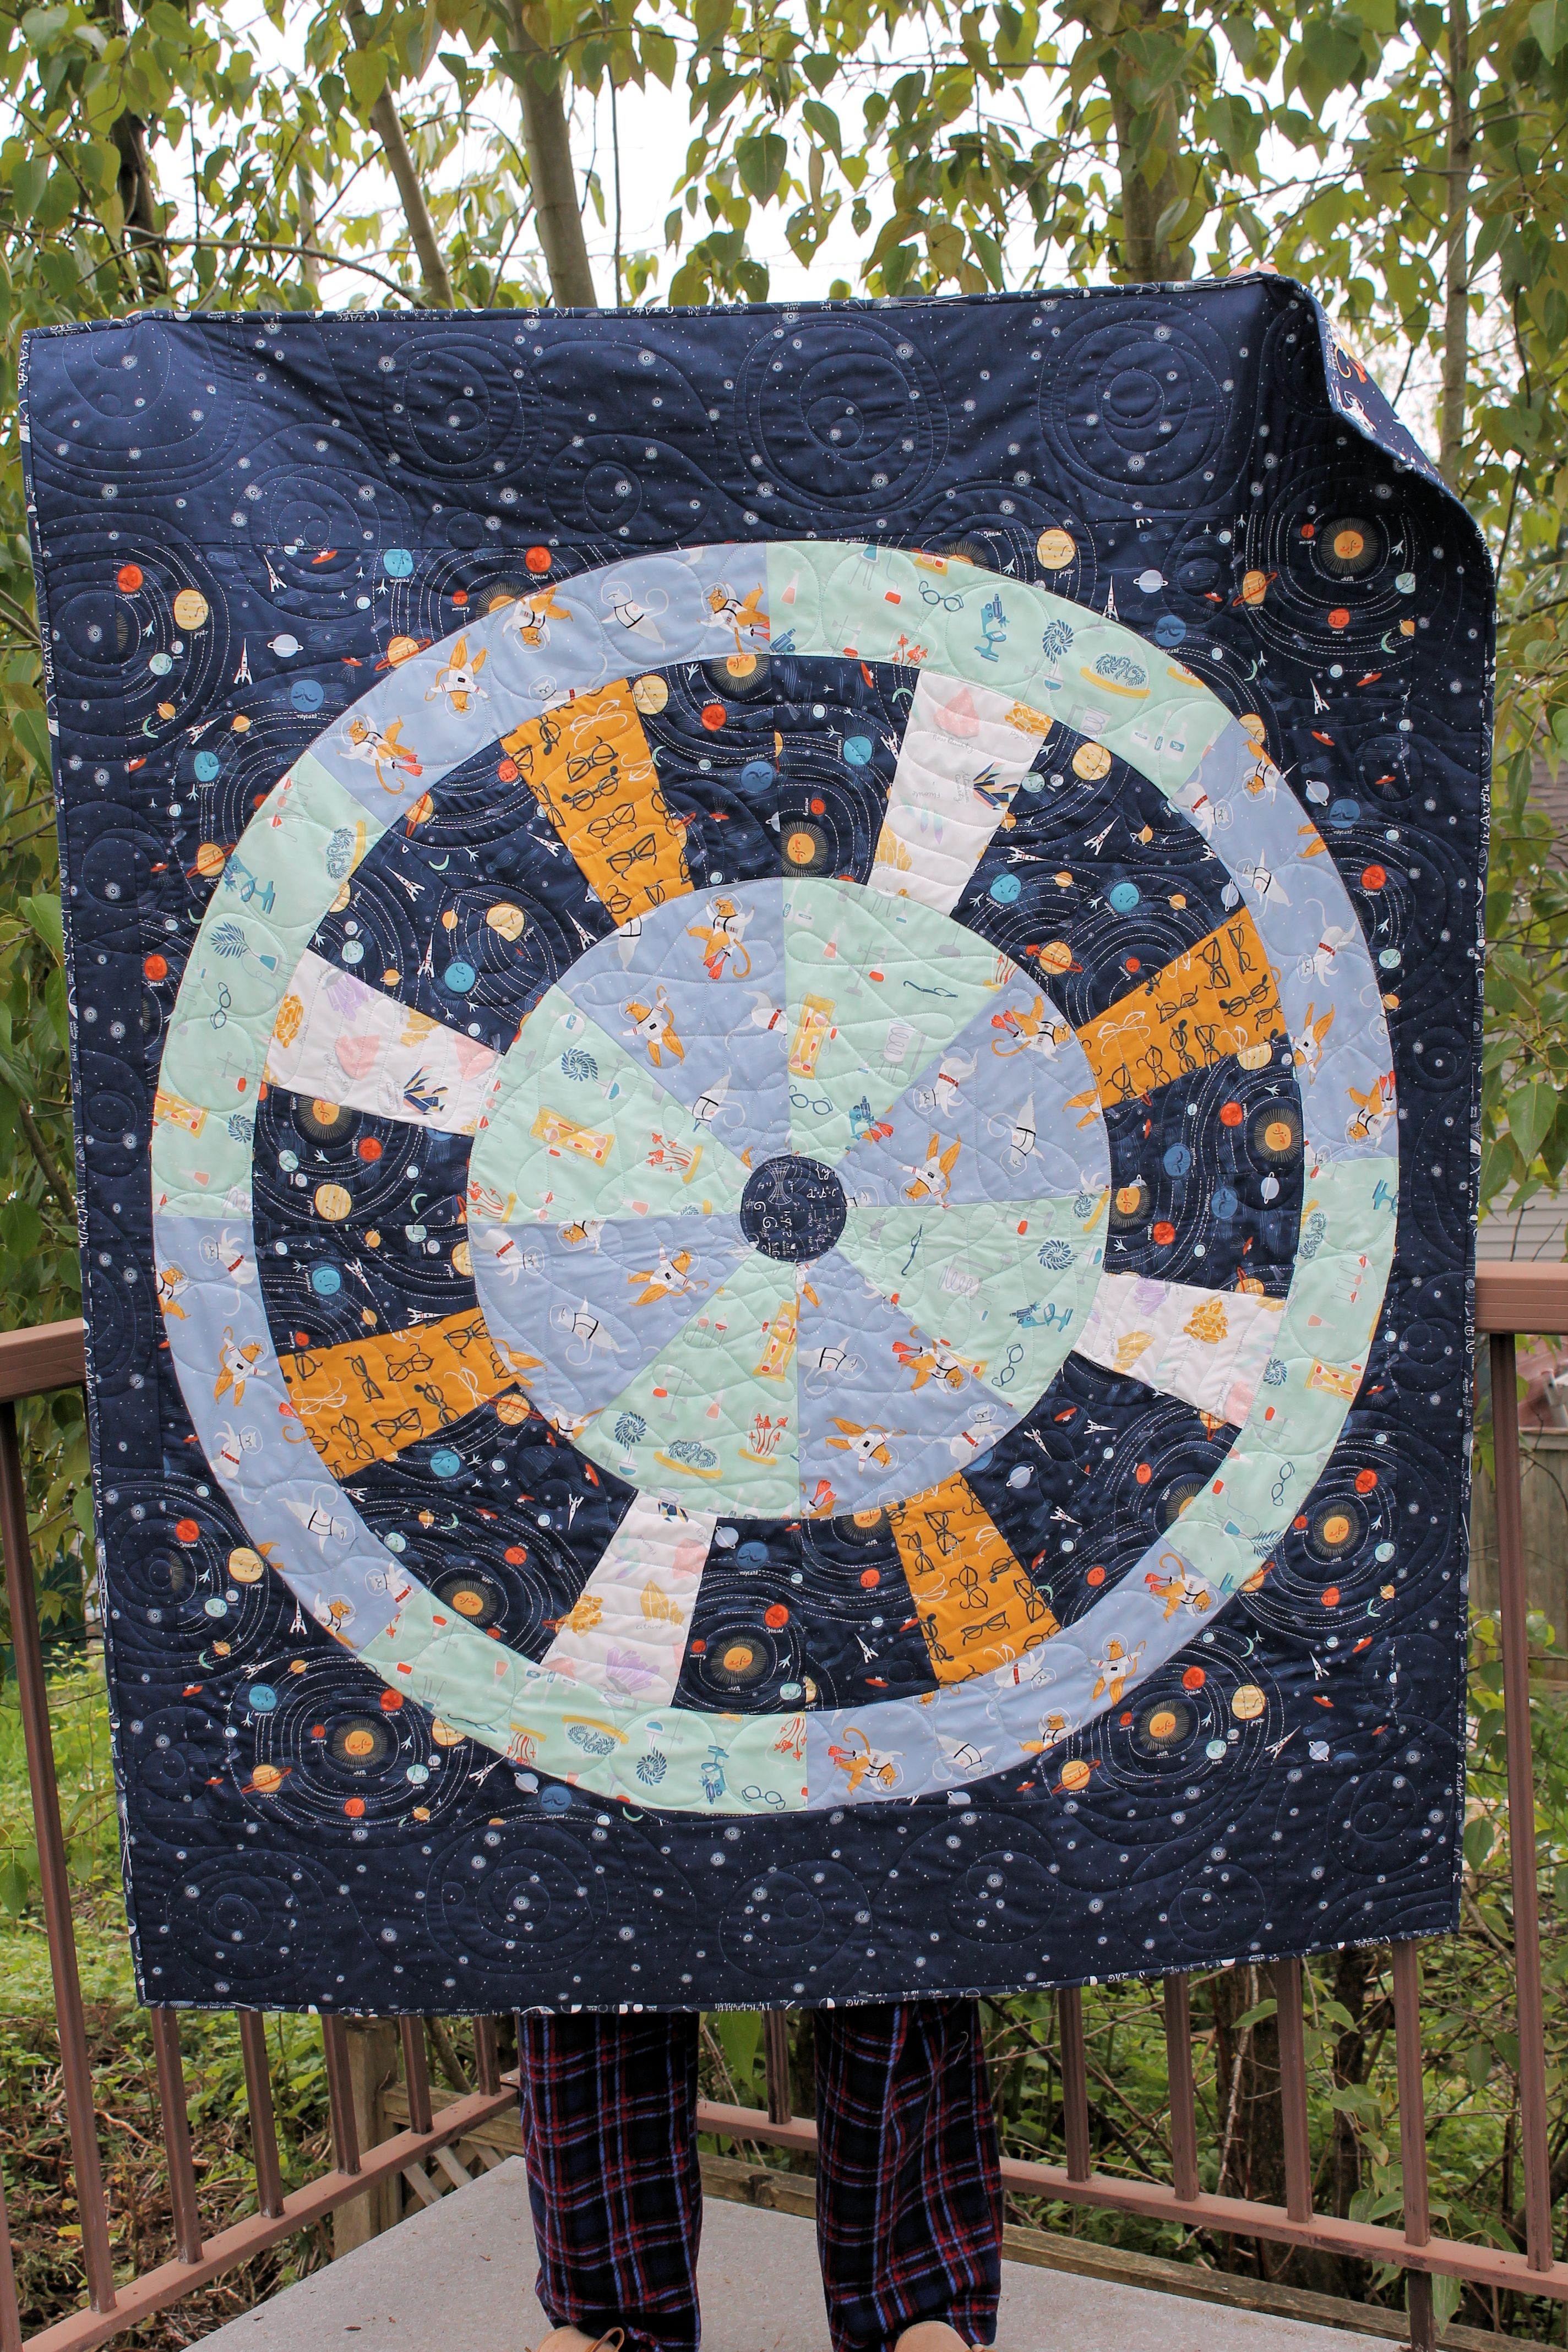
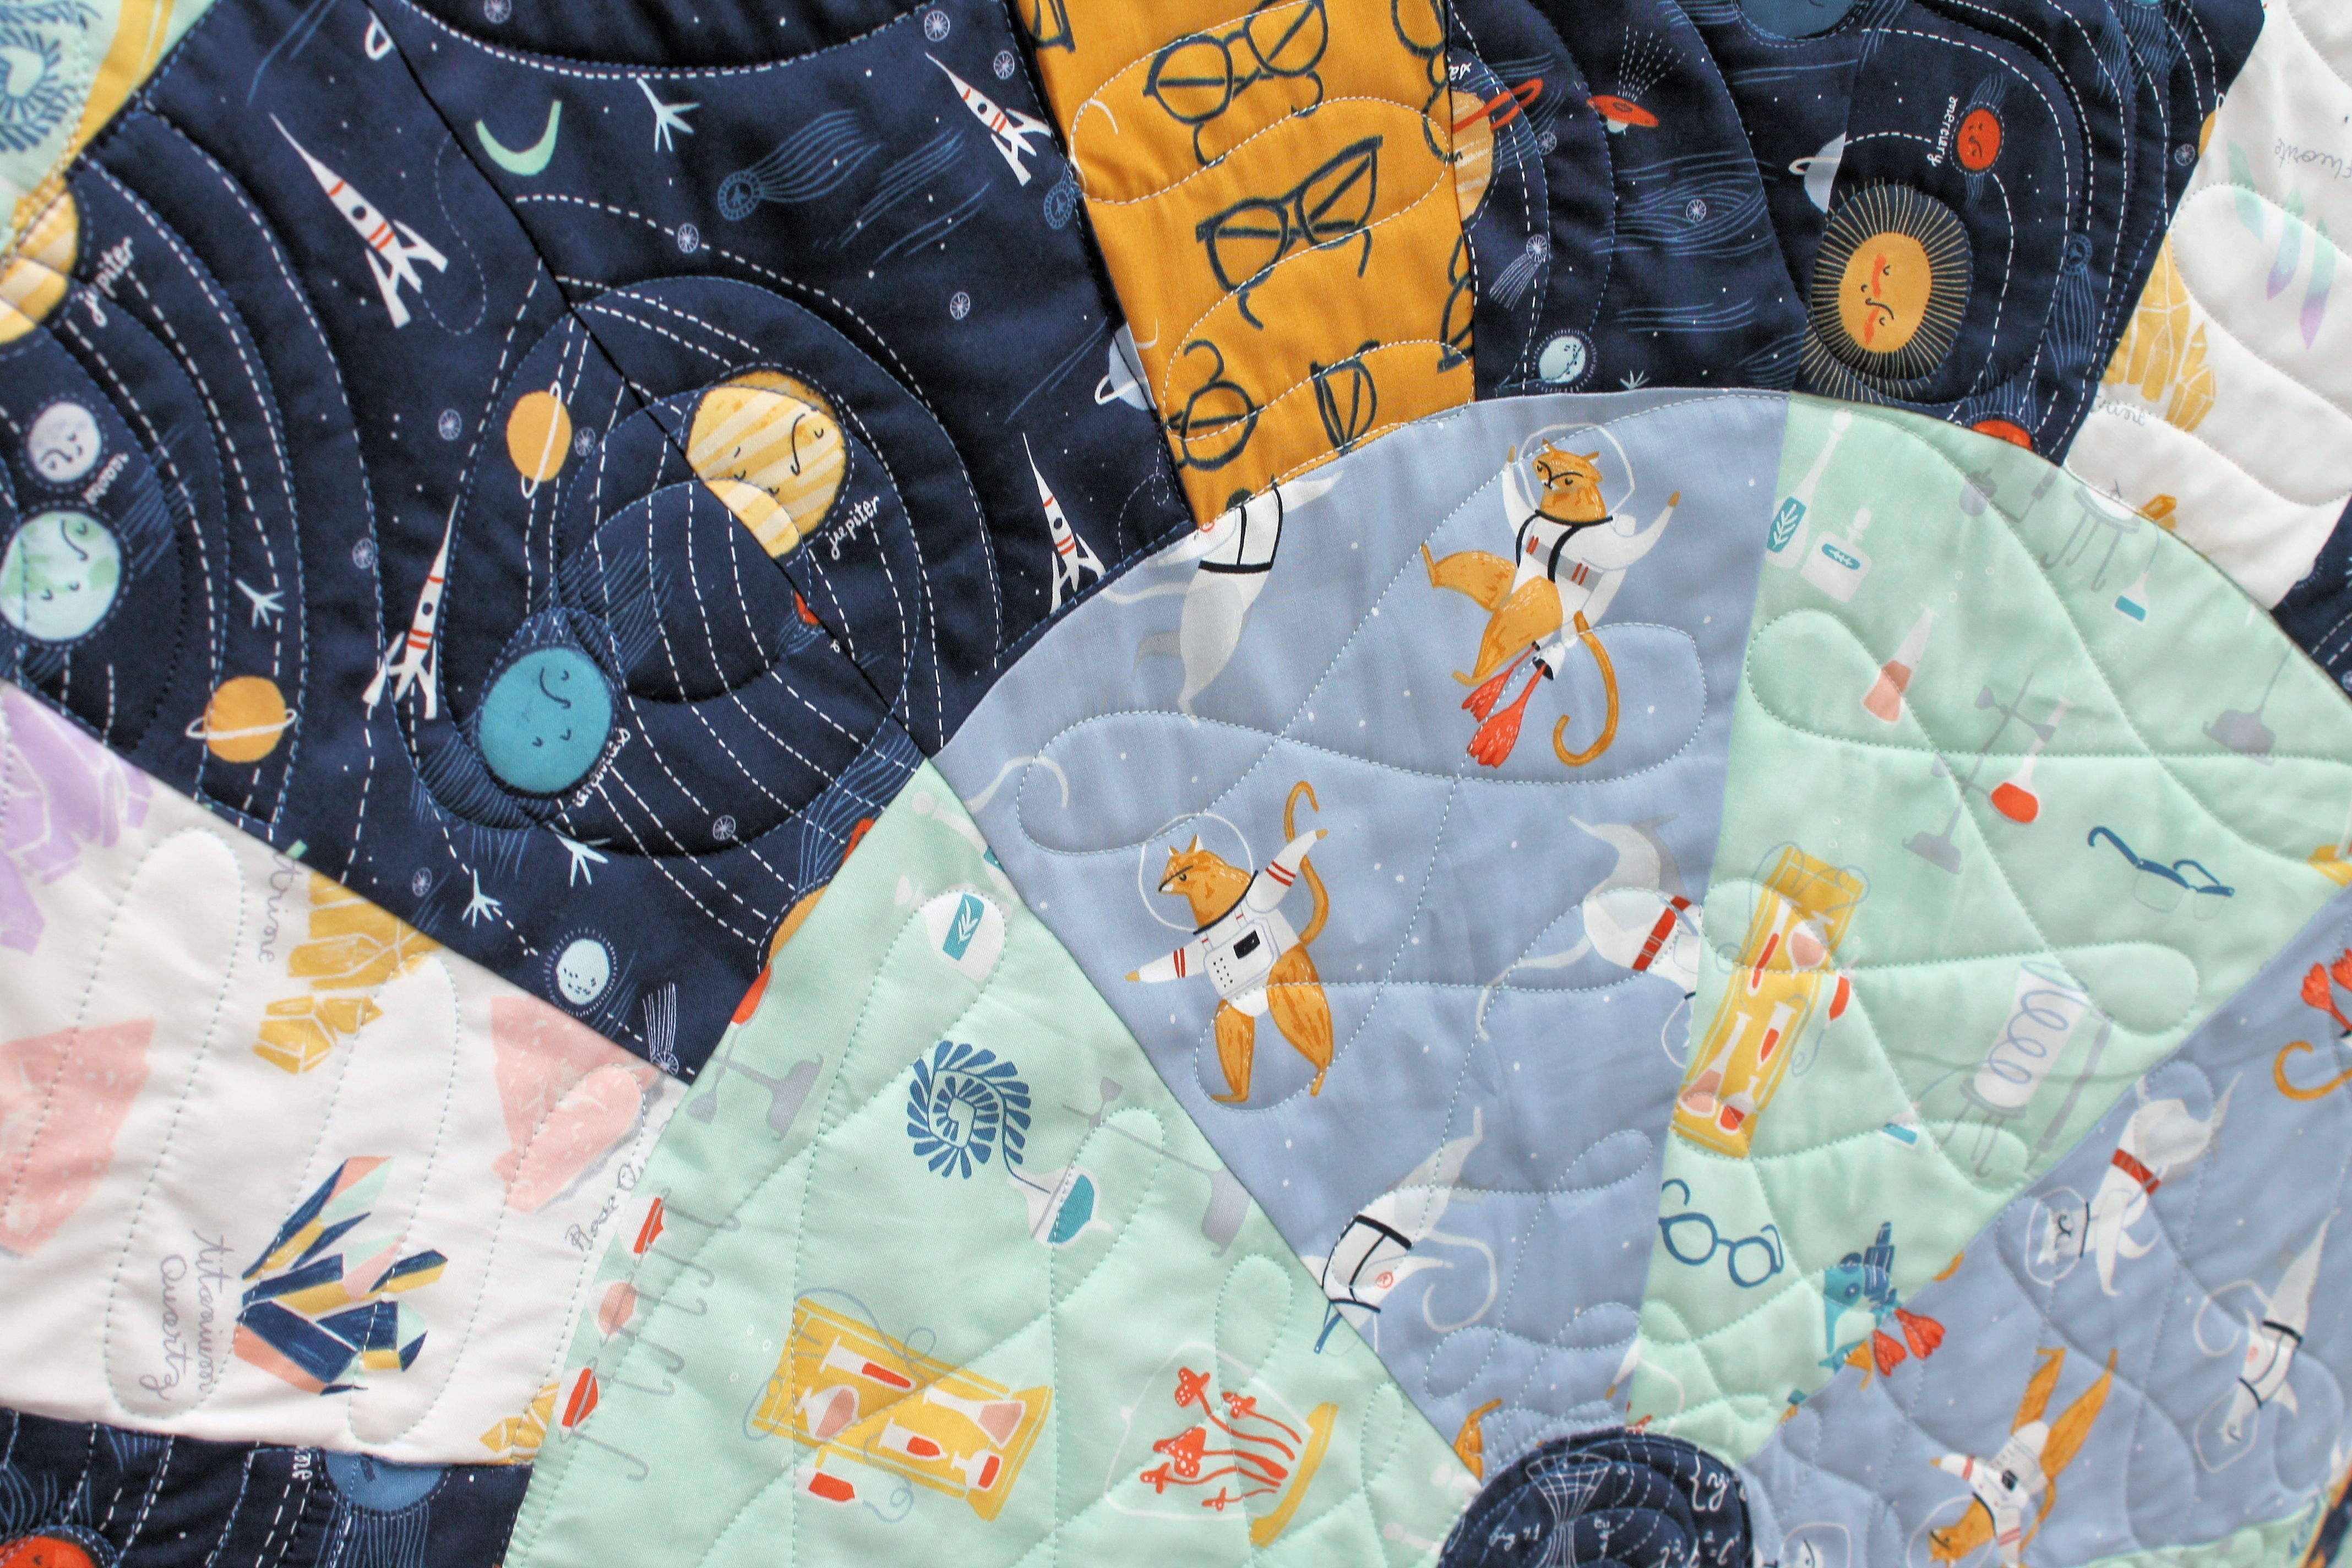
First up, and probably my favorite, is the Space Station Quilt for Supernova by Rae Ritchie. I love Rae’s design style and it is always a pleasure to work with her prints.
My older son helped me pick the fabric placement for this one. He loves space and one days he wants to be an astronaut/karate kid/hockey player. This quilt gets to live at home with us. HE was absolutely thrilled when “his” design was picked for the collection, and doubly so when he saw the finished quilt. The pattern is available HERE from Dear Stella.
Next is the pattern CHOMP! for the Dark and Stormy Collection I just LOVED the sea theme and immediately thought of sharks popping out of the water. During the process I am pretty sure my family managed to come up with more than a dozen unique shark puns as name suggestions for the pattern.
The shark teeth can be made 3D or pieced. I thought it was clever to use the pirate head print for the teeth. Tee hee! You can find the pattern HERE.
For Timeless Treasures I got to play with a more traditional collection, Zephyr by Alice Kennedy. There are 22 neutral and greyscale hues in 15 unique prints. I loved how they all played together, and the varying levels of contrast meant I could create a lot of depth and texture without adding color.
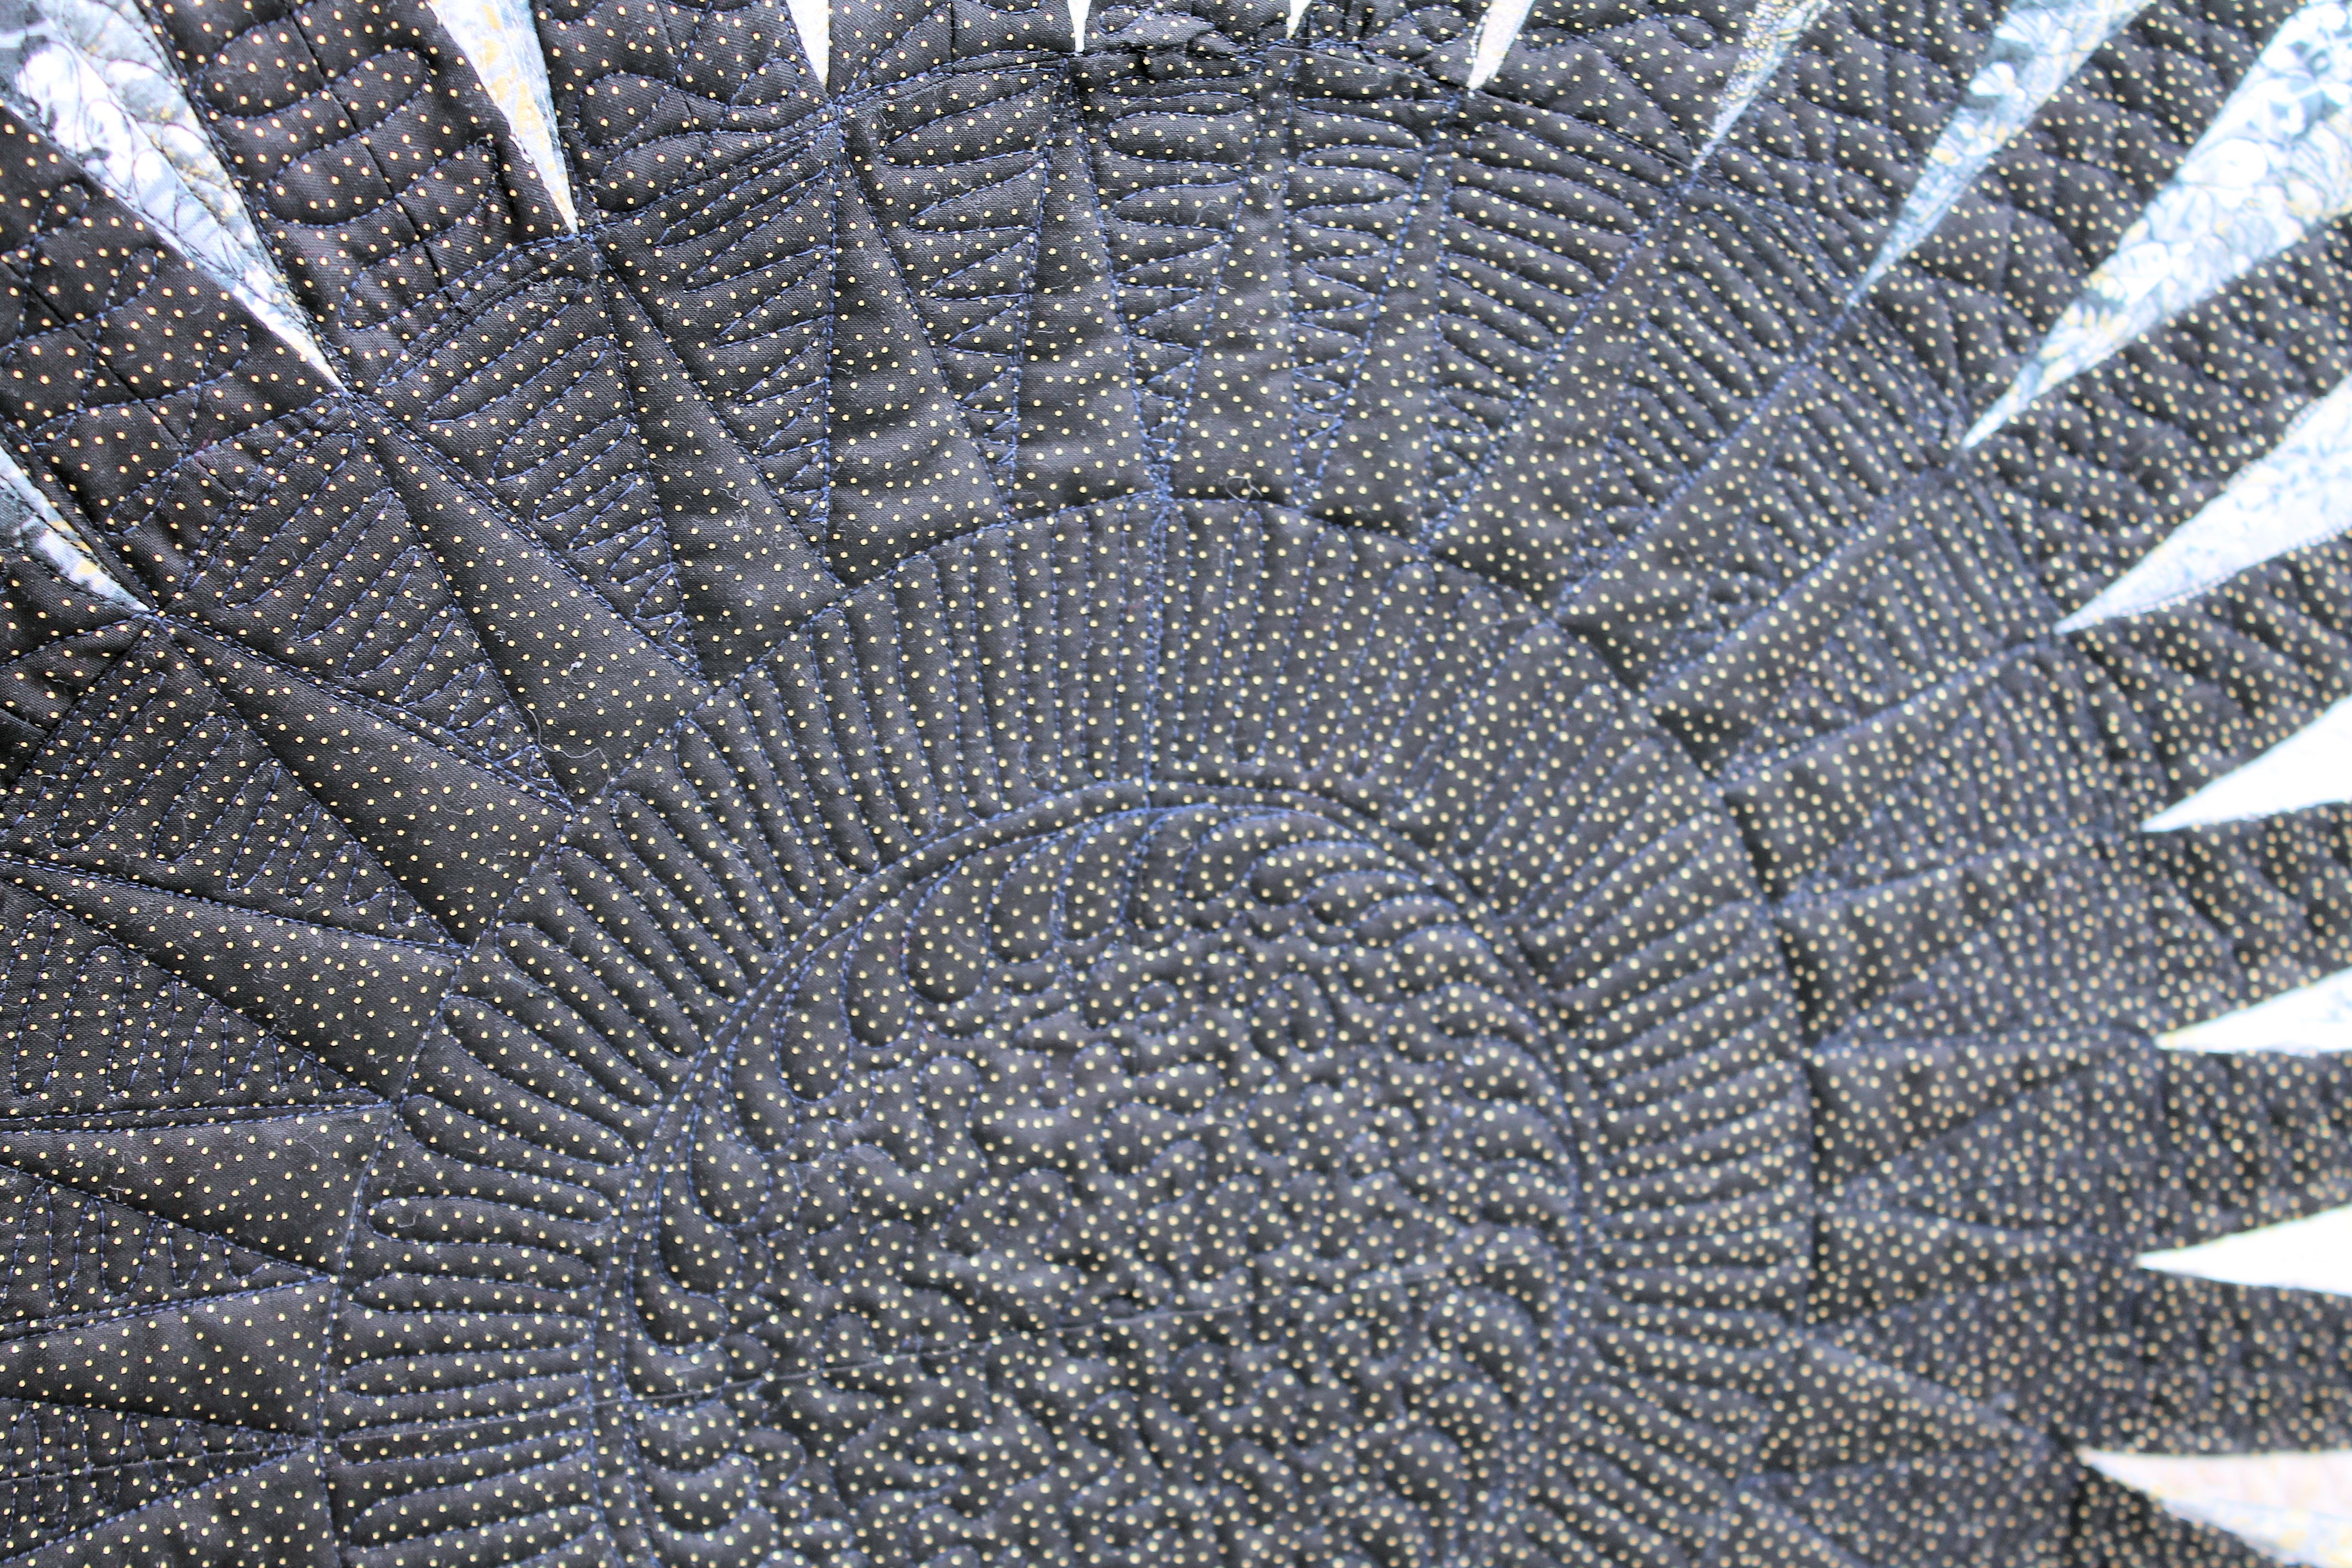
The first quilt, Halo, is my favorite. I grew up in northern Alberta and at night, with the moon shining brightly, you could often see (what we called) “moon dogs” haloing the moon. The shimmering ice crystals were my inspiration for this quilt. You can find the pattern HERE.
I probably overquilted it, but I don’t care! The black spaces were calling to me. I used a deep navy thread for a subtle glow against the black fabric, and to prevent eye strain while I was quilting. I quilted a series of loops, swirls, straight lines, and circles. This quilt gets to live at Timeless headquarters in New York. (Does that mean I get to say I have art hanging in New York? I’m going to say YES!)
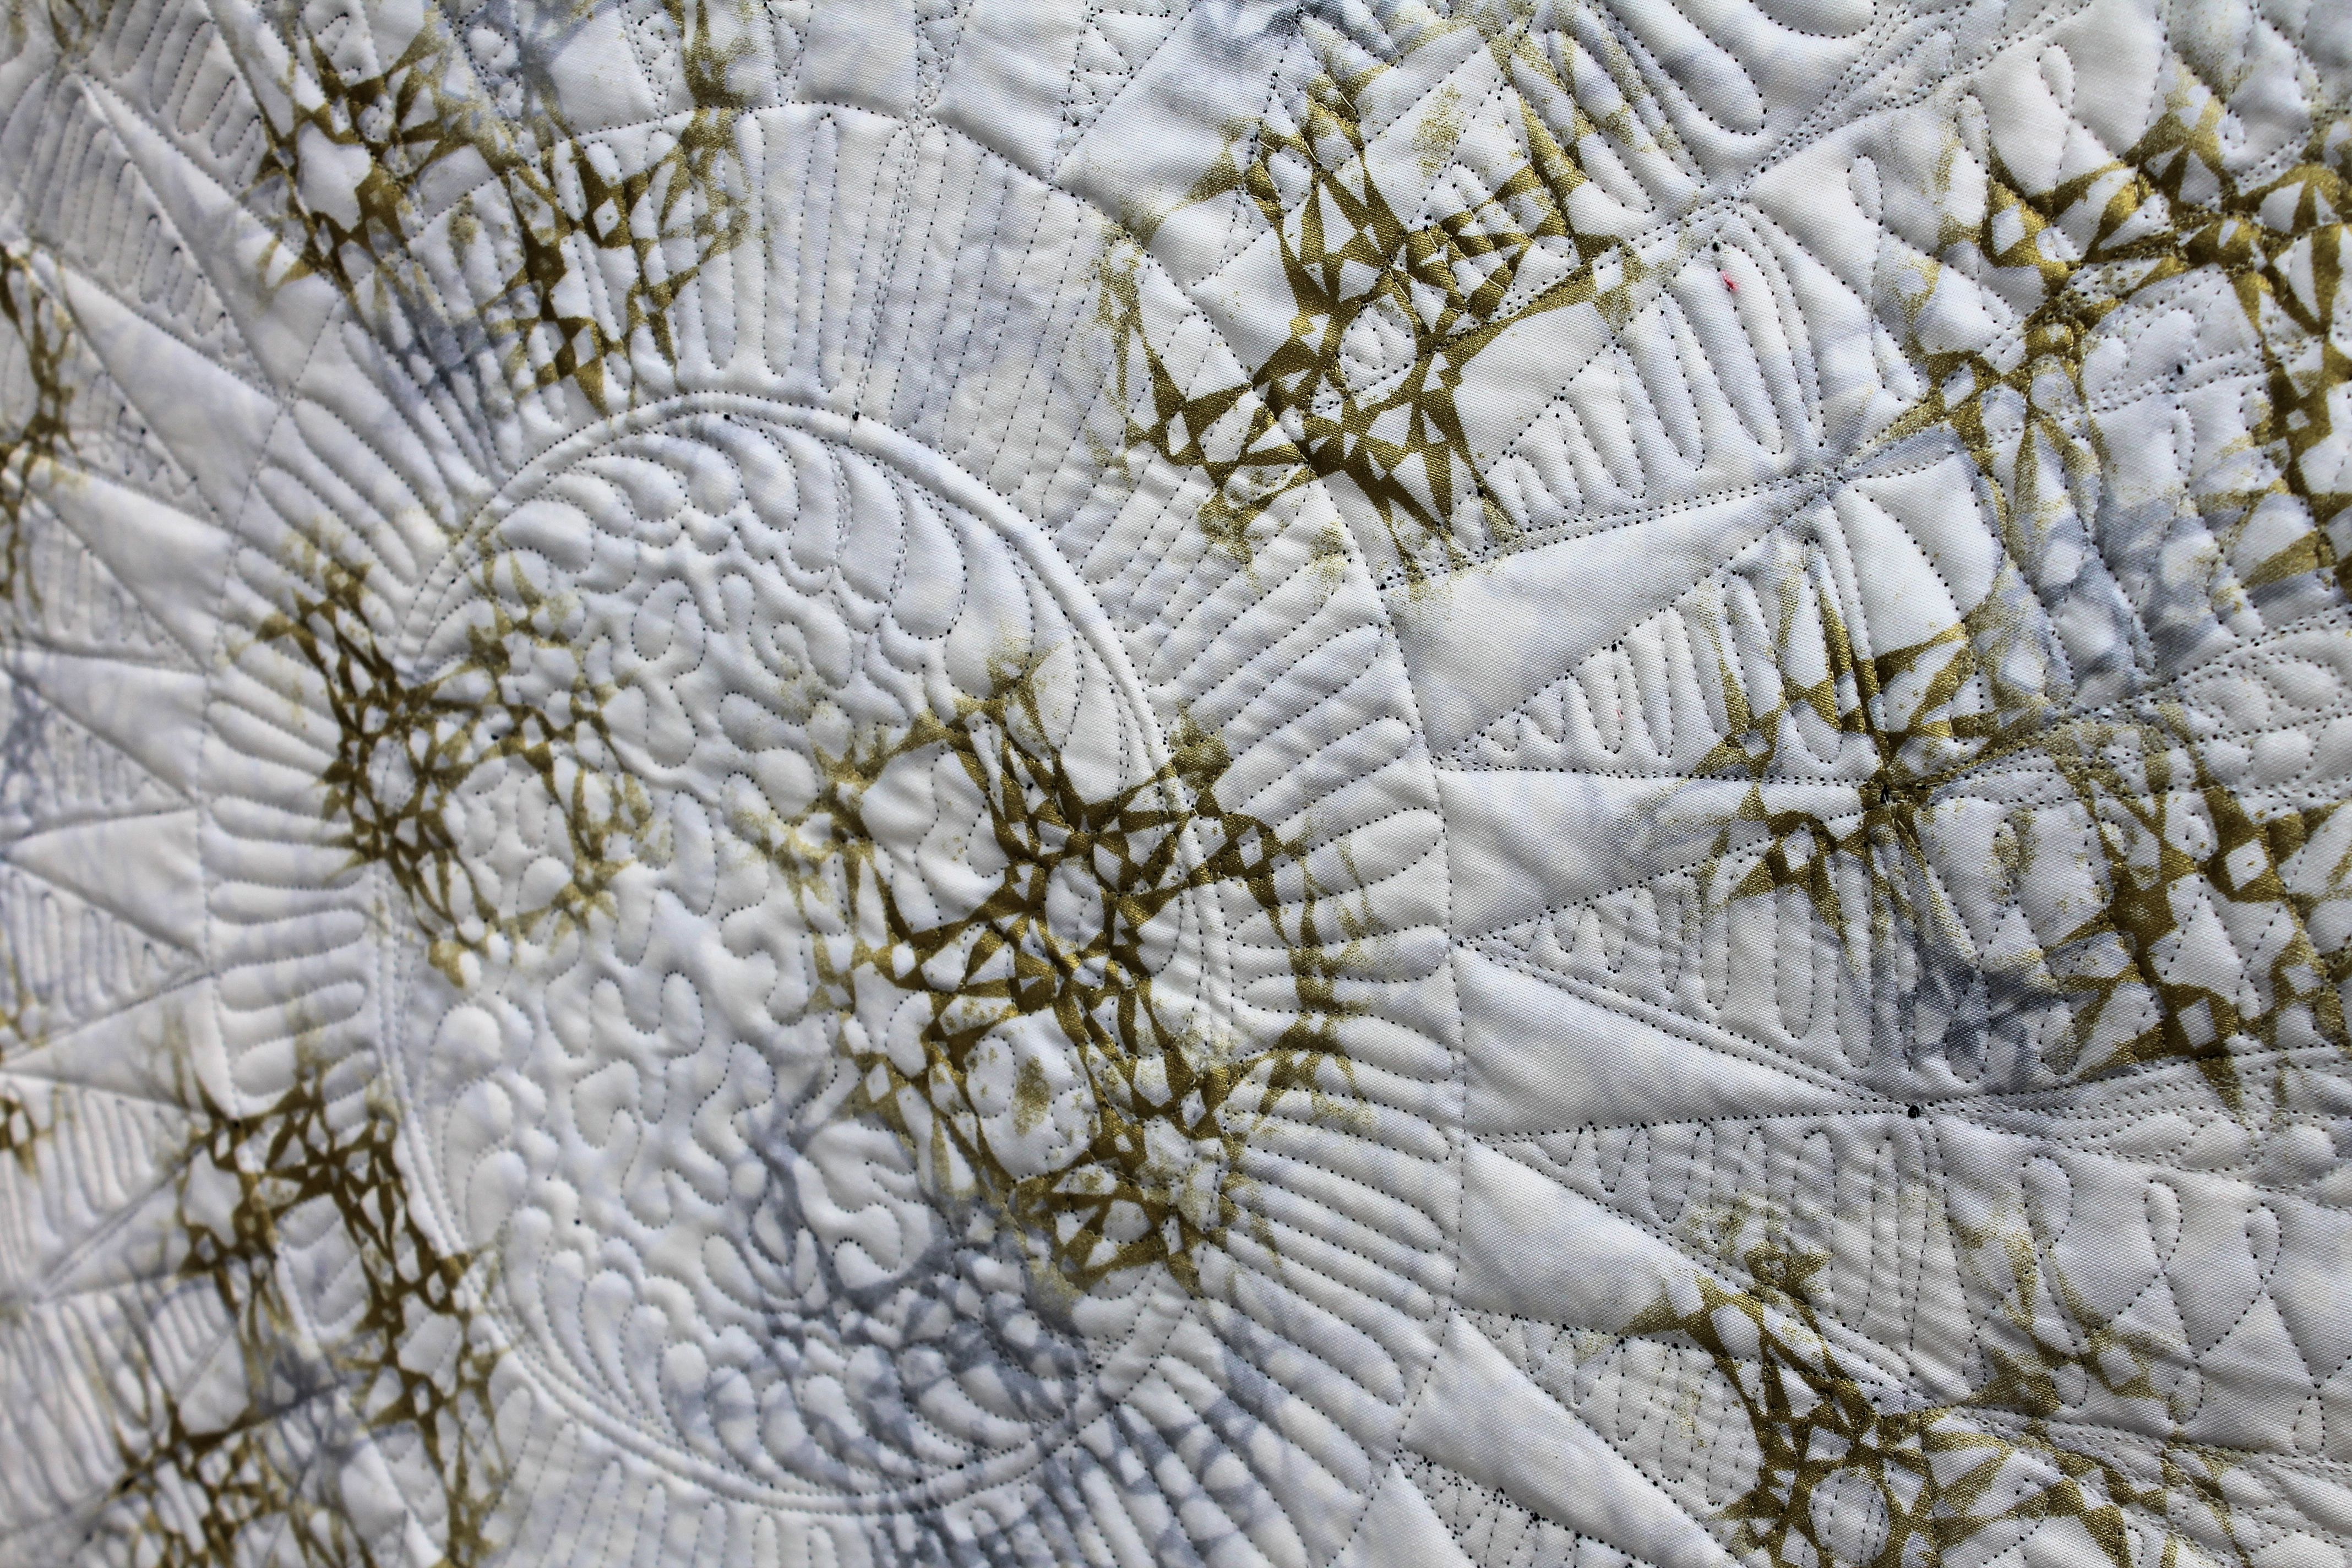
The second quilt, Marbled, I wanted to play with simple shapes that make a complex texture. I wanted a tile wall-inspired flow and form to the quilt. Pretty sure I succeeded with that. You can find the pattern HERE.
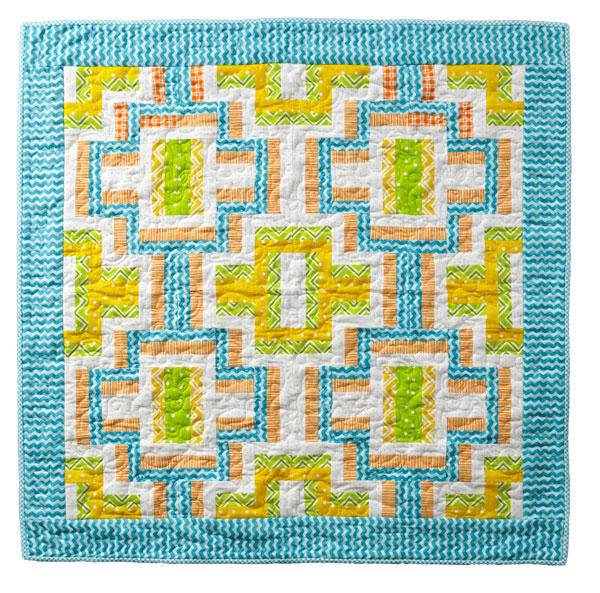
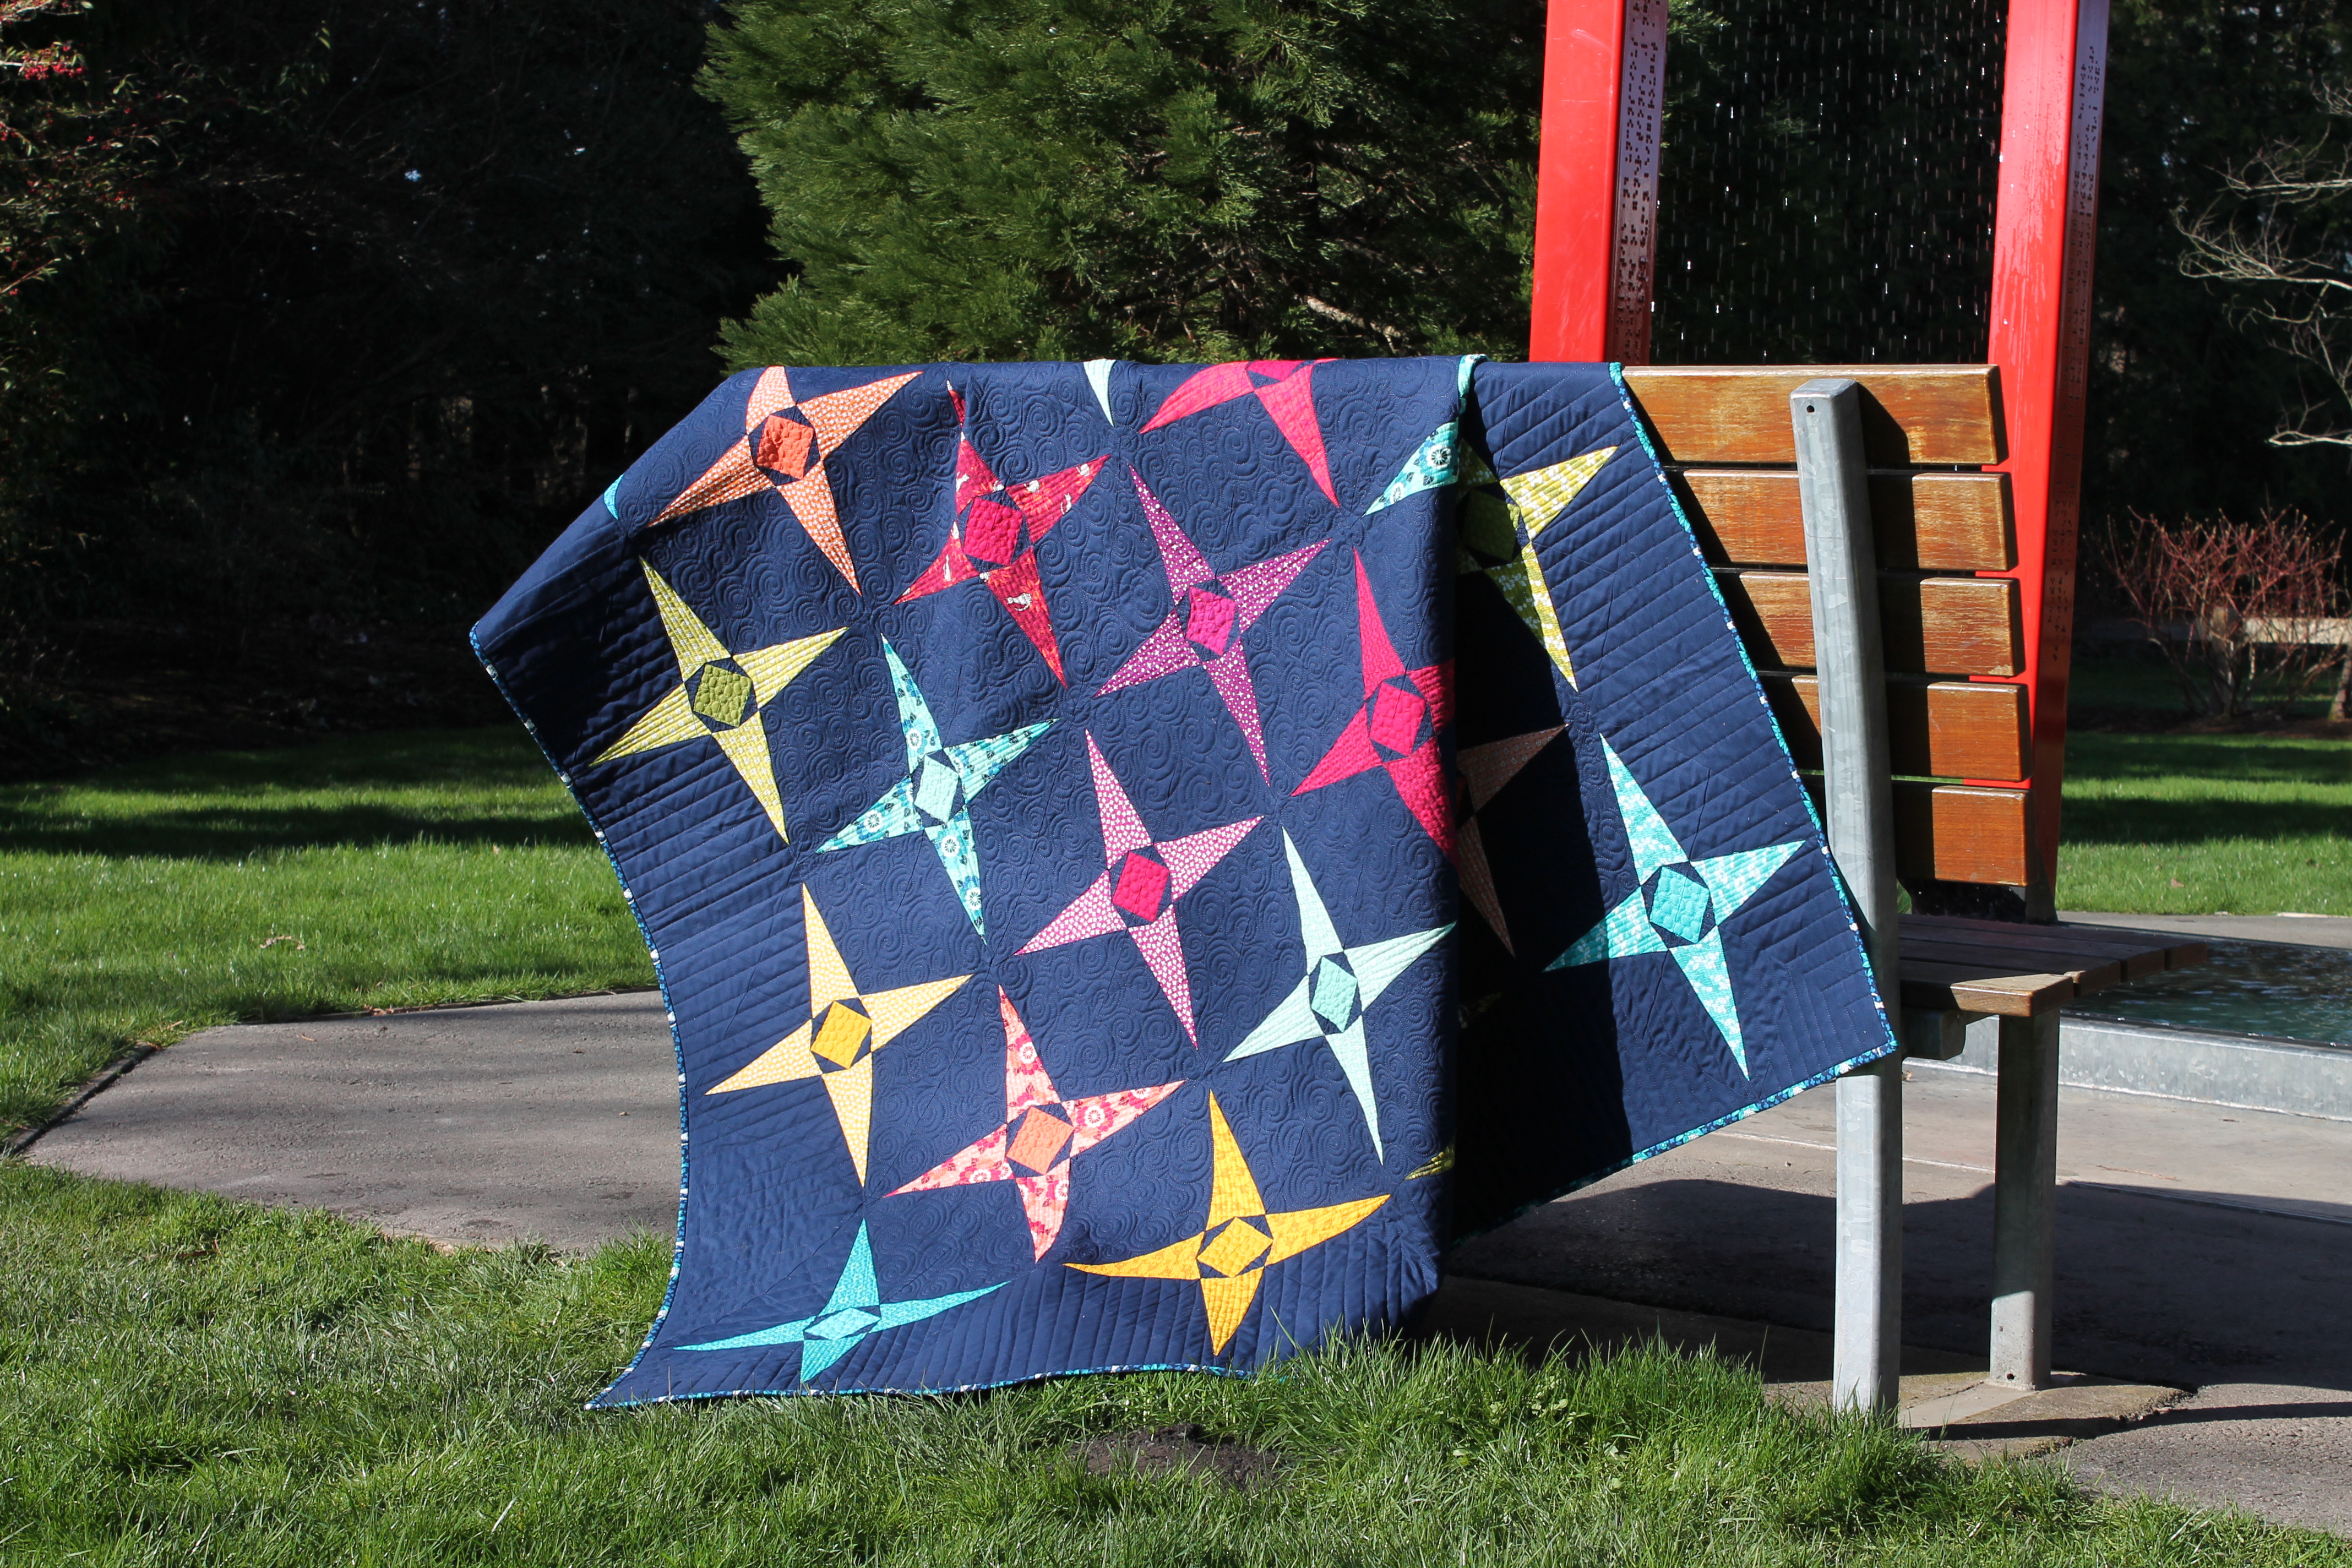
Sudoku is the second quilt I made with Urban Scandinavian by Kirstyn Cogan for P&B Textiles. This quilt uses all of the color prints from the line, where Silent Film used all of the black and white prints. Sudoku was featured in the Fall 2016 issue of Scrap Quilts from Fons and Porter and features a star-in-a-star block that I just love.
I chose the Star-in-star block in order to use as much of the line as possible. Each print has a light and dark counterpart in each motif, which made the block so successful. Its not overwhelming or jarring, the prints flow harmoniously, there is visual interest and movement. The quilt is perfect for a baby quilt, and the pattern can easily be brightened up with a selection of colorful prints or solids. Imagine an ombre solid, with the light in the center and the dark in the outer star? Yum! It’s in the Scraps Quilts issue because each star is made from small amounts of different fabrics. The prints cycle through, and then repeat on the bottom row. You could bust out a whole lotta scraps and leftover pieces with this one! Got a Fat Eighth bundle hanging about that you don’t know what to do with? Sudoku to the rescue!
I quilted it all over in a swirly pantograph called Brittany from Anne Bright Designs. It is one of my favorites, lots of movement and interest, works well with almost anything.
The sample quilt finally made it home after an extended stay in customs, and just in time. Isn’t it perfect with our Christmas tree? I foresee lots of snuggles and hot chocolate in front of the fireplace with this one!
Quilt Market wrapped up this past Monday, and in between basement reno’s and Halloween prep and a family visit, I found some time to follow along on Instagram and check out all the new awesomeness that was released. I was also stalking patiently to see pictures of the quilts I made for Market.
I have been sitting on my hands waiting patiently for the official release so that I can show off my new designs. I LOVE the new collections, and and super excited and happy with how everything turned out. My sewing room is finally set up the way I want it, and that includes the home for my new longarm!
That’s correct, I am now the proud owner of a Tin Lizzie Apprentice. I love my machine! She still needs a name (if I go that route, which I likely will). She stitched beautifully and works with my favorite threads – Glide and Aurifil – without issue. The best part is now I don’t have to get a quilt done all in one sitting! I have been getting more creative with my quilting as a result and I am seriously excited as all heck about the future. I can see it getting a lot more productive around here!
Now it’s time for quilts!
Fleur-de-Lis is an applique quilt using Joel Dewberry True Colors. It was a gloomy rainy day when I finished this one up, but @freespiritfabrics has a great picture on their IG account. I quilted it with the extended piano key on the outside borders, and an all over stipple in white Glide between the applique pieces. I outlined each piece in a matching Aurifil thread to quilt. This is going to be a free pattern from FreeSpirit Fabrics.
Fleur De Lis
Fleur de Lis
Next up is another True Colors quilt using Tula Pinks collection of prints. This one is going to be a Craftsy kit. It was hanging front and center in the FreeSpirit Gallery at market, what an honor! I quilted it with an all over swirl in a pretty aqua thread. The aqua pretty well went with everything.
Rainbow Bargello
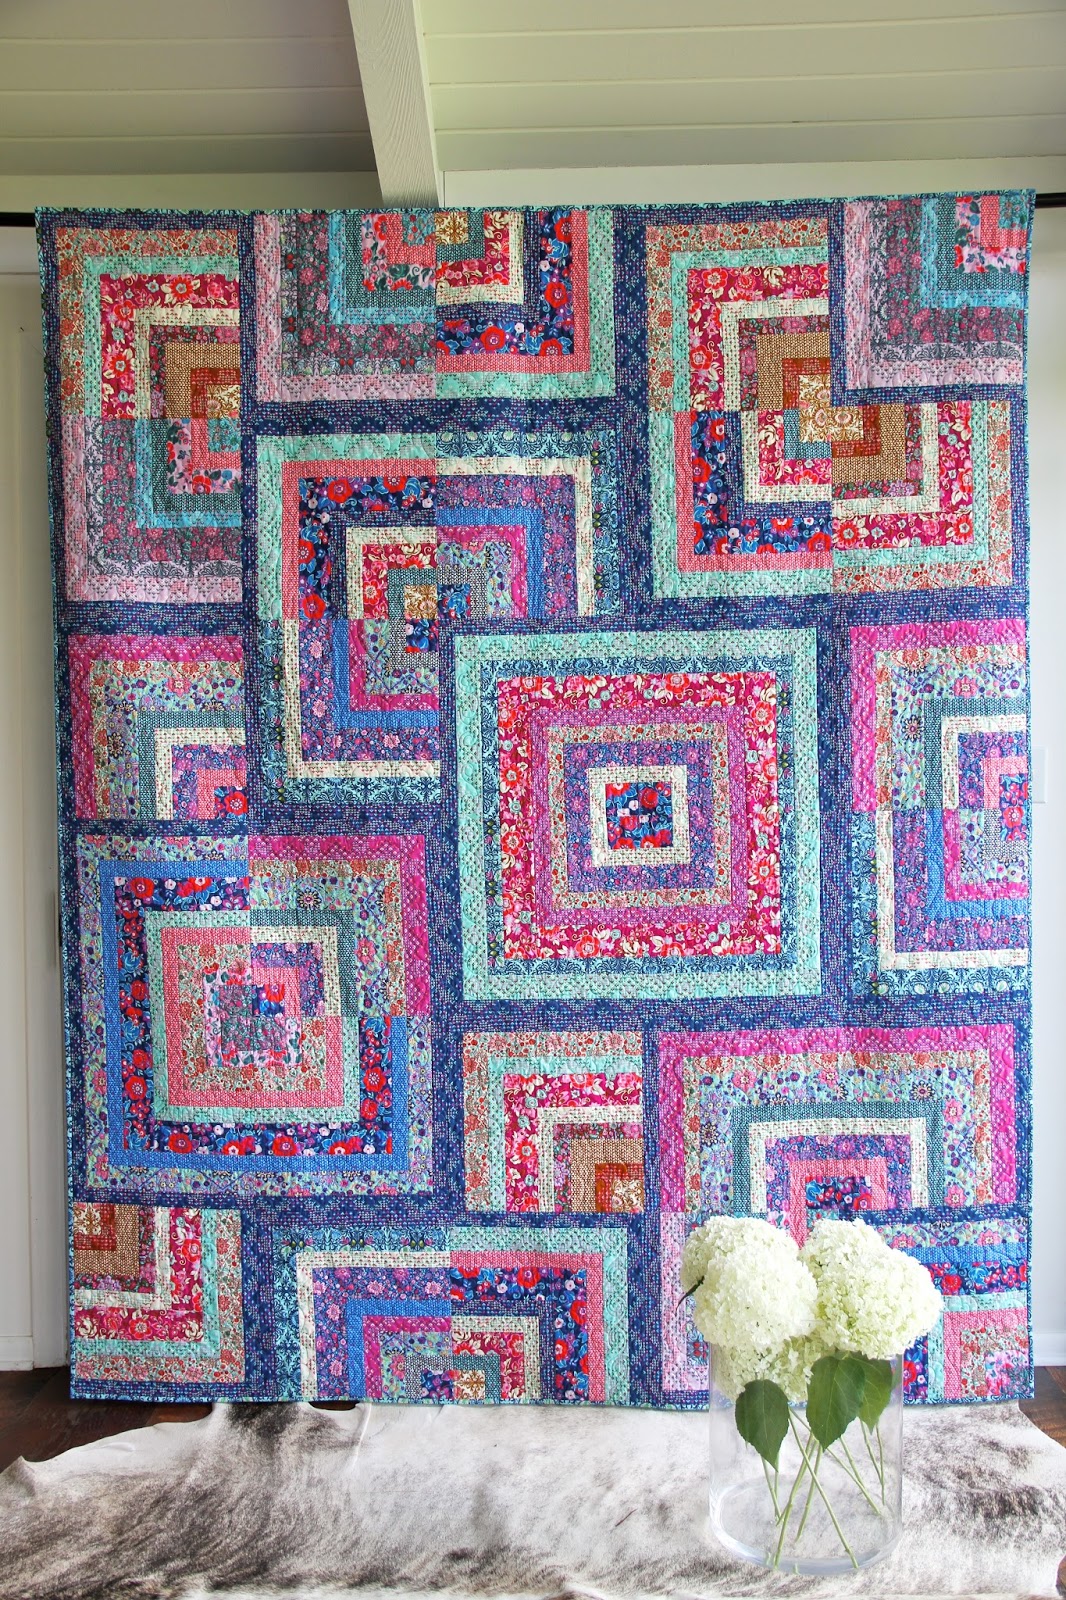
And then there were two quilts for Amy Butler’s new collection, Splendor. Zen Garden was designed by myself and sewn by Kerri Thomson. Clematis was quilted on my Lizzie, and I am so proud of it! I was able to take mytime over a couple evenings and really get creative with my quilting. Clematis and Zen Garden are both going to be free patterns. These are the mini versions of the quilts, just wait until you see the full size! I haven’t shown a full size of Clematis because it wasn’t actually pictured yet, but once it’s been released, I will. But sneak peeks of the fabric have been posted to Amy Butler’s IG feed, so I can share the quilting details. These are slated to be free patterns as far as I know. A big thank you to Amy Butler for choosing my designs!
Zen Garden – image from @freespiritfabrics on instagram Sewn and quilted by Kerri Thomson
Clematis-Details
Clematis-Details
Clematis-Details
Finally, I am super pleased to share the Catnip quilt, which is a collaborative design between myself and Tula Pink for her new collection, Tabby Road. I am not entirely sure who did the quilting on it, either Angela Walters or Tula herself, but it is fantastic! Tula pieced the quilt. This quilt is the new exclusive quilt kit, which will be available from your local quilt shops and online retailers in March 2017, which is when the collection hits the stores. I already have a full yard bundle on pre-order!
Thh Catnip Quilt- Image from @tulapink
The Catnip Quilt- Image from @tulapink
There are going to be a couple more quilts for this collection eventually, so I will keep you posted.
I am happy that I finally remembered to share this with everyone! As you know the last few months have been super busy preparing for the new house and baby. Now that things are settled down, I realized I still had quilts floating around out in the world that were ready to share.
Silent Film is one of the quilts featured in the December issue of American Patchwork and Quilting. I sewed this up ages ago, mailed it off, and then promptly forgot about it until the lovely editor emailed me with pictures and a release date.
I designed Silent Film as part of the Urban Scandinavian collection by Kirstyn Cogan for P&B Textiles. Black and white collections are always a challenge for me. I love color, so B&W is right out of my safe box. Designing with it always comes down to value. I used different variations of black on white and grey on black to create subtle changes in value, and the striped print for visual interest in the blocks and border. The resulting quilt reminded me of an old-time movie theater, playing a black and white movie.
Silent film is the perfect sofa quilt. Back it in a soft flannel or minky, and you have a cuddly yet elegant quilt to snuggle up with and watch your favorite movie. And when guests come over, Silent Film can be left folded over the couch as a sophisticated party guest!
I used the following fabrics from Urban Scandinavian B&W
Funny story about this quilt- this was quilted on my friends longarm, back when we had a small quilting co-op running. I was on a tight deadline, and I was SURE that I had black thread in my cubby at the space. I got the quilt loaded and wouldn’t you know, NO black thread! I almost panicked, and then started auditioning other colors. This is actually quilted with Navy Aurifil 50 wt. The thread was very fine, and it blends in into the quilt so well you cannot even tell. It was a close tie between this and a beautiful warm violet 40 wt Aurifil I had at the space.
Of course, we also love color, so the good people over at American Patchwork and Quilting made up this lovely mini version using color prints from Alexander Henry.
As you can see, it makes a fun statement and would be perfect for gifting to a new baby! You could also use black and white and a touch of color. The possibilities go on and on with this one!
The December issue of American Patchwork and Quilting goes on sale October 4. You can pick up a copy on newsstands or download a digital copy directly from All People Quilt. Please tag me when you make your version on Instagram @staceyinstitches or send me an email with pictures of the finished quilt (or top) and I will feature it here. I love to see what others make from my patterns =)
So, I didn’t make it to quilt market this spring, but a few of my designs did! I have been sitting on these quilt design for months, and its been driving me crazy because I love them SOOO MUCH! When FreeSpirit asked me to design with Tula’s upcoming Slow and Steady line I of course said (in a calm and professional manner) YESSSSS! I submitted a handful of designs, and they were given to Tula herself for approval. She liked them a lot, and made a tweak or two with color placement in the approved designs. She really is a genius of color, and I found the collaboration to be eye opening and inspiring. She is also a genuinely super nice person. I would buy her fabric based on that alone if I didn’t also love it so much. Then the good news came that they wanted one of the designs for a kit. I didn’t clue in until the market photos started popping up that it was one of the amazing pre-cut box kits! HOLY COW!
Seriously, thank goodness for social media, otherwise when would you ever find pictures of stuff! Yay for Instagram and a huge thanks to @swimbikequilt, @angelafmq, and @tulapink for posting photos.
Fandango, pieced by Tula Pink, Quilted by Angela Walters
Then there is the lovely Wall of Fame Quilt. This quilt is to be a free pattern download from FreeSpirit Fabrics. I will link to it in my patterns section once it goes live.
Pieced by myself, before Angela got her talented magical hands on it…..
…and after! Gorgeous quilting!
Hanging in the FreeSpirit booth. So many gorgeous projects. Check out those Umbrellas!
There is one more project that I made for this collection, but it is heading someplace else. I cannot wait to share it with you!
Northern Lights started life as a QDAD design. When Elizabeth Hartman released Rhoda Ruth (her very first fabric collection with Kaufman) I just ADORED it. And still do. I love rich, vibrant jewel tones, and since my good friend Anne introduced me to the joys of navy as a background, I love them even more! I knew when I saw it that I just HAD to make something with Rhoda Ruth and started digging through my files. I landed on this beauty from Aug 30th. The inspiration photo was a bunch of root veggies-carrots and radishes I believe.
As you can see, the final design took quite a departure from the original. It took a couple versions to get the paper piecing just right. I REALLY wanted to have the chevron shape at the end of the point, instead of just a straight across piece. Would it have been easier? Yes. Would it have looked as stellar as it does now? Not a chance!
I wanted to try and showcase as many of the Rhoda Ruth prints as possible, for the most part because I couldn’t narrow them down much, and then paired them up with the coordinating Kona Solids.
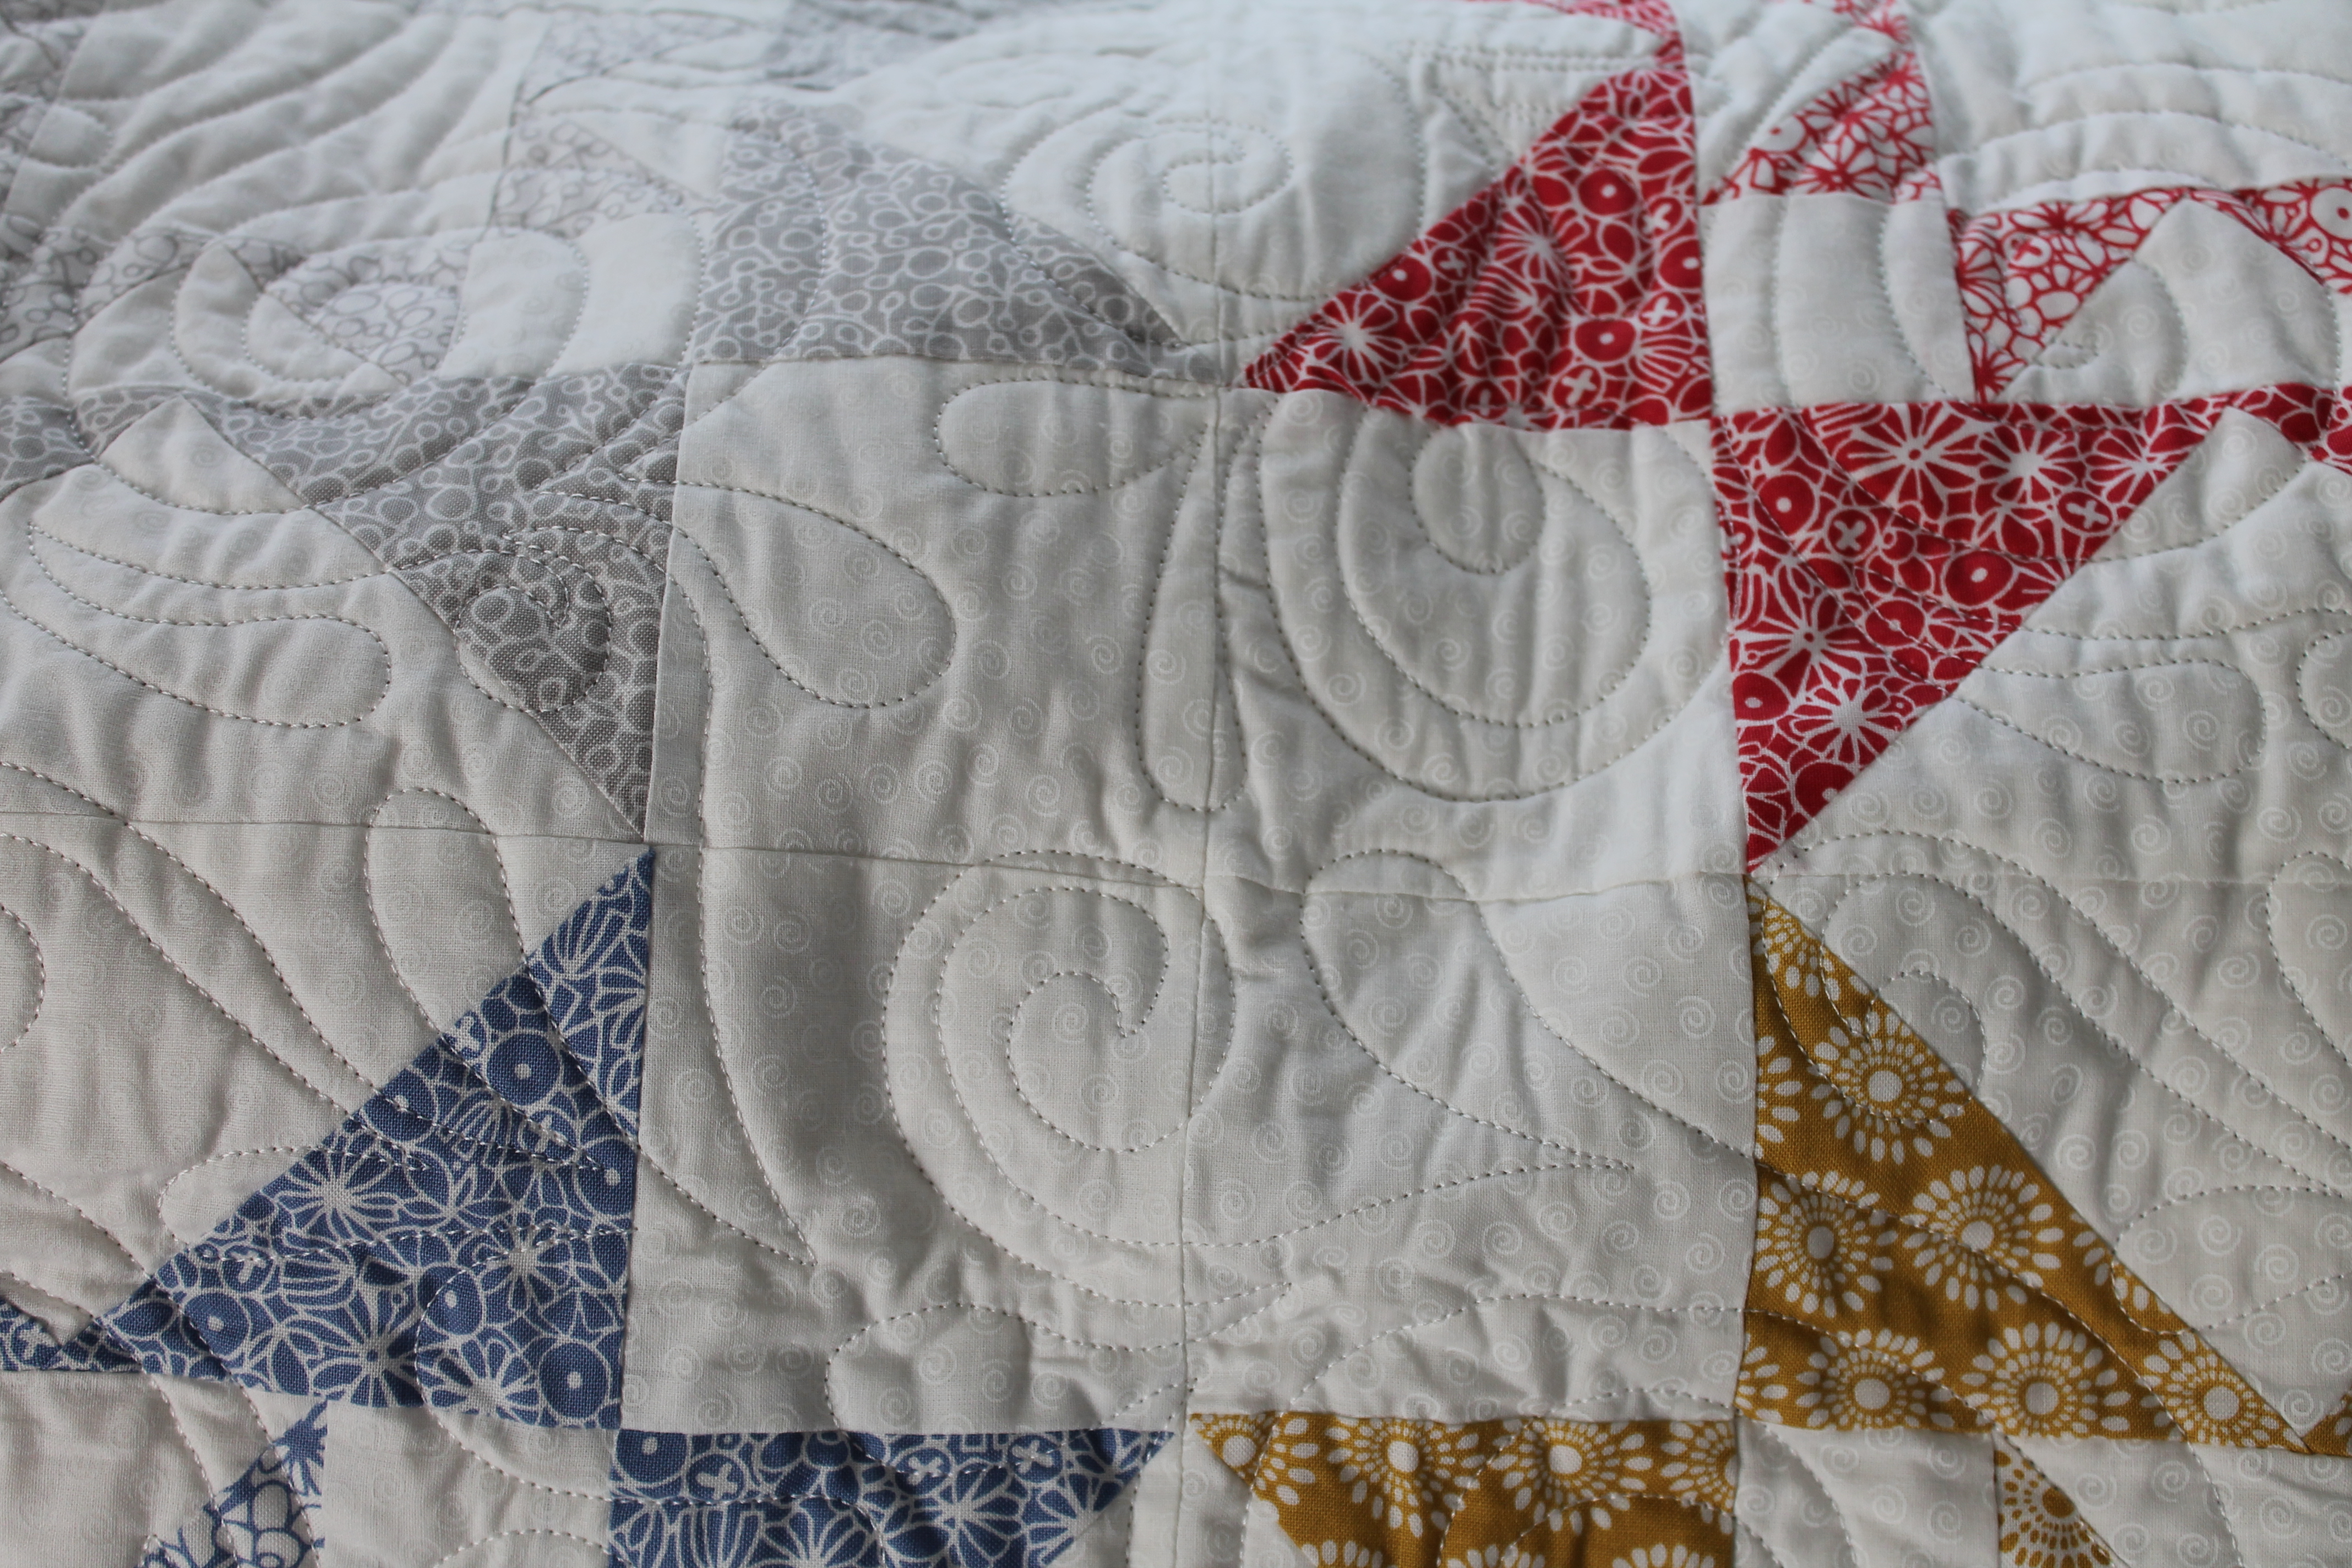
The quilting took me a while to think of, but I finally went with a combination of freehand designs that really made the quilt pop! I changed thread for each color of stars (a lot of winding the quilt top back and forth for that!) and quited some dense straight lines in the star points and then some pebbles in the center solids for texture. The background I went with a freemotion swirl between the stars to represent the motion of the night sky, clouds and wind. Then I chose an elongated piano key for the outside edge, giving the quilt a faux border and adding some additional visual texture and interest in the solid background. This is why I have a love/hate with solids, because you can have some amazing quilting stand out but you need amazing quilting because it will stand out. Makes total sense, yes?
I love that the quilting hides the seams of the blocks so you can’t tell it’s on point. I don’t know why I love that, but I do =)
You can find the May/June issue of McCall’s quilting on Newsstands now. I really hope you give Northern Lights a go! It’s one of my favorite quilts to date =)