
For day two of my pattern roundup, I will be featuring P&B Textiles. I have been working with P&B Textiles since 2014. I work mainly with panels and artist prints for P&B. It’s challenging work, and I enjoy it. The artists at P&B are indeed artists; from the realistic style of Alaska Wildlife Artist Jon Van Zyle to the whimsical styles of Teresa Ascone and Sally Walsh, the prints are vibrant, colorful, and an absolute joy to work with.
There are a good number of quilts, so I’ll be going in alphabetical order.
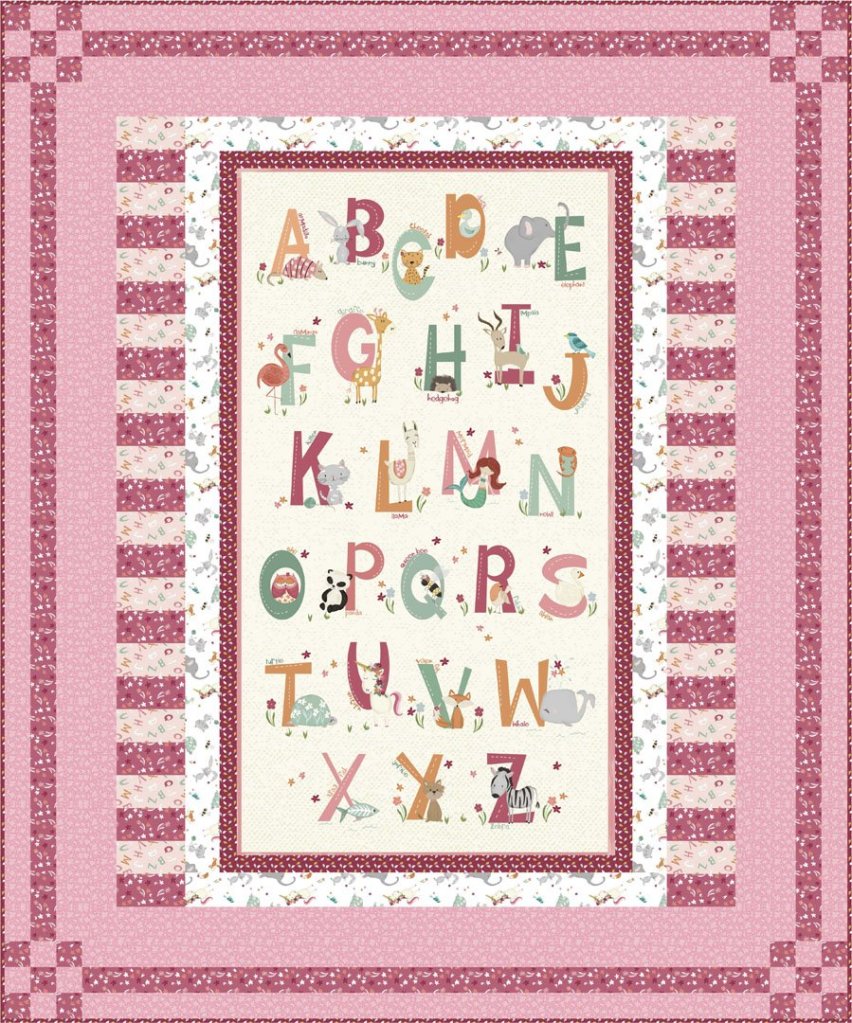
First up we have Animal Alphabet. They wanted a simple, beginner friendly quilt to feature the large panel. I made it baby quilt sized, perfect for gifting! The panel came in two colorways with adorable supporting prints.

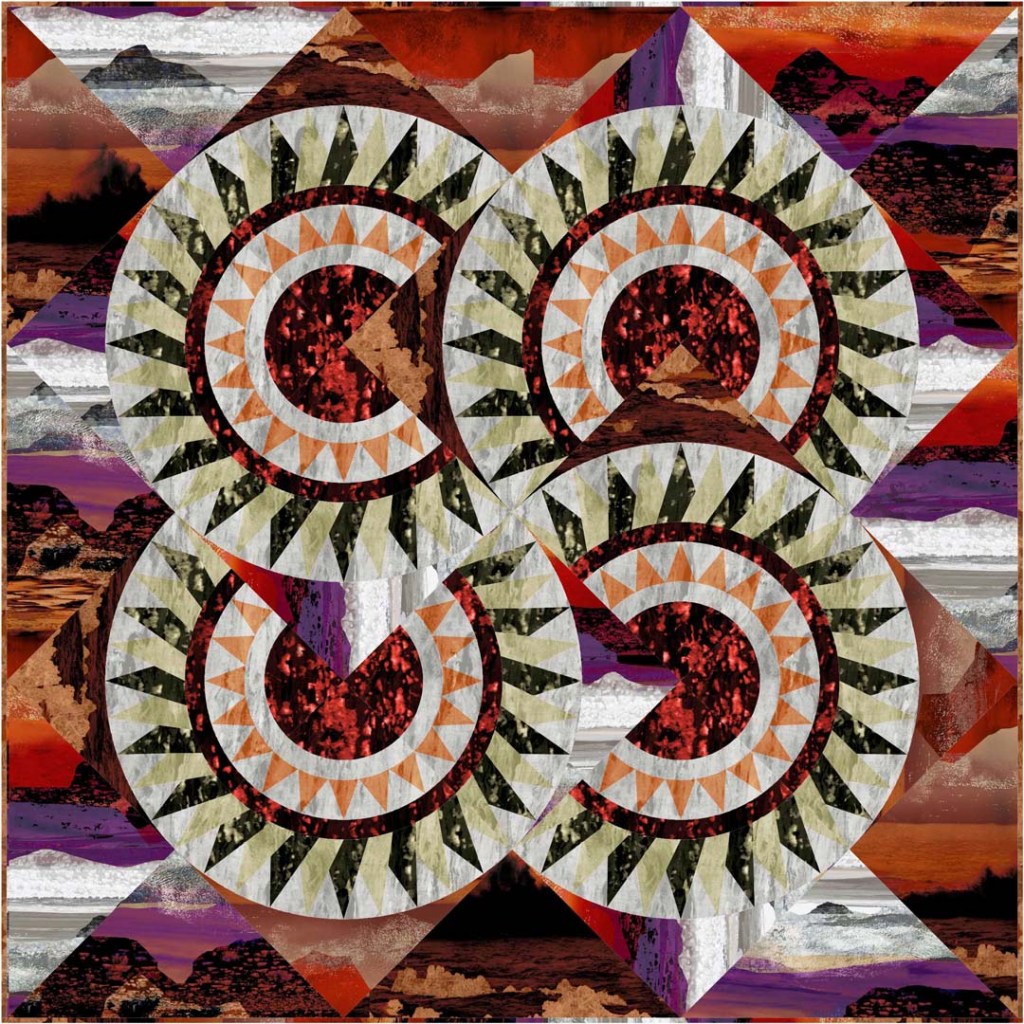
Next up is a pair of quilts I designed for a collection called Sedona. The collection came in full color and monochromatic, and both quilts could be made in either. The border print was stunning and needed its own feature quilt! This collection reminds me of my mom; totally her colors!

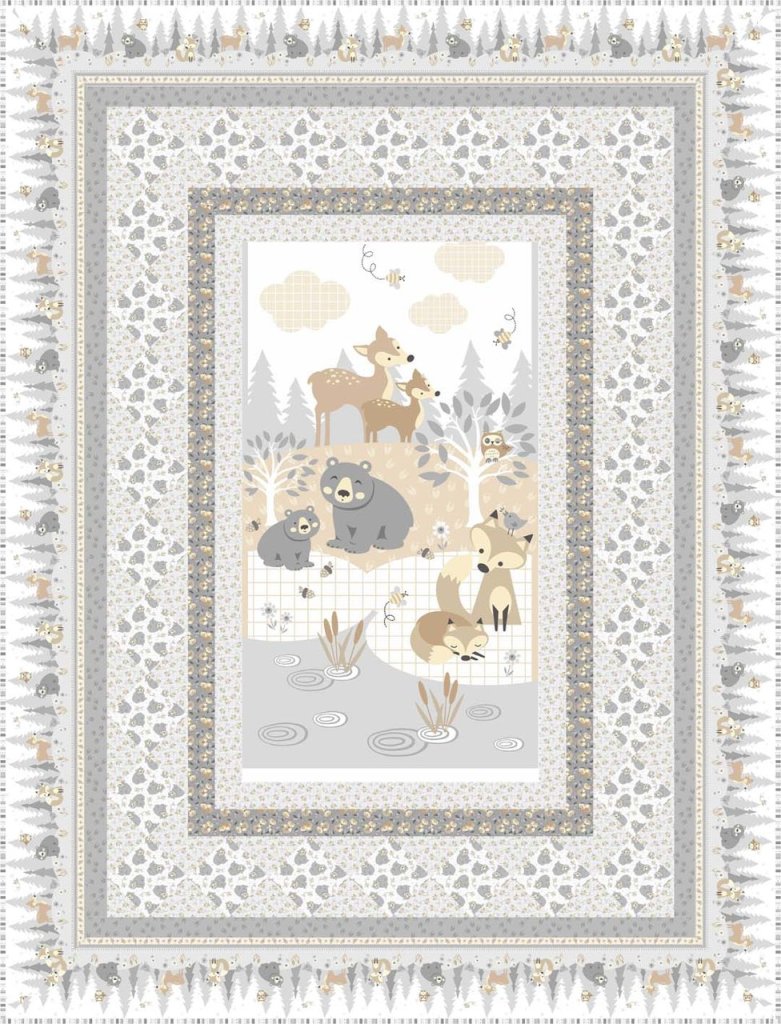
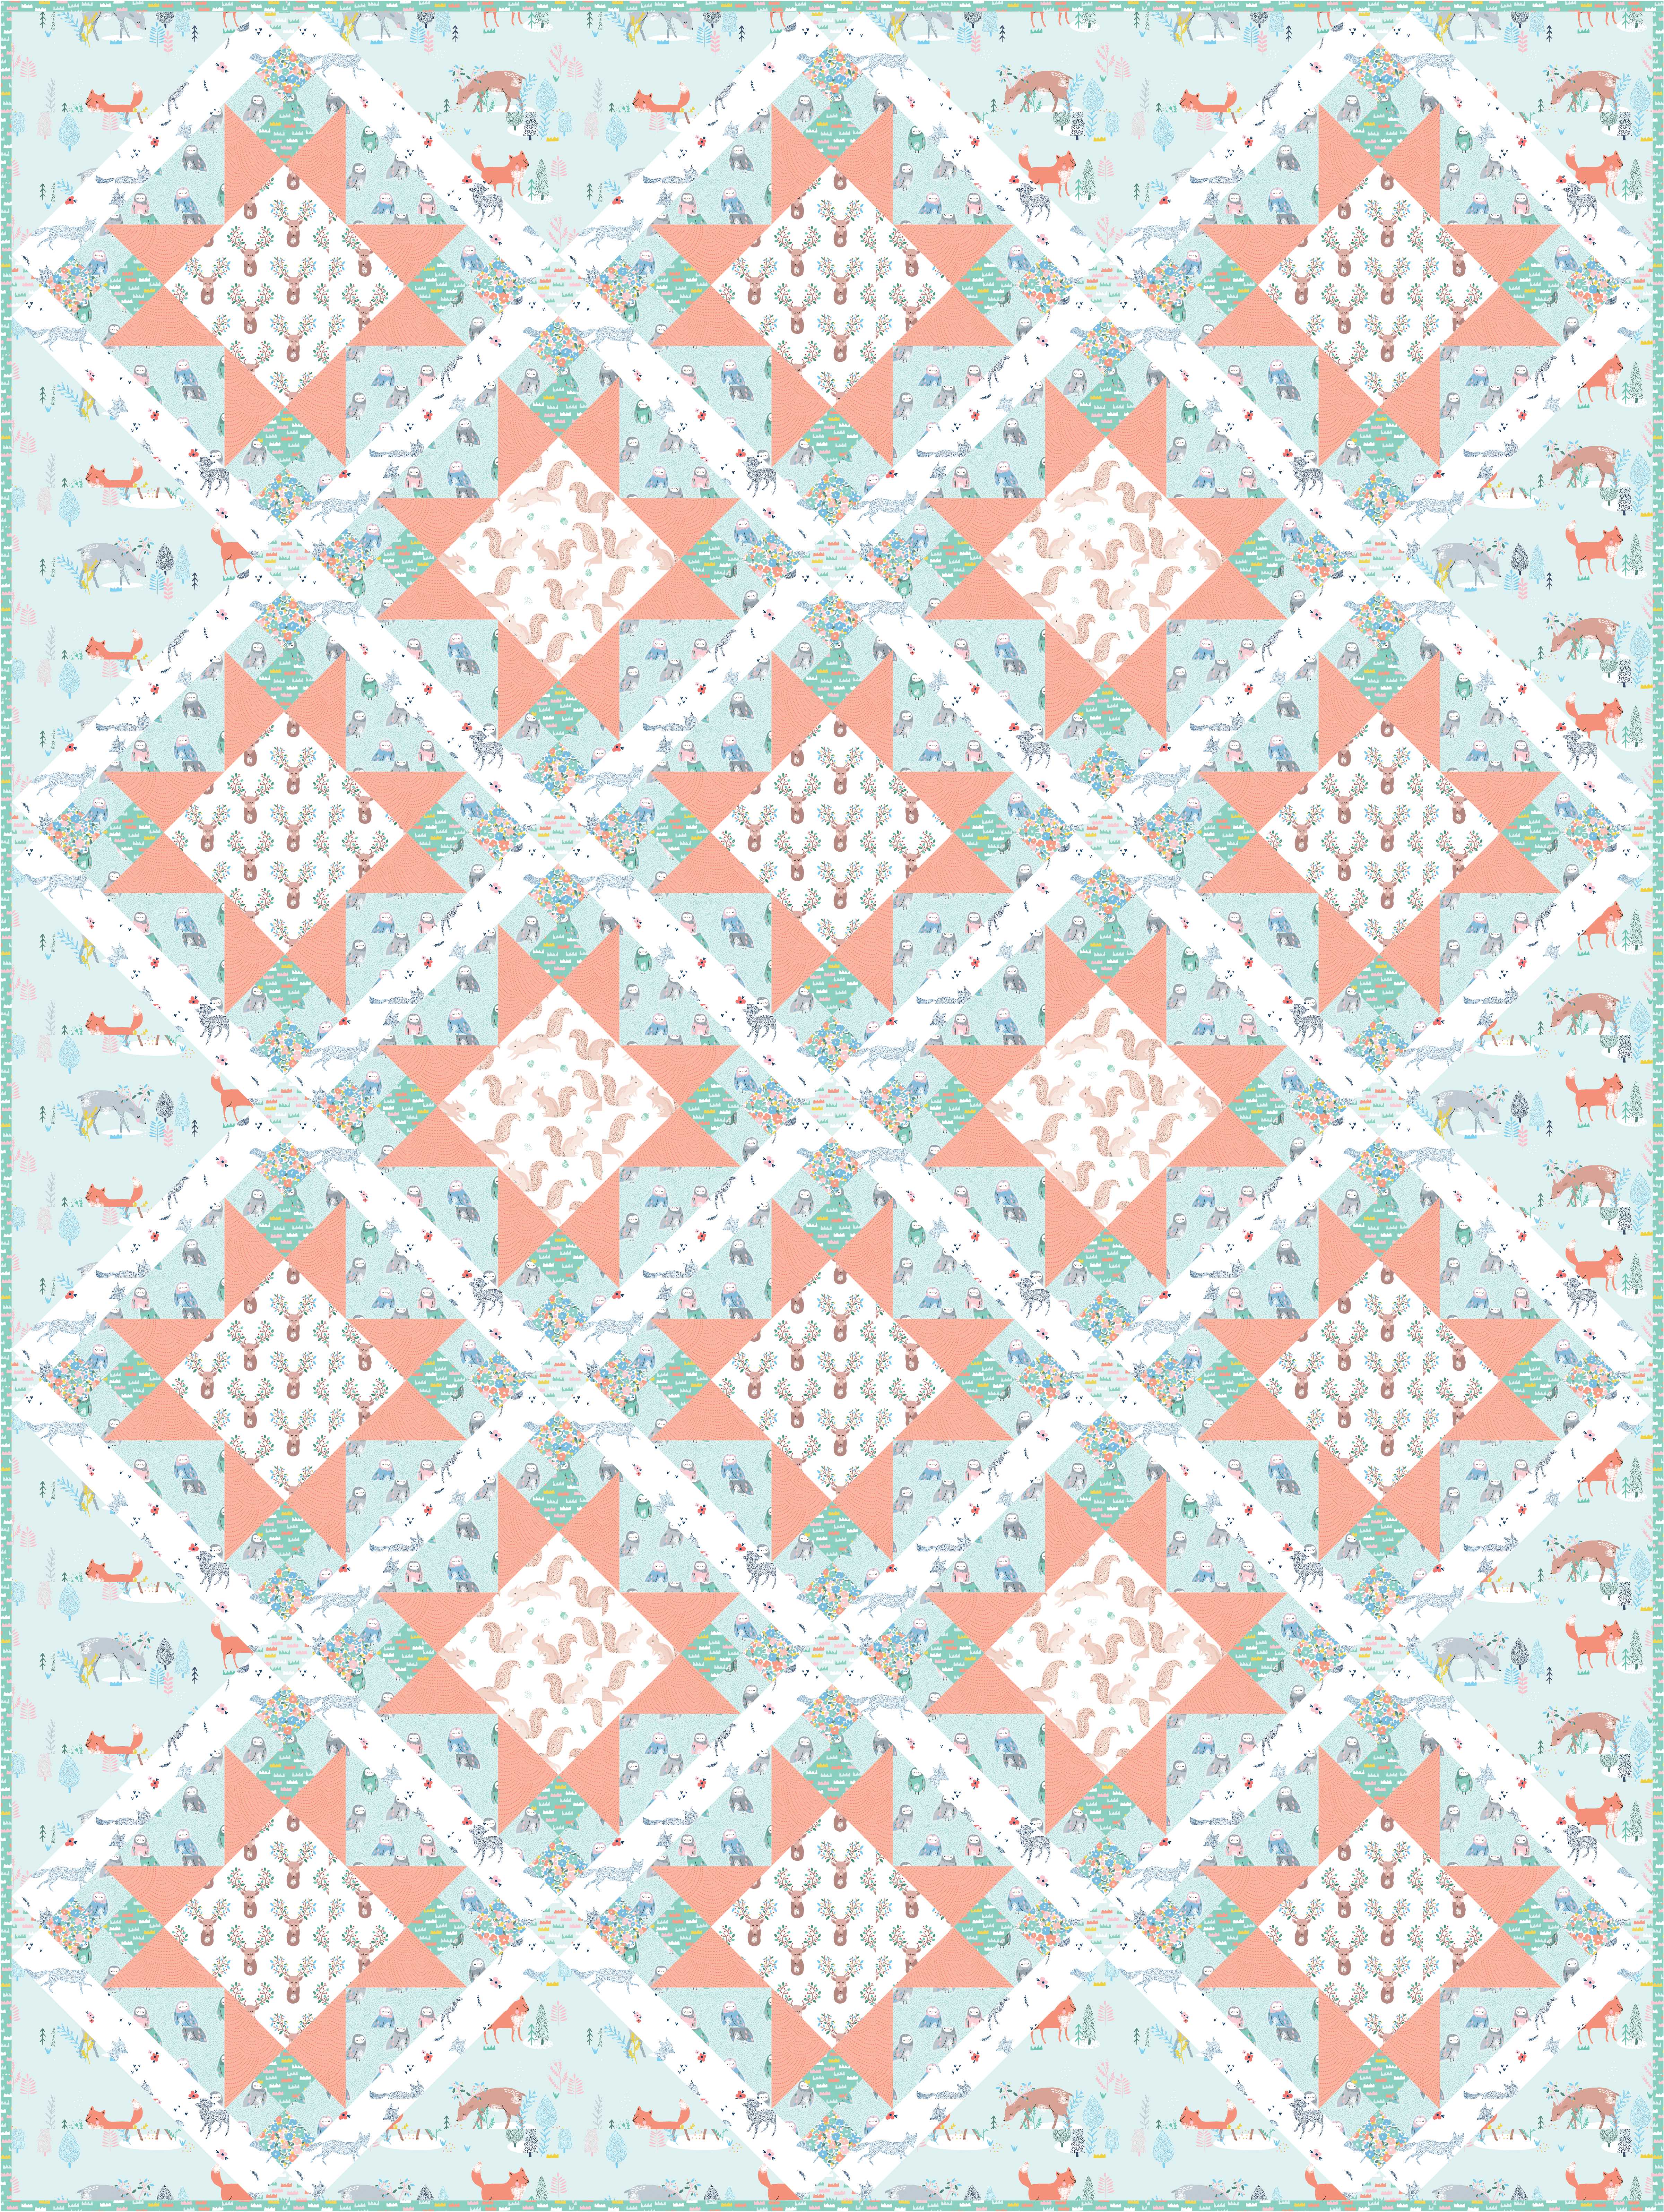
Then we turn around and head back to another fun children’s collection, Little Critter. I adore the baby animals featured in this collection; the prints are soft and whimsical, the palette is fully neutral so you can add pops of whatever colors you want to it.

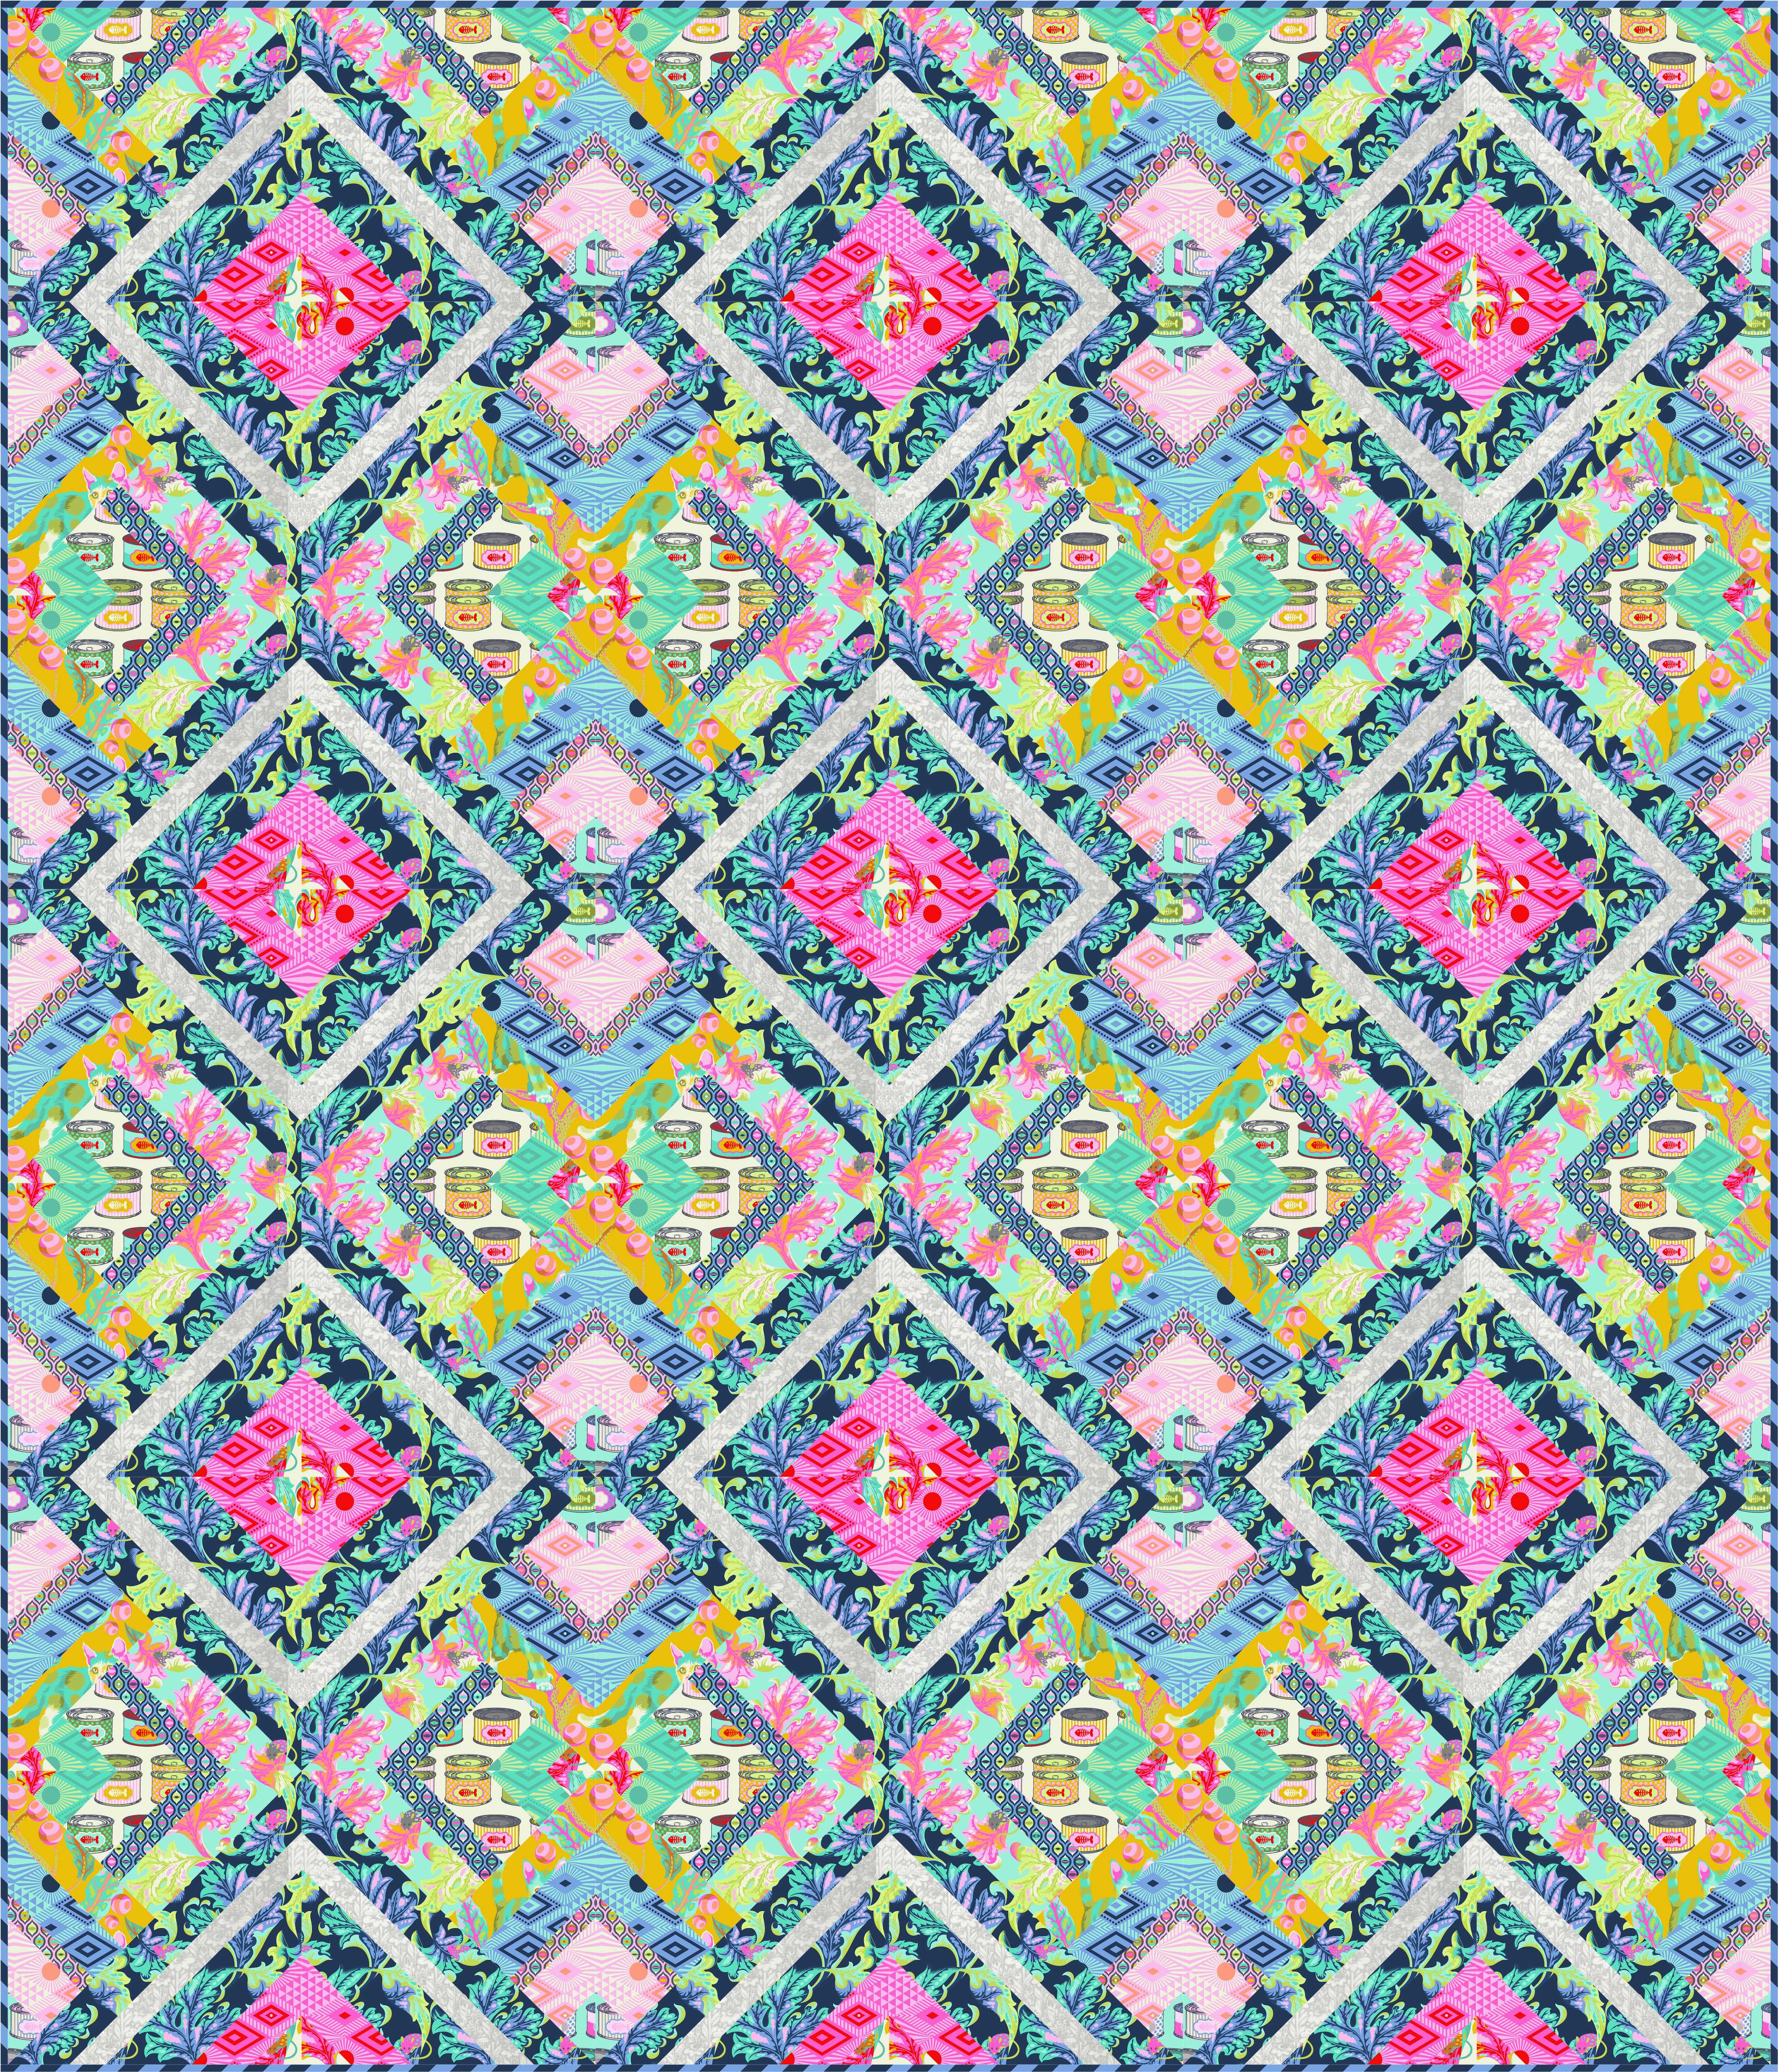
Now, may I direct your attention to Living Coastal, a bright and vibrant sea creature themed collection. I love sea life, and live near the coast. Some of my best memories were made on the west coast of Vancouver Island. I am so excited to be able to bring my children to the exact same campground this summer that my parents used to take us to as kids.


After that we welcome Magnificent Animals; a collection inspired by the wilds Alaska. Having taught on an Alaskan Quilt Cruise two years ago, I can personally recommend this collection. The bold, bright colors are exactly what you would expect to see on a sunny day in Alaska. I even had the privilege to observe some of the same creatures, from a safe distance of course! (Growing up in Northern Alberta, you know NEVER to approach bears. Or Moose. Or Canadian Geese…..)


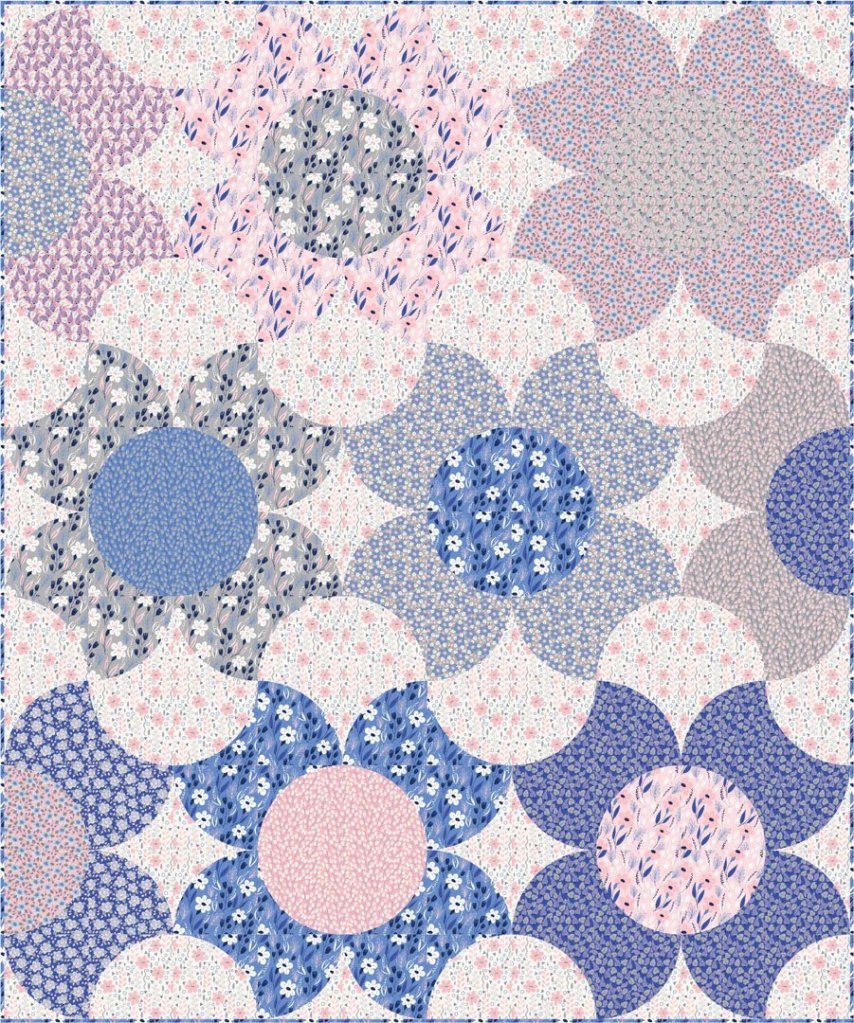
Meadow Lane looks exactly like it sounds; soft, inviting florals in a varied palette. Perfect for cuddling up in while sipping a hot beverage and reading a book outside on a warm spring morning.
For some hot and sunny inspiration, Tropic Gardens is perfect for you! Let the deep jewel tones and high contrast prints transport you to a tropical paradise of blooming flora. I love making lone stars and variants, this quilt is definitely expert level but oh-so-gorgeous and well worth the effort required.

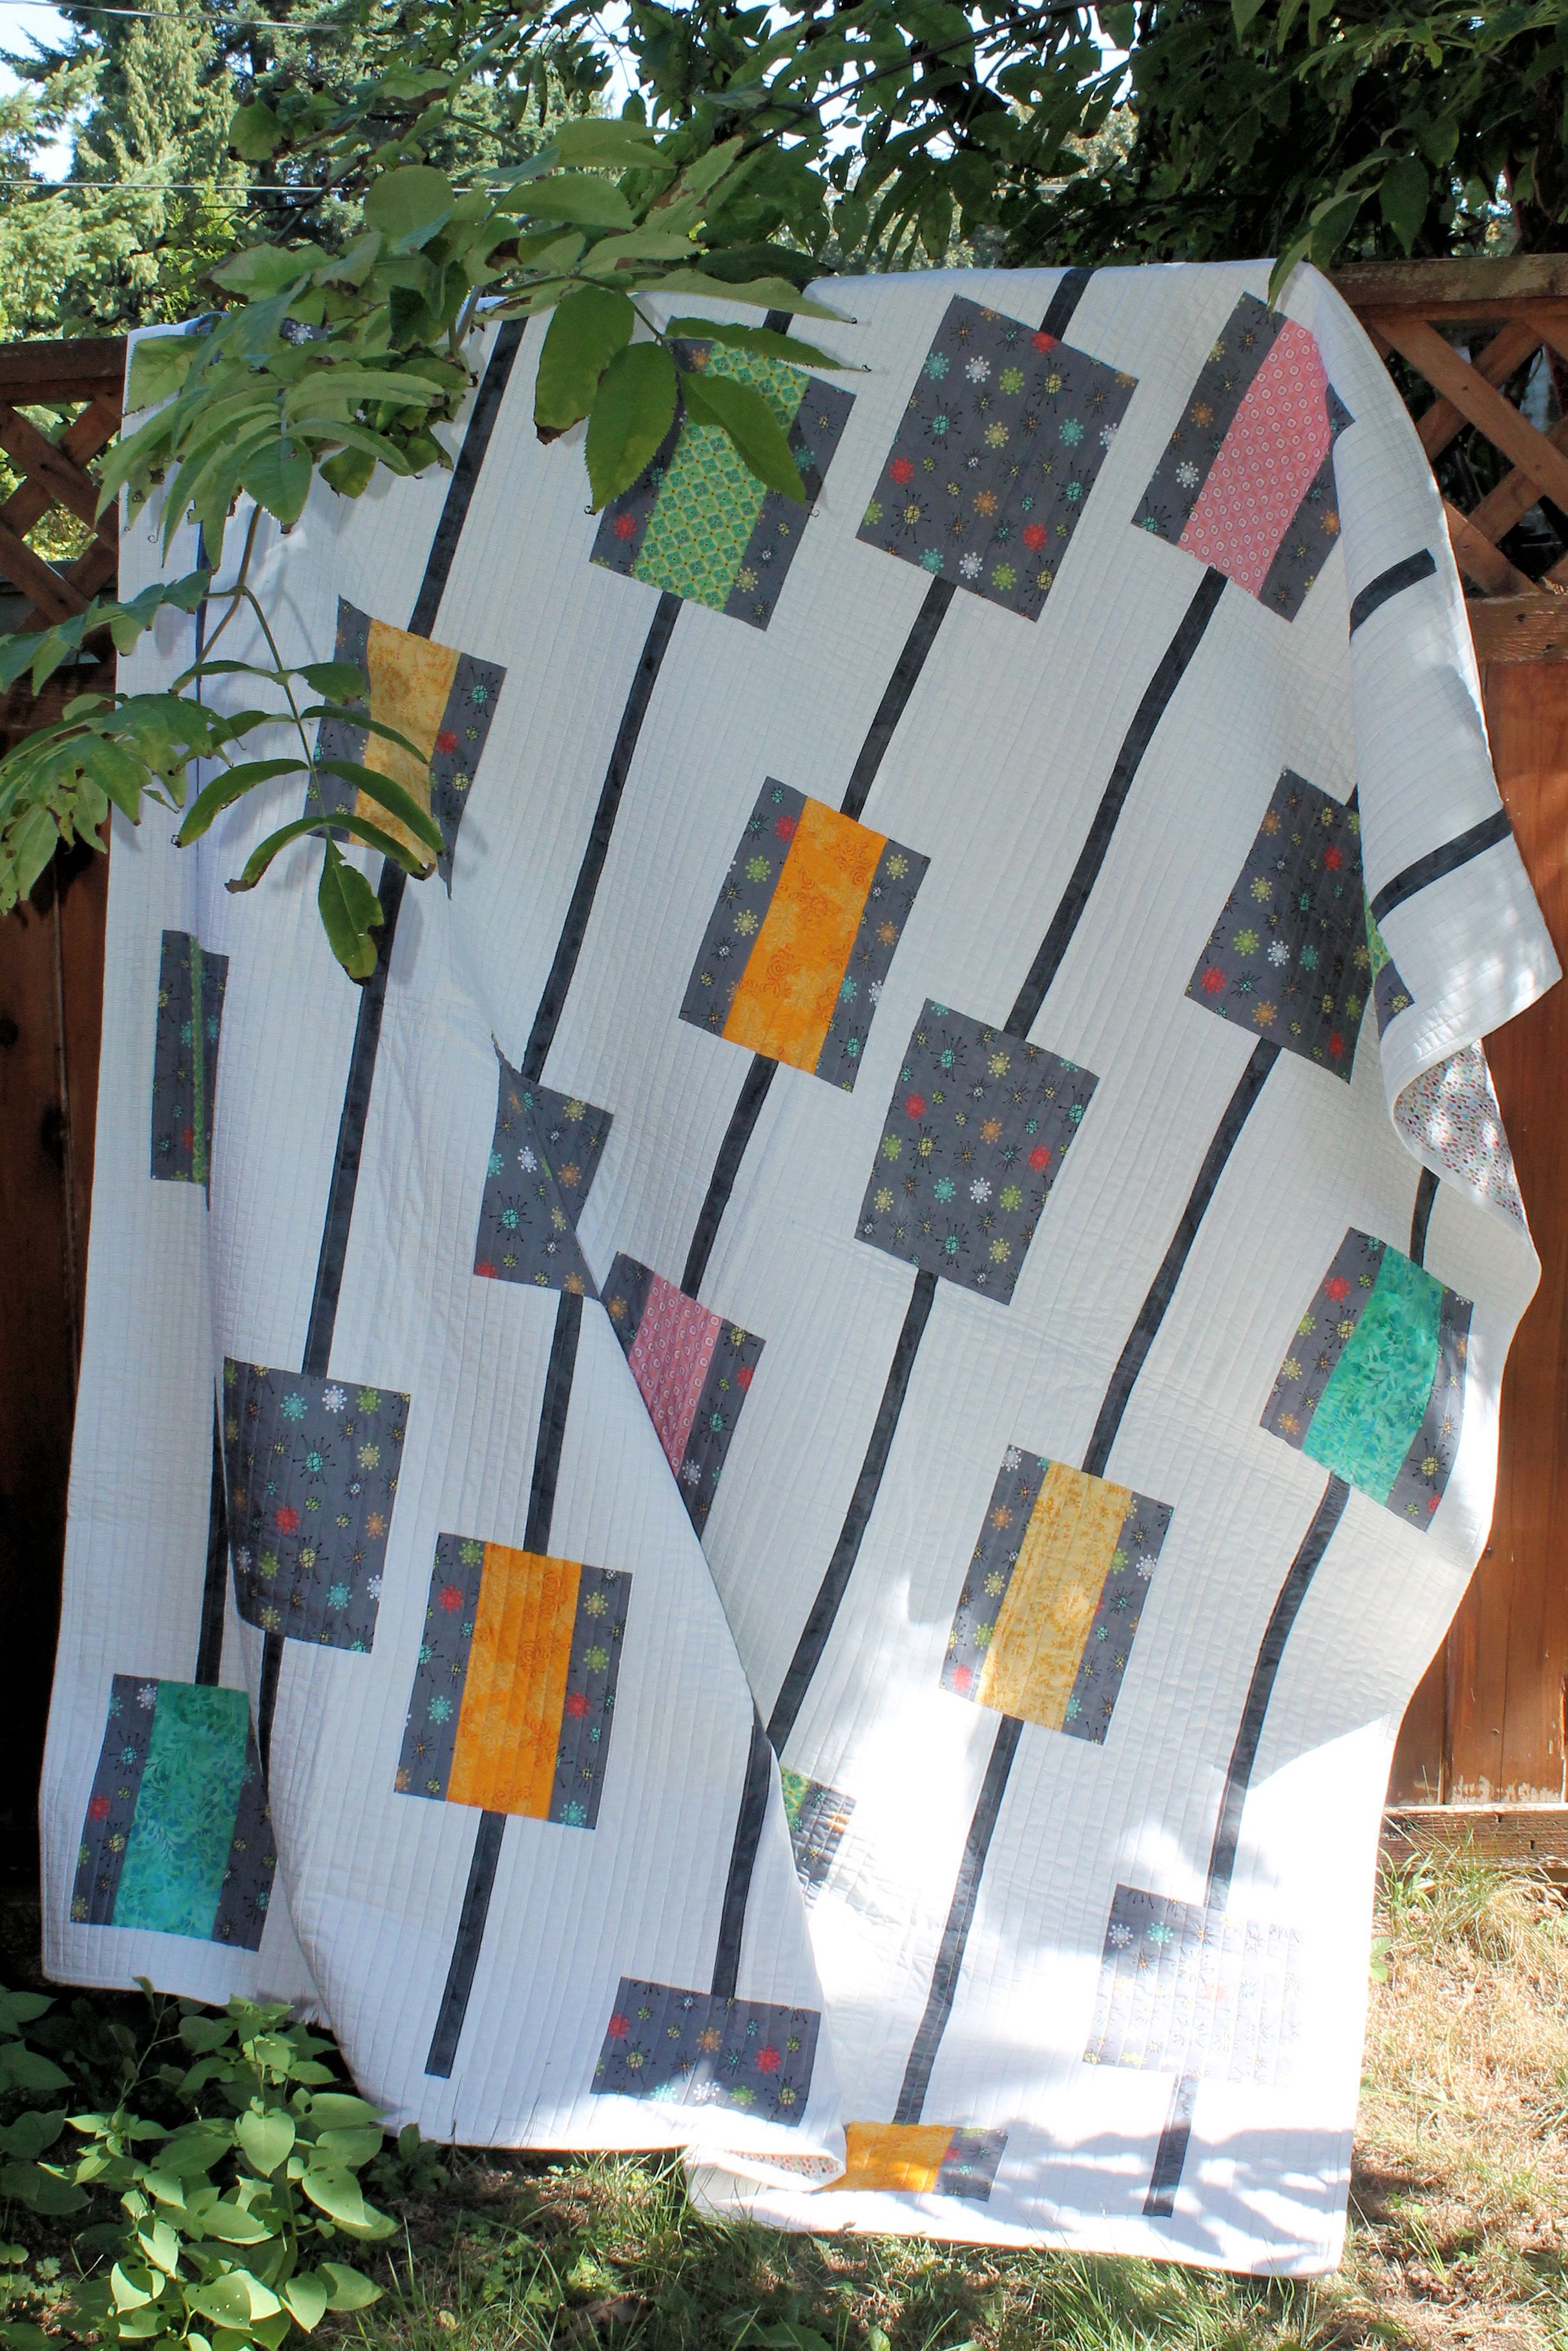
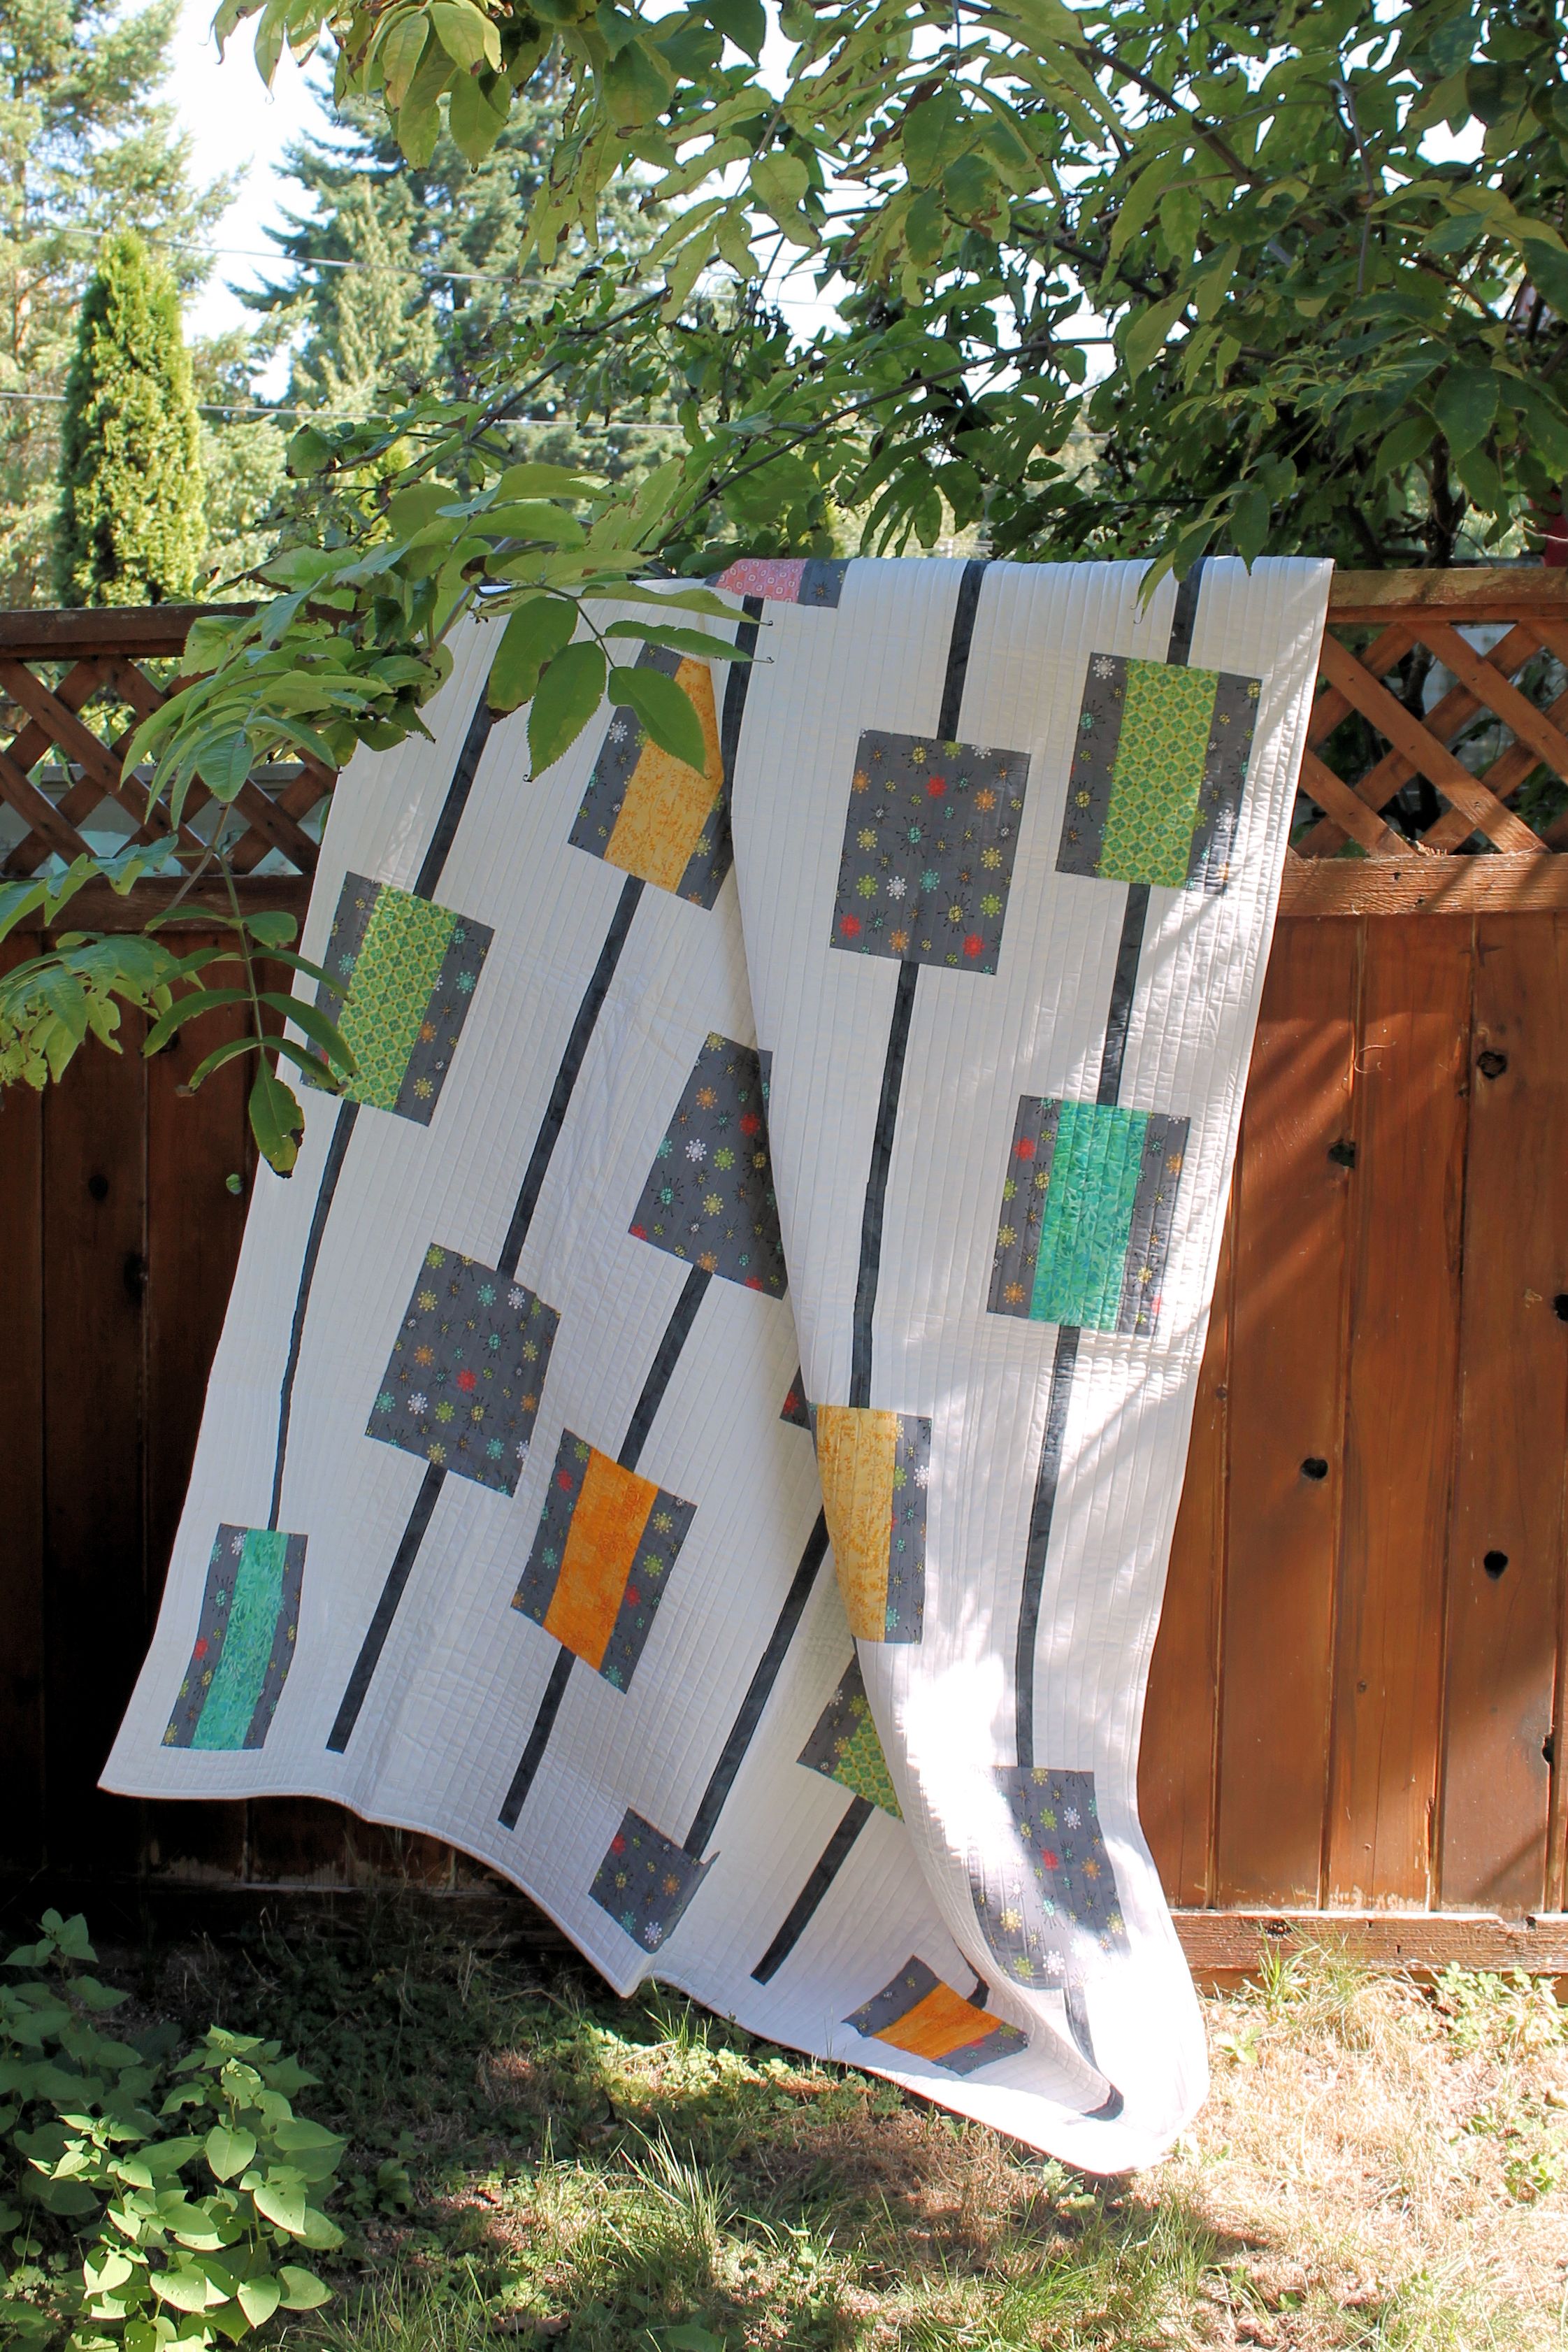
Finally we come to Equinox; a collection of blender prints to add a pop of color to any project. Equinox is the perfect pairing of bold patterns and monochromatic palettes.

Some of these collections released last year, and I apologize if they become difficult to find. I promise to keep on top of things from now on.
I hope you find something to inspire you, and as always I would love to see your quilts made from my patterns! Tag me on Instagram @staceyinstitches with your quilty makes.
Happy Stitching!


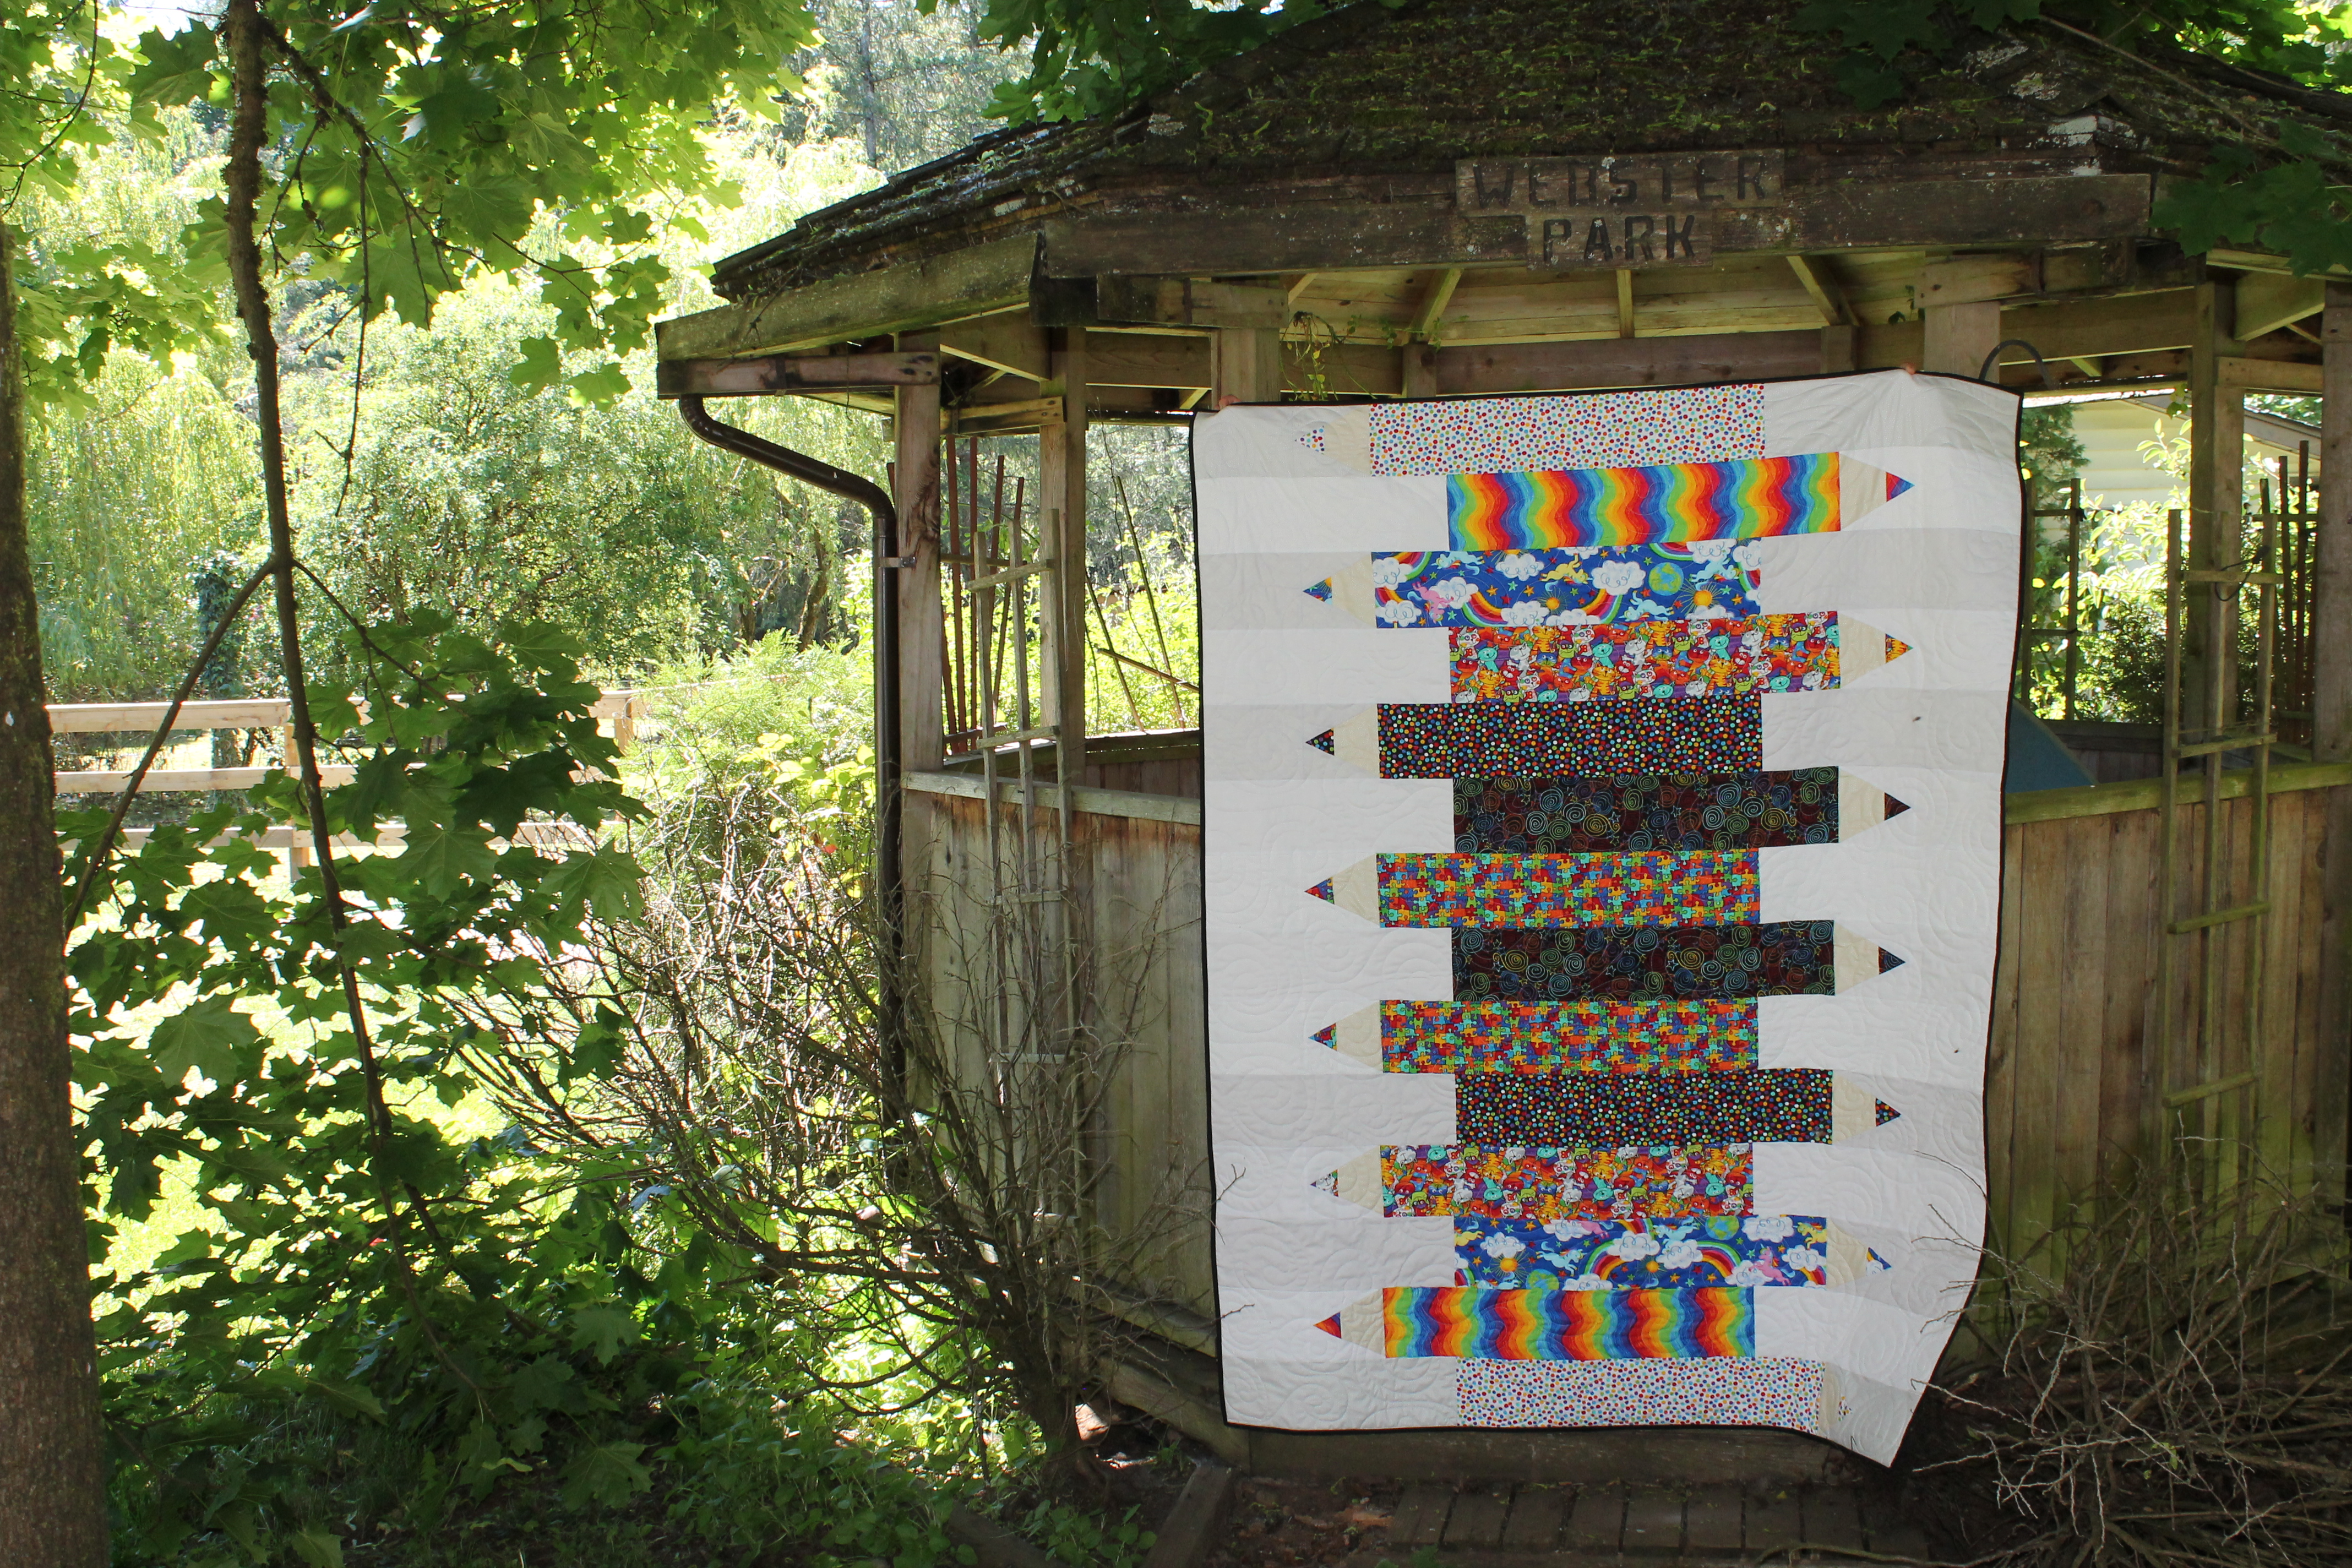
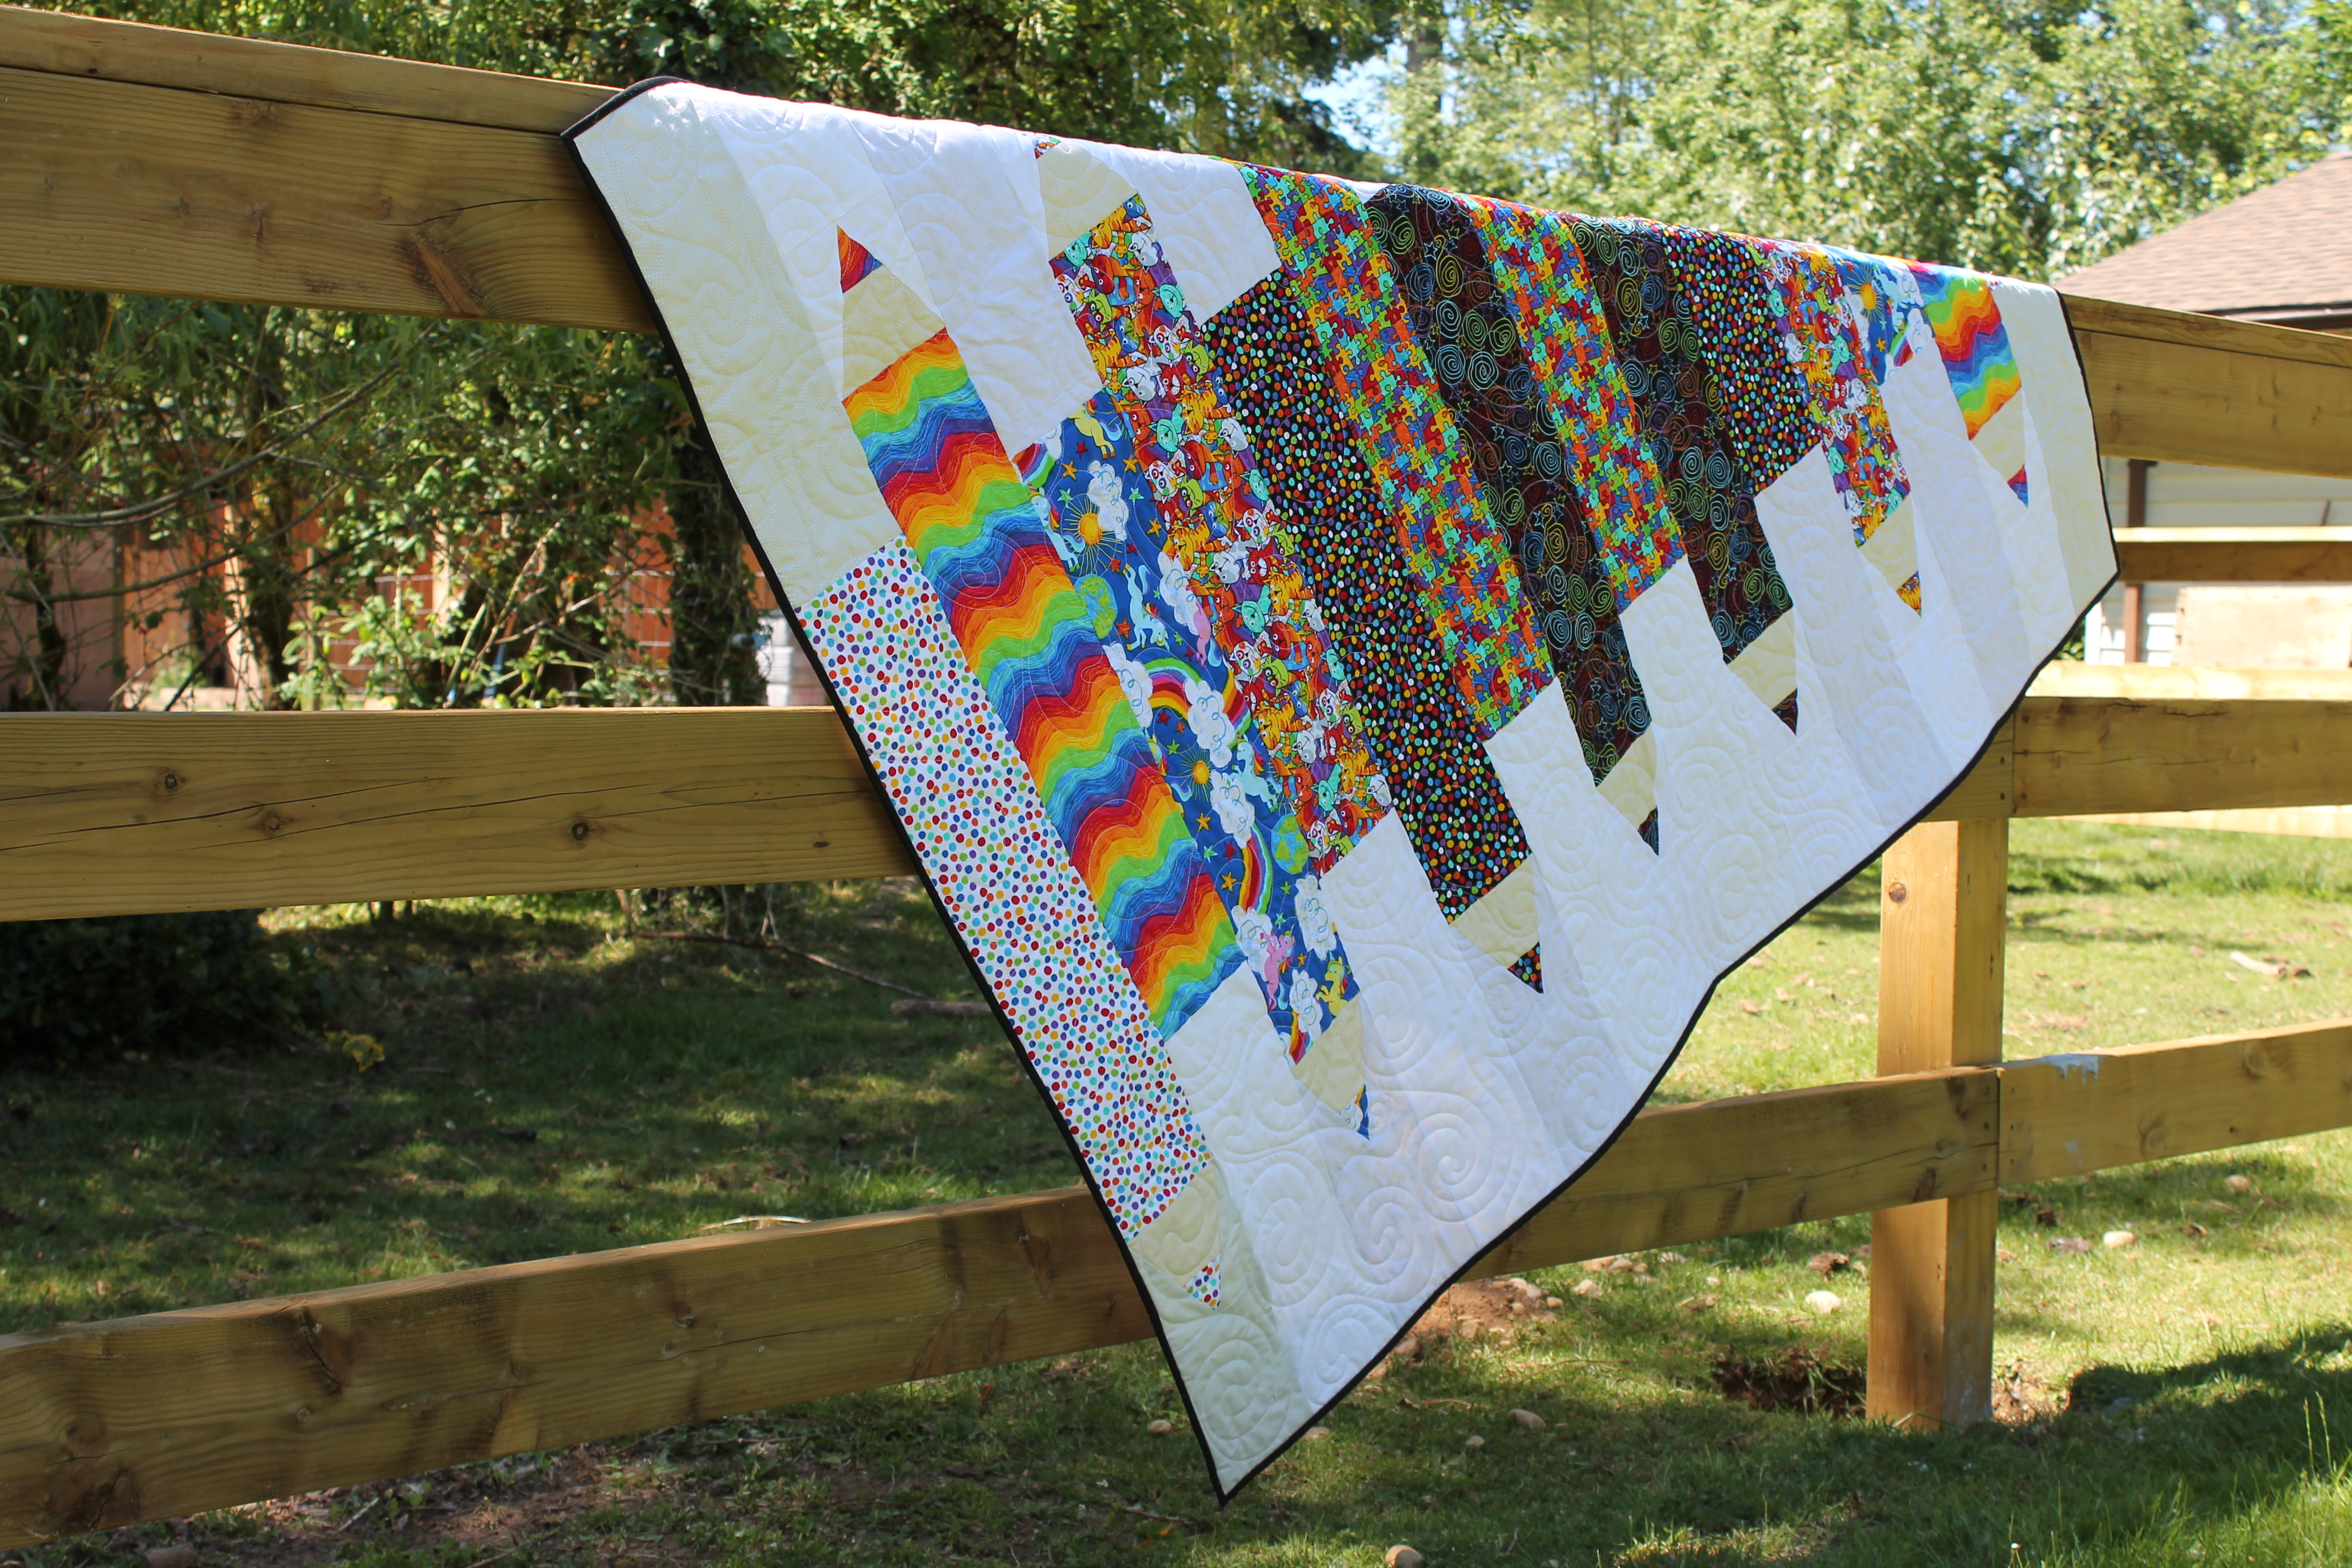
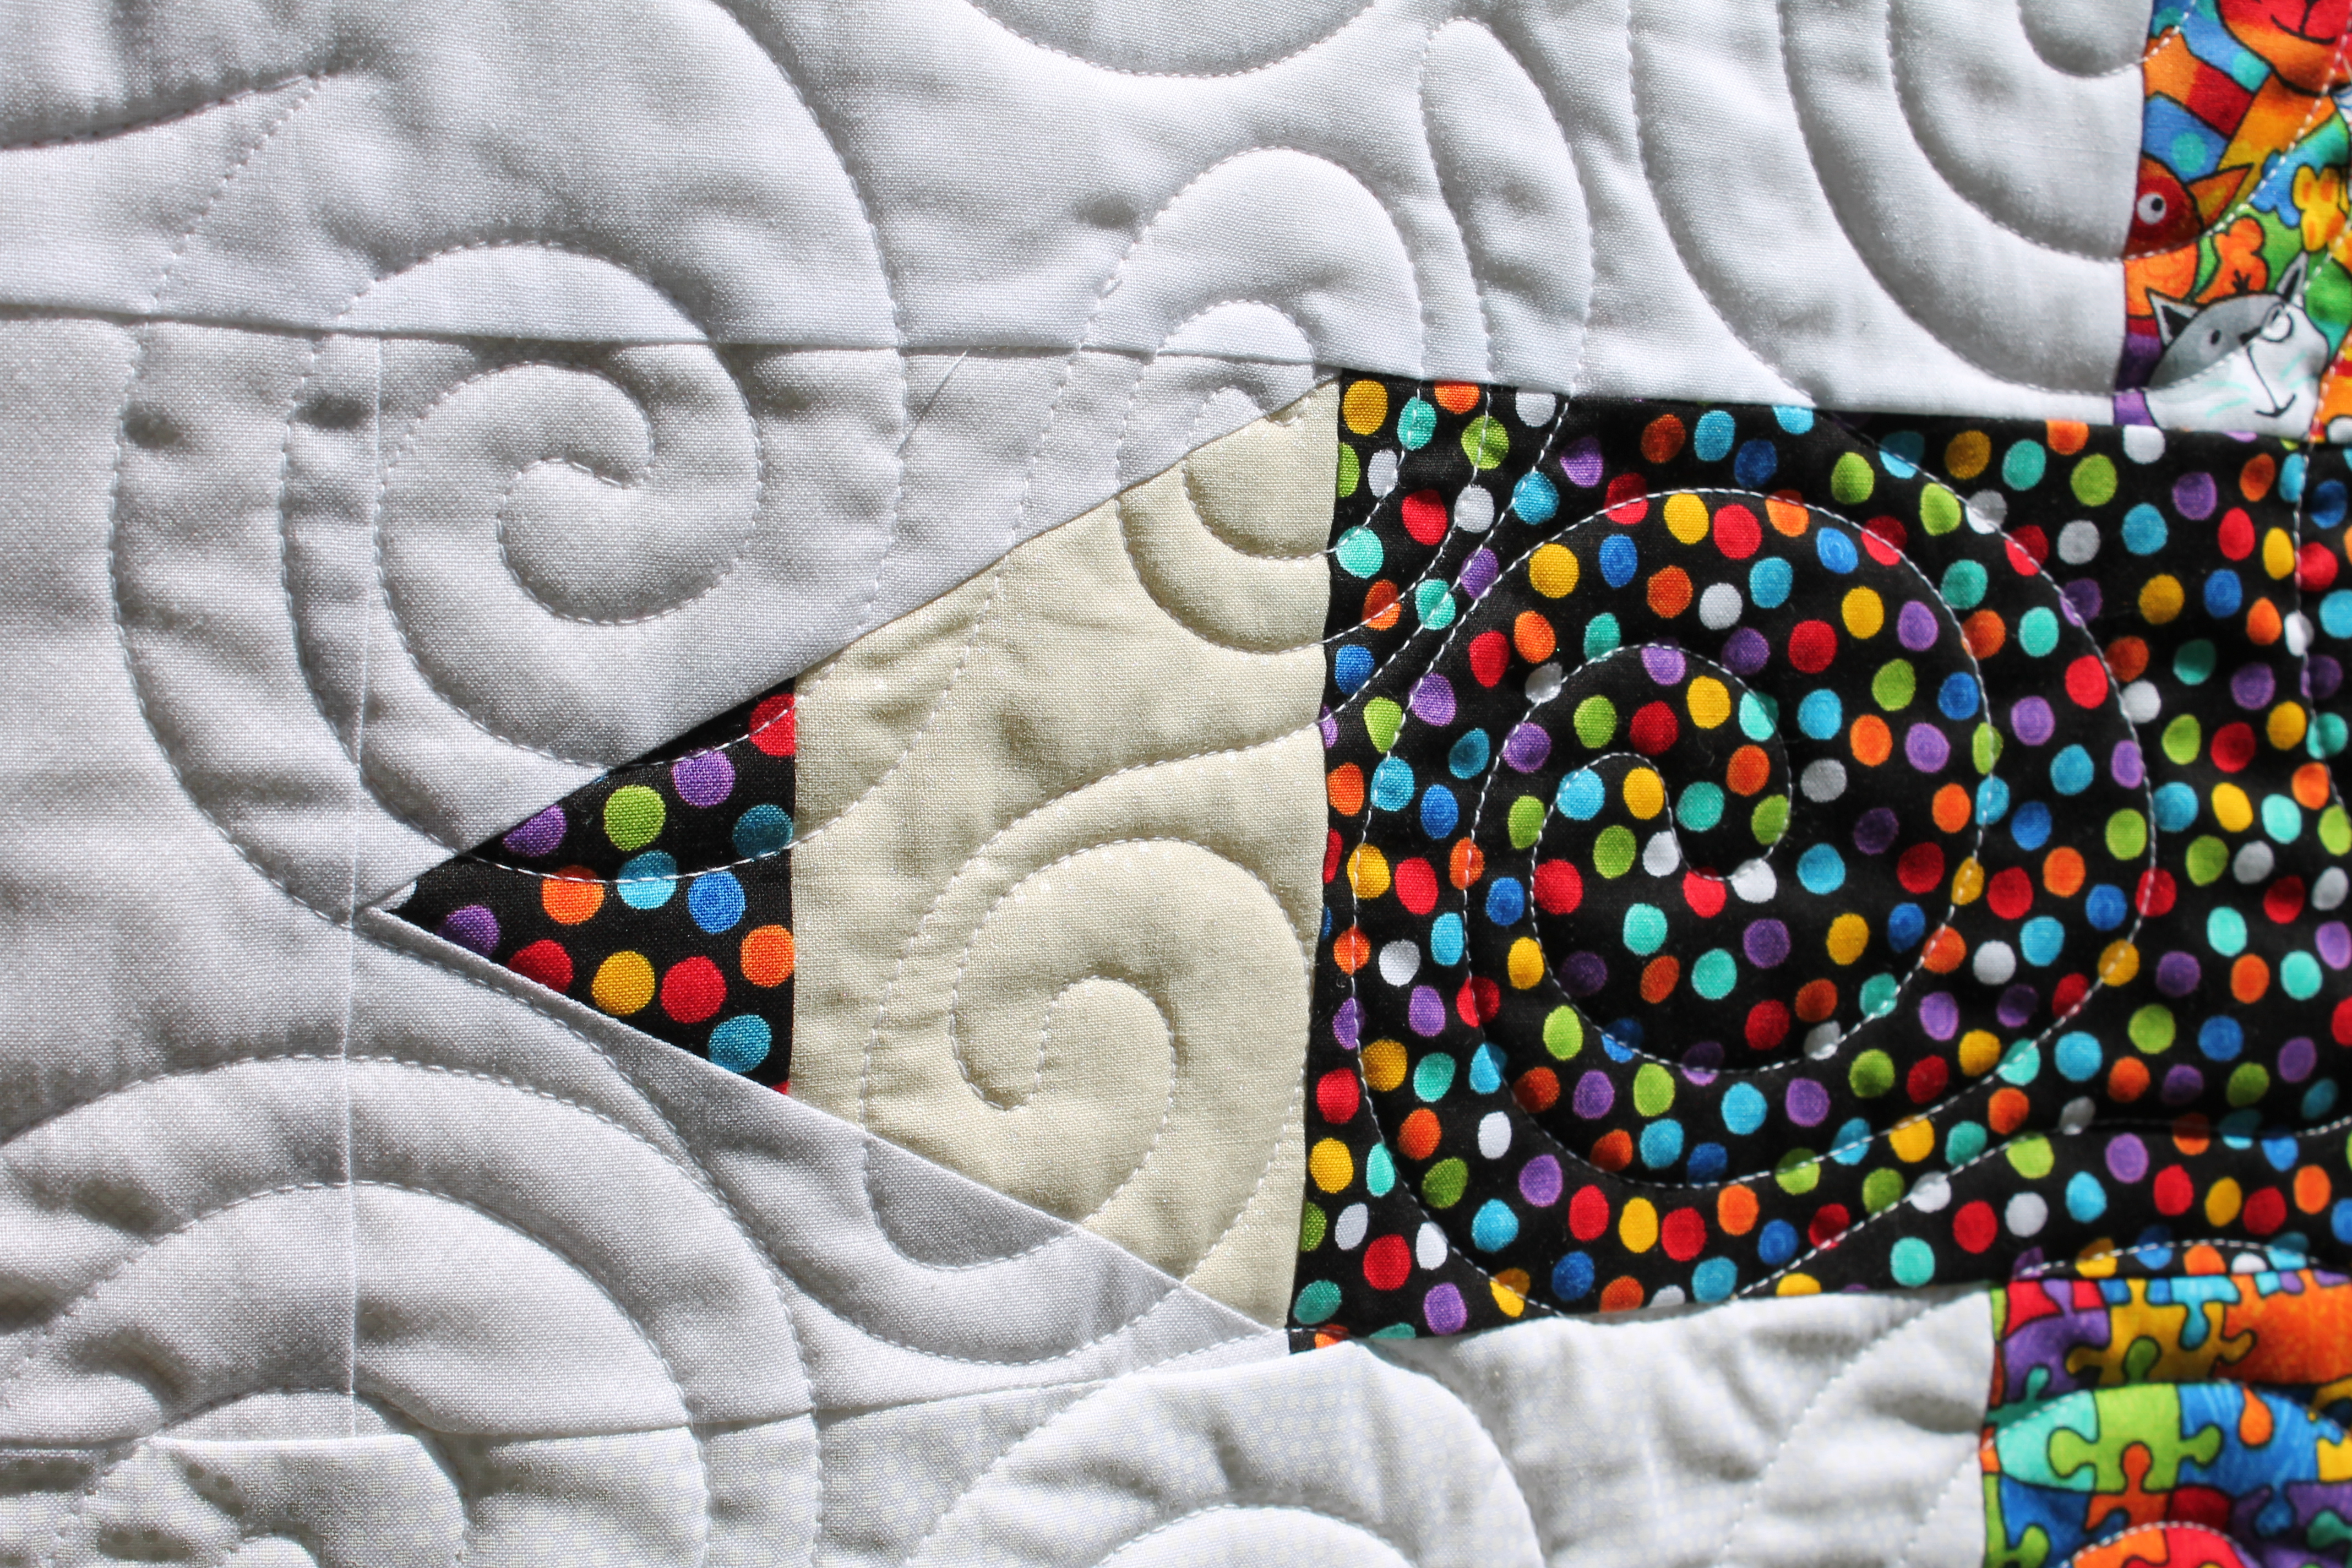


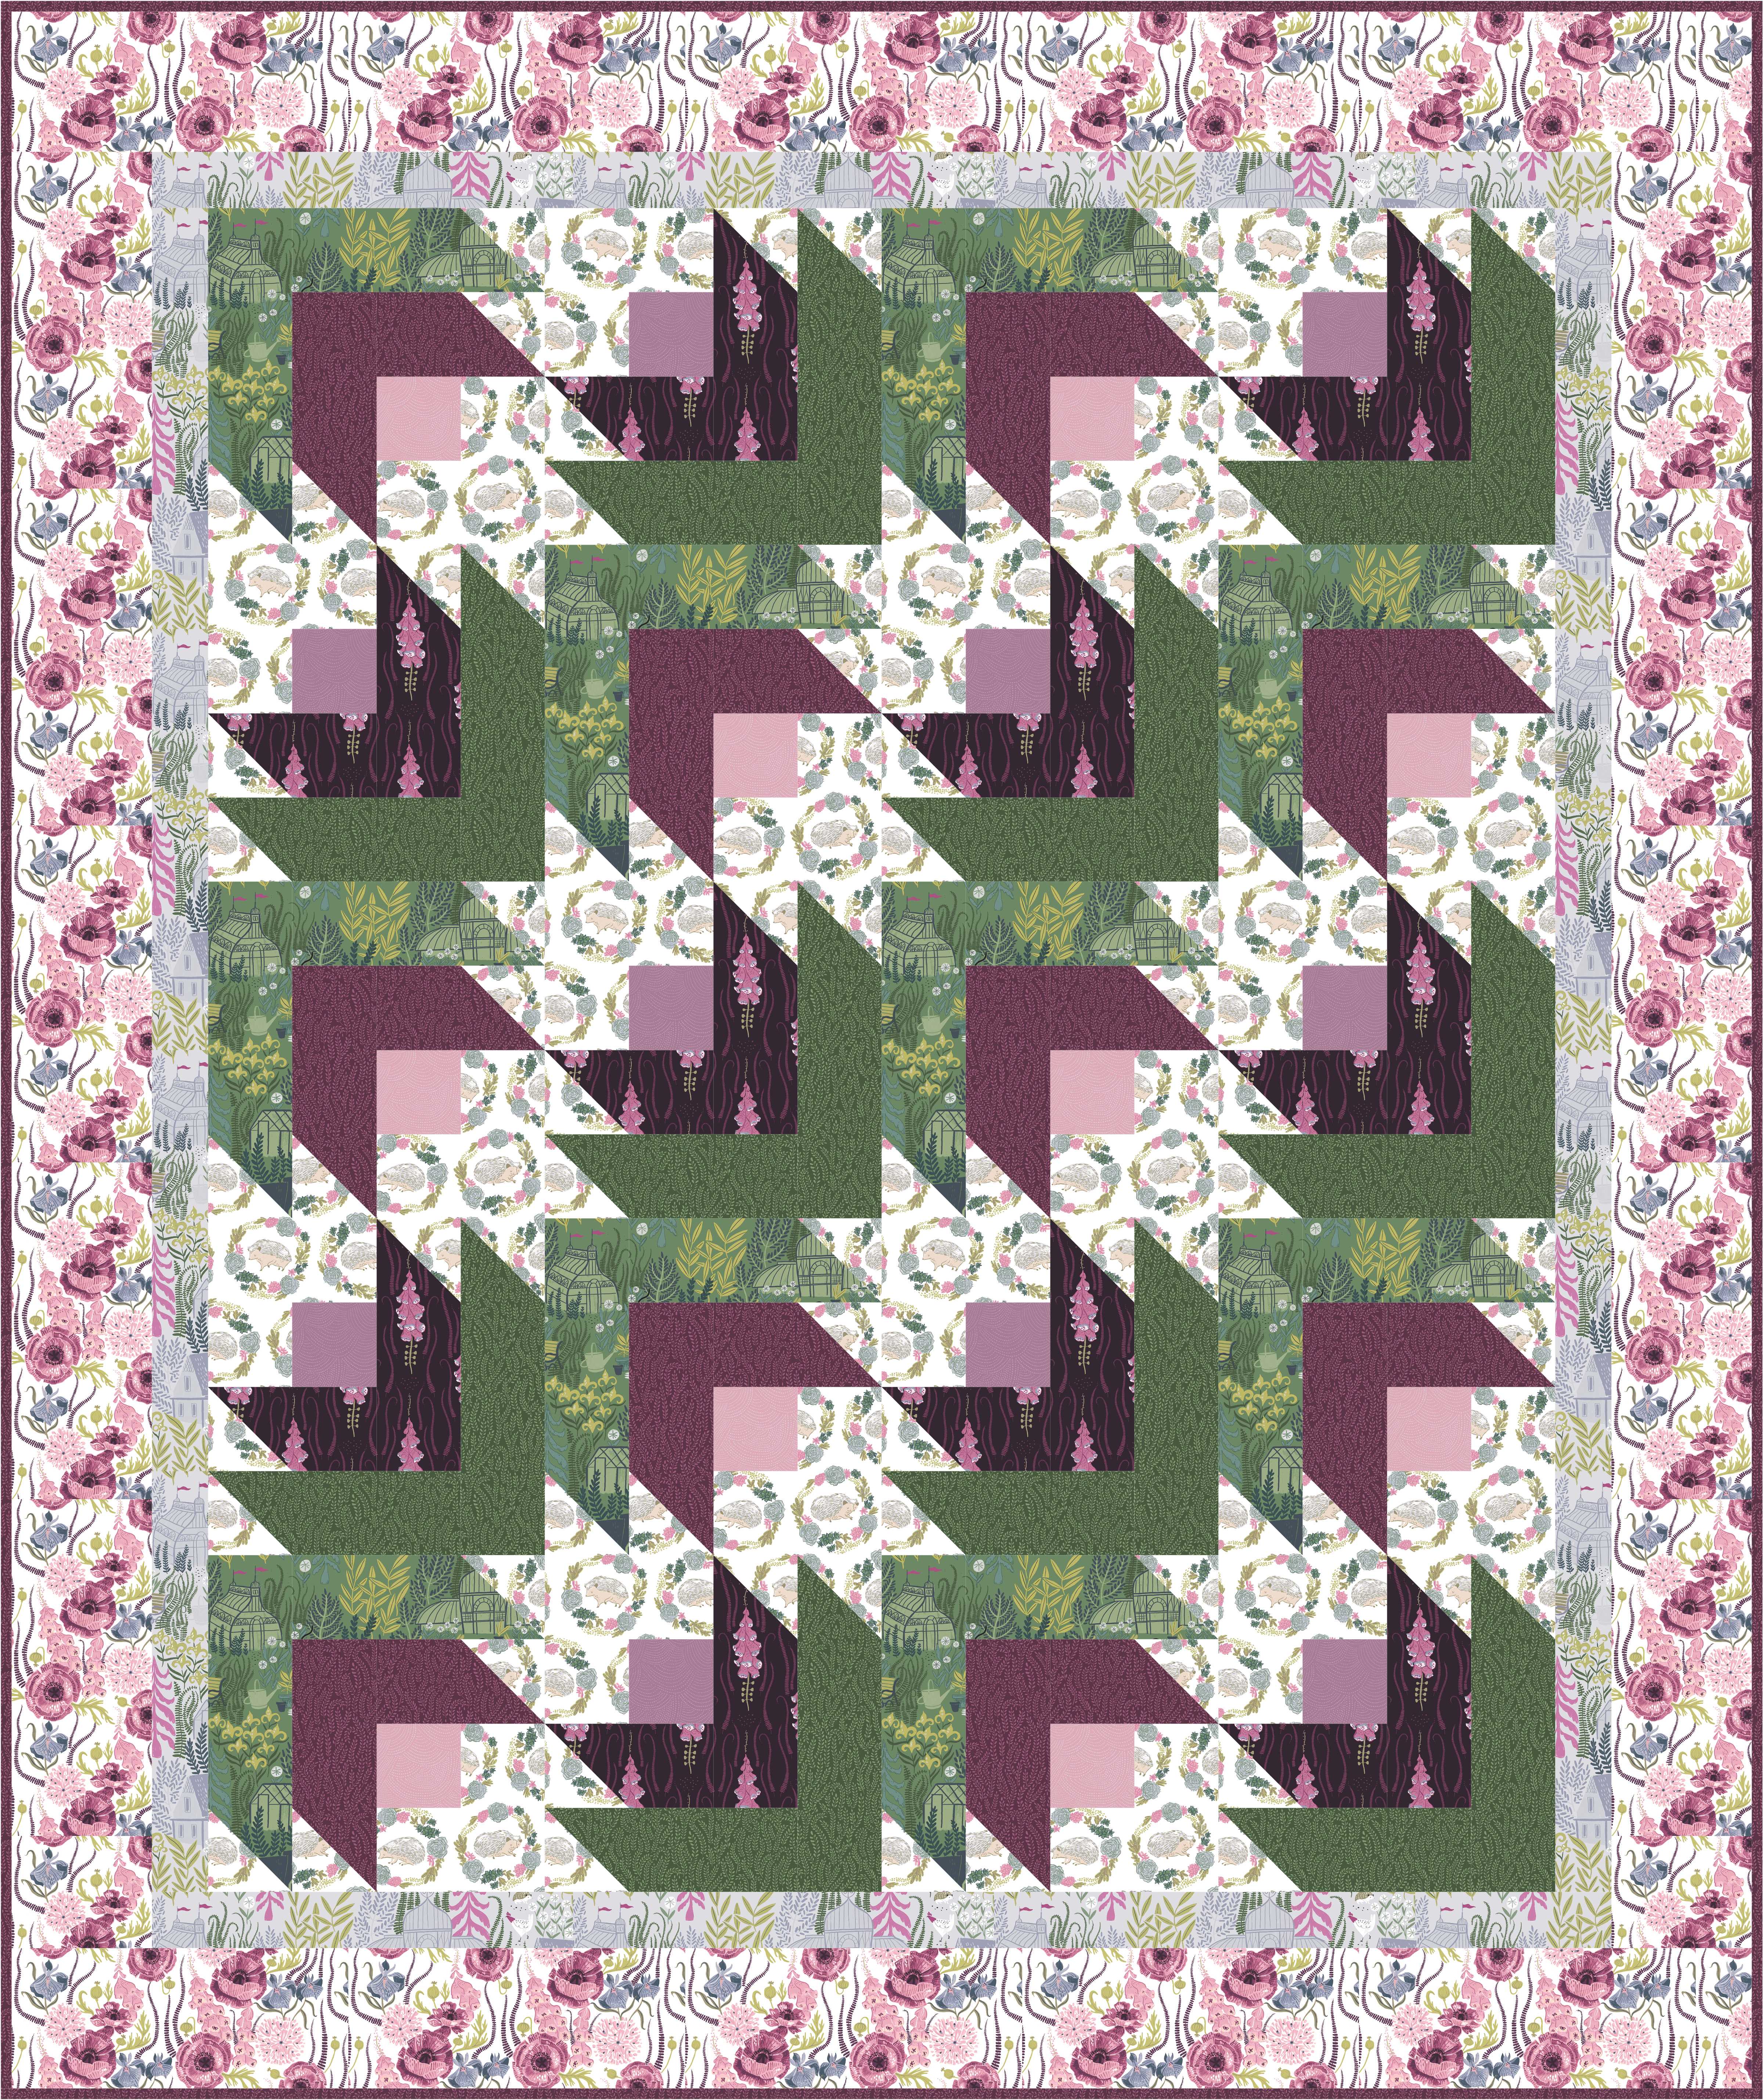


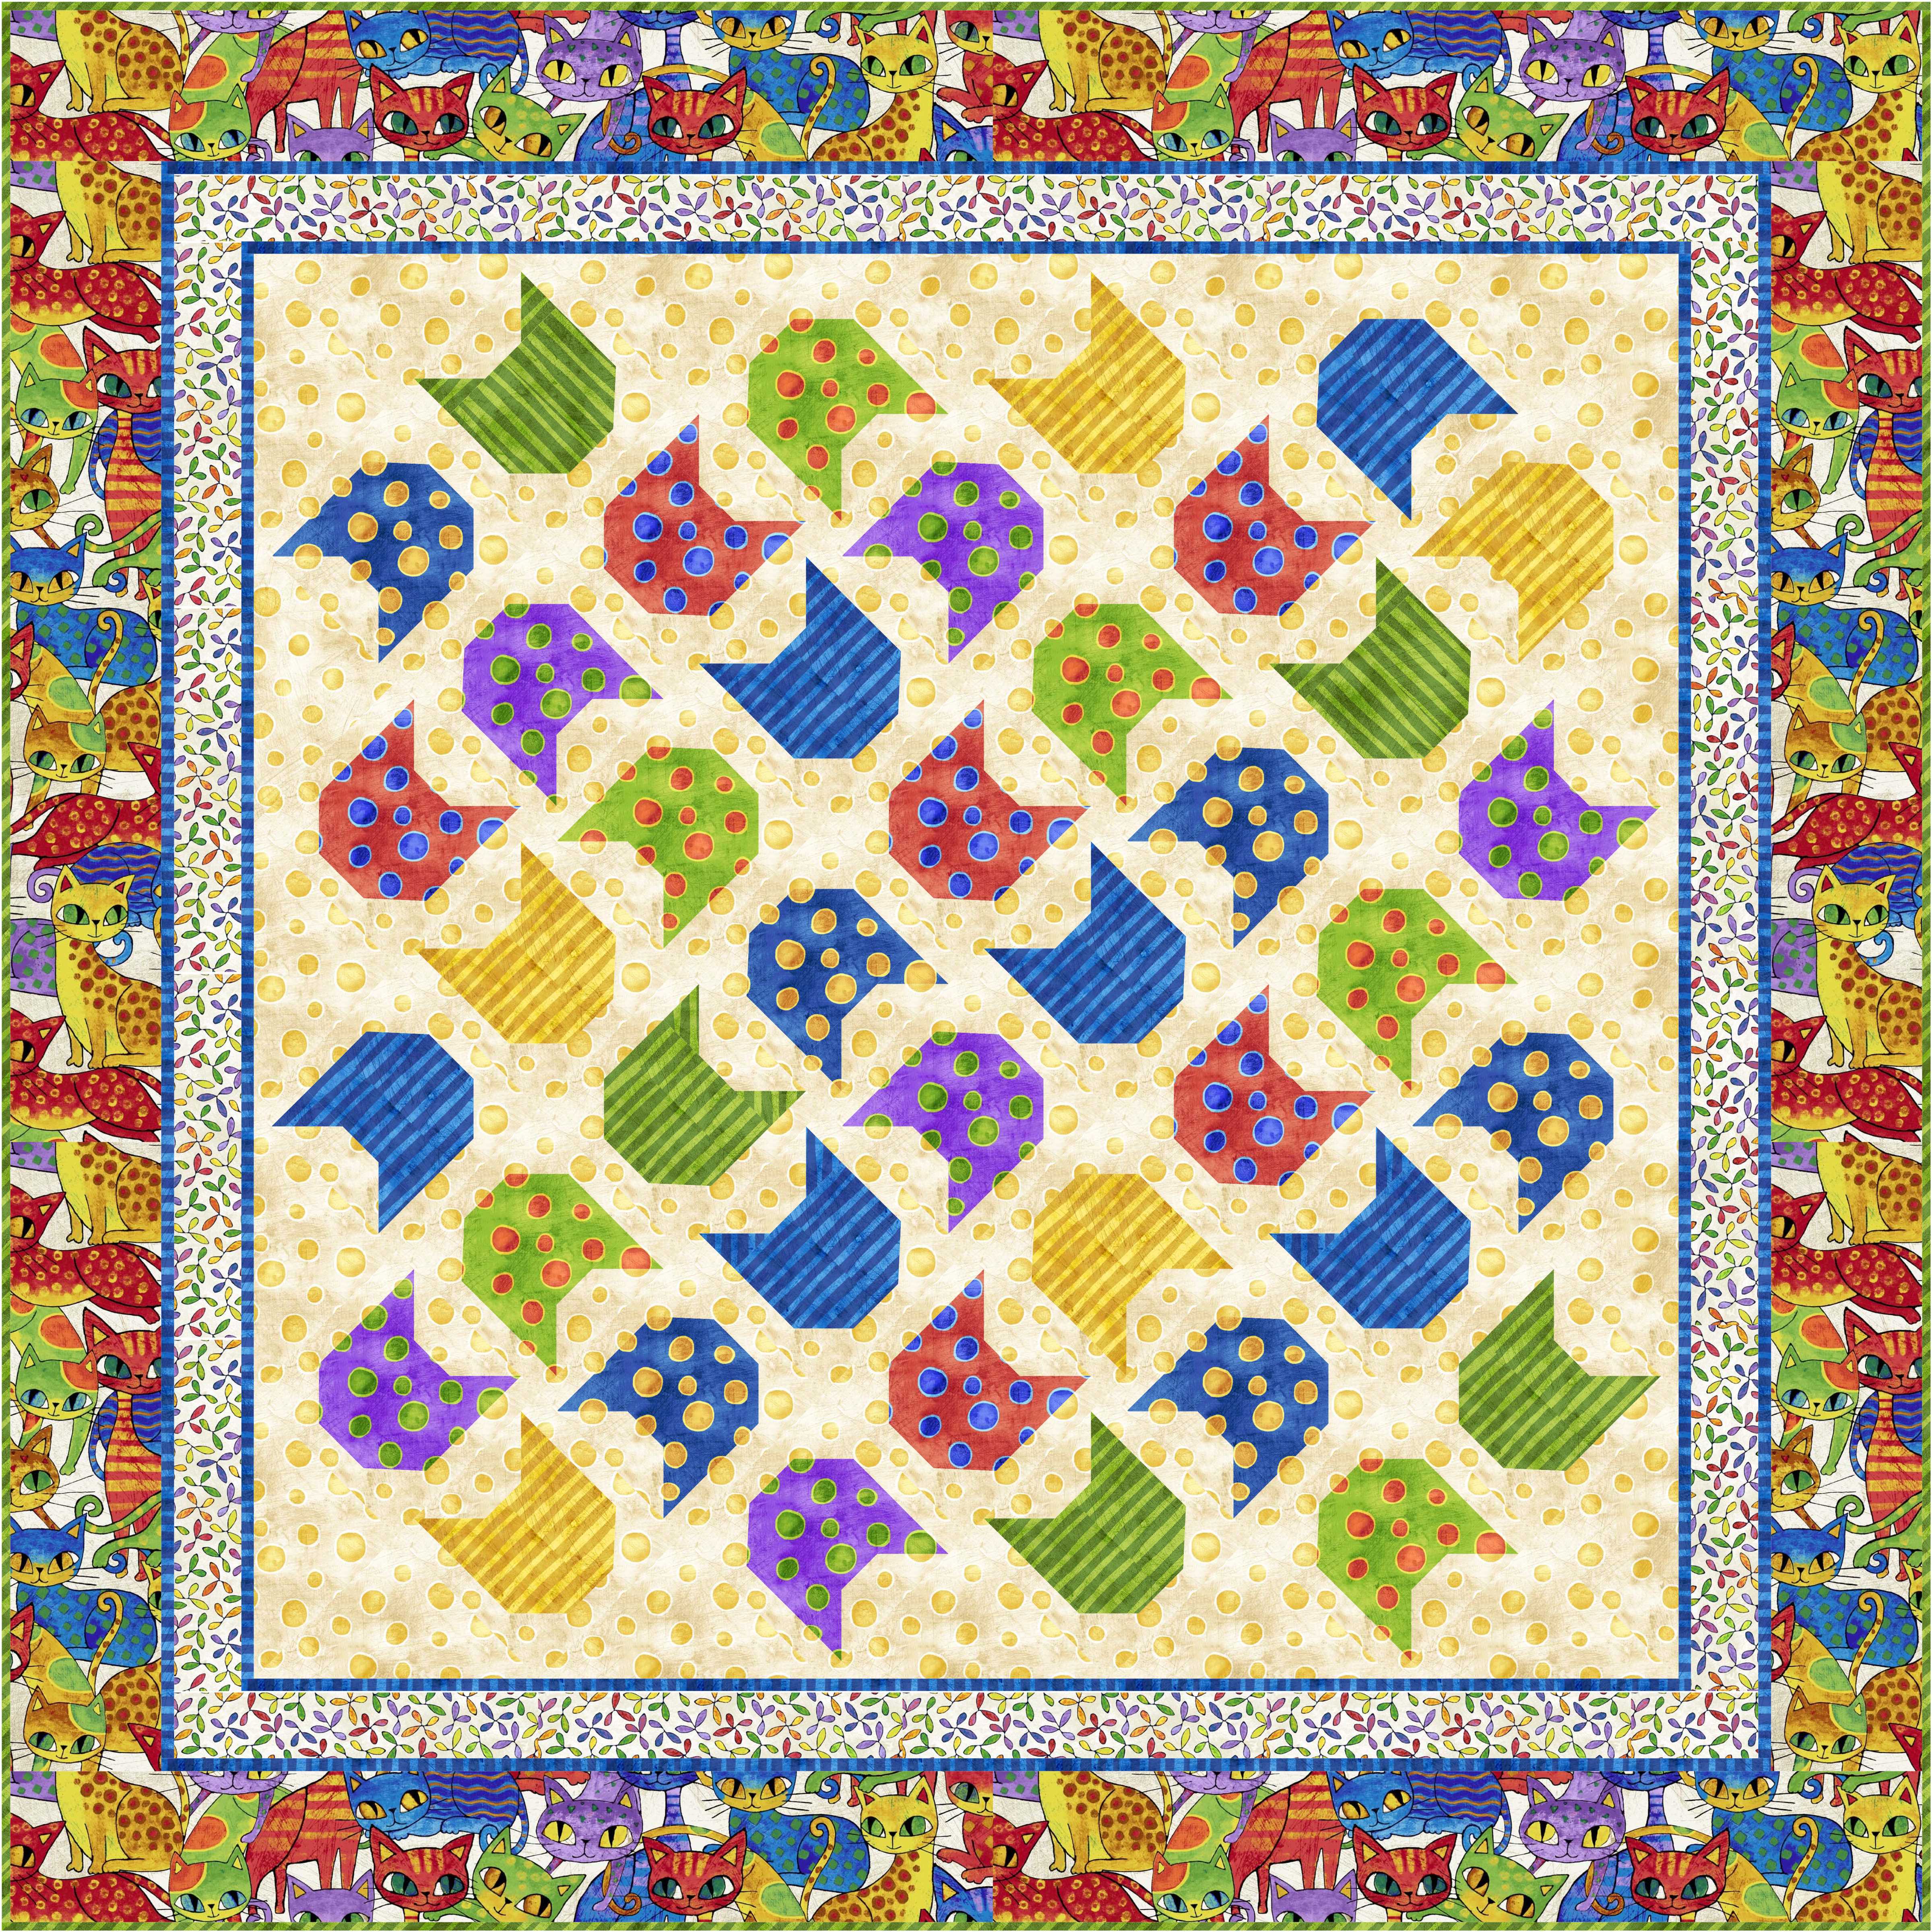
 The prints are showcased perfectly, and to soften the hard edges of the block shapes I used an all over swirling design for the quilting.


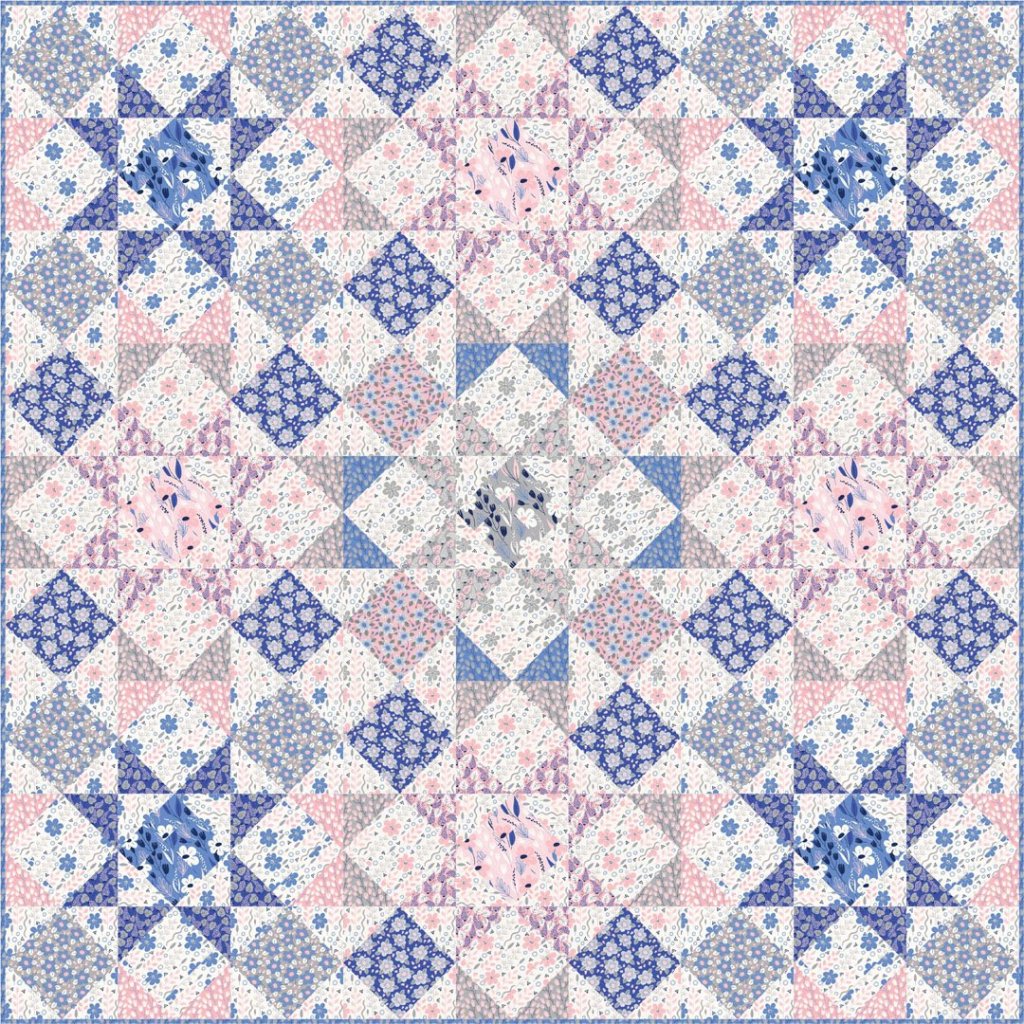
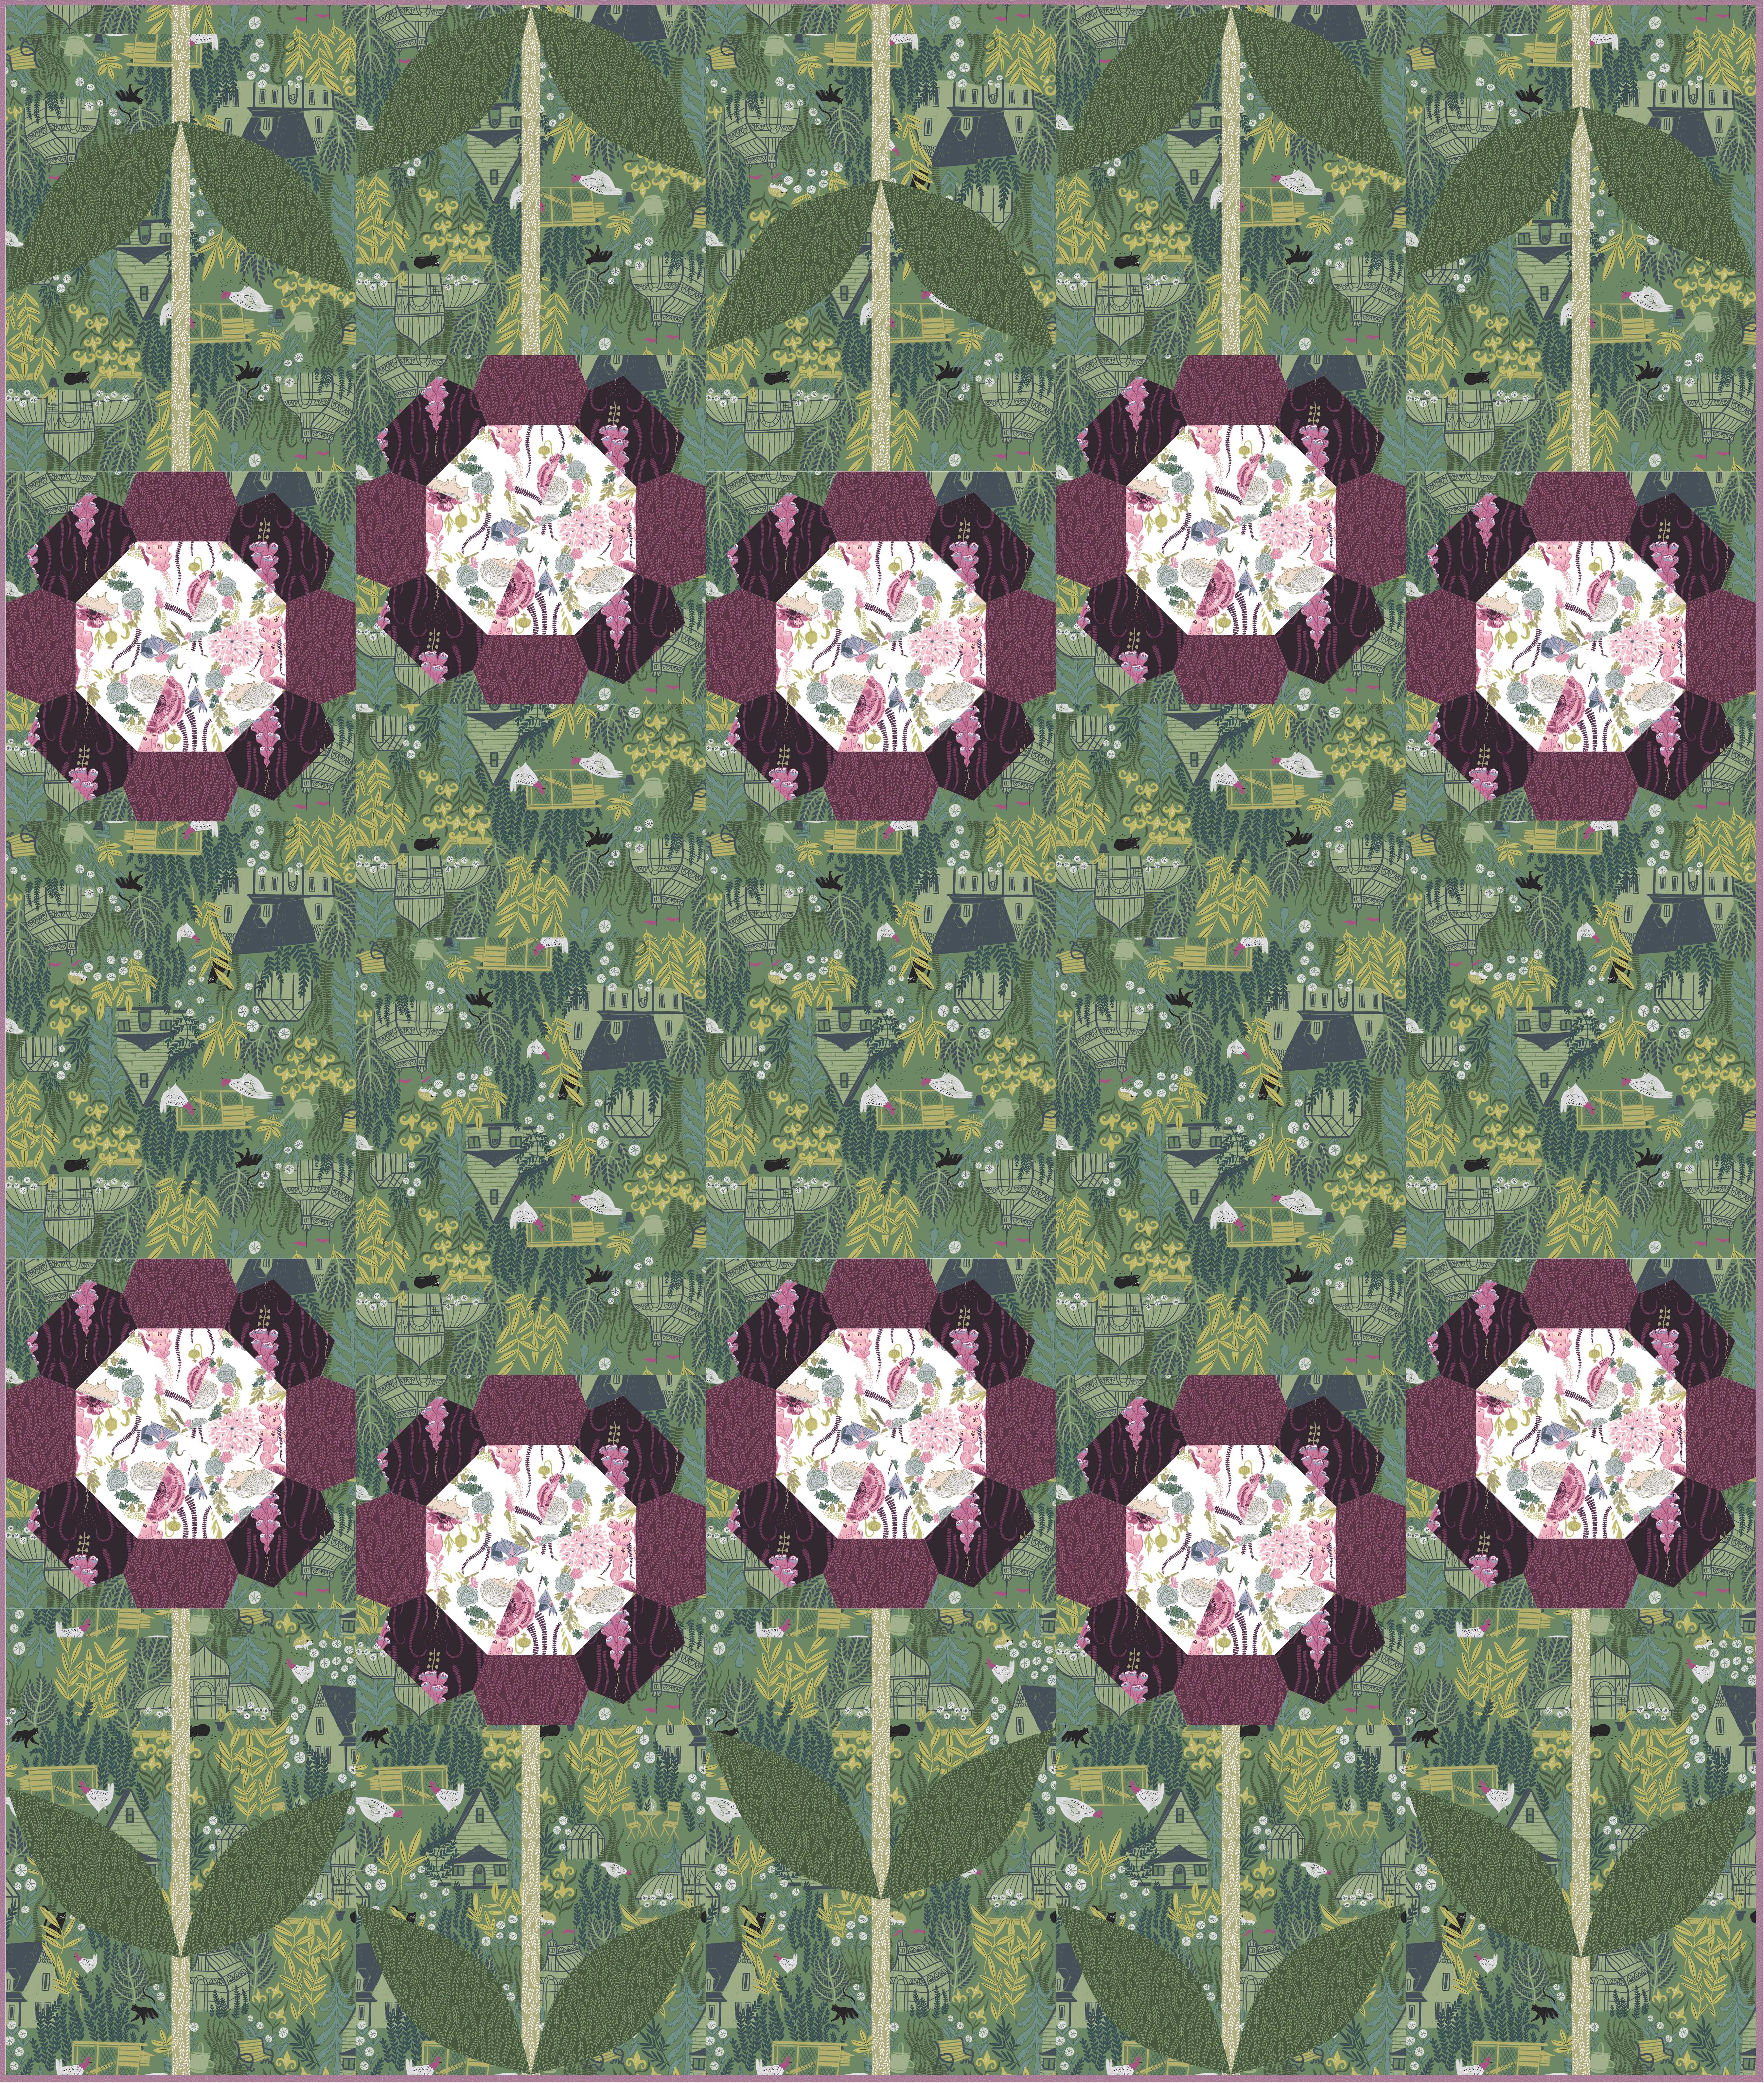
My favorite print is Posy Bunches – Abelia because oh.those.colors!