Going Up- A Free Pattern Download

Its been a long busy summer, with so many things that I just cannot share at the moment. So I thought I would carve some time out and do something that I could share with you!

Meet “Going Up”

IMG_4690

I used some of my favorite fabrics from my stash, and it was lovingly pieced by Holly Broadland @hollybroadland . The quilting is a medium grey thread, and Joan of Maple Leaf Quilters did a great job straight line quilting this on her long arm for me.

IMG_4687

Going Up is one of the patterns from the book that never was. I finally got motivated enough to illustrate it and try to take some pictures (solo outdoor pictures with a white quilt on a sick day? Yeah, that was really smart of me) But they turned out not half bad and I was rewarded with a visit from an actual real live bumble bee. I took more pictures of him than I did the quilt!


That bumblebee was exactly what I needed today. I have been sick for a few days, and feeling overwhelmed with responsibilities at home and at work. Watching that little guy, standing in the warm summer sun, I felt a peaceful calm fall over me. I was able to relax and enjoy the moment. It has been a dry, hot summer with severe drought conditions, so its no small miracle that we have these teeny tiny flowers for him to enjoy. Some shots even show the pollen as it bursts from the flower while he works.

I feel busy as the little guy for sure!

Going up is available as a free download from my Craftsy Pattern Shop. I have some other great patterns there too, so have a look around and enjoy!

Happy Stitching

StaceyDay_Logo


The Flashy Quilt- A free pattern

A few weeks back I was contacted by Michael Miller Fabrics, to see if I wanted to make up a free pattern for a new line of metallic prints, “Glitz Garden”.The fabrics are gorgeous and have metallic detail, which I love.  The catch was that they only wanted the “Glitz Bars” fabric in the quilt. Well, you all know how much I love a fabric challenge, so of course I said yes!

A little frame block and fussy cutting later, I came up with “Flashy”.

IMG_4459

The name comes from the layout, to me it looks like the flash of a strobe light or set lighting. I used the metallic bars (which are evenly spaced! woot!) to create a secondary pattern. The blocks all have mitered corners, so fussy cutting is really effective.

The quilting for this one gave me pause. I was determined to do an all over swirl, but Fashy was made when I was still learning the art of the long arm, and swirls were getting a little….boring. It needed something to break the swirls up and compliment all the striaght lines. So, add some straight line quilting!

This was the first quilt where I combined the swirls and straight lines, the motif I used in my Trade Winds quilt, only these lines went vertical instead of horizontal. It was liberating and a lot of fun. I used a white Aurifil thread, and it hides well over the colored fabric.

IMG_4462

The metallic details in the Glitz Bars are suprisingly soft and easy to sew with. The quilt comes together fast ( I made most of it at my frind Kristie’s house during one of our late night sewathons) and the white space means there are tons of quitling options, from simple to sublime.

You can find a permanent link to the pattern in the Free Patterns section of the blog.

Happy Stitching!

StaceyDay_Logo

It’s Worth WHAT?!?- The Feather Quilt and a retreat

Last weeked I had the immense pleasure of attending one of Krista @poppyprint wonderful Quilting By the Bay retreats. Its a 13 hour day full of sewing, great food, and great friends. I managed to find a sitter for the entire day, so I was off and away bright and early that morning.

SDQ retreat

A gorgeous view in beautiful Lions Bay!


As usual, I brought waaay to much stuff with me, but I would rather have it and not need it, than need it and not have it. My biggest goals for the day were to finish up a longterm project, by BTW challenge quilt for the Pacific NorthWest show, and do my Riley Blake MQG challenge quilt. If I had time, I was going to play with making some Anna Maria Horner feathers, since I love them so much! I was reminded of them from a recent Molli Sparkles post and decided I really wanted to make some at one point in the day.

SQD table

A table with a view, amidst my fellow VMQGers!


I did manage to get most of my blocks sewn together from the long term project, but got bored waiting for the iron, and decided to put the rows away ( I know, I know, only 5 seams left, it’s just not a priority right now) and star on my BTW challenge quilt. I made up a design using only the Black to White fabrics, in a very effective grayscale. I had purchased a whole bunch of Cotton and Steel Black and White fabrics, and ended up with none of them in the final design for the quilt. By the time I finished sewing up the 256 Half Square Triangles, I was pretty bored of that too. I just wasn’t feeling it (To put some perspective on my strange mood, this was the first time in almost 2 weeks that I actually spent any time on my machine. I was burned out, and feeling it. I made a skirt at some point in there, but it doesn’t really count. Garment sewing is a whole ‘nother creature from quilting).

SDQ Trimmings

Holy Trimmings Batman!


I had a big, bright bundle of Hadley by Denyse Schmidt in my bag, and the templates and instructions for the Anna Maria Horner feathers, and I decided to play around with that. Only, as I was digging for the big, colourful bundle, I instead pulled out the Cotton and Steel fabrics that didn’t make it into the first quilt, paired with a lime green C+S basic (Dotties Cousin is the name of the print). It hit me then, that these particular fabrics together would look exactly like seagull feathers! Living on the coast, seagulls are a stable fixture in the environment. At the beach, in the parking lot at the store, or pretty well anywhere there is a chance of free food. Especially along the pier and beach at White Rock, which is a favorite spot for us.

A table full of feathers

A table full of feathers

I worked my way through the pattern, made a couple tweaks, and had enough strips cut from my fat quarters to make 11 feathers. Perfect for the baby quilt size. I had just enough white to make the surrounds, but had to borrow the solid black for the insides because I mistakenly grabbed an old poly-cotton blend that just didn’t work with the other fabrics (Thanks @FelicityQuilts!). I finished sewing the feathers together at home the next morning, added strips to the sides to make the quilt wider, and then backed it in another C+S print. The next day I booked my time on the longarm, and got to it! I chose a pattern of curved/straight lines and bubbles. I believe its is called Effervescent? Either way, it’s from the book Step-By-Step Free Motion Quilting by Christina Cameli.

Day.Stacey-Feathers-FULL

Feathers (Unofficially called Squack!)


IMG_4567

Quilting detail! This is one of my new favorite background fills

I color bombed the binding, and then hand sewed the whole thing, label and sleeve notwithstanding. I love my Feather quilt so much, I decided to completely forgo the original design and use this in place as my BTW entry. As I was filling out the entry form, I got to the section that asks if you want to sell your quilt. I decided to use the Molli Sparkles spreadsheet to see just how much, exactly, this quilt was worth.

Feathers Cost Sheet

HOLY CRAP! ITS WORTH WHAT!!!!

Let me clarify a couple points in this spreadsheet. I am an award winning quilter, an author, teacher and lecturer. I have more than 15 years of experience quilting. $33/hour is reasonable for a skilled and experienced artist. Quilting cotton in Canada is expensive, with solids starting around $10/yard and designer prints upwards of 17.99/meter, and Cotton and Steel in particular is at the upper end of the scale. The shop I purchased them from charges 16.99/yard, and I only charged for the actual amount of fabric used. The longarm rental is a flat rate of $60/day. There technically would have been the cost of babysitting and the retreat in there, since thats where I was sewing, but I didn’t include it. Then there is the 23% that the PNW takes as commission for selling your quilt (12.5% for two NFP entities) so that 30% markup is really only 7% for myself. Not much, considering most businesses mark up their products 50% or more ( I worked at a shoe store once, and made the mistake of checking the invoice. Our cost, $5.00, our retail price, $89.99, that’s an 1800% markup!) And Canada Post is mega expensive, even with my discount card, and that cost is a low estimate based on what it usually costs me to package and send off quilts to the lower US.

I never would have put this quilt at almost $900, but there it is! Personally, when I make a quilt for myself and as gifts, I don’t take cost into account. Especially with gifts, because friendship is priceless. But if you go and read through the We are Sew Worth It series from Hunter Studios, Molli Sparkles, and Sew Mama, Sew, it starts to make sense. When someone seeks out out to request a quilt, you are spending a lot of time, energy and money to make said quilt. Our time and skill has worth!

StaceyDay_Logo

2015 Gathering of the Guilds

Two weeks ago in April I was honored to be one of the featured speakers at the 2015 Gathering of the Guilds in Osoyoos, BC. It was an amazing day, filled with laughing, quilting, shopping, and fun. I got to meet so many amazing people!

The Osoyoos Quilters Guild hosted the annual event, and they did an amazing job. From the charity blocks to the table settings, everything followed the theme of “Black Tie Affair”. Everyone who attended wore black and white, the charity quilt blocks were black bowtie blocks, and each table setting had a handmade basket in black and white filled with yummy treats and healthy snacks. It looked awesome!

IMG_20150425_104410

I was given a display table right up front. I did not expect it to be so large OR front and center, and had a mini panic attack. Luckily my mom is super awesome (and really should be an event planner) and she helped me pull off a great looking display of patterns, quilts, and little ceramic quails. I am not ashamed to admit I have been coveting those quails for years….

IMG_20150425_084759

IMG_20150425_084822

I handed out buttons, cards, and sold patterns in the morning. I talked with lots of quilters from all over the BC Interior, enjoyed a yummy breakfast of homemade muffins and pastries, and met fellow presenter and Canadian Quilters Association Instructor of the Year, Dianne Stevenson of Black Crow Quilts. She is a very talented, very knowledgable, and very inspiring lady. Dianne was the afternoon presenter, and her lecture, “Feed Sacks and Fancy Things”  was so interesting I forgot to take pictures. She had some pristine feed sacks that looked brand new with her, as well as a collection of vintage quilts, feed sacks, and even an antique barrel label! Also, we found out that Dianne and her husband BIKED ACROSS CANADA five years ago! She learned a lot about Canada’s history in that trip, and it sounded amazing. I can barely bike to work and it’s only three blocks away…


IMG_20150425_084907

Me and my display table


I presented my trunk show in the morning. My mom and grandma were in the very front row taking pictures and (silently) cheering me on. I talked about my journey as a third generation quilter, my inspirations, my achievements and my failures (which we all know are just learning experiences). I was able to finally show the quilts from the book that never was and talk about how that experience was a defining point for me as a quilter. I had almost 25 quilts in my trunk show, and as it turns out, all but 2 were made in the last 18 months. There were even quilts that I wasn’t able to show, due to the timing of quilt market, and I realized just how much I actually do.

There is a reason its called a trunk show

There is a reason its called a trunk show

At lunch time I went upstairs to visit the merchant’s mall. I was delighted at the number of quilt shops in BC’s Interior, especially the new ones that have opened in the last couple years. It shows that quilting is alive and well in this part of our beautiful province. I picked up some thread to try on the long arm from Peach Tree Quilts (I also cleaned her out of Mochi), and a curated bundle of fat quarters from Heart n’ Sole Quilts just because it was pretty (Bonnie and Camille with Joel Dewberry is a match made in heaven)!

IMG_20150426_192216

IMG_20150426_192652

I also stopped by to chat with Barb at Poppins Quilt Parlour. Poppins and I have a long history together, and every time I go in there (which is really maybe twice a year) Barb remembers me every time! Poppins chose my quilt, The Long Road Home, to compete in the Canadian Cottage/Trend Tex Challenge. Each shop could only chose one quilt per category, and mine ended up winning first place. Now I am going to be teaching classes there, and she even had these great little cards announcing the classes in her booth! Star of the West and Sherbert at the beach are the two classe I am teaching. You can find more information under the Calendar tab of the blog =)

IMG_20150425_125733


The day was amazing, and made a wonderful end to a very, very busy month. Thank you so much Maureen Wood and the Osoyoos Quilters Guild, for having me!

StaceyDay_Logo


2015 Pantone Quilt Challenge- Marsala Edition

Well, you all know how I felt about Marsala when it was first announced.

BUT I love a good challenge, and I have always wanted to participate in the Pantone Quilt Challenge hosted by Anne @Play-Crafts and Adrianne @On the Windy Side. I missed out on Radiant Orchid last year ( I had all the fabric and forget why it never got done), so Marsala it was.

Marsala button

I wanted to try and use colors that maybe weren’t the easiest to match to Marsala. I wanted to try and bring out some of the other undertones you find with it, while keeping it warm and friendly. I bought a bundle from Hawthorne Threads, and then added colors to my shopping cart until they looked good on screen. Of course thats always a gamble, the screen won’t show how bright or vibrant a fabric is, but I lucked out and got exactly what I thought I was getting. Woo hoo!!

And then it sat. and sat and sat and sat and sat. AAAAAAAAAND SAT. I had too many ideas to try and time kept on slipping away. I started to panic.

When I finally realized I was overthinking things, I took a step back and started looking through some of my books. I came across the pattern “In the Throne Room” from the book Modern Rainbow by Rebecca Bryant and experienced a true blue AH-HA! moment. I didn’t make it exactly, but you can see the influence in the layout.


Presenting Trade Winds.

Image1

Trade Winds is 42″x55″. For the background I cut into my huge stash of Cotton and Steel Dotties Cousin in Linen. I think it is the perfect neutral and gives a really natural warm glow to the quilt. I picked eight of the Marsala fat quarters based on their value from darkest to lightest and paired them with the jade and tangerine. Those two hues are very very different, but work so well to pull out the earthy tones in the marsala. I also arranged them by value, so the bars fluctuate from dark to light to dark a pair of times across the strip. In the spirit of doing things that are a challenge for me, I left a TON of negative space. I also decided, after laying the strips out, that alternating the direction of the prints really made the quilt interesting, like a back and forth between the two groups of Marsala at either end. IMG_4457

For the quilting, I took a chance on a variation of a design I saw on 13 Spools. Amy Garro has some great tutorials for quilting, and my favorite is her Matchstick feathers.  I am not quite at feather level on the long arm, so I thought I would do some freemotion large swirls, in part to contrast with the pieced bars, and in part to start getting used to the control it takes to really reign the curves in. As I went, I decided to add some horizontal spaced lines to compliment my spaced bars and add the contrast to the swirls. It isn’t matchstick, but the effect is what I wanted,and the result looks like a cloudy sky with the wind blowing between them. The almost Oriental color theme, the back and forth of the colors,  and the quilting stuck the name Trade Winds in my head. I think it really suits. I used Aurifil 40wt in Sand for the quilting, and the darker thread did wonders for the quilting!

Of course I Marsala bombed the binding with my favorite arrowhead print, which I also alternated the direction of as a nod to the bars.

This quilt is very different for me, with a lot of super bold elements, and I really love it. I am also happy that I was able to use a unique color pairing to bring out the best in the Marsala. I actually kind of like it!

Linking up with the 2015 Pantone Quilt Challenge.

Happy Stitching,

StaceyDay_Logo

Lanterns- A Tutorial

A few weeks ago I was invited to participate in the What Shade are You Blog Hop by RJR fabrics. I am always up for a blog hop, it gives me the chance to bring some of my Quilt Design a Day designs to life AND give away some great fabrics to a lucky reader!

Blog Hop 2015 logo C small

Back in December one of our inspiration photos, called Sparks and provided on a weekly basis by a QDAD member, really struck me with its colors and intensity. Taken during Snowmageddon, that particular QDAD design I had flagged in my head as one to do up as a pattern. The timing was perfect, as RJR sent the invite not a week later, and that design came to mind.

10363836_10152410670582294_7472710089444888399_n
QDAD Spark Photo Courtesy of Alyson@ The Hasty Quilter
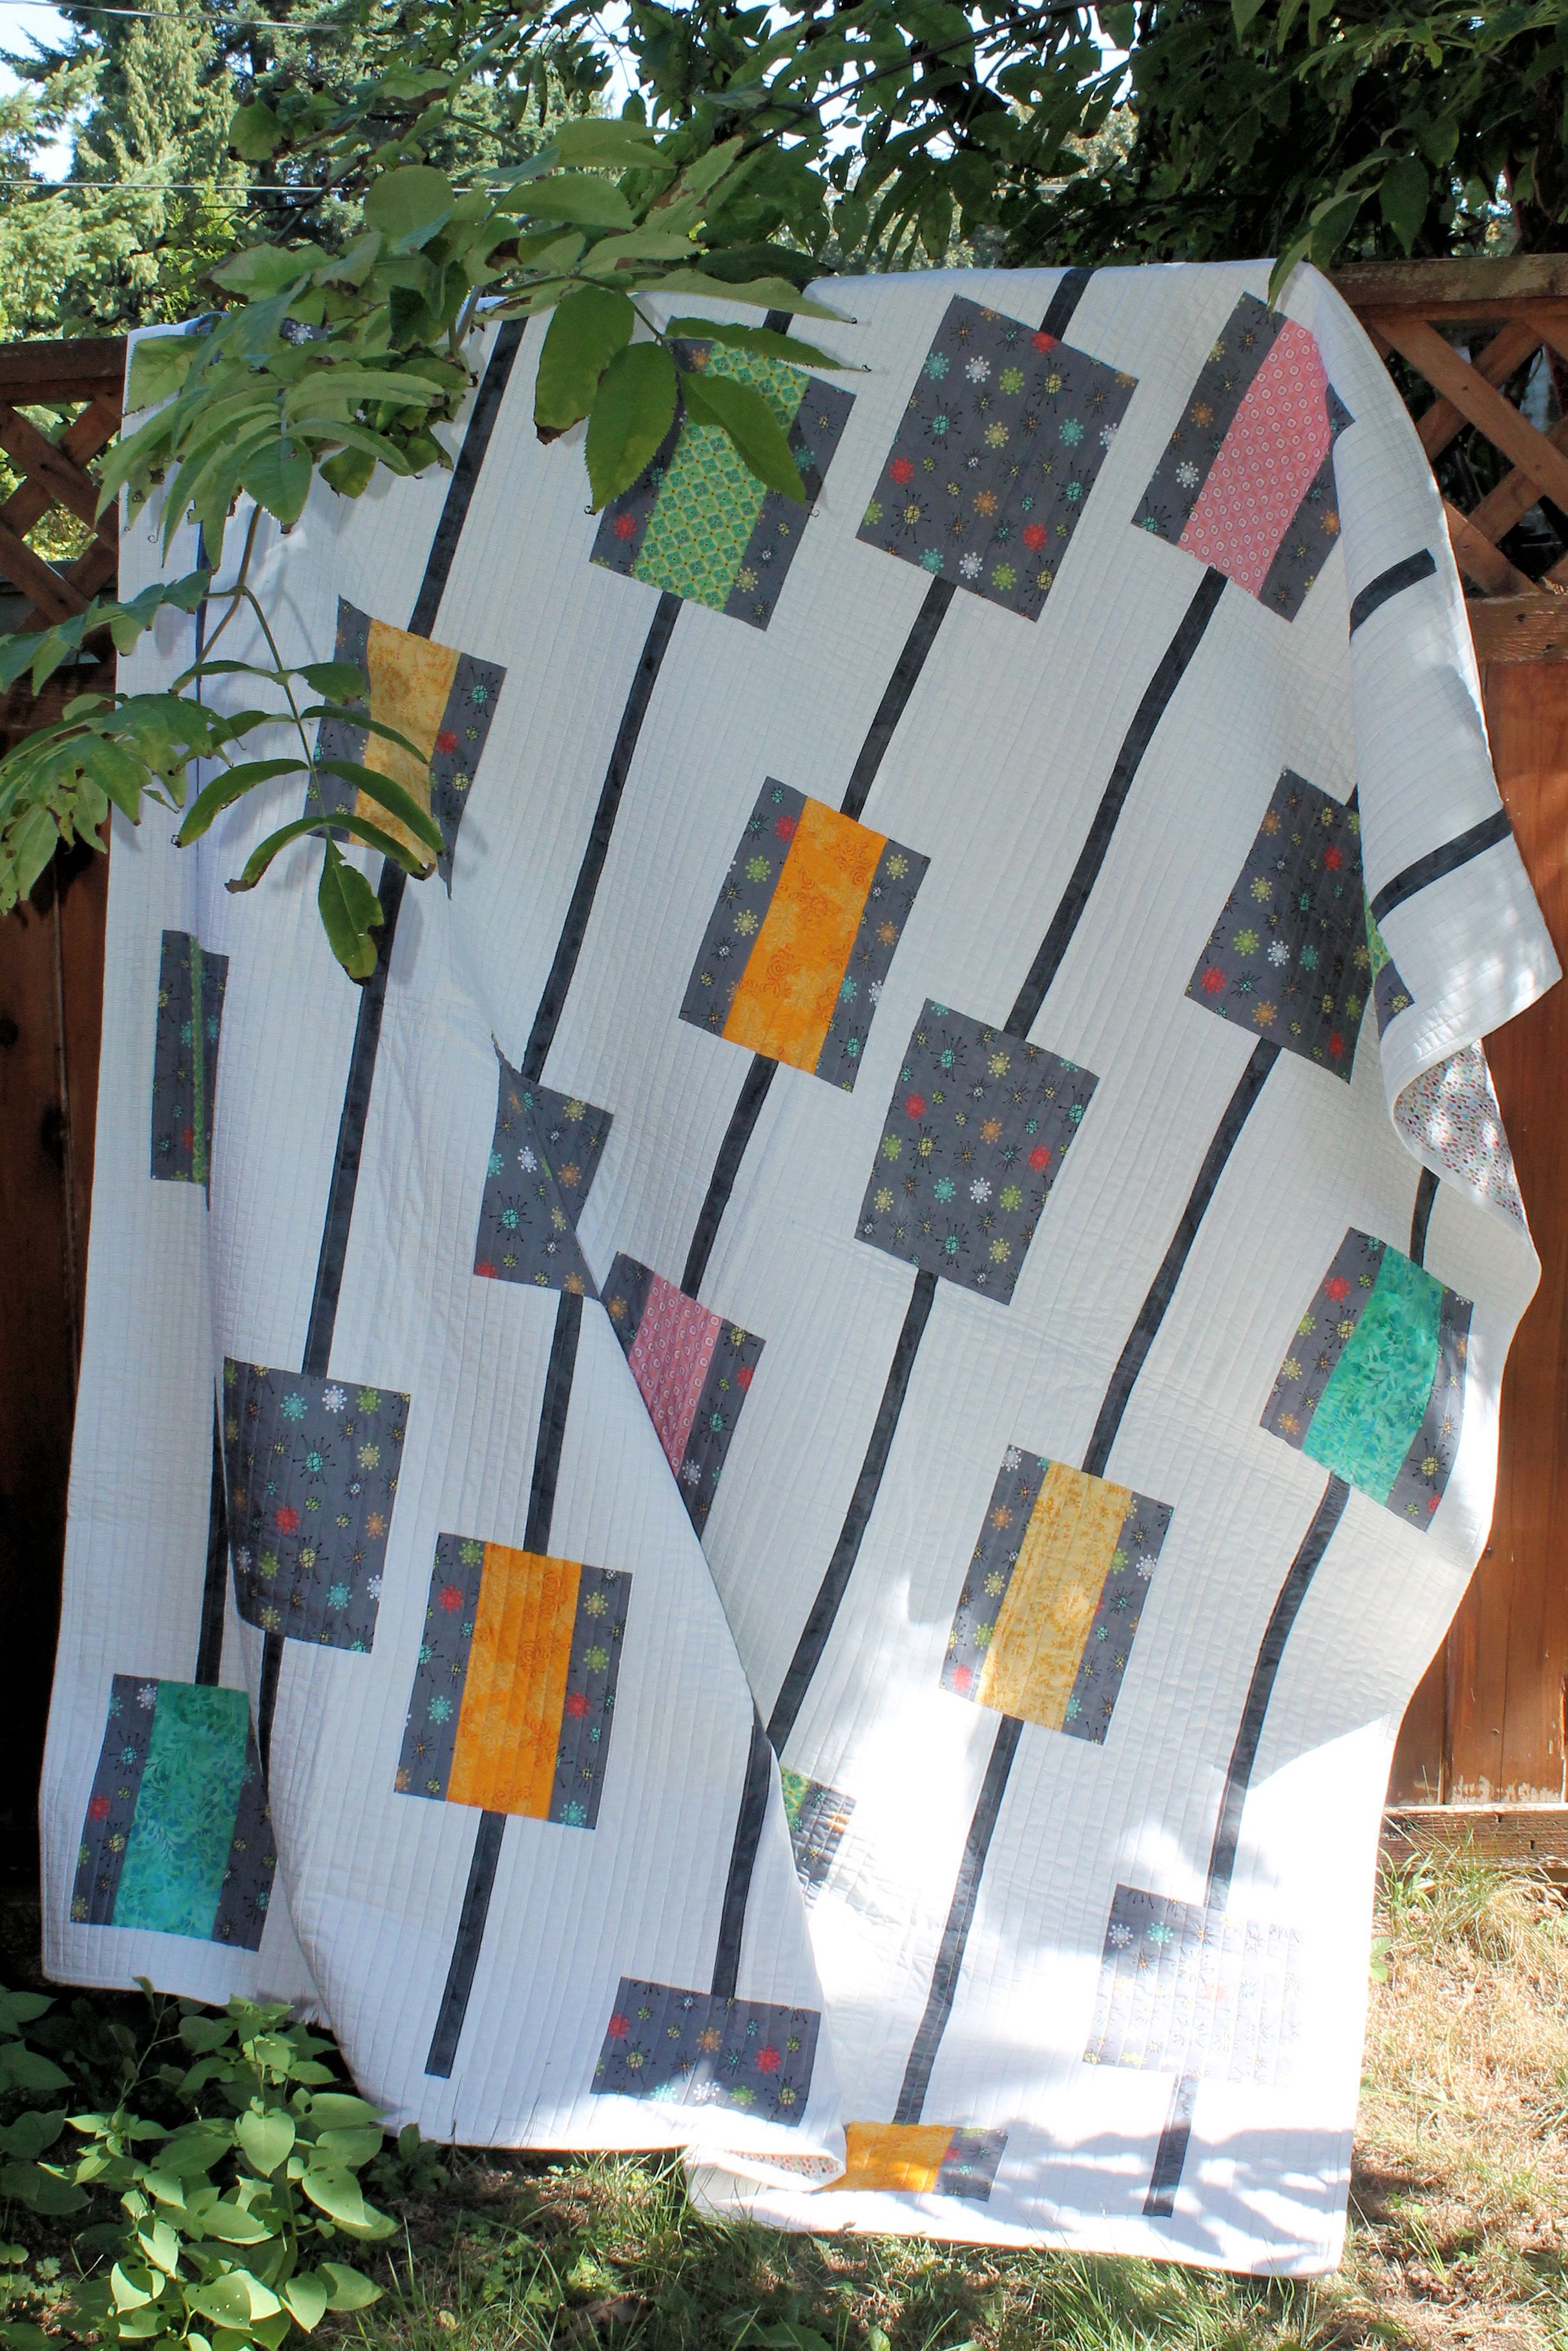
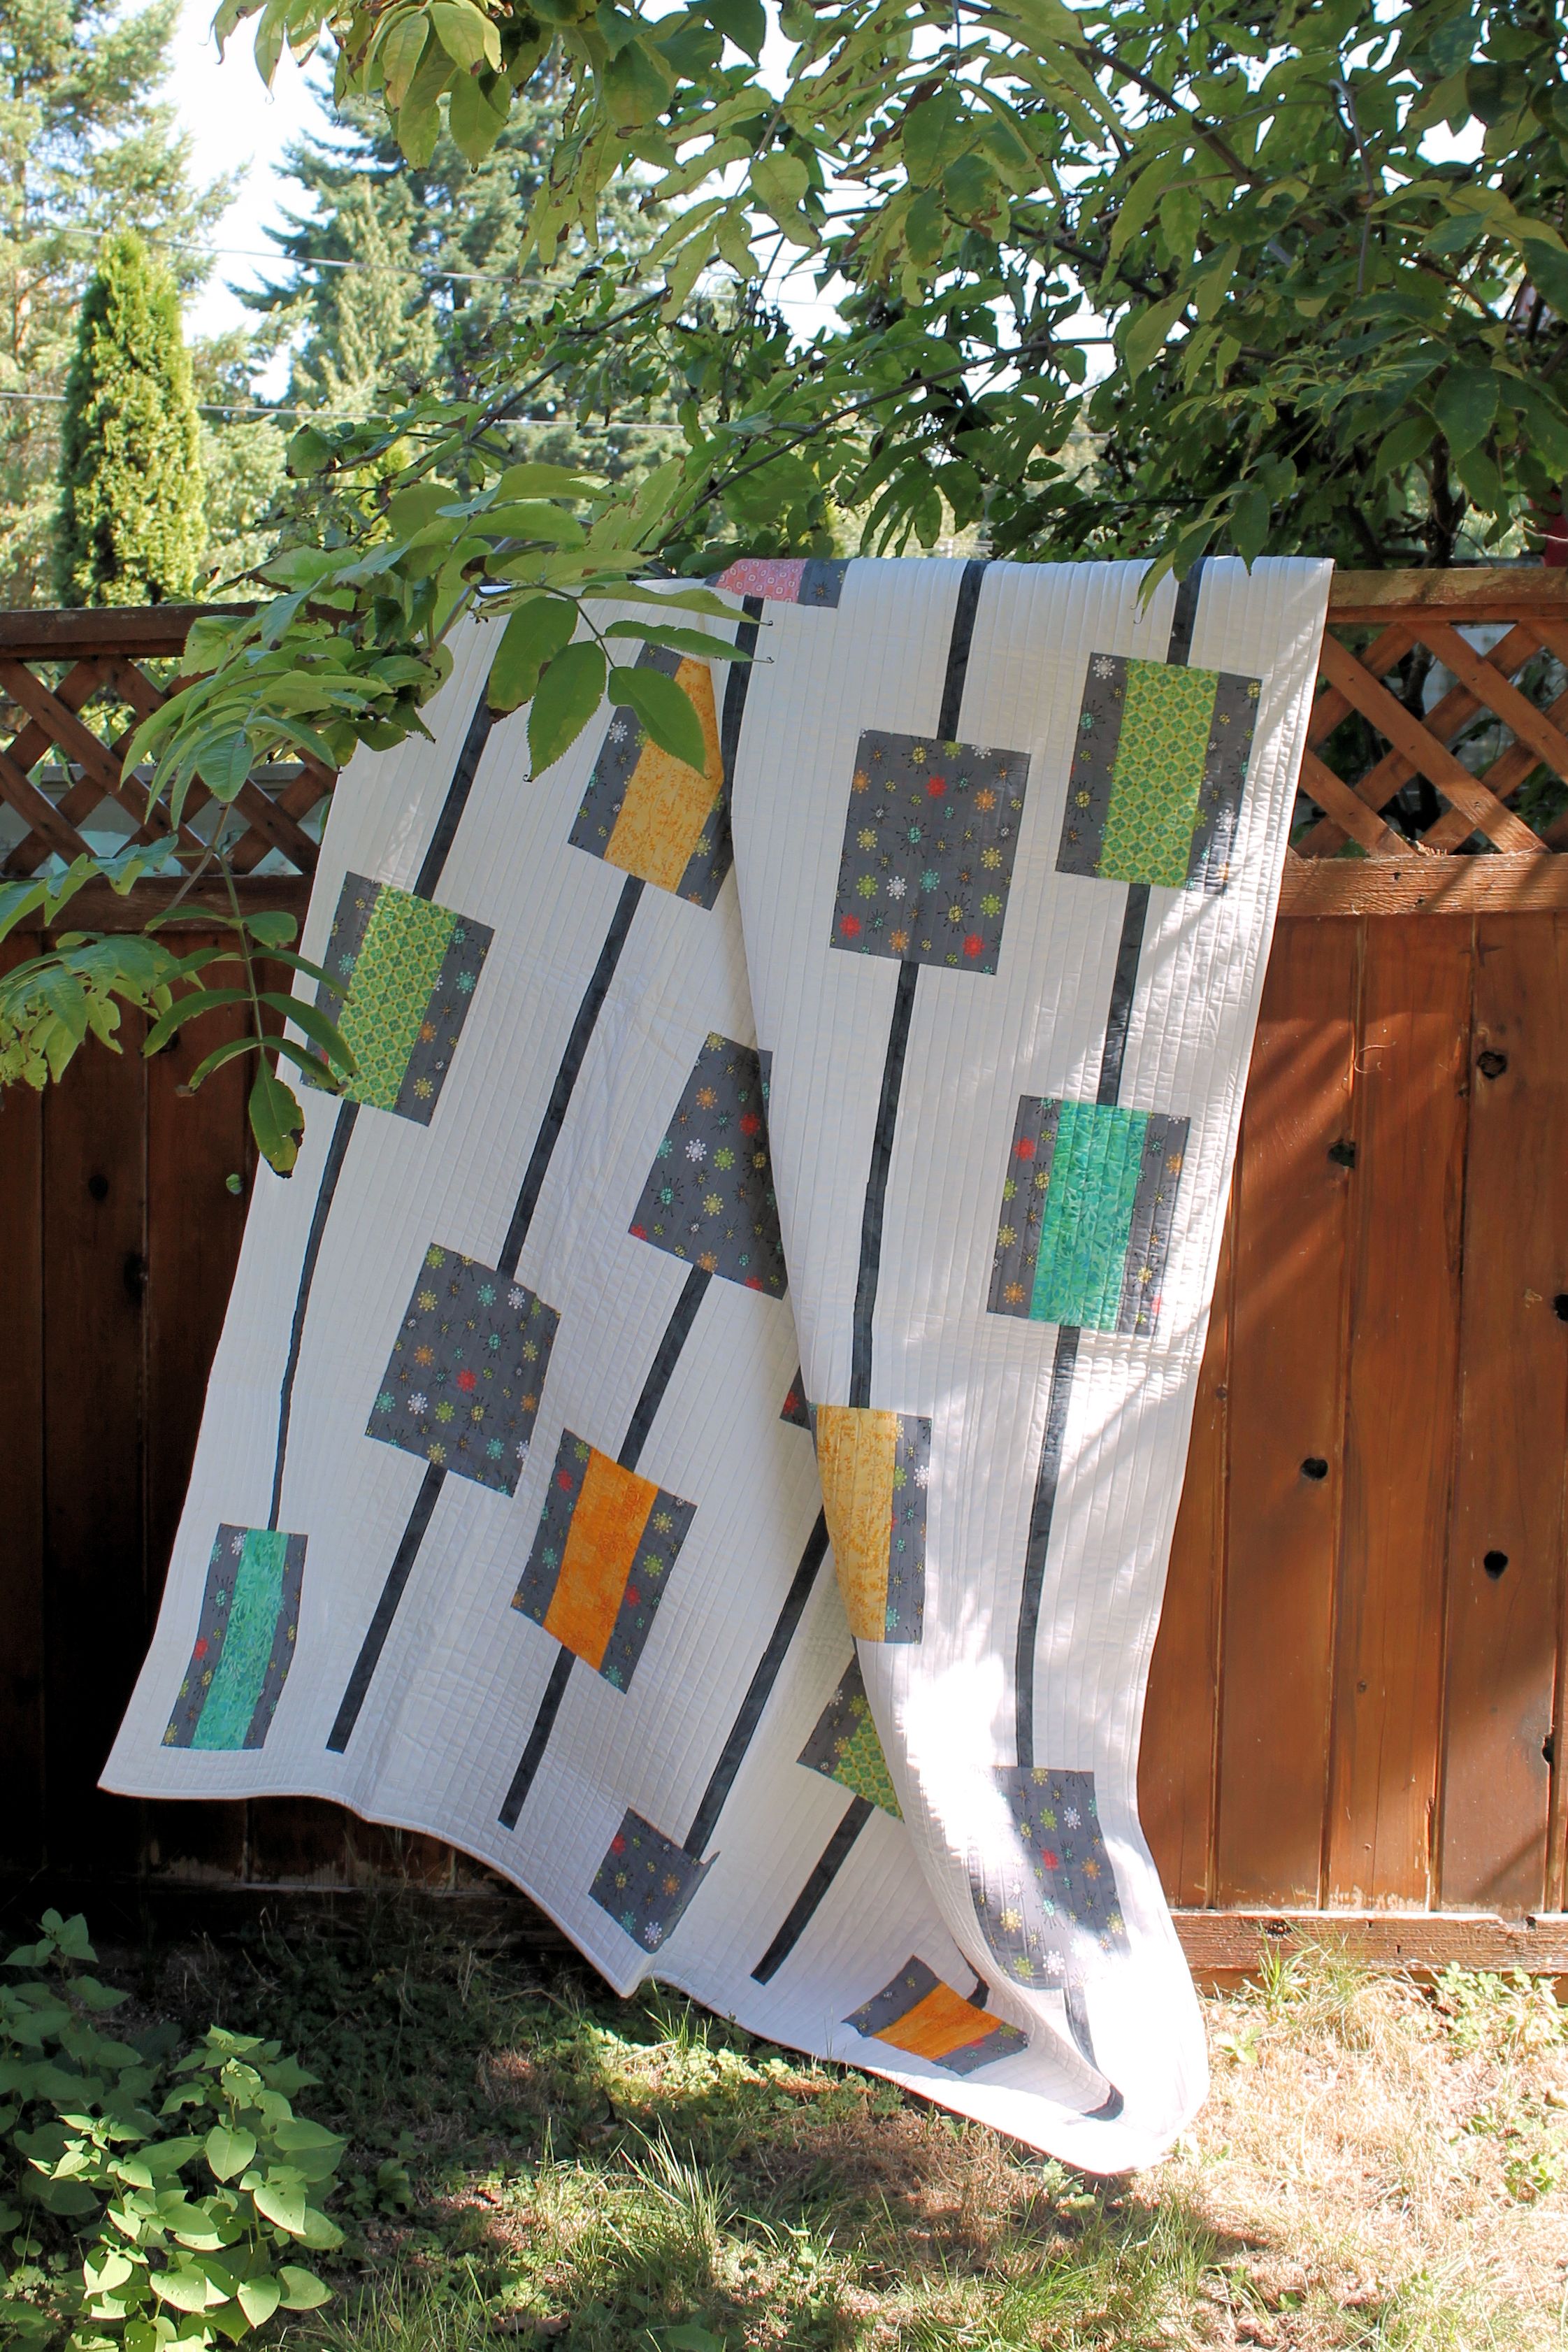
Lanterns

Lanterns

I had a lot of fun narrowing down the colors to use from the Cotton Supreme Solids. RJR has 149 solids colors to choose from in the Cotton Supreme line. They have a beautiful drape, weight, and feel to them. They might actually become my new favorite.

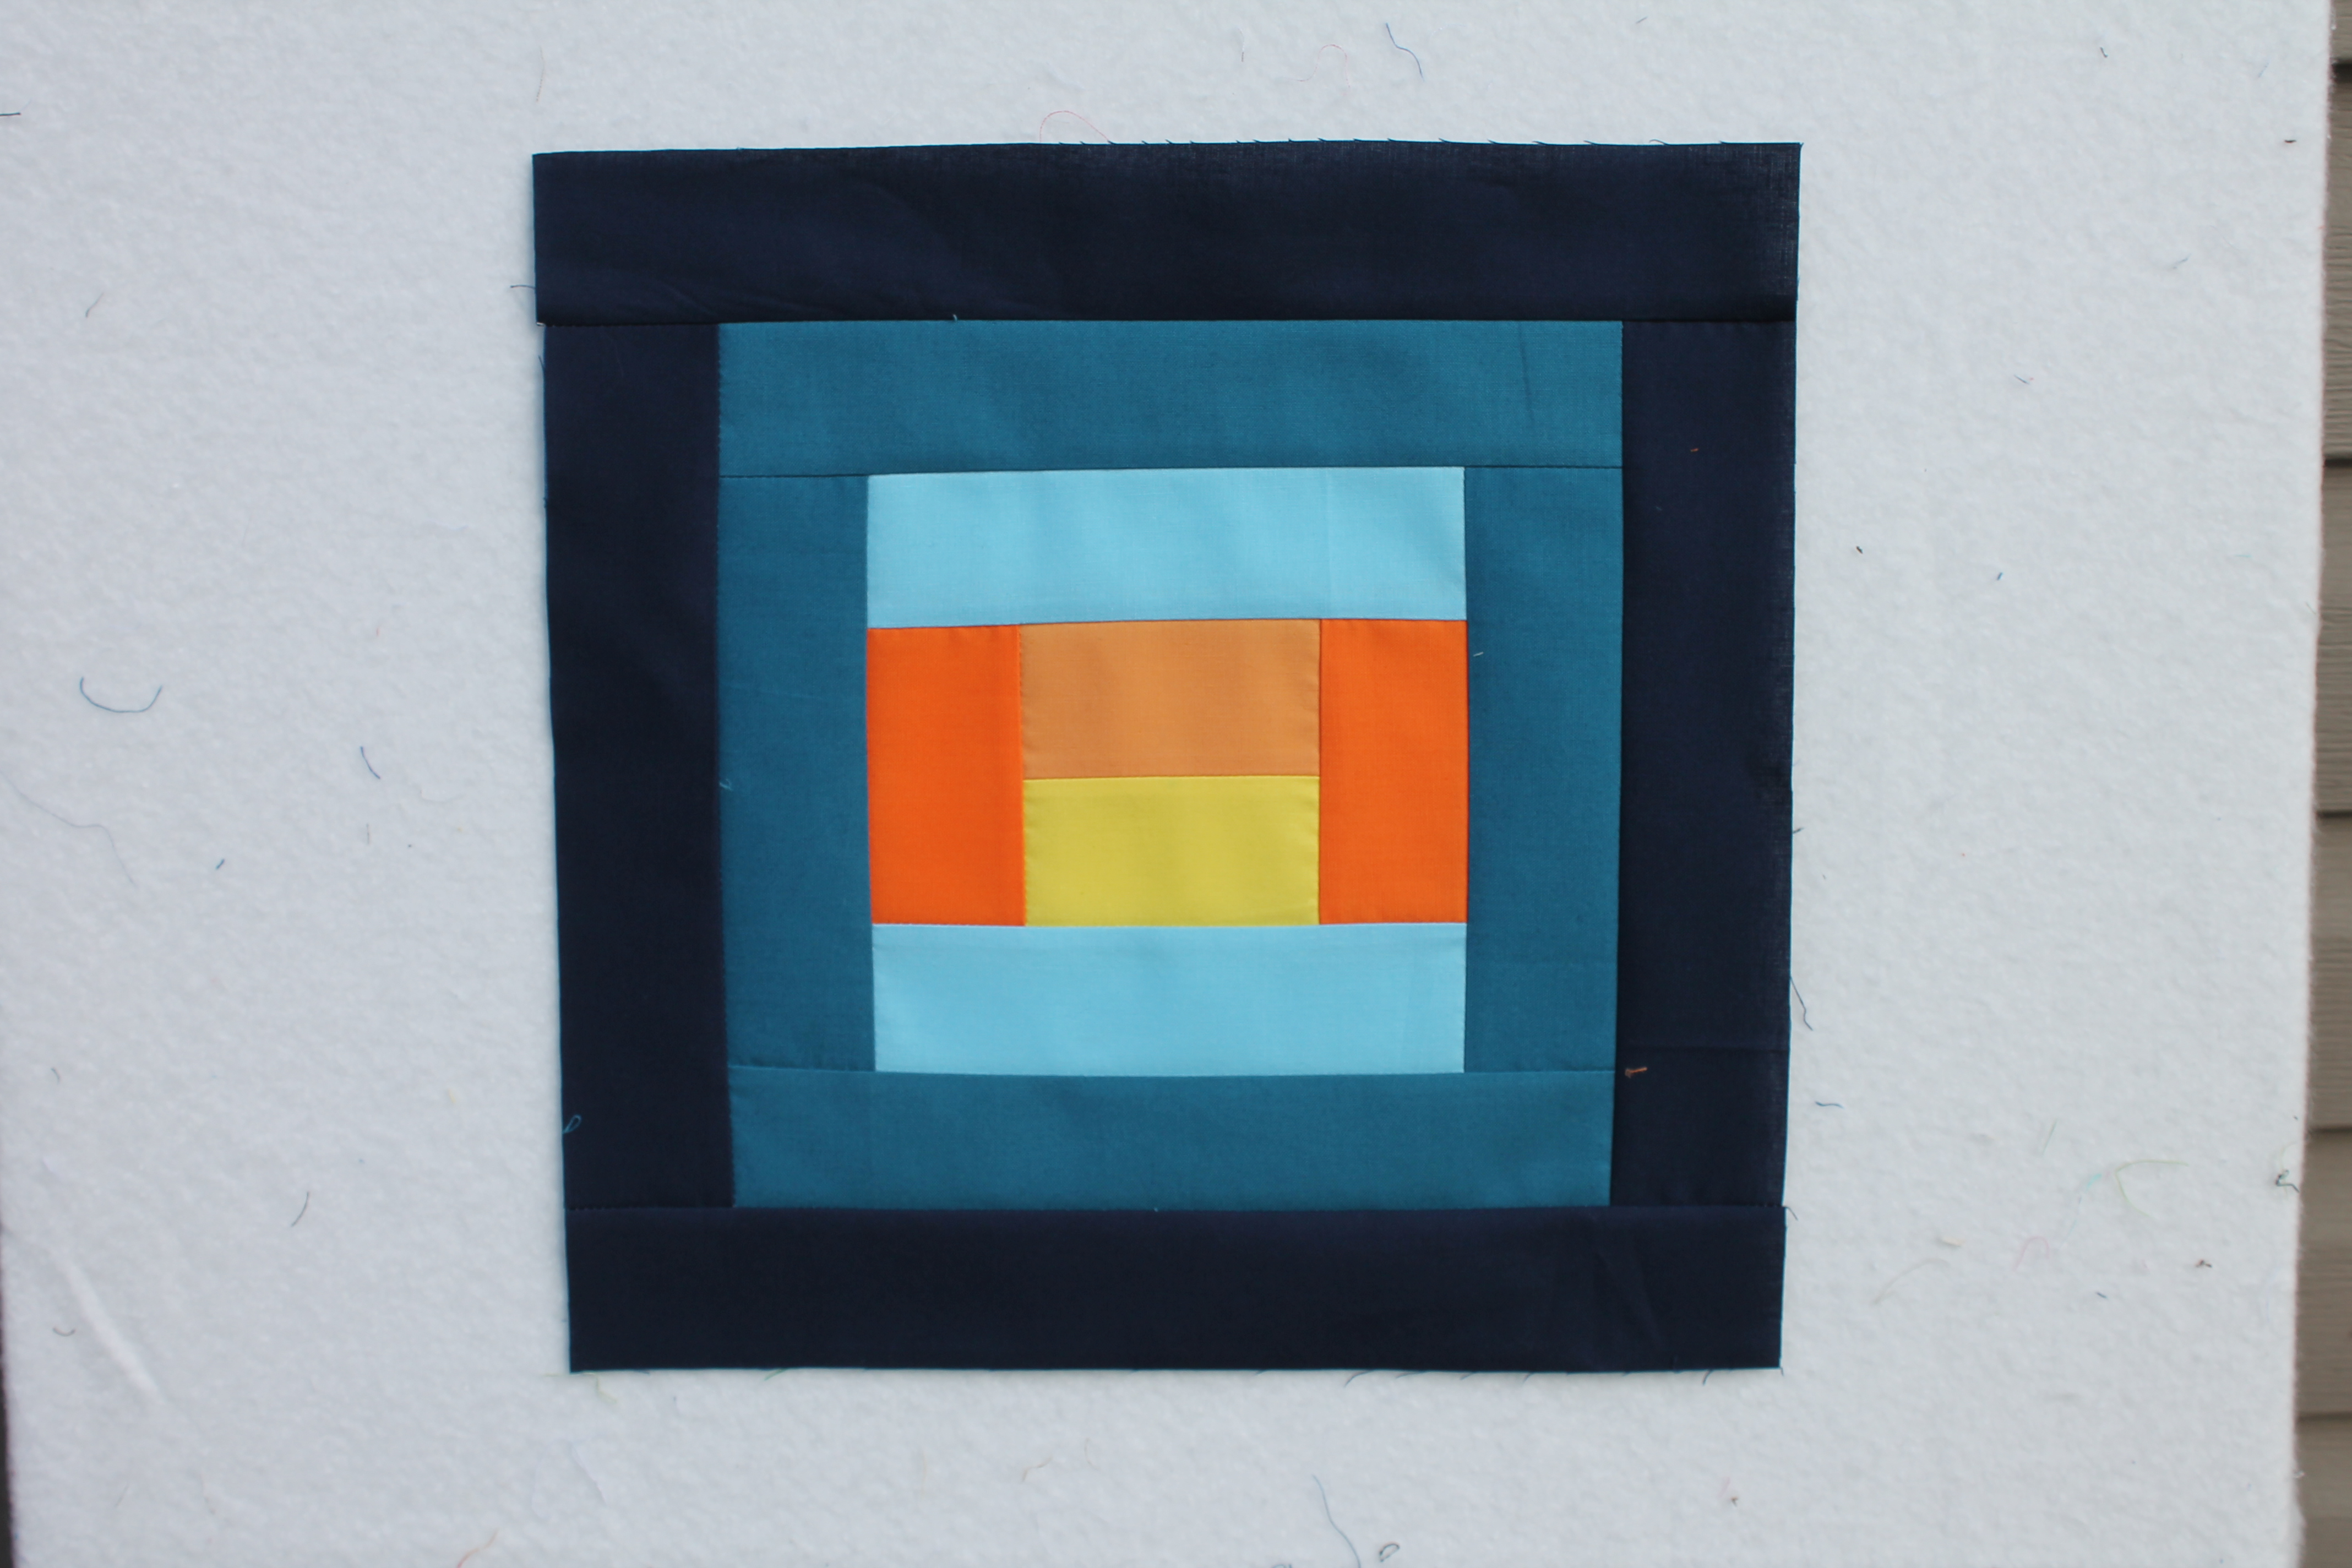
I tweaked the design to make it lap sized. The construction is a basic log cabin with a few fun color placements. This design would look great in some of the other color offerings RJR has as well.

Dogwood

Cherrywood- 297, 282, 283, 289, 291, 294

Kelpie

Kelptastic- 342, 348, 349, 327, 328, 300

Patina

Winter Dogwood- 297, 282, 283, 289, 291, 294

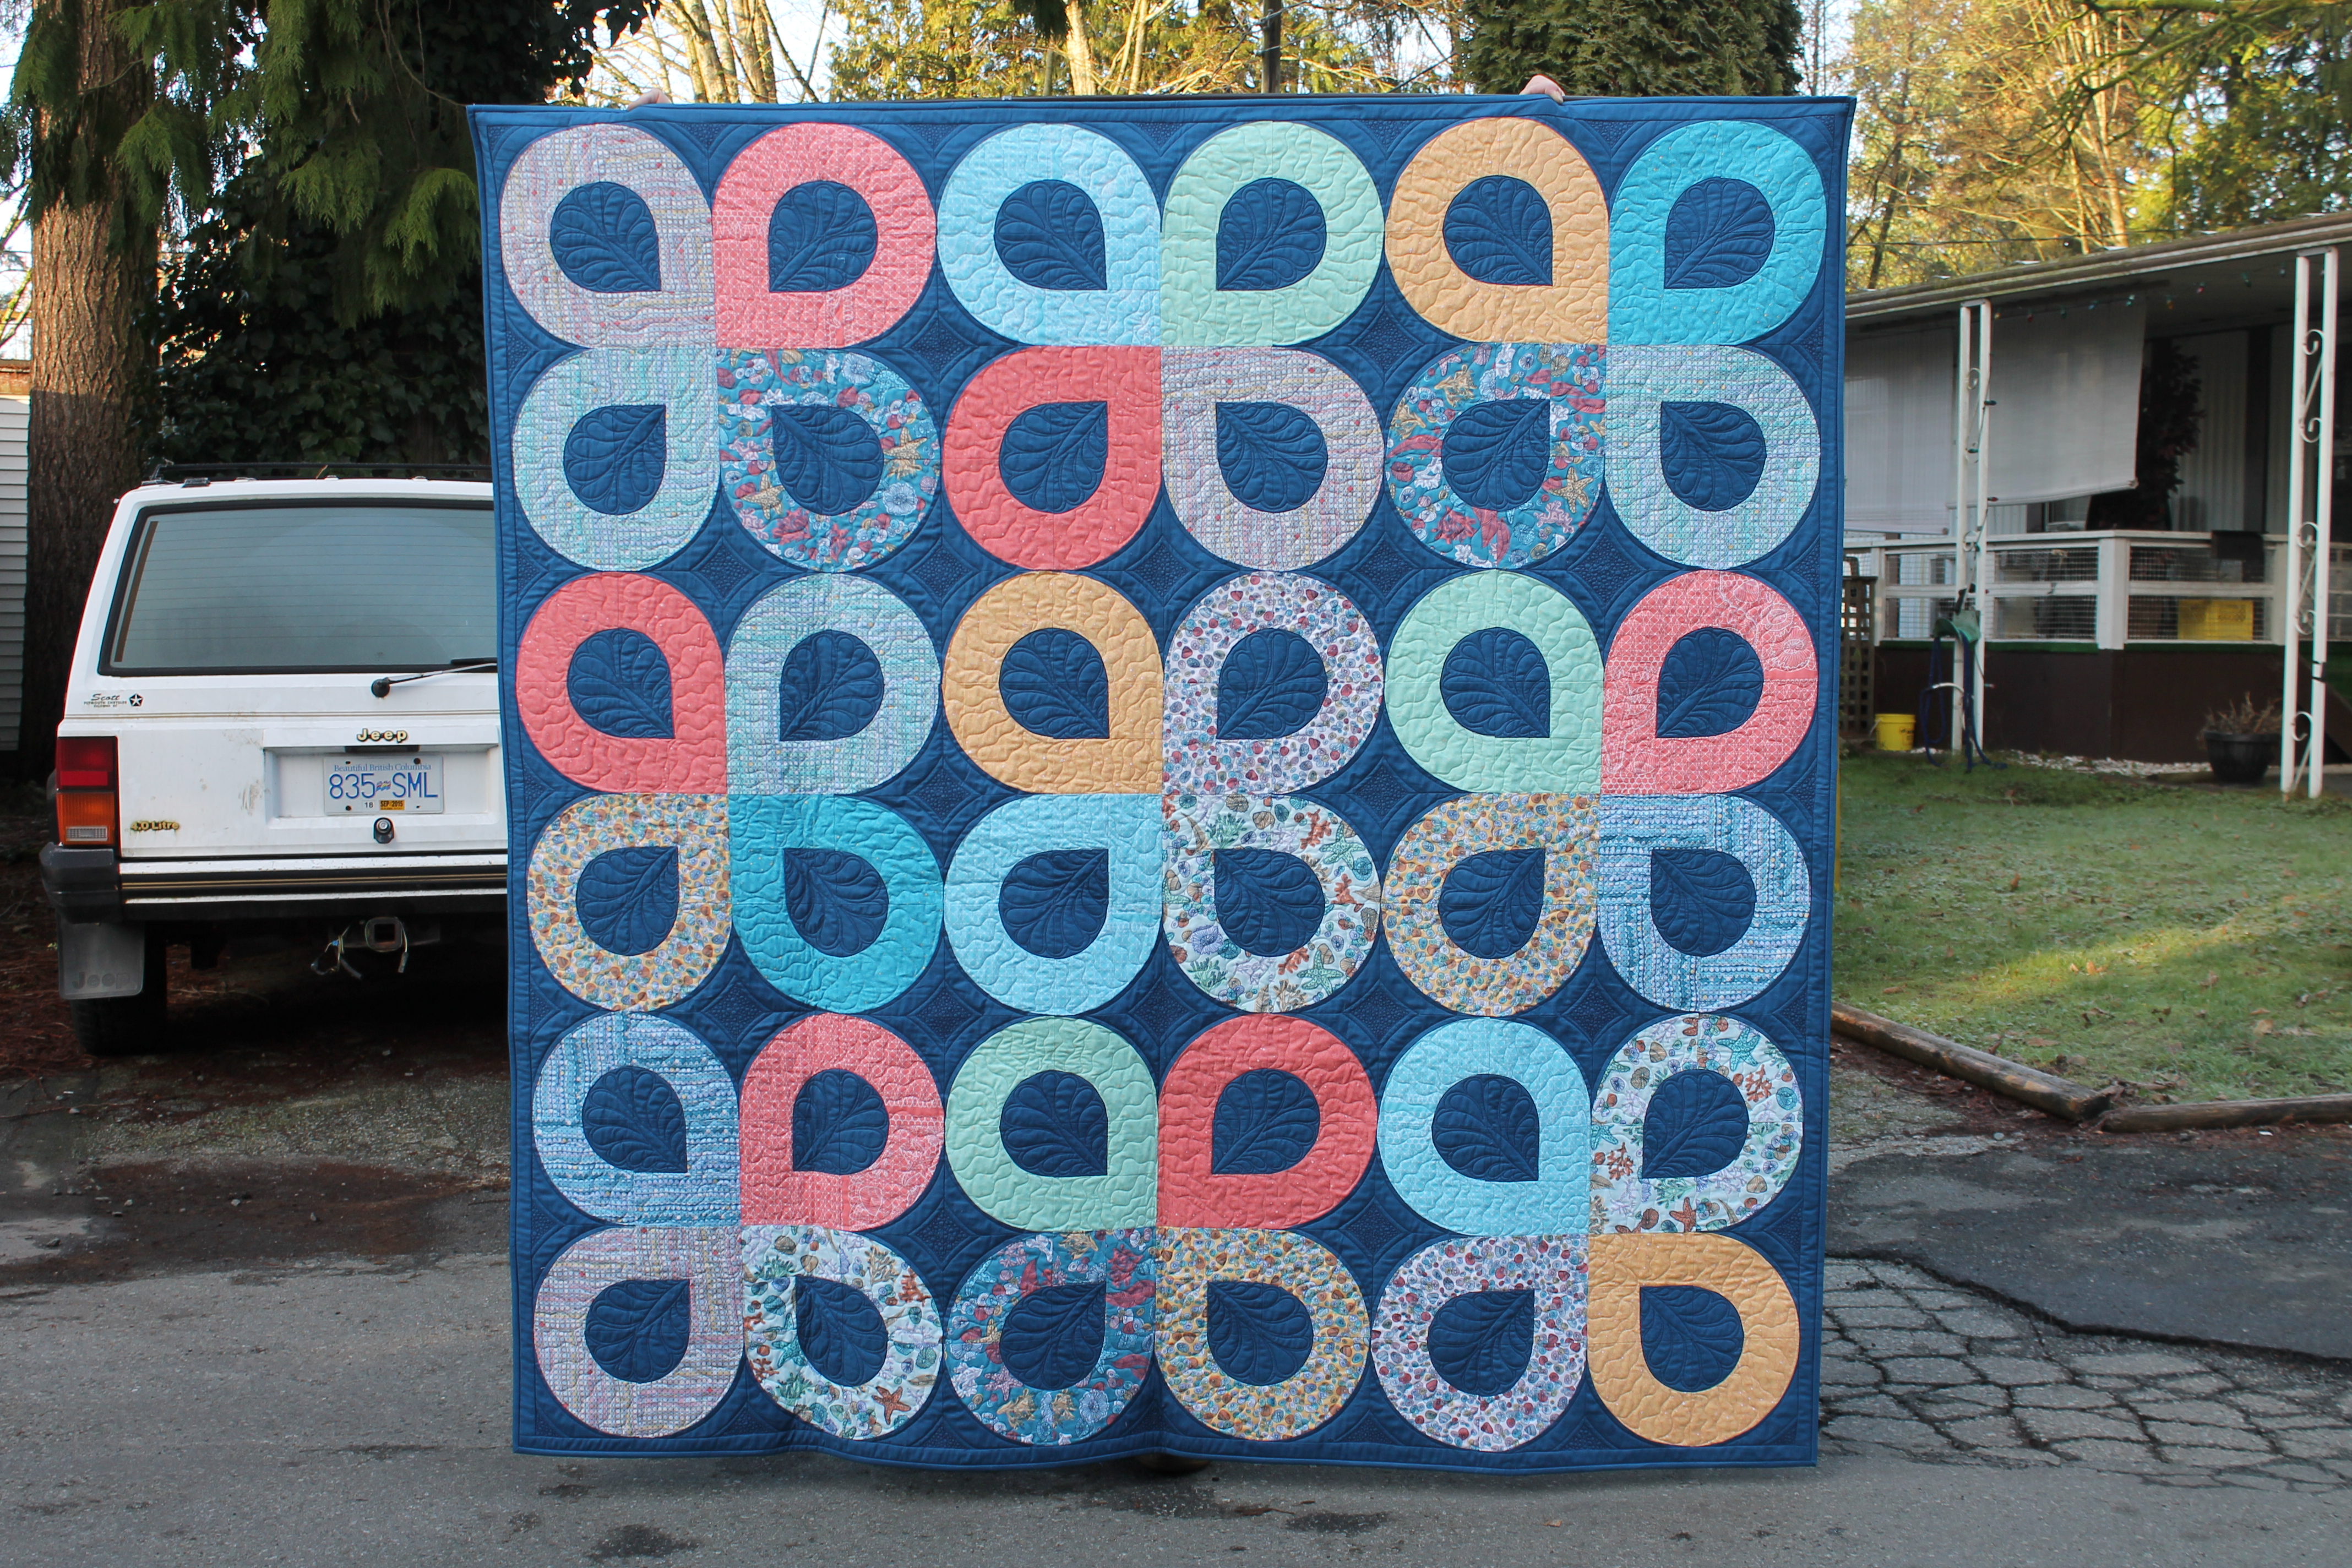
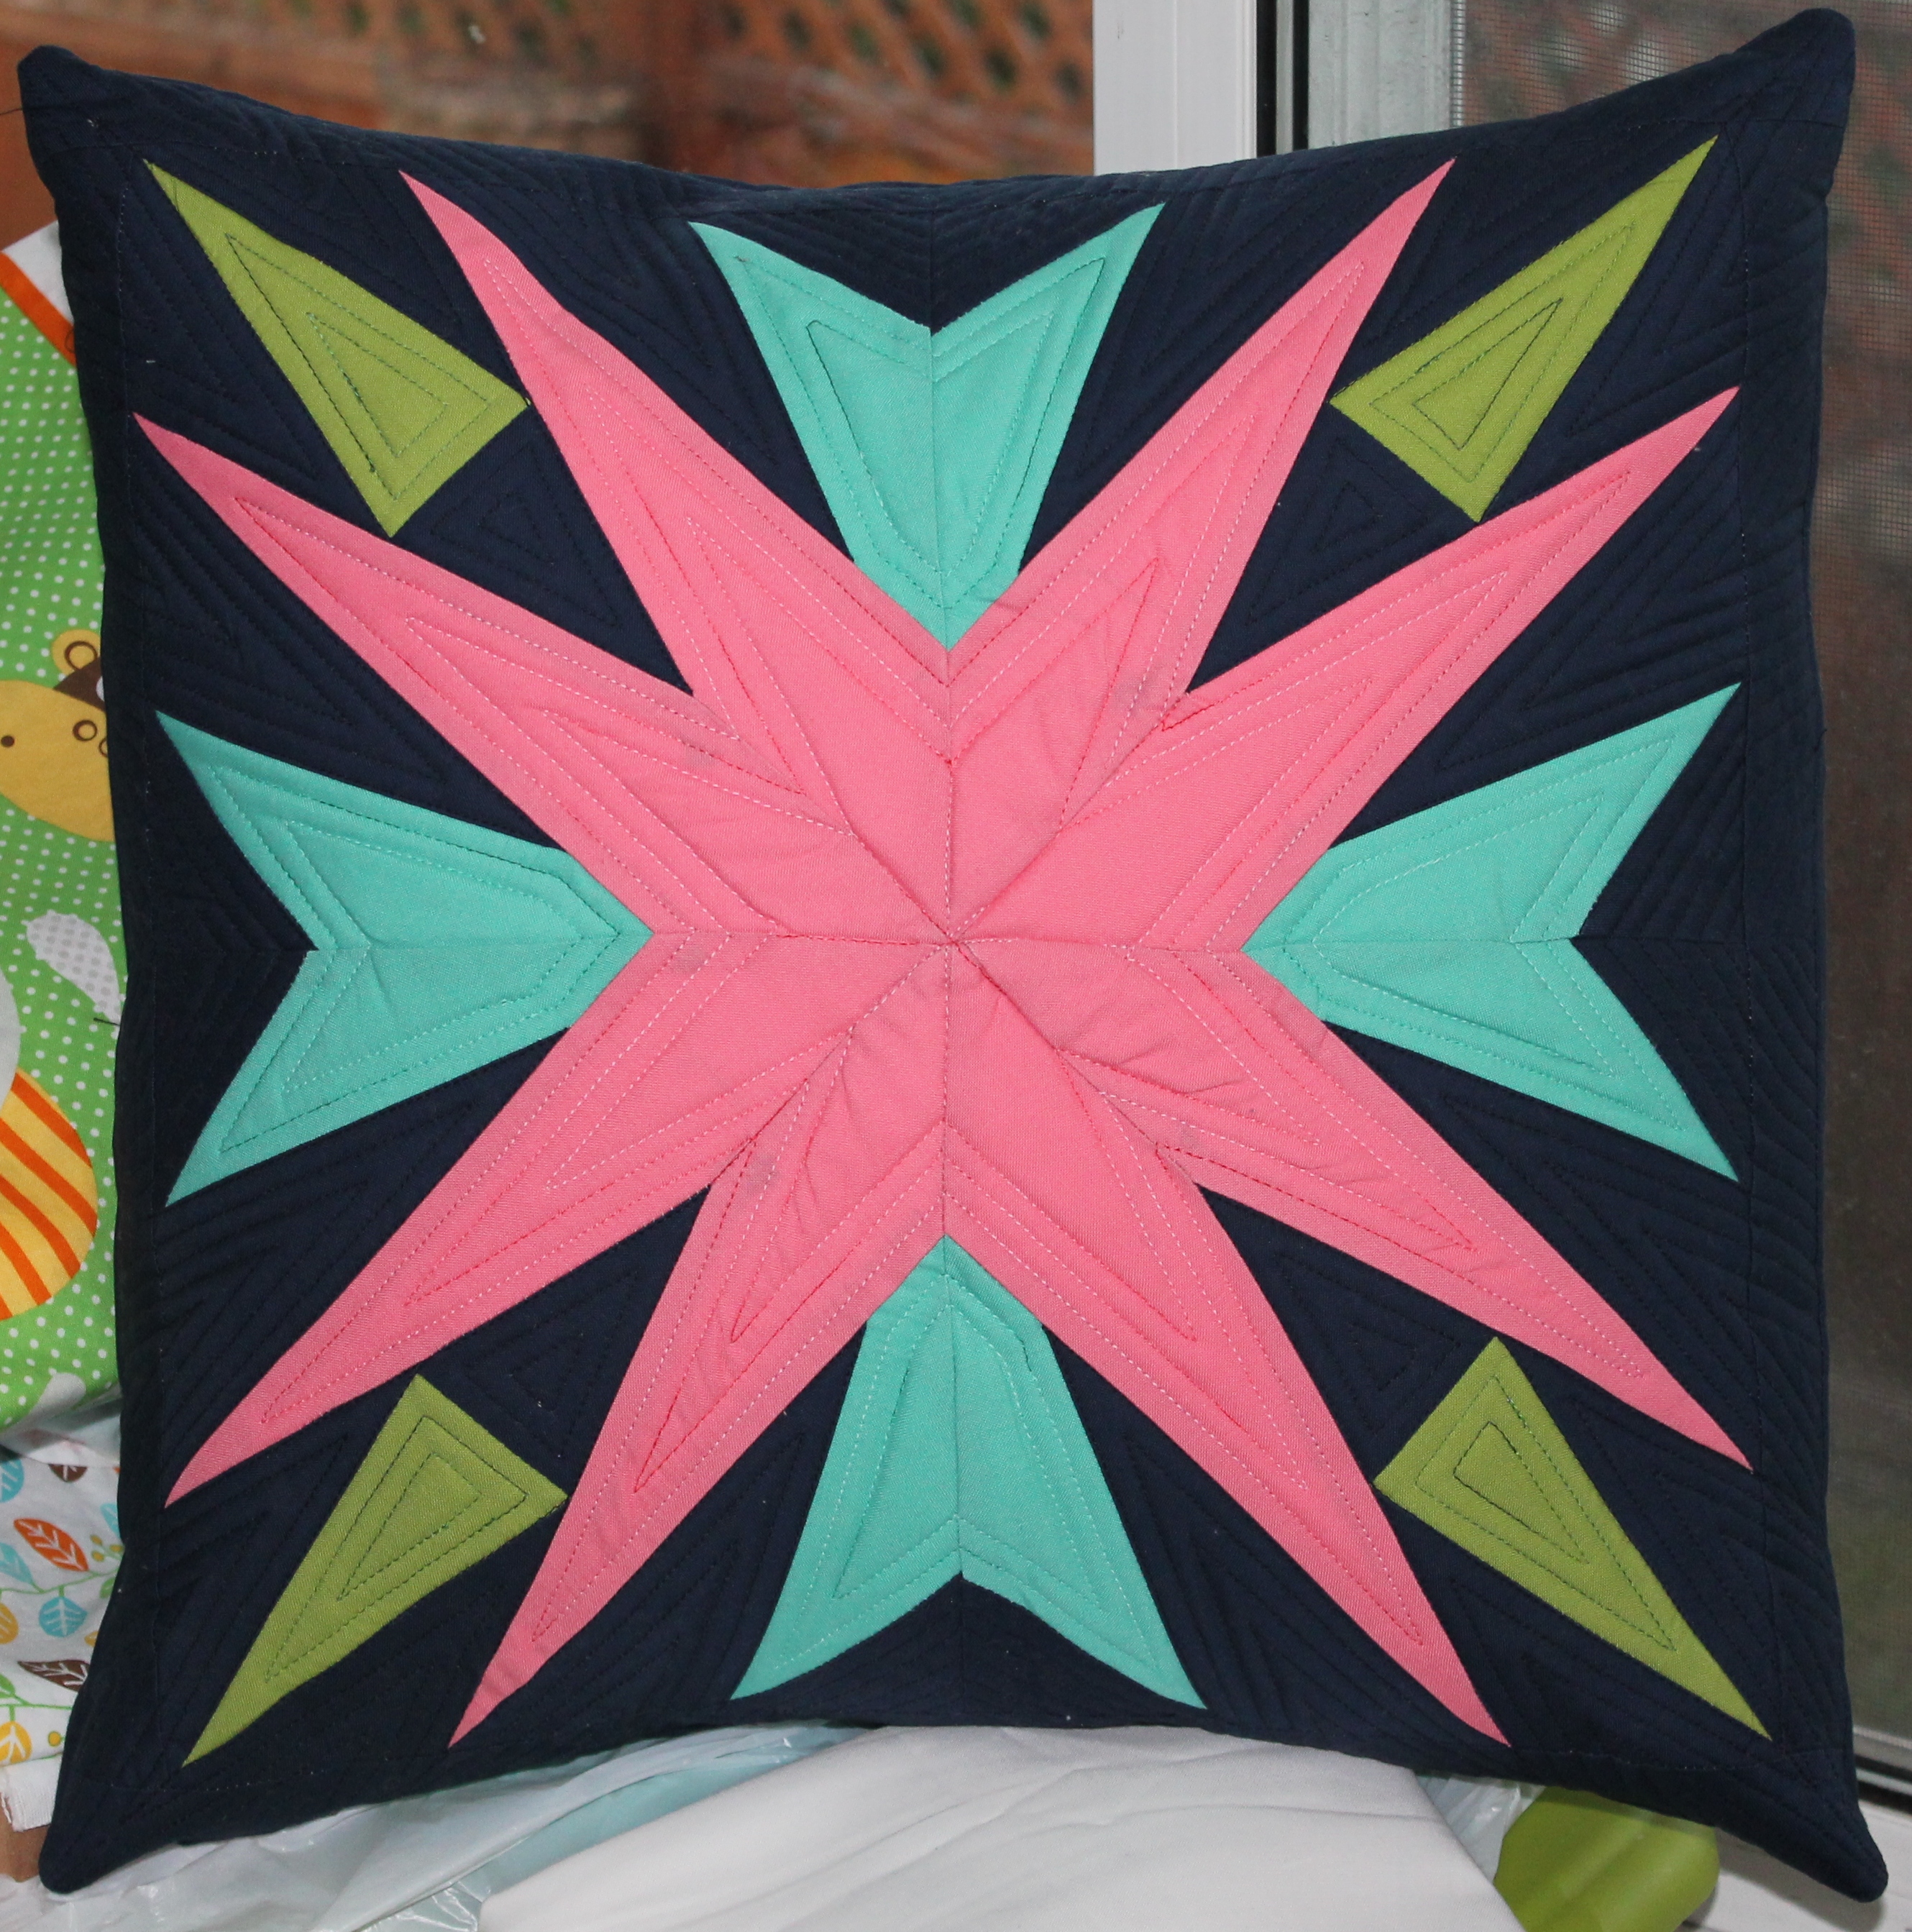
Now, normally I wouldn’t just show you a quilt top, I like my quilts to be finished and bound and presentable. However, in this case I am saving this top to be finishe don a long arm. Quite possibly by me. Which is super super super awesome!

Alrighty, on to the good stuff!!

Lanterns


Lanterns Glow Tutorial

Finished Quilt: 54”x 66”

Finished block: 12” square

Fabric Requirements

1/4 yard medium bright yellow (Cotton Supreme 9617-337)

1/4 yard bright yellow-orange (Cotton Supreme 9617-140)

1/2 yard medium tangerine (Cotton Supreme 9617-276)

1/2 yard light blue (Cotton Supreme 9617-327)

1 yard medium blue (Cotton Supreme 9617-300)

2 1/2 yards navy for background (Cotton Supreme 9617-191)

1/2 yard royal for binding (Cotton Supreme 9617-345)

3 5/8 yards for backing

64″x 76″ piece of batting
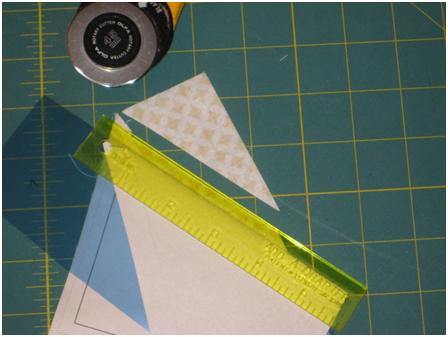
Cutting

Tip: Use a light spray of starch or starch alternative before cutting to help keep the pieces from shifting and skewing while sewing. Spray on the wrong side and press from the right side of the fabric.

From the medium bright yellow cut:

20 rectangles, 2”x 3 1/2”

From the bright yellow-orange cut:

20 rectangles, 2”x 3 1/2”

From the medium tangerine cut:

40 rectangles, 2”x 3 1/2”

From the light blue cut:

40 rectangles, 2”x 6 1/2”

From the medium blue cut:

40 rectangles, 2”x 6 1/2”

40 rectangles, 2”x 9 1/2”

From the navy cut:

40 rectangles, 2”x 9 1/2”

40 rectangles, 2”x 12 1/2”

4 strips, 3″x 42″

2 strips, 3″x 19″

2 strips, 3″x 12″‘

From the royal cut:

7 strips, 2 1/4”x 42” for binding
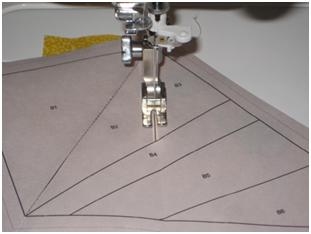
Instructions

All seams are 1/4” unless otherwise stated. Pieces are sewn right sides together.

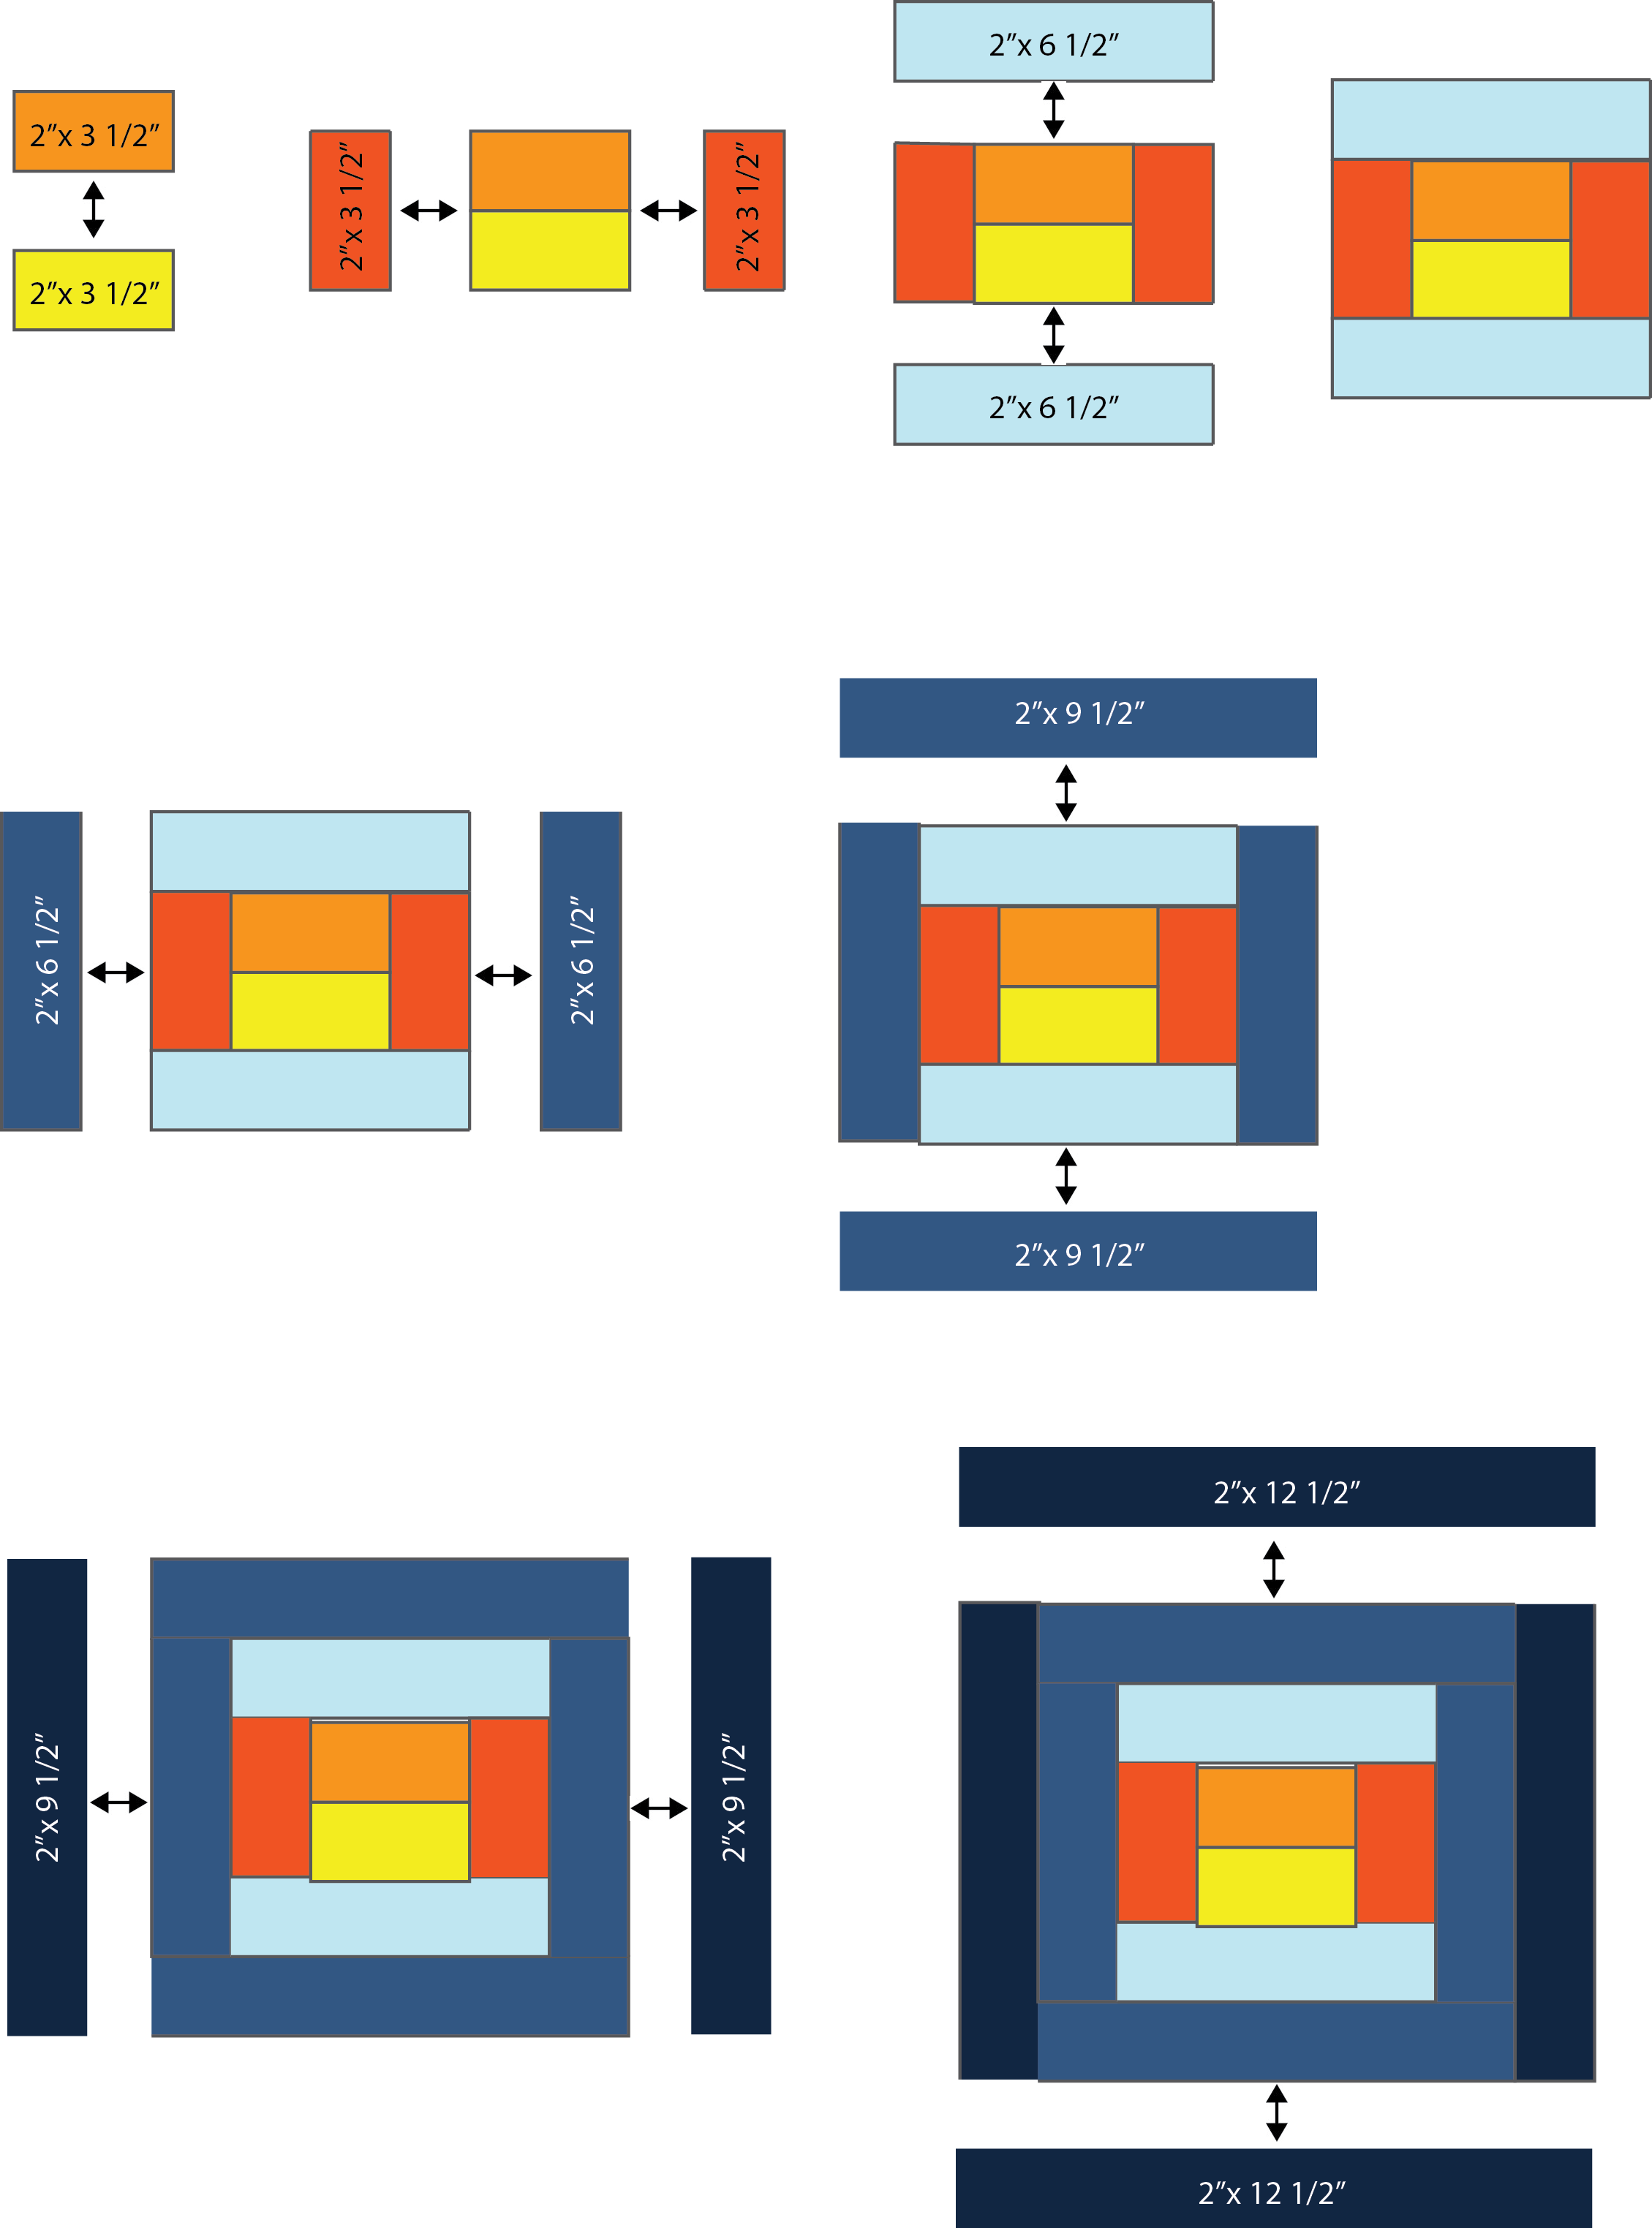
Take the medium bright yellow and bright yellow-orange 2”x 3 1/2” rectangles and sew them right sides together. Press the seams open to make the center squares.Take the medium tangerine 2”x 3 1/2” rectangles and sew them to either side of the center squares as shown. Press towards the center square. Take the light blue 2”x 6 1/2” rectangles and sew them to the top and bottom of the block. Press towards the center square.

Lanters Illustrations

Take the medium blue 2”x 6 1/2” rectangles and sew them to the sides of the block as shown. Press towards the center, and then sew the medium blue 2”x 9 1/2” rectangles to the top and bottom. Press towards the center.

Lanters Illustrations

Take the navy 2”x 9 1/2” rectangles and sew them to the sides of the block as shown. Press towards the center, and then sew the navy 2”x 12 1/2” rectangles to the top and bottom. Press towards the center. Trim and square the blocks to 12 1/2”x 12 1/2”.

Lanters Illustrations

IMG_4419

Sew the blocks together into rows of four as shown. In the odd rows the second and fourth block will be rotated, and in the even rows the first and third blocks will be rotated. Sew the rows together into the quilt top.

Sew the 19″ navy strips to two of the 42″ navy strips to make two side borders blocks 60 1/2″. Sew the 13″ navy strips to the remaining 42″ navy strips to make the top and bottom borders 53 1/2″. Sew the side borders to the side of the quilt top, matching ends and centers, and press towards the borders. Sew the top and bottom borders to the quilt top, matching ends and centers, and press towards the borders

Piece the backing together so it measures approx 64″x 76″. Layer the quilt top with batting and backing; baste. Quilt as desired. Join the royal 2 1/4″ wide binding strips using a diagonal seam to make a single long binding. Fold the binding in half and sew it around the quilt top on the right side. Turn the binding to the back and secure in place by hand or machine. Label and enjoy!

Lanterns


You could quilt each color individually, changing threads each time, to hide the quilting and let the blocks pop. Alternately, you could choose a medium blue thread and quilt in straight lines that radiate out at angles from the center of the block to mimic the flow of light, and then use a swirl in the yellow sections to soften out all the hard angles.

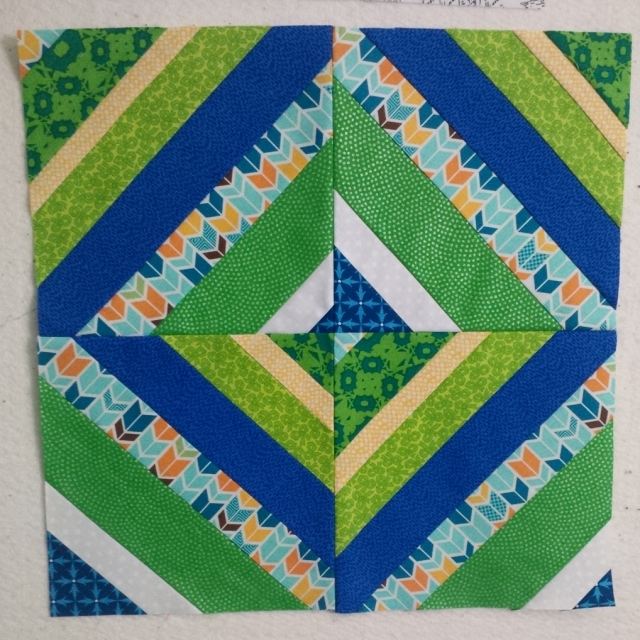
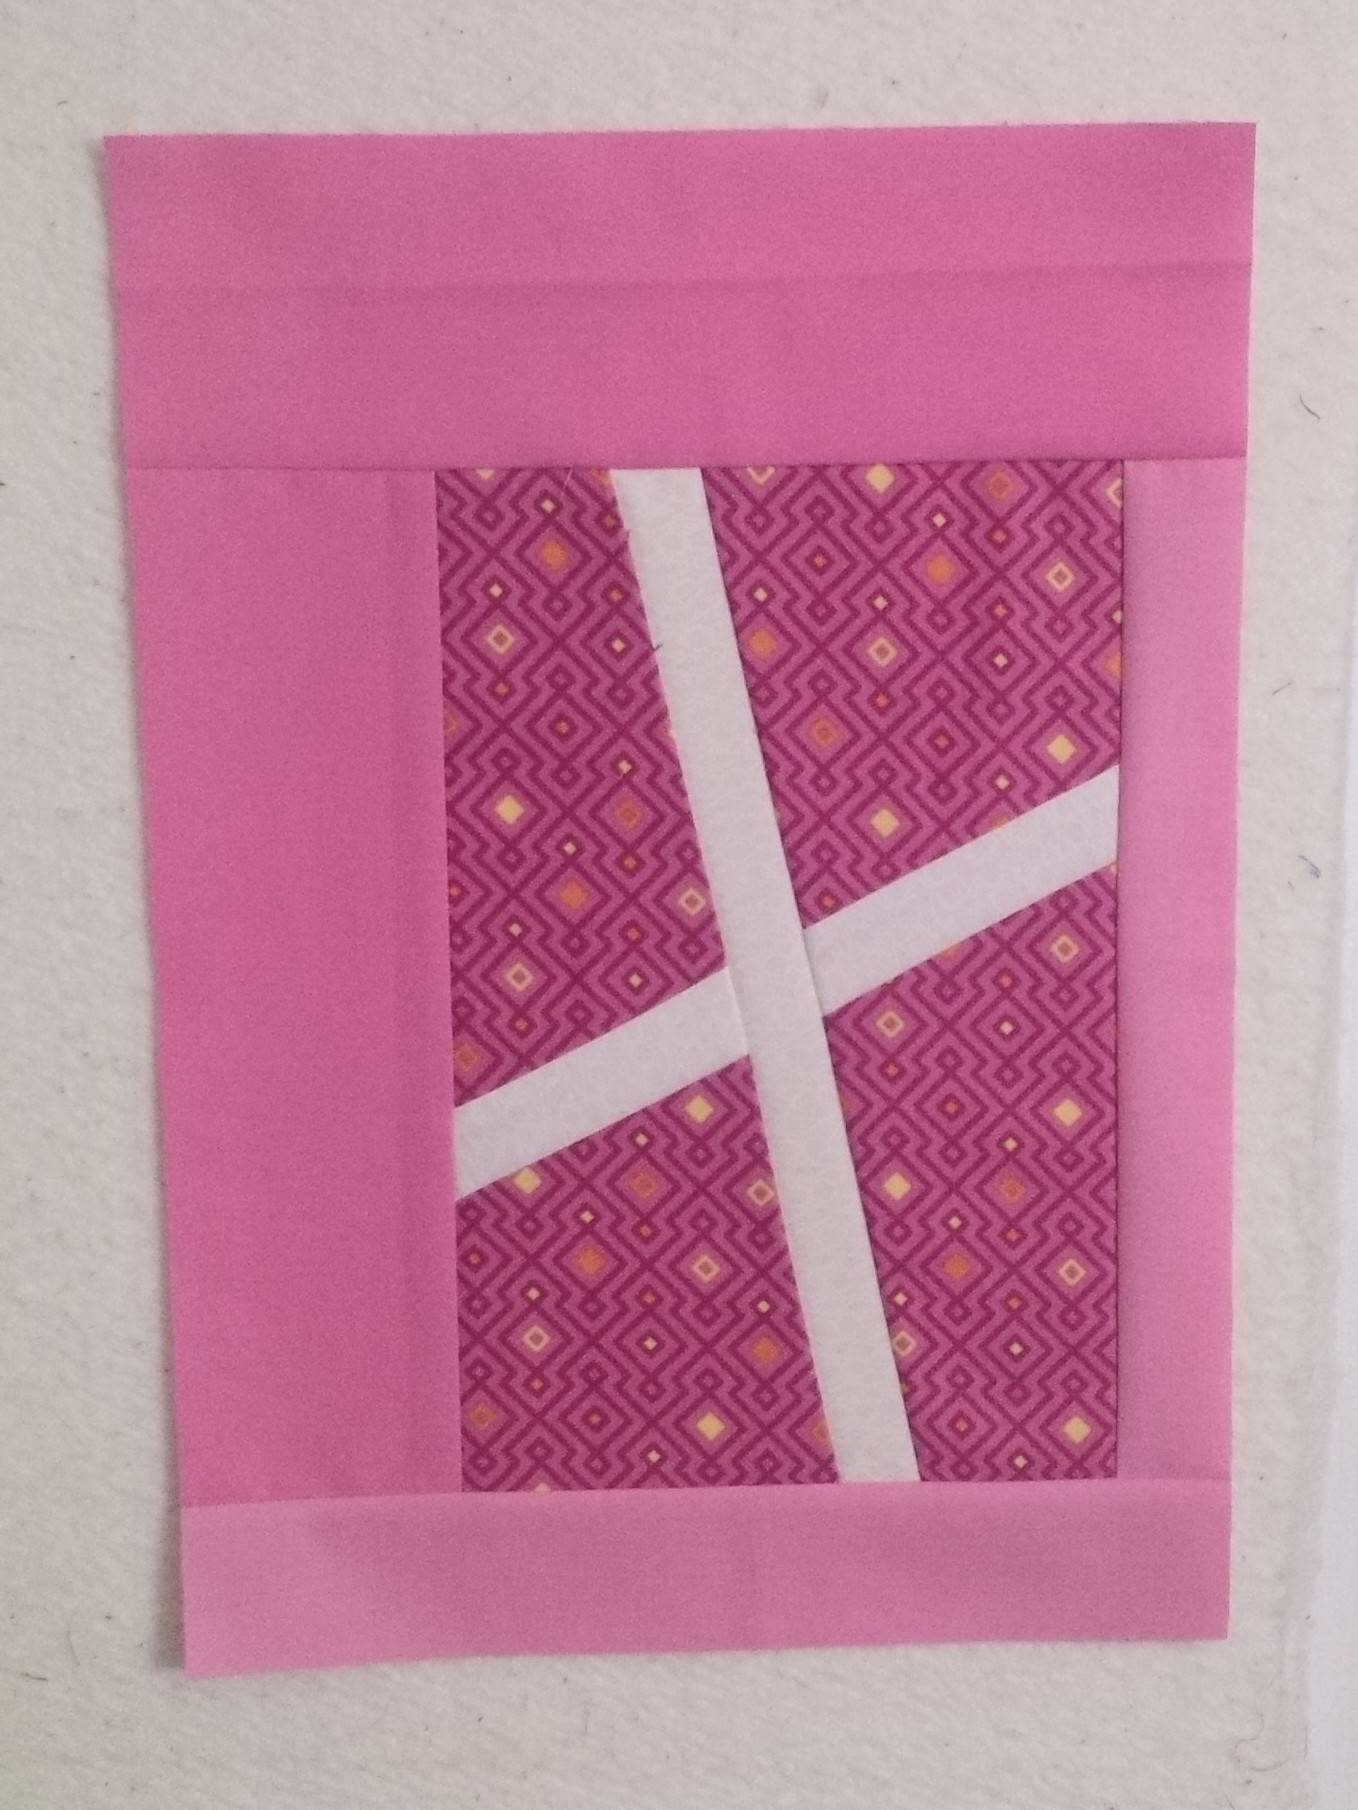
If improv is more your thing, you could easily make the blocks using varying width strips for a modern wonky log cabin look. Construct the blocks in the same order, using pieces with varying widths, building the log cabin outwards. Use the indigo round to bring the blocks to just over 12 1/2”, then square. Put them all together for some fun and funky movement to your Lantern Quilt.

I hope you enjoy making your own version of Lanterns Glow. I love to see what your make, so please send me some pictures of your finished quilt, or upload them to the Stacey Day Quilts group on Flickr. You can also tag me in instagram @staceyinstitches #lanternsquilt

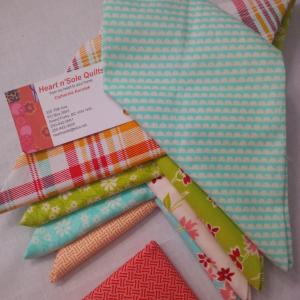
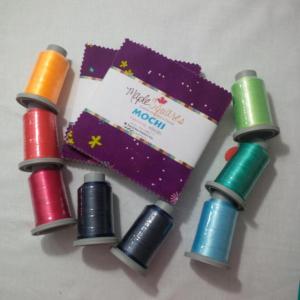
RJR has generously donated a bundle of the same fabrics used in my Lanterns Glow quilt to give away to one lucky reader!

Simply comment below with an answer: What color are you and why? Entries will be open until 8pm Sunday, when I will draw a name using Random.org.

winner lanterns

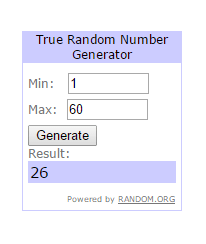
Congratulations Michele!

The Winner was #27, Michele, who said “Beautiful quilt and I absolutely love the name for it!!! My favourite colour would be Aqua so #292, #291, and #289 are my colours!! I would love to make a quilt just like yours and it would be perfect for a gift to my BIL!! Thanks for the chance!!”

Thank you for entering Michele, and thank you to everyone who came by to visit!

*Full Disclosure* When I picked out my fabrics I did so without a color card, and what I thought was Navy was actually that beautiful royal almost purple at the bottom of the bundle. I am using it for the binding and back of the quilt. In the meantime, I found the correct color sku for the Navy and used that in the quilt as well as quoted it correctly in the instructions.

2015.04.03 B 2015.04.03 C

Enjoy your long weekend, I know I will be sewing and spending time with family (and eating chocolate, shh! Don’t tell my diet!)

Happy Stitching,

StaceyDay_Logo

A lot ‘a Lotta! Sneak Peek!!

FINALLY!!!

A couple months ago I had the opportunity to design a quilt with the upcoming Windham Fabrics line by Lotta Jansdotter. I love Lotta! I have a ton of carefully hoarded Glimma in my stash, and have added all of my favorites from each of her lines over the years. (I would show you a picture but no one needs to see the disaster that is my stash). I have been keeping the finished quilt a secret, and finally last week Windham and Lotta started sharing sneak peek photos on Instagram ( @windhamfabrics and @lottajansdotter ).

So now I get to show you all my favorite quilt!!

IMG_4370d


Meet Playing the Odds! I love this quilt so much! I had a lot of different design ideas along this theme. My inspiration was the name of the new collection: Lucky. I wanted to try and capture a game of chance kind of feel with the quilt, while using as many of the bright and colorful fabrics as I possibly could. I also wanted to show off Jerry the Cat. The Jerry print is adorable and is one of the signature prints of the collection. At Quiltcon Lotta was handing out Jerry patches to iron on to your clothes. I have a pair of Jerrys put away for something special. Probably a bag =)

IMG_4364


My good friend Joan at Maple Leaf Quilters did the quilting for me. I picked a nice big swirly design to soften out all the angles of the squares. And of course I had to take my Lil’ Lotta paper doll to the photo shoot. I have discovered that the park by my house has a TON of great setting and backdrops to take quilt pictures. As long as it stops raining of course. Usually the sun is setting by the time the rain stops, but we managed to get some nice shots.

IMG_4369


The Hubster is getting really good at holding quilts for me, don’t you think?

I almost cried when I sent this quilt to Windham, but I have enough left over to make another one so the Post Office lady only had to pry the box out of my hand a little bit 😉 The pattern will be available on the Windham Website as a free pattern. In the meantime check out Windham and Lottas Instagram feeds or Facebook for more sneak peeks of Lucky and all the great projects you can make with it!


Happy Stitching!

StaceyDay_Logo

Work Work Work!

Seems that all I have been doing lately, and not a whole lot that I can share at the moment.

One of the things I CAN share is the Rainbow Confetti Quilt!!

This pretty lap quilt is in the latest issue of Modern Quilts Unlimited. I made it using Color Theory by V and CO for Moda. I love everything V and Co does! The block is one of my favorite asymmetrical blocks. You can really make things pop when you start playing with rotation and layouts.

Rainbow Confetti

Rainbow Confetti


I used the Ombre in Navy for the backing and the binding. Oh man, the Ombre!!

IMG_3877


March 1st saw me frantically sewing February bee blocks for the Great Canadian Stash Busting Bee. Since I was making Feb block, I figure I might as well sew the March blocks too! I also finished the March block for the I Love Lucy International Bee (but forgot to take a finished picture, yikes!).

IMG_20150301_192701_edit_edit IMG_20150301_192028_edit IMG_20150301_201517_edit_editIMG_20150301_195322_edit


I also finished this quilt for Windhams new collection, Forest Parade by Petit Collage. It’s printed on organic cotton and is so super cute! The free pattern will be available soon ( I will have a link on my Free Patterns page)

Forest Clearings featuring the Forest Parade Collection by Petit Collage

Forest Clearings featuring the Forest Parade Collection by Petit Collage


I also have a bevy of patterns out with P&B Textiles. They have some great blenders (I love Dash and Color Weave) and some really pretty prints. You can find links to the patterns again on my patterns page.

I picked up this cute little Lotta Jansdotter paper doll at the Windham booth at Quiltcon (and got to meet Lotta in person! EEE!). L’il LJ has been helping out in my sewing room, coming on photo shoots, and organizing my thread by color ( to match her outfits apparently). She also gave me a hand with some of the secret sewing I have been doing!

IMG_20150225_133924_edit

IMG_4364IMG_4365


I have some great fun stuff coming up in the next couple months. I am really really excited about it and cannot wait to share it with you!!!

Enjoy your springtime, and Happy Stitching!

IMG_20150228_113336


Stacey

Covergirl!

10260002_10205914726129874_6223861551859960138_n

EEEE!!!!!!! I am so happy right now you guys!! That is my quilt, Whirlpool, on the cover of American Quilter Magazine!! *happy dance*

Okay….breathe in and out….okay…I’m good!

This is one of the big things I have been working on in the last few months. After the book was canceled (see this post to read all about it)I started submitting designs to different magazines. The first place I contacted was American Quilter MAgazine. I have had a subscription to AQS magazine for years. I love every issue, there is always something for me in them. And the subscription comes with membership benefits, like digital content, web bonuses, and access to back issue articles and pattern files.

IMG_4287

My shelf of American Quilter Magazine. 4 years worth plus a random Jan 2007. I am slowly filling in my back issues as I find them!

I was stunned and thrilled at the reaction to my design submissions. Michele, the Editor in Chief, was so supportive and just awesome to work with. We played around with some ideas ( I had a lot!). Then Kim@I Adore Pattern told me she had sent some fabrics to AQS to help promote her line, Tidal Lace. So I decided to mock up another quilt using her fabrics and sent it off to Michele. Everyone loved it, so off to production we went. Whirlpool was a go! Windham was totally awesome and generously provided fabric for the quilt.

IMG_4279

One the top was done, however, I was a little stuck. How to quilt it? My usual long arm quilter was on vacation at the time.  A finished quilt post in one of the modern quilting Facebook groups led me to Mandy Liens of Mandalei Quilts. She is a super talented quilter in NY state, and I loved her work. We got to talking, and she came up with this amazing quilt job for Whirlpool! She took my quilt and brought out the best in it, which is what a good quilter does. She even has some Craftsy classes you can take for quilting (super talented!)

A snowy day

A snowy day at the park

The day of the photo shoot it snowed. Which is very unusual for Vancouver, but it was also the only sunny day that week ( its the rainy season. I have a half dozen things that need photographs. STOP RAINING!) So off we tromped to the park!

I am so happy with how Whirlpool came together.  The entire process was great! the March Issue hit newsstands today, so go out and get yourself a copy! Or better yet, become and AQS member! Because for the rest of the year, I have a web bonus series of patterns coming out with each issue! AND with a membership you can download an EQ7 design file to color your own version of Whirlpool! YES!! As well as get all the awesome content that is members only. You also get the 6 magazines a year. (Disclaimer: AQS did not ask me to promote for them, I just think it is an awesome publication and have subscribed for year and never been disappointed!)

You can order a copy of the magazine here, and if you want to make your own just like mine you can ORDER THE KIT HERE! YAY!!!!!! Thats right AQS loved the pattern and fabric so much that they decided to make it a kit! Kim and I were over the moon when we got the email, and I still cannot believe it!

I hope you all enjoy making Whirlpool as much as I did!!

Happy Stitching!

StaceyDay_Logo


A Paper Piecing Tutorial

Lately I have been so (sew!) busy, that I haven’t had time to write as much as I would like. I have a bunch of ideas strewn about my sewing room on scrap pieces of paper, of ideas for blog posts and tutorials, as well as some free pattern shares for you all. As I find them I will start working my way through them. Well, those still legible despite cat teeth marks and copious amounts of peanut butter fingerprints (those only happen ONCE, and he knows it!)

Today it’s all about paper piecing, which is perfect because I have a couple of patterns coming out very soon that use paper piecing!

Cartwheel Mini-Addapted from Cartwheel COnstellation published in AQS magazine January 2010

Cartwheel Mini-Adapted from Cartwheel COnstellation published in AQS magazine January 2010

Paper piecing, also known as foundation piecing, is a method of sewing your fabric to the wrong side of a piece of paper, stitching down the printed lines on the right side of the paper. It makes piecing irregular angles and tiny shapes a breeze, and you don’t have to worry about your straight and bias grain as much as if you were piecing normally. You can also paper piece blocks made from templates or blocks you could piece normally, it makes for very accurate points and corners.

Supernova

Supernova

My favourite method for paper piecing is a combination of a couple different techniques I have learned over the years. The tutorial works for all manner of foundation patterns, simple, complex, pictorial…

Rainbow Star

Rainbow Star

When I paper peice ( I am sure you noticed that I interchange the terminology) I like to pre cut my fabrics. This is how I know that a) my pieces will be large enough to cover the entire area of the foundation section, and b) that I actually have enough fabric to make all the pieces. There is nothing worse than cutting a piece too small or not having enough fabric to make all the pieces!

When foundation piecing it is important to pay careful attention to the sewing order of the peices. The sewing order is laid out so that the next seam sewn always covers the first.

To determine the size of strips to use:

Lay the foundation printed side up on your work area. Find the sewing line between the first and second section of the foundation pattern. This line will be the first line you stitch down, so you use this line to find the length of the fabric strips.

*NOTE* If the first section is a triangle shape, or has a long edge that is also the seam allowance, like the triangle of a flying geese block, then you want to use that edge as the length of your first piece plus seam allowance, and then determine the width. I cut Half Square Triangles for triangle shapes, that way there is less waste fabric.

IMG_4124

Take a large clear acrylic grid ruler and place it over the template, with the 1/4″ line on the stitching line and the bulk of the ruler covering the first section. Adjust the ruler so that it starts at least a 1/4″ past the end of the stitching line. Find the end of the stitching line, and the measurement on the ruler that corresponds with it. Add 1/4″ to that number. This is the length of your piece with seam allowances included.

IMG_4120

Now without moving your ruler, find the outer edge of the first section and the measurement that corresponds with it. Add 1/4″ to that number. This gives you the width of the piece with seam allowances included. Write down the two measurements inside the foundation section, this helps avoid a million measurements on a single piece and avoids confusion.  As a general rule, I will add an extra 1/4″ to each measurement as a safety net-sometimes fabric shifts as you are sewing.

IMG_4123

Now move your ruler so that the bulk is covering the second section of the foundation pattern, again with the 1/4″ line of the ruler on the same stitching line. Using the same method as above, find the length and width of the piece. Continue across the foundation, from section to section in the order they are sewn, until you have mapped out the measurements of each section.

To determine the amount of fabric you need:

I use this calculation to determine how much fabric I need:

42″ (the average usable Width of Fabric) divided by the length of the piece = the number of pieces per strip (always round this number DOWN to the nearest whole number)

I then divide the number of pieces needed by the number of pieces per strip, and round the answer UP.

Finally, take the number of strips needed and multiply it by the width of the pieces, then divide by 36 ( the number of inches in a yard). The final sum is the required yardage.

So for example:

I need 16 white rectangles 2 1/2″x 7 1/2″

42/7.5= 5.6, rounded down to 5

16 pieces/ 5 pieces per strip =3.2, rounded up to 4 strips

4 strips x 2.5 wide=10″

10/36= 0.2777777 , rounded up to the nearest whole cut of fabric, which is 0.3333333, or 1/3 yard. 

Here is a handy chart for you to reference!

0.125 = 1/8 yard

0.250 = 1/4 yard

0.333 = 1/3 yard

0.375 = 3/8 yard

0.5 = 1/2 yard

0.625 = 5/8 yard

0.666 = 2/3 yard

0.75 = 3/4 yard

0.875 = 7/8 yard

1 = 1 yard

I like to label my fabrics in the order they are pieced, that way I don’t confuse myself if there are lots of little pieces.

Now that we have our fabric pieces cut we can start piecing the foundations.

1. Lay the first fabric strip right side up on the wrong side of the paper over the first section of the pattern. Hold the fabric to the paper and look through the printed side of the pattern, holding it up to a light in, to make sure the fabric is covering the entire section and there is approx 1/4″ extending into the second section for seam allowance. Pin in place.

090112_2033_StardustPin7.jpg

2.Place the fabric labelled #2 right sides together on top of the first, matching the raw edges in the seam allowance. Secure the second piece of fabric, turn the foundation over and stitch down the line between the first and second sections of the pattern, extending your stitching through the printed seam allowance.

090112_2033_StardustPin6.jpg090112_2033_StardustPin8.jpg

*Note* Sometimes it’s easy to misjudge the placement of your fabrics when foundation piecing. When this happens you will have to remove the stitches. The cleanest way to do this is with a sharp seam ripper. Place the seam ripper between the paper and the base layer of the fabric and ripe the stitches. The thread on the paper side will remain intact, all you have to do is pull it off and it will take all the extra thread bits out as well.

3. Press open with a hot, dry iron. Fold the paper back along the second stitching line, where piece 2 and three meet, and trim the seam allowance to 1/4”. I use a piece of template plastic and an Add-A-Quarter Ruler to make this quick and easy.

090112_2033_StardustPin9.jpg090112_2033_StardustPin10.jpg090112_2033_StardustPin11.jpg

4. Place the third fabric RST with the second, matching the raw edges to the seam allowance and stitch as before, making sure to stitch at least 1/4″ past the next line or through the outside seam allowance, depending on where the piece is on your template. Continue stitching, pressing, and trimming until all the pieces are sewn.

090112_2033_StardustPin13.jpg090112_2033_StardustPin14.jpg090112_2033_StardustPin25.jpg

5. Trim around the pieces, leaving a 1/4” seam allowance. Often the seam allowance is marked as an outline around your shapes.

090112_2033_StardustPin27.jpg

Some people swear by leaving the paper in when sewing. With simple shapes-squares and rectangles- I will remove the paper before sewing the shapes together. This gives a tighter, stronger stitch, I can easily match seams, and the fabric feeds evenly through the machine. For complex shapes, such as wedges and triangles, I will first pin the pieces with the foundations intact to make sure my seam allowances line up, and then remove the paper from the bottom piece, the one that is going to be at the feed dogs. That way I have a line to follow, and I know my pieces will line up. I find that when I leave both layers of paper I get slippage and the fabrics shift inside the paper.

Poppin' Pillow

Poppin’ Pillow

I use this same technique for pretty well all of my paper piecing. You can make so many awesome blocks with it, I really hope you find it helpful!

Happy Stitching!

StaceyDay_Logo