Hoffman Challenge 2015- Mariposa

Phew!

The last few months have been a whirlwind! Thank goodness for Instagram, or no one would ever see anything! (I am @staceyinstitches for those of you on IG)

Waaaaaaay back in July, I finished up and sent off my Hoffman Challenge Quilt. for the first time ever, my challenge quilt was finished and mailed more than three days before the deadline. Did you know it’s way less stressful to send things before the deadline? Cuz I do now!

Usually I mail so close to the deadline there is no time for pictures or ground shipping, its a 3-day or bust nail biting marathon of RUSH.

So this year was an immense pleasure. And, I also LOVE the quilt!

IMG_4568

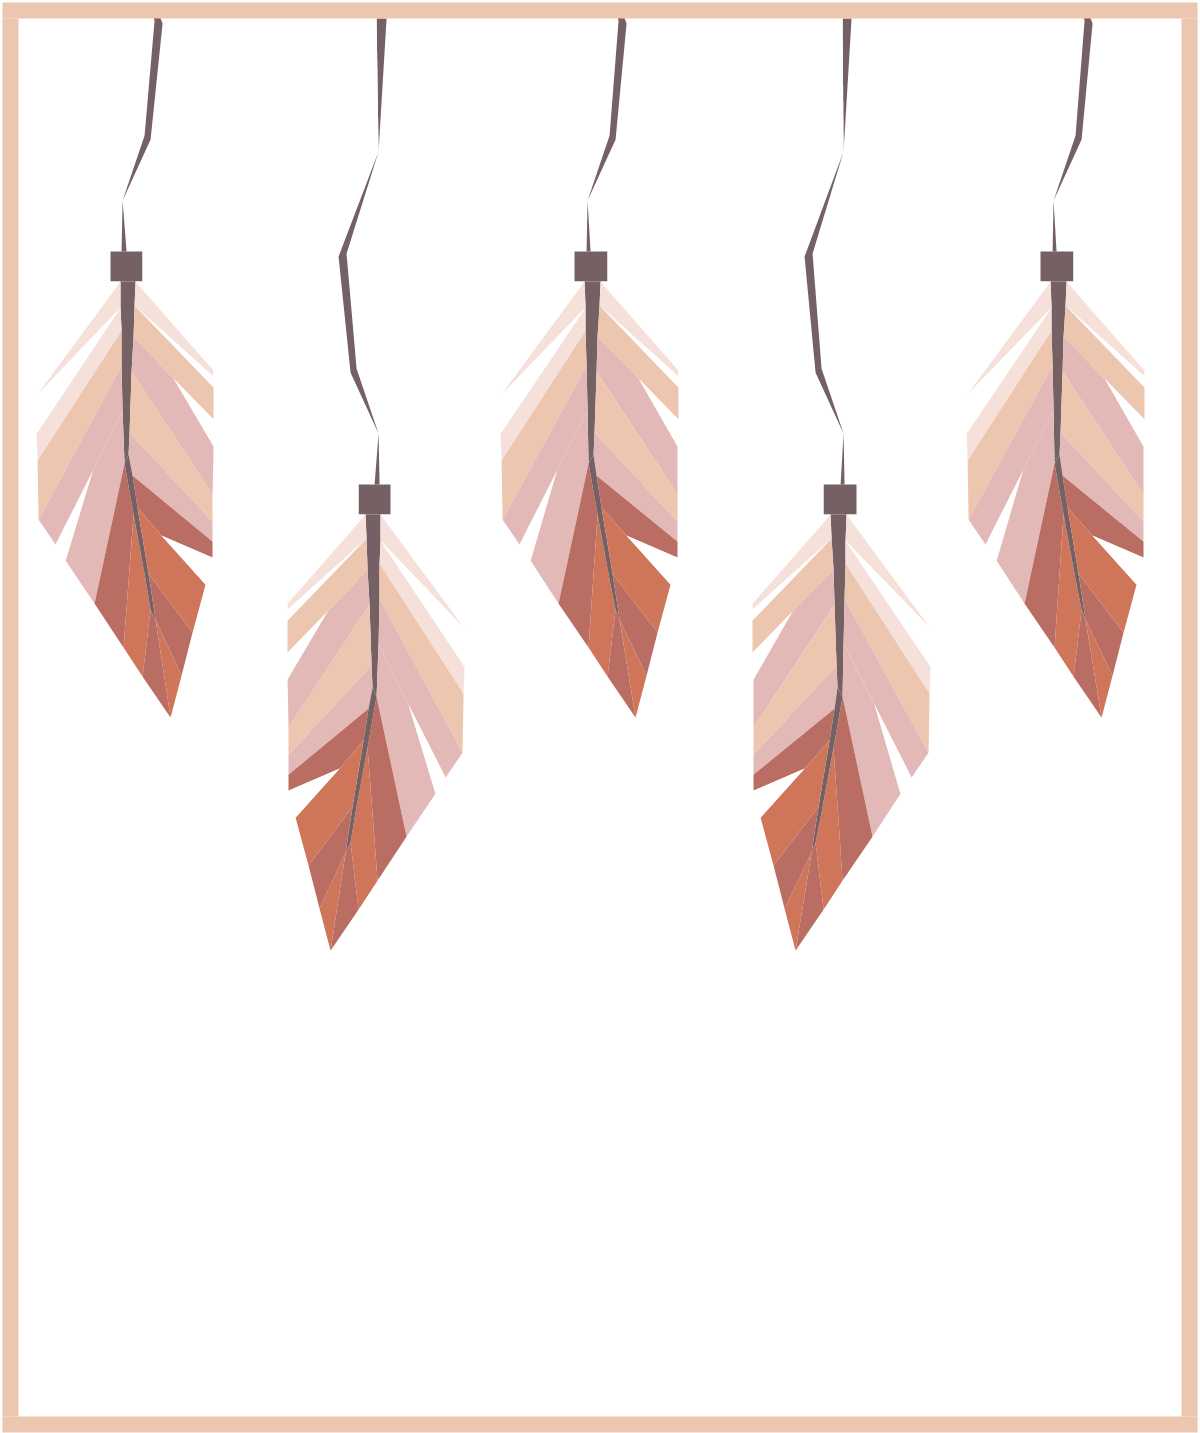
My quilt, Mariposa, is a super enlarged version of the Lillyella Stitchery “Take Wing” pattern. The original finishes at 18″x 24″, a perfect mini quilt size. My version finished at 35″x50″!

One of the biggest factors in finishing early was being able to quilt this on the longarm myself, and some excellent color and design advice/support from my friends. I agonize over color choices sometimes, and this was a doozy. There are over 32 different prints!

2015 fabric texture

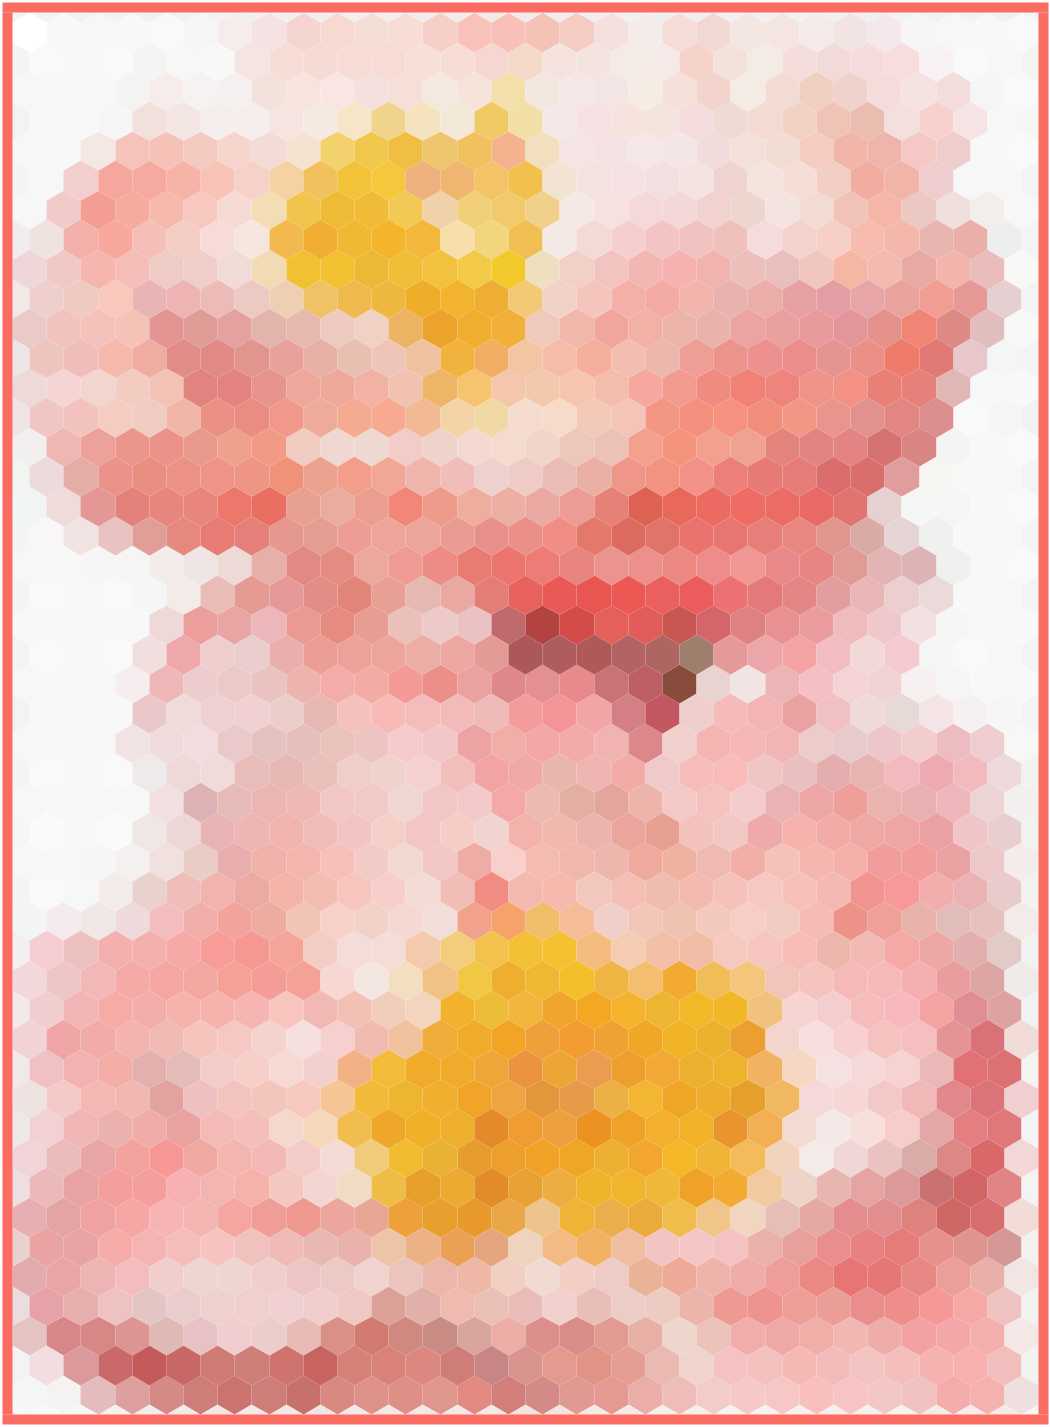
2015 Challenge Fabric

I knew I wanted to play up the base colors of the Challenge Fabric. I was drawn to the bright fuchsia pink the most. Then I wanted to contrast and play with the prints until I had an ombre effect, with the body the darkest and the wings the lightest. I pulled about 55 fabrics and had to start paring down from there.
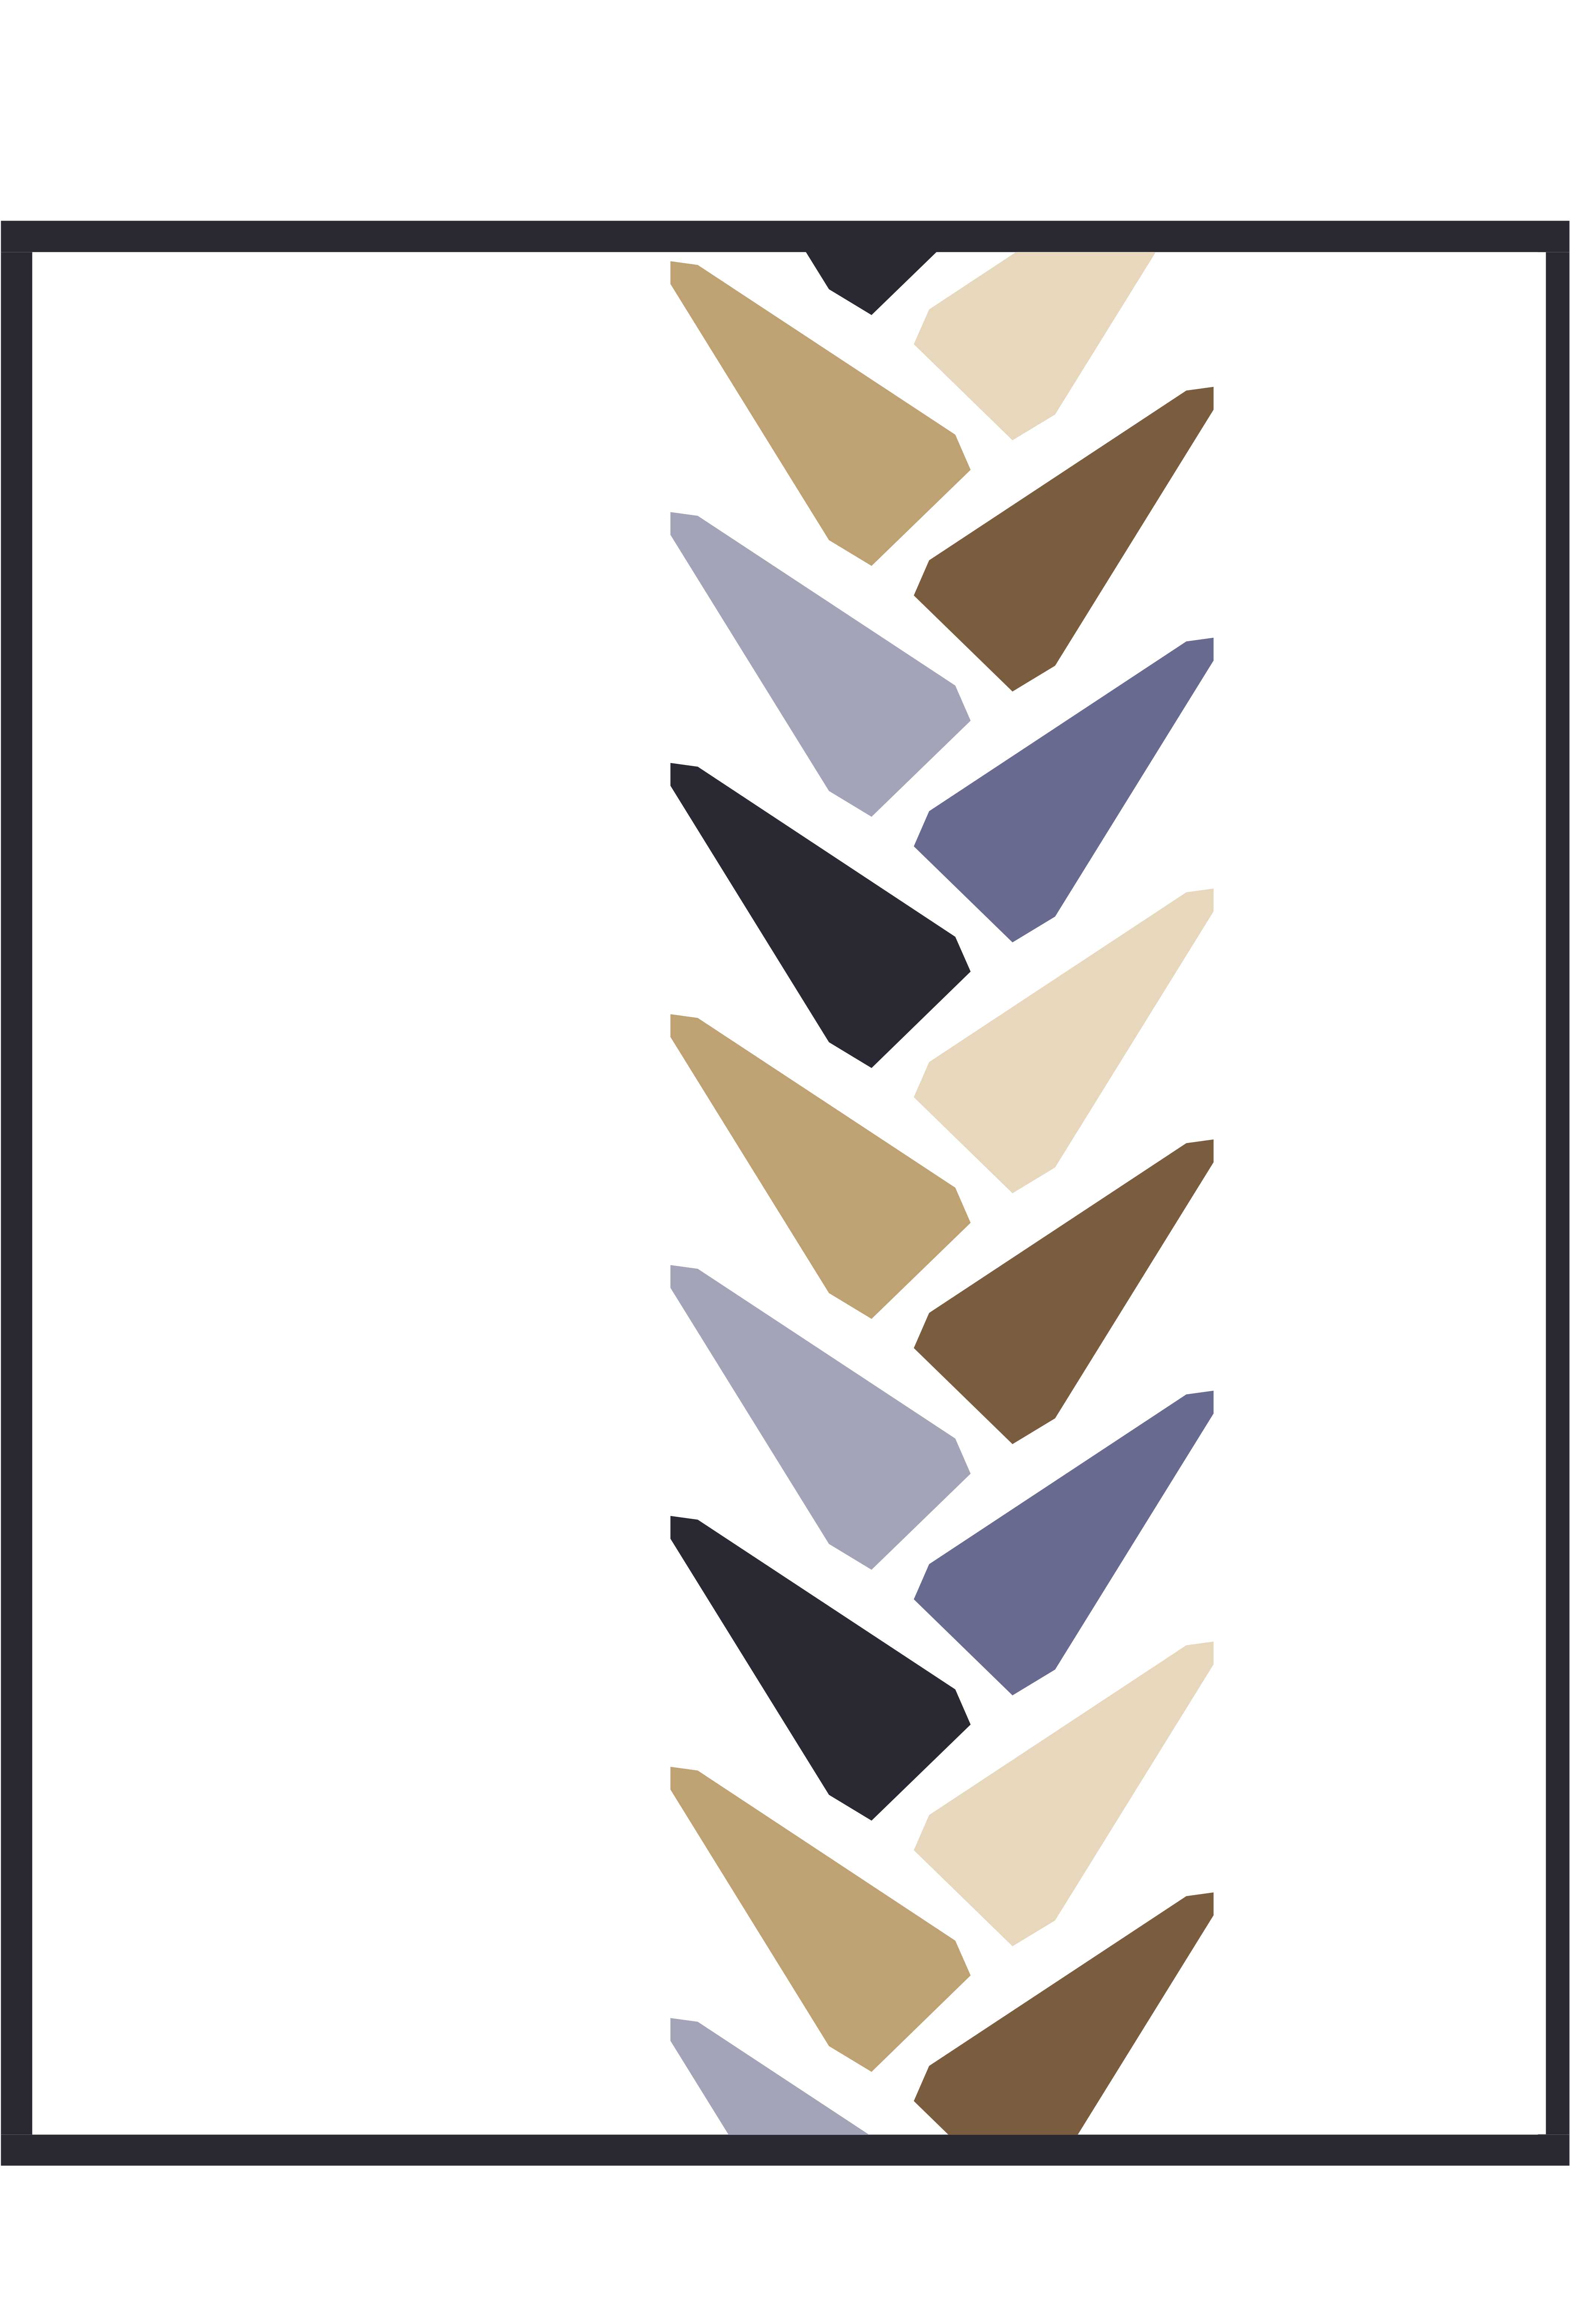
selection

The first pull

11195266_10155519947350367_1670985350_n

Finale, finally!

This was the last of about 15 different photos. Amy, Anne, Gillian and Kim (My QDAD peeps) were hugely patient and helpful in narrowing it down to this.

And then I started sewing. First the body, because it was small and easy for me to work my way into. I fussy cut the different textured indigo areas of the challenge fabric to create  different sections of the body, and threw in some of the prints. I used and indog Hoffman 1895 batik to make the textured pieces stand out.

body

Next came the wings. I started with the bottom wings because there were less pieces,and the color gradient for that was a bit easier. i incorporated some more of the indigo into the wings to balance out the center.

IMG_20150506_163624_hdr_edit

And then the big part, the top wings. It took me a week to make each wing, because the pattern pieces were huge, and each section was very large. I don’t normally use pins when paper piecing, but I had to with these pieces. It helped keep the large pieces of fabric steady.There are a lot of bias edges, and some of the pieces were as long as 22″. I could only piece one or two sections at a time before it got too ungainly and I moved on to other things.

But finally, FINALLY! I finished the top wing sections.  And. I. hated. it.

The fabric that I had pulled for the central wing focus, section 1 of 24, did not work at all. It was a print I LOVE for things ( my Rubix quilt, which I will talk more about in a few days, uses it for the background and it’s amazing)

For a split second I panicked. And then I remembered a technique taught to me at Quiltcon by Cristy Fincher, paperless paper piecing! Part of this technique involves glue baste and piecing from the outside in. So in that vein, section 1 would be the last section pieced. So with that in mind I removed some paper, firmly grasped my seam ripper, sent up a small prayer, and began some quilt surgery.

quilt surgery

Once the offending fabric was removed, I carefully grafted in the new section. I used the main print from Tula Pink’s Foxfield collection. I have tons of it, and it had both the pink and aqua accents in it. I fussy cut the fabric to show off my favorite parts. It worked perfectly, and I couldn’t be happier! I then took my new sugical skills ot the body, where I replaced the accent fabric with more of the fussy cut challenge fabric.

wing

Then I took the quilt off to the long arm. I froze for a bit, I knew what I wanted in the wig sections, but the background had me stymied. After a quick consultation with the amazingly talented Mandy Liens I outlined the butterfly and then used my favorite background filler from Christina Cameli’s book Step-by-Step Free Motion Quilting. This particular design is called Effervescent. Its super simple,and super effective.

IMG_4574

Following Mandy’s advice, I made curled feathers. I love how they look like feathers, but don’t require all the back and forth outlining of real feathers.

IMG_4573

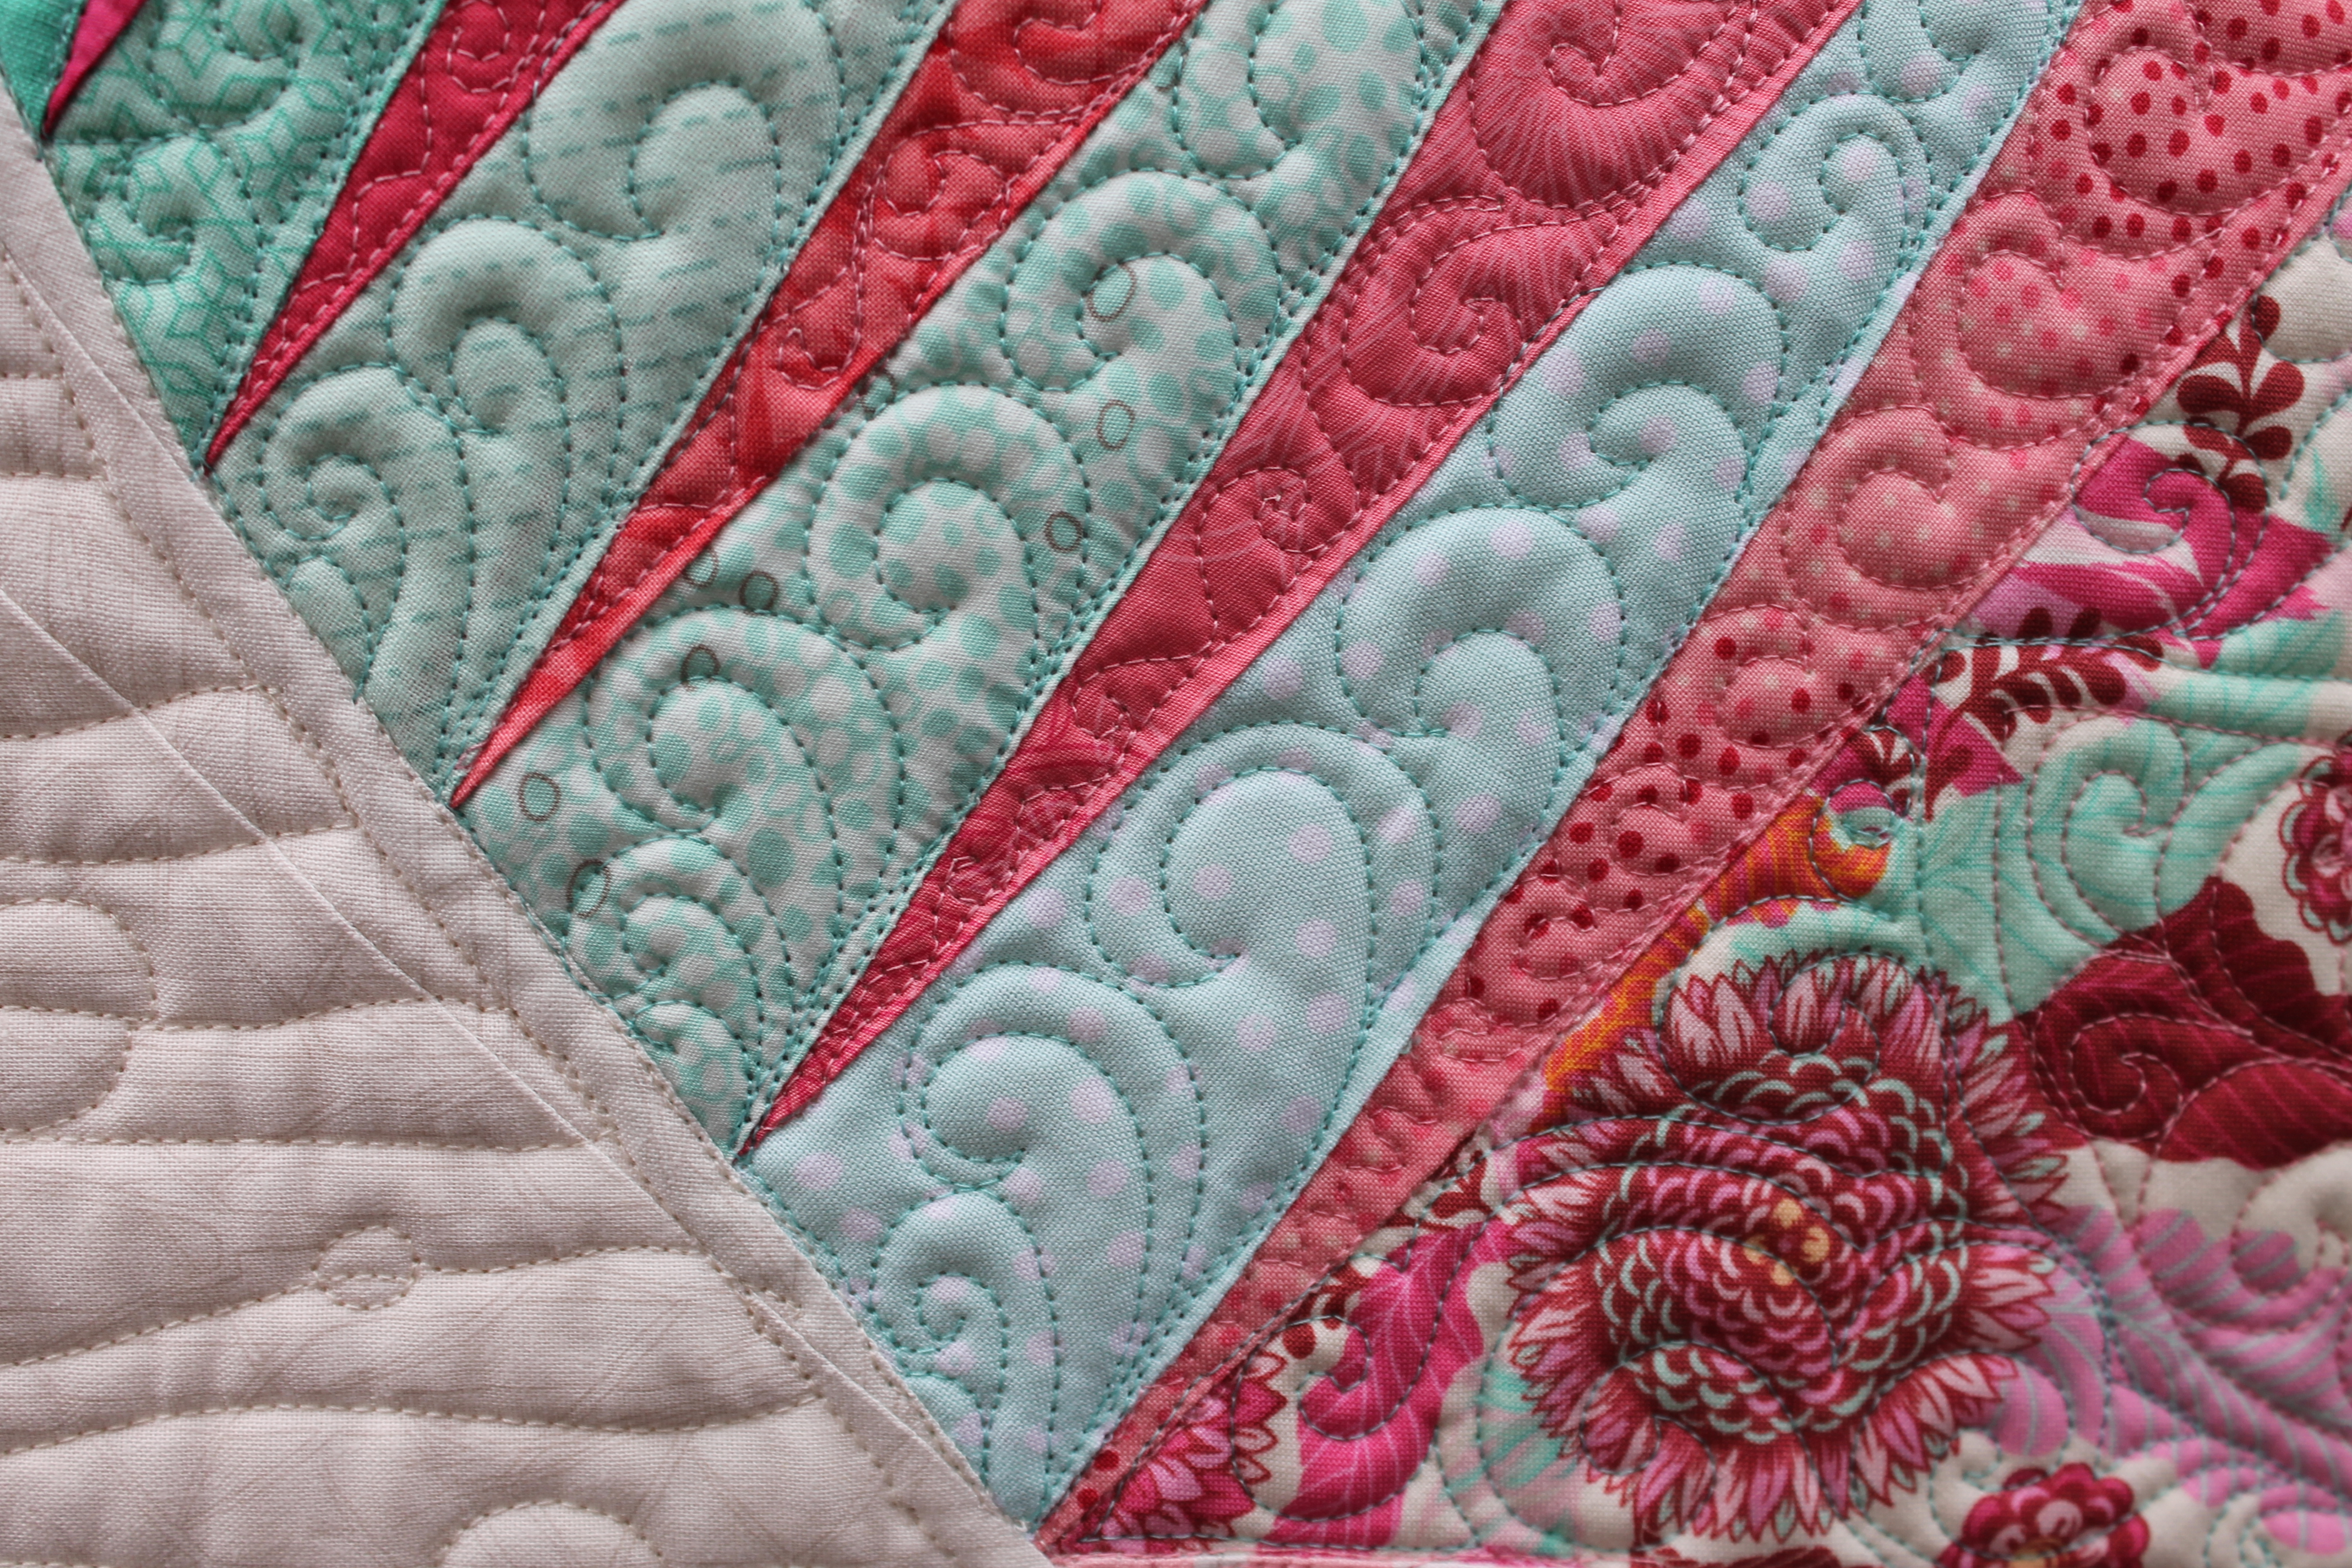
The body I had fun with. I used contrasting thread to create patterns and used mostly straight lines. SUper effective!

IMG_4575

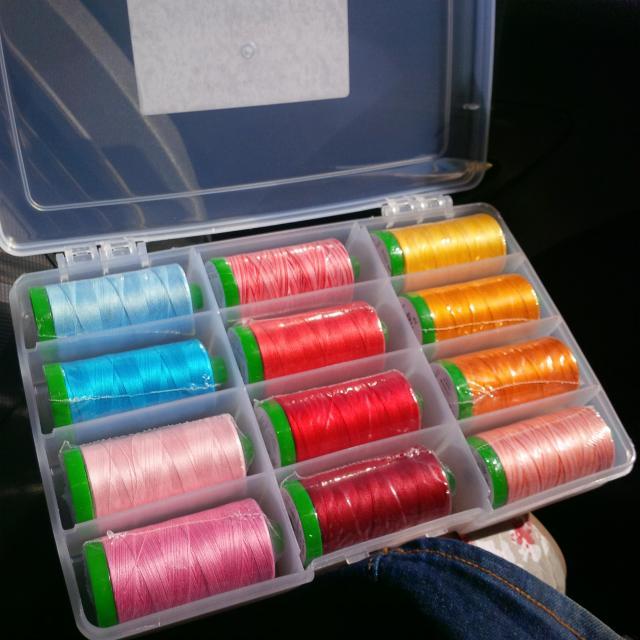
I used a custom box of Aurifil Threads that I picked up at a quilt show on the Sunshine Coast, from Carola’s Quilt Shop booth. I love that you get to build the box yourself from any thread in the shop!

IMG_20150502_161048

Then it was binding, labeling, and off to the front yard for photos. I thought in front of the rose tree would be lovely, but alas, no roses in bloom at the time. (you should see that tree now!)

IMG_4572

I mailed it off and waited. Then in late August the winners list was published, and there was Mariposa in Third place in the Pieced Category! I couldn’t believe it! I got this lovely ribbon (new for the challenge), letter, and two boxes of Aurifil thread as well as the participant packet of fabric and a beautiful enameled pin.

11853984_10155912479220367_1761151762_nprixe

I am so happy with Mariposa. She is winging her way around the USA for the next year as part of the Hoffman Challenge Trunk Show. If you spot her in the wild, snap a picture and sent it to me! or tag me on instagram @staceyinstitches #gianttakewingquilt

Happy Stitching!

StaceyDay_Logo

It’s Worth WHAT?!?- The Feather Quilt and a retreat

Last weeked I had the immense pleasure of attending one of Krista @poppyprint wonderful Quilting By the Bay retreats. Its a 13 hour day full of sewing, great food, and great friends. I managed to find a sitter for the entire day, so I was off and away bright and early that morning.

SDQ retreat

A gorgeous view in beautiful Lions Bay!


As usual, I brought waaay to much stuff with me, but I would rather have it and not need it, than need it and not have it. My biggest goals for the day were to finish up a longterm project, by BTW challenge quilt for the Pacific NorthWest show, and do my Riley Blake MQG challenge quilt. If I had time, I was going to play with making some Anna Maria Horner feathers, since I love them so much! I was reminded of them from a recent Molli Sparkles post and decided I really wanted to make some at one point in the day.

SQD table

A table with a view, amidst my fellow VMQGers!


I did manage to get most of my blocks sewn together from the long term project, but got bored waiting for the iron, and decided to put the rows away ( I know, I know, only 5 seams left, it’s just not a priority right now) and star on my BTW challenge quilt. I made up a design using only the Black to White fabrics, in a very effective grayscale. I had purchased a whole bunch of Cotton and Steel Black and White fabrics, and ended up with none of them in the final design for the quilt. By the time I finished sewing up the 256 Half Square Triangles, I was pretty bored of that too. I just wasn’t feeling it (To put some perspective on my strange mood, this was the first time in almost 2 weeks that I actually spent any time on my machine. I was burned out, and feeling it. I made a skirt at some point in there, but it doesn’t really count. Garment sewing is a whole ‘nother creature from quilting).

SDQ Trimmings

Holy Trimmings Batman!


I had a big, bright bundle of Hadley by Denyse Schmidt in my bag, and the templates and instructions for the Anna Maria Horner feathers, and I decided to play around with that. Only, as I was digging for the big, colourful bundle, I instead pulled out the Cotton and Steel fabrics that didn’t make it into the first quilt, paired with a lime green C+S basic (Dotties Cousin is the name of the print). It hit me then, that these particular fabrics together would look exactly like seagull feathers! Living on the coast, seagulls are a stable fixture in the environment. At the beach, in the parking lot at the store, or pretty well anywhere there is a chance of free food. Especially along the pier and beach at White Rock, which is a favorite spot for us.

A table full of feathers

A table full of feathers

I worked my way through the pattern, made a couple tweaks, and had enough strips cut from my fat quarters to make 11 feathers. Perfect for the baby quilt size. I had just enough white to make the surrounds, but had to borrow the solid black for the insides because I mistakenly grabbed an old poly-cotton blend that just didn’t work with the other fabrics (Thanks @FelicityQuilts!). I finished sewing the feathers together at home the next morning, added strips to the sides to make the quilt wider, and then backed it in another C+S print. The next day I booked my time on the longarm, and got to it! I chose a pattern of curved/straight lines and bubbles. I believe its is called Effervescent? Either way, it’s from the book Step-By-Step Free Motion Quilting by Christina Cameli.

Day.Stacey-Feathers-FULL

Feathers (Unofficially called Squack!)


IMG_4567

Quilting detail! This is one of my new favorite background fills

I color bombed the binding, and then hand sewed the whole thing, label and sleeve notwithstanding. I love my Feather quilt so much, I decided to completely forgo the original design and use this in place as my BTW entry. As I was filling out the entry form, I got to the section that asks if you want to sell your quilt. I decided to use the Molli Sparkles spreadsheet to see just how much, exactly, this quilt was worth.

Feathers Cost Sheet

HOLY CRAP! ITS WORTH WHAT!!!!

Let me clarify a couple points in this spreadsheet. I am an award winning quilter, an author, teacher and lecturer. I have more than 15 years of experience quilting. $33/hour is reasonable for a skilled and experienced artist. Quilting cotton in Canada is expensive, with solids starting around $10/yard and designer prints upwards of 17.99/meter, and Cotton and Steel in particular is at the upper end of the scale. The shop I purchased them from charges 16.99/yard, and I only charged for the actual amount of fabric used. The longarm rental is a flat rate of $60/day. There technically would have been the cost of babysitting and the retreat in there, since thats where I was sewing, but I didn’t include it. Then there is the 23% that the PNW takes as commission for selling your quilt (12.5% for two NFP entities) so that 30% markup is really only 7% for myself. Not much, considering most businesses mark up their products 50% or more ( I worked at a shoe store once, and made the mistake of checking the invoice. Our cost, $5.00, our retail price, $89.99, that’s an 1800% markup!) And Canada Post is mega expensive, even with my discount card, and that cost is a low estimate based on what it usually costs me to package and send off quilts to the lower US.

I never would have put this quilt at almost $900, but there it is! Personally, when I make a quilt for myself and as gifts, I don’t take cost into account. Especially with gifts, because friendship is priceless. But if you go and read through the We are Sew Worth It series from Hunter Studios, Molli Sparkles, and Sew Mama, Sew, it starts to make sense. When someone seeks out out to request a quilt, you are spending a lot of time, energy and money to make said quilt. Our time and skill has worth!

StaceyDay_Logo

2015 Pantone Quilt Challenge- Marsala Edition

Well, you all know how I felt about Marsala when it was first announced.

BUT I love a good challenge, and I have always wanted to participate in the Pantone Quilt Challenge hosted by Anne @Play-Crafts and Adrianne @On the Windy Side. I missed out on Radiant Orchid last year ( I had all the fabric and forget why it never got done), so Marsala it was.

Marsala button

I wanted to try and use colors that maybe weren’t the easiest to match to Marsala. I wanted to try and bring out some of the other undertones you find with it, while keeping it warm and friendly. I bought a bundle from Hawthorne Threads, and then added colors to my shopping cart until they looked good on screen. Of course thats always a gamble, the screen won’t show how bright or vibrant a fabric is, but I lucked out and got exactly what I thought I was getting. Woo hoo!!

And then it sat. and sat and sat and sat and sat. AAAAAAAAAND SAT. I had too many ideas to try and time kept on slipping away. I started to panic.

When I finally realized I was overthinking things, I took a step back and started looking through some of my books. I came across the pattern “In the Throne Room” from the book Modern Rainbow by Rebecca Bryant and experienced a true blue AH-HA! moment. I didn’t make it exactly, but you can see the influence in the layout.


Presenting Trade Winds.

Image1

Trade Winds is 42″x55″. For the background I cut into my huge stash of Cotton and Steel Dotties Cousin in Linen. I think it is the perfect neutral and gives a really natural warm glow to the quilt. I picked eight of the Marsala fat quarters based on their value from darkest to lightest and paired them with the jade and tangerine. Those two hues are very very different, but work so well to pull out the earthy tones in the marsala. I also arranged them by value, so the bars fluctuate from dark to light to dark a pair of times across the strip. In the spirit of doing things that are a challenge for me, I left a TON of negative space. I also decided, after laying the strips out, that alternating the direction of the prints really made the quilt interesting, like a back and forth between the two groups of Marsala at either end. IMG_4457

For the quilting, I took a chance on a variation of a design I saw on 13 Spools. Amy Garro has some great tutorials for quilting, and my favorite is her Matchstick feathers.  I am not quite at feather level on the long arm, so I thought I would do some freemotion large swirls, in part to contrast with the pieced bars, and in part to start getting used to the control it takes to really reign the curves in. As I went, I decided to add some horizontal spaced lines to compliment my spaced bars and add the contrast to the swirls. It isn’t matchstick, but the effect is what I wanted,and the result looks like a cloudy sky with the wind blowing between them. The almost Oriental color theme, the back and forth of the colors,  and the quilting stuck the name Trade Winds in my head. I think it really suits. I used Aurifil 40wt in Sand for the quilting, and the darker thread did wonders for the quilting!

Of course I Marsala bombed the binding with my favorite arrowhead print, which I also alternated the direction of as a nod to the bars.

This quilt is very different for me, with a lot of super bold elements, and I really love it. I am also happy that I was able to use a unique color pairing to bring out the best in the Marsala. I actually kind of like it!

Linking up with the 2015 Pantone Quilt Challenge.

Happy Stitching,

StaceyDay_Logo

Lanterns- A Tutorial

A few weeks ago I was invited to participate in the What Shade are You Blog Hop by RJR fabrics. I am always up for a blog hop, it gives me the chance to bring some of my Quilt Design a Day designs to life AND give away some great fabrics to a lucky reader!

Blog Hop 2015 logo C small

Back in December one of our inspiration photos, called Sparks and provided on a weekly basis by a QDAD member, really struck me with its colors and intensity. Taken during Snowmageddon, that particular QDAD design I had flagged in my head as one to do up as a pattern. The timing was perfect, as RJR sent the invite not a week later, and that design came to mind.

10363836_10152410670582294_7472710089444888399_n
QDAD Spark Photo Courtesy of Alyson@ The Hasty Quilter
Lanterns

Lanterns

I had a lot of fun narrowing down the colors to use from the Cotton Supreme Solids. RJR has 149 solids colors to choose from in the Cotton Supreme line. They have a beautiful drape, weight, and feel to them. They might actually become my new favorite.

I tweaked the design to make it lap sized. The construction is a basic log cabin with a few fun color placements. This design would look great in some of the other color offerings RJR has as well.

Dogwood

Cherrywood- 297, 282, 283, 289, 291, 294

Kelpie

Kelptastic- 342, 348, 349, 327, 328, 300

Patina

Winter Dogwood- 297, 282, 283, 289, 291, 294

Now, normally I wouldn’t just show you a quilt top, I like my quilts to be finished and bound and presentable. However, in this case I am saving this top to be finishe don a long arm. Quite possibly by me. Which is super super super awesome!

Alrighty, on to the good stuff!!

Lanterns


Lanterns Glow Tutorial

Finished Quilt: 54”x 66”

Finished block: 12” square

Fabric Requirements

1/4 yard medium bright yellow (Cotton Supreme 9617-337)

1/4 yard bright yellow-orange (Cotton Supreme 9617-140)

1/2 yard medium tangerine (Cotton Supreme 9617-276)

1/2 yard light blue (Cotton Supreme 9617-327)

1 yard medium blue (Cotton Supreme 9617-300)

2 1/2 yards navy for background (Cotton Supreme 9617-191)

1/2 yard royal for binding (Cotton Supreme 9617-345)

3 5/8 yards for backing

64″x 76″ piece of batting

Cutting

Tip: Use a light spray of starch or starch alternative before cutting to help keep the pieces from shifting and skewing while sewing. Spray on the wrong side and press from the right side of the fabric.

From the medium bright yellow cut:

20 rectangles, 2”x 3 1/2”

From the bright yellow-orange cut:

20 rectangles, 2”x 3 1/2”

From the medium tangerine cut:

40 rectangles, 2”x 3 1/2”

From the light blue cut:

40 rectangles, 2”x 6 1/2”

From the medium blue cut:

40 rectangles, 2”x 6 1/2”

40 rectangles, 2”x 9 1/2”

From the navy cut:

40 rectangles, 2”x 9 1/2”

40 rectangles, 2”x 12 1/2”

4 strips, 3″x 42″

2 strips, 3″x 19″

2 strips, 3″x 12″‘

From the royal cut:

7 strips, 2 1/4”x 42” for binding

Instructions

All seams are 1/4” unless otherwise stated. Pieces are sewn right sides together.

Take the medium bright yellow and bright yellow-orange 2”x 3 1/2” rectangles and sew them right sides together. Press the seams open to make the center squares.Take the medium tangerine 2”x 3 1/2” rectangles and sew them to either side of the center squares as shown. Press towards the center square. Take the light blue 2”x 6 1/2” rectangles and sew them to the top and bottom of the block. Press towards the center square.

Lanters Illustrations

Take the medium blue 2”x 6 1/2” rectangles and sew them to the sides of the block as shown. Press towards the center, and then sew the medium blue 2”x 9 1/2” rectangles to the top and bottom. Press towards the center.

Lanters Illustrations

Take the navy 2”x 9 1/2” rectangles and sew them to the sides of the block as shown. Press towards the center, and then sew the navy 2”x 12 1/2” rectangles to the top and bottom. Press towards the center. Trim and square the blocks to 12 1/2”x 12 1/2”.

Lanters Illustrations

IMG_4419

Sew the blocks together into rows of four as shown. In the odd rows the second and fourth block will be rotated, and in the even rows the first and third blocks will be rotated. Sew the rows together into the quilt top.

Sew the 19″ navy strips to two of the 42″ navy strips to make two side borders blocks 60 1/2″. Sew the 13″ navy strips to the remaining 42″ navy strips to make the top and bottom borders 53 1/2″. Sew the side borders to the side of the quilt top, matching ends and centers, and press towards the borders. Sew the top and bottom borders to the quilt top, matching ends and centers, and press towards the borders

Piece the backing together so it measures approx 64″x 76″. Layer the quilt top with batting and backing; baste. Quilt as desired. Join the royal 2 1/4″ wide binding strips using a diagonal seam to make a single long binding. Fold the binding in half and sew it around the quilt top on the right side. Turn the binding to the back and secure in place by hand or machine. Label and enjoy!

Lanterns


You could quilt each color individually, changing threads each time, to hide the quilting and let the blocks pop. Alternately, you could choose a medium blue thread and quilt in straight lines that radiate out at angles from the center of the block to mimic the flow of light, and then use a swirl in the yellow sections to soften out all the hard angles.

If improv is more your thing, you could easily make the blocks using varying width strips for a modern wonky log cabin look. Construct the blocks in the same order, using pieces with varying widths, building the log cabin outwards. Use the indigo round to bring the blocks to just over 12 1/2”, then square. Put them all together for some fun and funky movement to your Lantern Quilt.

I hope you enjoy making your own version of Lanterns Glow. I love to see what your make, so please send me some pictures of your finished quilt, or upload them to the Stacey Day Quilts group on Flickr. You can also tag me in instagram @staceyinstitches #lanternsquilt

RJR has generously donated a bundle of the same fabrics used in my Lanterns Glow quilt to give away to one lucky reader!

Simply comment below with an answer: What color are you and why? Entries will be open until 8pm Sunday, when I will draw a name using Random.org.

winner lanterns

Congratulations Michele!

The Winner was #27, Michele, who said “Beautiful quilt and I absolutely love the name for it!!! My favourite colour would be Aqua so #292, #291, and #289 are my colours!! I would love to make a quilt just like yours and it would be perfect for a gift to my BIL!! Thanks for the chance!!”

Thank you for entering Michele, and thank you to everyone who came by to visit!

*Full Disclosure* When I picked out my fabrics I did so without a color card, and what I thought was Navy was actually that beautiful royal almost purple at the bottom of the bundle. I am using it for the binding and back of the quilt. In the meantime, I found the correct color sku for the Navy and used that in the quilt as well as quoted it correctly in the instructions.

2015.04.03 B 2015.04.03 C

Enjoy your long weekend, I know I will be sewing and spending time with family (and eating chocolate, shh! Don’t tell my diet!)

Happy Stitching,

StaceyDay_Logo

Cirrus Solids BOM Challenge

I am super excited to share with you all my Cirrus Solids Block of the Month Challenge! 


Lattice Block

Image Credit: Cloud 9 Fabrics


Introducing the Lattice Block!

Back in July, Amy@Badskirt posted in the QDAD Facebook group about the Cirrus Solids BOM Challenge hosted by Cloud 9 Fabrics, to introduce their new line of solid fabrics.  Cirrus solids are a soft, supple and vibrant line of chambray weight cross woven yarn-dyed solids. There are 21 hues in the collection, and hopefully they will be adding more! The fabrics are 100% certified organic and the dyes are low impact, so not only are they gorgeous, they are ecologically responsible. So naturally the more you have the better it is for the environment, right? I am always up for a challenge, so I started playing with color combinations and shapes. Then life happened, and I had to step away for a while.

About a month later I had a brainstorm, and sketched out some block ideas on a sketch pad I keep on my nightstand (you never know when inspiration will hit). I drafted out a few blocks and plugged in some fabrics.

There are so many variations and options with this block. It creates unique shapes when placed on point or horizontally. You can mirror the blocks, play with the color, whatever you want! Super versatile, and you know how I love versatile!

You can download the pattern and instructions HERE on Cloud 9’s blog. The instructions include yardage to make a 16 block quilt. Below are some of the variations I came up with. You will need a few more than 16 block

Shorelines in Horizontal Deep Sea in On Point

I can wait to make something with my bundle of Cirrus Solids! I hope you all take the time to enter the challenge! The entries are rolling, which means your block could be picked any time, you don’t have to enter every month. You can also check out the past challenge winners here and here!

A big thank you to Cloud 9 for making this a great challenge!


Happy Stitching!

StaceyDay_Logo

The Reclaimed West Blog Tour

I have been waiting patiently for MONTHS to post about this! I still have another week to go for the big reveal, but I am still super stoked!

reclaimed-west-blog-tour-graphic

This blog tour, running from November 17-21, is hosted by Timeless Treasures to celebrate the release of Judy & Judel Niemeyer’s first-ever fabric line, The Reclaimed West. This line is full of rich, saturated prints in a whole rainbow of colors.

My Day is the 19th, when I will be releasing my pattern for the collection. This whole process has been a dream come true for me, and I hope to one day meet Judy in person! But for now, fabric will do =)

There will be awesome giveaways on the Timeless Treasures Blog, and I will be giving away a PDF copy of my pattern right here! See you all next week!

Reclaimed West Logo QW BW timeless_treasures

Happy Stitching,

StaceyDay_Logo

Tidal Lace Blog Hop and Giveaway *giveaway closed*

Welcome to my stop on the Tidal Lace blog tour! I first met Kim through the Quilt Design a Day group and we got to know each other over time. I was thrilled when Kim approached me and asked if I wanted to make something for her debut line of fabric from Windham. Of course I said yes! I had a design in mind almost immediately.

 TL-BlogHopFIN002

 I love Tidal Lace so much. The colors, the texture, the OMBRE! Woot! Ombre. I thought a long time about all the wonderful things I could say about Tidal Lace. Kim did an outstanding job in her debut collection, and it shows. The prints are soft, delicate, and so very very versatile. The colors are a feast for the eyes, and overall Tidal lace it suited to so many different things, which you will see in the coming days as you hop from blog to blog. I absolutely adore the starlight blenders and the tidal lace border print. Oh, that border print! I have plans for that print, which may or may not include fussy cutting a whole lot of skirt panels. We will see.
Tidal Lace Wheel, borrowed from Kim with permission

Tidal Lace Wheel, borrowed from Kim with permission

When I saw Tidal Lace for the first time, I was really struck by it. I knew Kim’s inspiration-days sifting through antique lace with her grandmother, family vacations to the ocean, and how she connected the memories into the collection.  The stories really stuck with me. Most of us had someone in our lives, a mother, grandmother, favorite aunt, that taught us to sew or planted the seeds of creativity that later sprout and flourish. In my family, quilts were given for any occasion-new babies, weddings, moving out on your own or just because. My own grandmother instilled an appreciation of quilting into her children and grandchildren. I have memories of visiting my grandma at the local quilt shop, where she would let me play with jars of buttons and scraps, and of sitting in her basement making our first quilt together. I still have that quilt, and I remember how happy I was to be able to spend so much time with grandma.
IMG_5909
 I also started thinking about quilting, and how as quilters we use fabric to make connections and create memories. We create to express love, friendship, joy, and also in times of hardship and sorrow. Quilting forms threads, connections, between individuals, friends, and family. The sharing of ideas and inspirations, whether its blogging, instragram, or a casual conversation at work or in the grocery store, strengthens those connections. Every handmade treasure we gift, swap, share and show add more threads, until the connections form a delicate lacework that strengthens with each pass. Many of us have formed strong bonds of friendship with people we may never meet, all centered around the craft of sewing and quilting. We are part of a community, based on sharing and inspiring. I am honored to be able to express myself in fabric and thread, and be able to share the experience with others.
I used Tidal Lace to create a queen size quilt. I wanted something that would be simple, letting the fabrics shine and take advantage of the amazing border print. The pattern, which will have four sizes, will be coming around the same time as the collection is released is now available from my Craftsy shop. In the meantime I really wanted something to share with everyone. There were a lot of leftover half square triangles left over from the quilt, so I chose to make pillows to match the quilt. They whip up quick and we had a lot of fun at the beach taking pictures.
IMG_20140914_163530

H helping out

After the tutorial there is a Fabric Giveaway! Windham was generous enough to provide a full fat quarter bundle of Tidal Lace for each blog to give away! When you’re done here, hop on over to Anne @Play-Crafts and check out her awesome pillow! The full hop list can be found here, be sure to visit everyone and enter for your chance to win a bundle. There is a whole lot of talent packed into this hop, and I can’t wait to see what everyone else has planned for Kim!

The Tide Pool Pillow Tutorial

IMG_20140914_163034

Fabric Required:

An assortment of HST corner scraps-16 background and 16 prints. If you are cutting from scraps you want 8 squares 4″ of assorted prints and 8 of the background, cut in half to make 16 HST’s of each
4 strips of fabric 18 1/2″x 3″ for borders (I used the background print)
2 rectangles, 14 1/2″x 18 1/2″ for pillow back
1 square of batting 19″x19″
1 square of plain fabric or broadcloth 19″x 19″
*optional* a 6″x 90″ pieced strip for the ruffle (I used the narrow border print)
 an 18″ square pillow form

Instructions

1. Sew the print HST’s right sides together with the background HST’s to make 16 HST squares. Press and trim the squares to 3 1/2″.
 Trim squares
 2. Arrange the squares on your design wall or cutting table so that the HST squares form chevrons. Play with the layout until you are happy with it.
HSTsquares arranged

HST squares arranged

3. Sew the HST squares into pairs and then into the chevrons. Double check the layout on your deisgn wall

Double Check!

Double Check!

4. Sew the chevrons together to make the center of the pillow. Press well, square and trim.

5. Mark the seam allowance in the corner of the pillow center. Pin the border strips right sides together to the pillow sides, matching centers. Sew the border strips to the side of the pillow the marked corner of each seam allowance. Press the strips out, pin the top and bottom and sew in the same way, stopping and starting at the corner.

IMG_3850

6. Draw a line from the corner of the seam allowance to the edge of the strip. This will be the stitch line for the your mitred border. Do this for both sides for the top and bottom strips.

IMG_3852IMG_3853

 7. Fold the pillow right sides together on the diagonal so that the ends of the border strips are matched up. Push the seam allowances out of the way and sew down the line, starting at the seam allowance and stitching the edge.

IMG_3858 IMG_3855

8. Trim the seam to 1/4″. Repeat sewing for the remaining three corners, trim, and press all the seams open. Press the pillow top well.

IMG_3859

9. Layer the pillow top, batting and the broadcloth square to make a small pillow sandwich. Baste and quilt as desired. Trim and square the finished quilt sandwich.  * Now would be the time to make the optional ruffled edge. I use this tutorial,. If you don’t have a ruffler for your machine, a line of basting and then a gentle gather does the trick.*

IMG_3860

10. Take a 14 1/2″x 18 1/2″ rectangle. Fold one end over 1/2″ to the wrong side, and then 1/2″ again, so that the raw edge is covered. Repeat for the other rectangle. Topstitch next to the fold. Layer the pieces right sides together on the pillow front, so that the finished edges overlap by 4″. Stitch around the pillow 3/8″ from the raw edge. Trim the corners and finish your edges either with a serger or a zigzag/overlock stitch on your domestic. Turn the pillow to right side out through the opening in the back, stuff with an 18″ pillow form, and enjoy! The pillow finished slightly under 18″ square, giving the pillow some loft when the form goes in. 

IMG_20140914_163438

IMG_20140914_163358

Voila! I hope you enjoyed the tutorial!

On to the Giveaway!!

To enter, just leave a comment below on this post! Tell me what you would create to make a connection with someone, which is your favorite, or just how much you love the collection (because, come on, who wouldn’t love the collection!)

Tidal Lace Wheel, borrowed from Kim with permission

Tidal Lace Wheel, borrowed from Kim with permission

The winner will be drawn Sept 23 at 8pm PST. Make sure to visit the other blogs to see their awesome projects and inrease your chances of procuring this lovely bundle of joy!

Happy Stitching

StaceyDay_Logo

Quilt Design a Day and a Giveaway*winner chosen*

Welcome to another QDAD day here at Stacey in Stitches!

If you are here visiting from the Sew Mama Sew interview, welcome! I have a lot of fun making a Quilt Design a Day. Today marks day 140 of designing for me. I am happy to say I haven’t missed a day. QDAD is one of my favorite exercises, and the group is so happy and friendly and a whole lot of fun! We’ve had an influx of new members, many of whom are participating. It’s great to see everyone’s interpretation of the inspiration photo. I hope everyone gets a change to try it at least twice. The first time for practice, the second time to get hooked!

I use EQ7 for my designs, though I did download a new program to try. I am playing with Corel Draw, and I want to try Adobe Illustrator. Sometimes there are things in my head that need a drawing board rather than a grid to work on. I have discovered many new features in EQ7 in the meantime, and I am having a blast playing with different layouts and blocks.

July 2 Tap

July 2-Faucet

This design reminded me of a video game, so I called it The Dark Castle. The inspiration photo had an outdoor faucet topped with a fanciful castle. Soe days a literal interpretation is in order, and I love how it came out!

July 6-Buttons

July 6-Buttons

This particular inspiration was a bowl full of buttons. It evoked so many different memories in people, for me it was the button jars at my grandma’s house when they lived down the road from us. We used to play with those hundreds of buttons, and I’m sure many of them saw the inside of a vacuum when we went home. Not on purpose either.

July 4 Ice Cream

July 4 Ice Cream

July 4th marked our 200th member, and the 200 member challenge. l chose the color rich ice cream inspiration photo for my 200 quilt. I haven’t counted them, but I am pretty sure there is enough ice cream in this photo for all our members, including the new ones! I love the navy as a background, I think its my new favorite! I recently bought a whole lot of navy solids, so I am going to have to make something with it soon.

Anne’s 200 member quilt  ended in hilarity and this picture as a result.

10535613_10154327900065367_6553829421266295958_o

STACEY THE BOLD WELCOMES ALL NEW QDADERS!

You know how hard it is to take a selfie wearing a tinfoil helmet and holding a rotary cutter?? Its not easy…..and that tinfoil is HOT!

July 12 Antiquity

July 12 Antiquity

The photo for this one was of an antique door knob and keyhole. I was planning to make something around the shape of the keyhole, but then I noticed the scuffed and faded pattern carved into teh doorframebehind it. It was a little nine patch interspersed with lines and diamonds. I did my best to recreate it and ended up in a Gatsby-era art deco world. I added the tiny coral diamonds and it really added dimension to the design. I am very happy with it and may work it into a pattern.

Run, Zombi Run!

Run, Zombi Run!

This design started out happy and fun, but there is a running joke about the zombie apocalypse in QDAD, sparked by a series of abandoned looking building with random diamond shapes in them, and chihuahuas. Someone mentioned this looked like people running from something, probably zombies. So I turned some of my happy little petal pluses into zombies. Minus the whole Z.A theme, I like the grayscale graduating into color. It definitely sparked a conversation or two!

July 13 Raspberry

July 13- Raspberry

This inspirtion was a bowl of raspberry swirl frozen yogurt. It looked so yummy! I decided to do a cross section of the swirl, which has sparked a series of cross sectional designs. Mostly fruits and veggies, and every so often ice cream. I am going to do a couple up as patterns so I will save them for a surprise!

May 24 feathers

I did do up a foundation pattern for my feather blocks, you can download it here for free! If you make one ( or a dozen) send me a picture, I would love to see it!

Feather Block Feather String

I hope you enjoyed your visit today! Make sure to visit Amy Gunson at Badskirt, and Anne Sullivan at Play-Crafts, both have QDAD giveaways running!

Now for my Giveaway! The giveaway is now closed! You can see the winner in my next post!

The giveaway is open to anyone, including international visitors! Simply leave a comment. That’s all! Tell me your favorite color, your favorite quilt design, what you’re going to make with the feather block or the bundle, what the weather is like at your house today, tell me a joke ( the punnier the better!) ANYTHING!

IMG_3736

I am giving away a Fat quarter bundle of 5 cool colors of my new Colorworks Premium Solids by Northcott. I picked these up on vacation, and I got a ton of yardage, so I thought I would share with everyone. The colors are deep and rich, more so than in the photo. The colors are perfect for making a QDAD of your own! The Giveaway will be open until Wednesday at 8pm PST, and I will pick the winner using Random.org

Happy Stitching!!

StaceyDay_Logo

April Showers

Bring May Flowers!!

Seriously people. Its been raining quilts at my house. And fabric. Its EVERYWHERE!!!

I have been working on some super secret projects that I am getting really excited about sharing. Things have also picked up at work, so at least April was kind enough to wave as it flew by.

I hit 60 days in QDAD on the first. That was a cool milestone for me. I can’t believe I have managed 2 designs a day for a whole 60 days. Mind you, not every one is a winner, or even really feasible as a quilt (4000 piece pixel quilt? Yeah, I don’t think so)

April 13-Hexie flowers

Not quite 4000 pieces, so doable?

But there are some very good designs that might just make it into pattern form. Pattern writing is something I am getting quite good at 😉

Pattern Anyone?

Pattern Anyone?

One finish I CAN share today is my Modern Metallic Challenge Quilt. I called it Ivy Garden. I love how this one turned out. I quilted it on Joan Nicholson’s long arm. SHe is a fantastic quilter, and rents out the back of Maybelline one you have taken her class. I used a curvy floral panto for the quilting that softens out all the pointy edges. This is a new favorite of mine that might end up as a Christmas gift for someone (she knows who she is and is squealing with delight as we speak lol)

Ivy Garden

Ivy Garden

I hope everyone has a Happy May! This month is going to be filled with quilts, weddings, and Quilt Market going ons.


Happy Stitching!

Stacey

Lets Celebrate Giveaway Weekend!! ***Winner Announced***

Its Giveaway Weekend!!

To Celebrate Sapphire Star coming in second this past weekend, I wanted to thank everyone for all the support and love and keep the happy train rolling!

I payed a visit to The Cloth Shop on Granville Island today. Its been a while since I’ve been to the shop, the last time was before they moved, so lets say 2 years ago. I was blown away! The new space is bright and cheerful, and oh! The fabric! An entire wall dedicated to Kaffe Fasset! So many modern fabrics and blenders and gorgeous happy Batiks! It is Definitely worth the trip in!

I put together a beautiful bundle of five fat quarters, and they will be going home with one lucky person! The Mini Margarita Bundle is up for grabs!

Bundle

Its super easy to enter. All you have to do is leave a comment on this post! Tell me what you love about quilting, my blog, your favorite CQA quilt, the weather in your town, whatever you want! You don’t have to subscribe, but I would love to have you *wink*

The Giveaway will be open to EVERYONE EVERYWHERE!

May 002

Make sure you tell your friends! If you do, leave a second comment telling me how you shared this post for another chance to win!

The fabrics in the Mini Margarita are:

Tone on Tone dots in Teal from David Textiles

Medallion in Green and Red from Flea Market Fancy by Denise Schmidt

Delhi Blooms in Lime from Soul Blossoms by Amy Butler

and finally a Golden/Tangerine Tone on Tone of Unknown Origins (I forgot to check the selvedge before I bought it, oops!)

For those of you who are local they still have full yardage at the Cloth Shop of all these prints!

The Giveaway will be open until 5pm PST and I will announce the winner then!

Good luck!

AND THE WINNER IS……

Winner

#21 What Comes Next who said “I need to make a trip down to Granville Island – I’ve been hearing all kinds of good things! I love seeing all the incredible quilts and inspiration at the quilt shows – the CQA show was fabulous. Lovely bundle you’ve put together!”

Thank you to everyone for making this giveaway a success. Its so much fun to read everyone’s comments =)

Stacey

Here is where to find the buttons, there was some confusion the last time, I hope this helps =)

Where to find the buttons