Modern Plus Sign Quilts blog hop

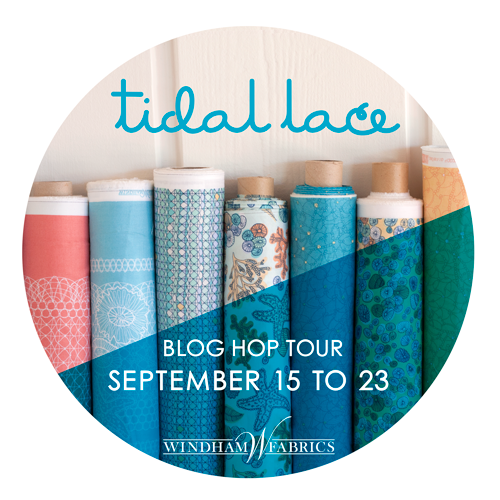
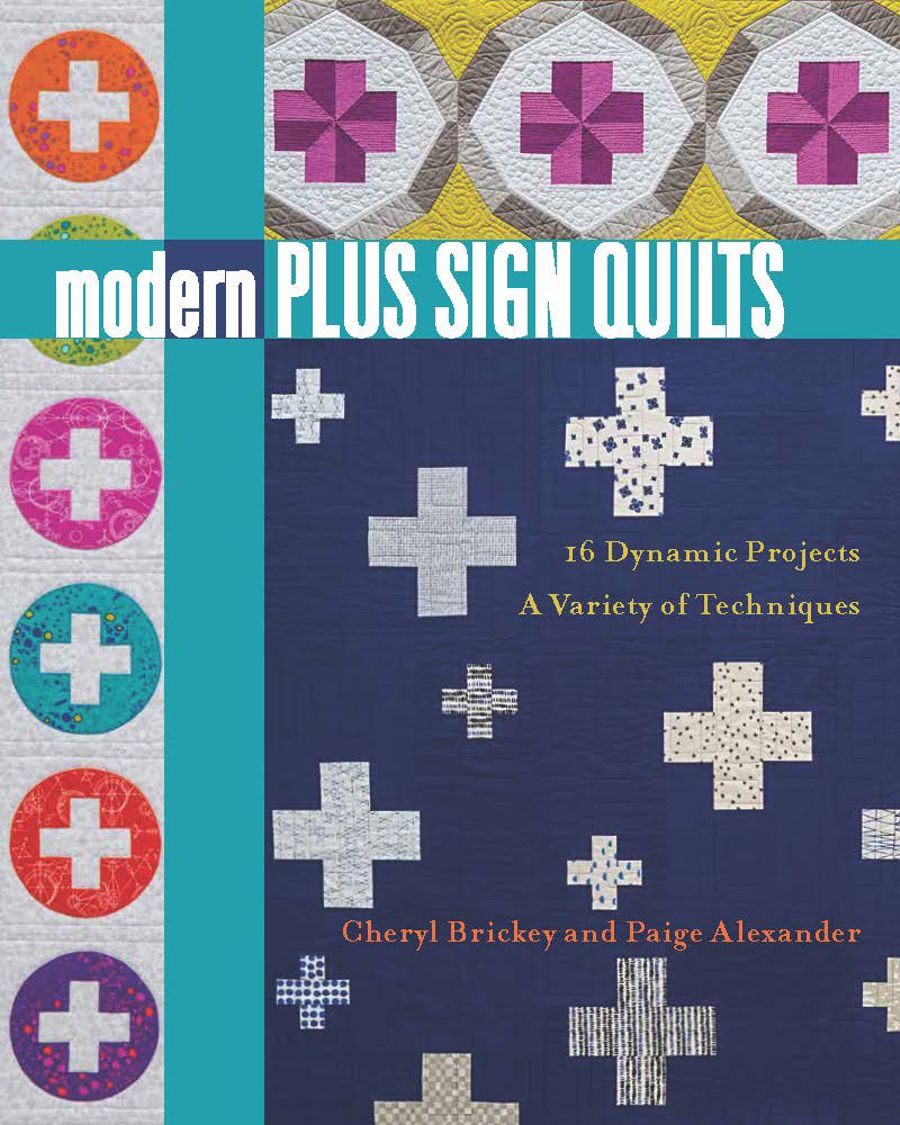
Welcome to my stop on Day 4 of the Modern Plus Sign Quilts blog hop! I am here to wax poetic on behalf of Cheryl Brickey of Meadow Mist Designs and Paige Alexander of Quilted Blooms , two wonderfully talented designers who have taken the simple Plus Sign block and turned it into 16 extraordinary quilt designs. I knew immediately upon seeing the cover of Modern Plus Sign Quilts that I needed to have it in my library.

Each quilt is a unique take on the plus sign. There is a project for every skill level, from fun and simple to gorgeous and complex. Flipping through the book, there was no question which quilt I wanted to make, and what fabrics I wanted to use. I was immediately drawn to it out of all my favorites.

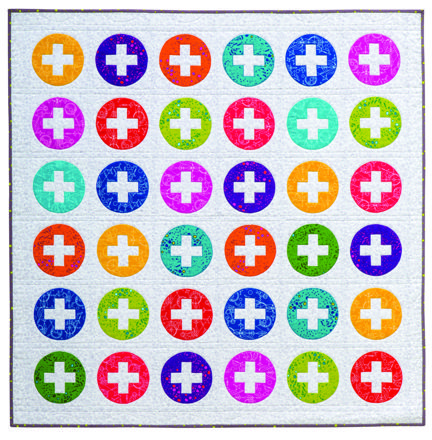
My third favorite quilt is Cute as a Button. I love the negative space plus signs. I want to make these extra large for a full size bed quilt!

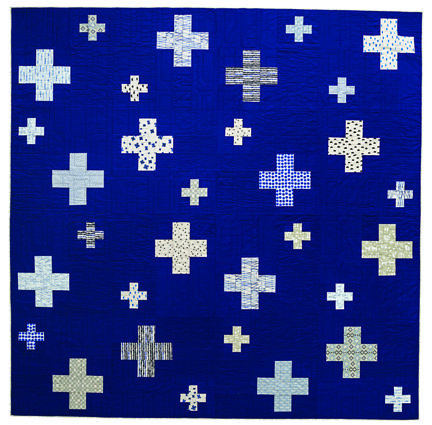
My second favorite quilt is Celestial. It is one of the cover quilts, and I could immediately picture this is soft and bright yellows with a deep twilight navy background. This will be the next quilt I make for the boys.

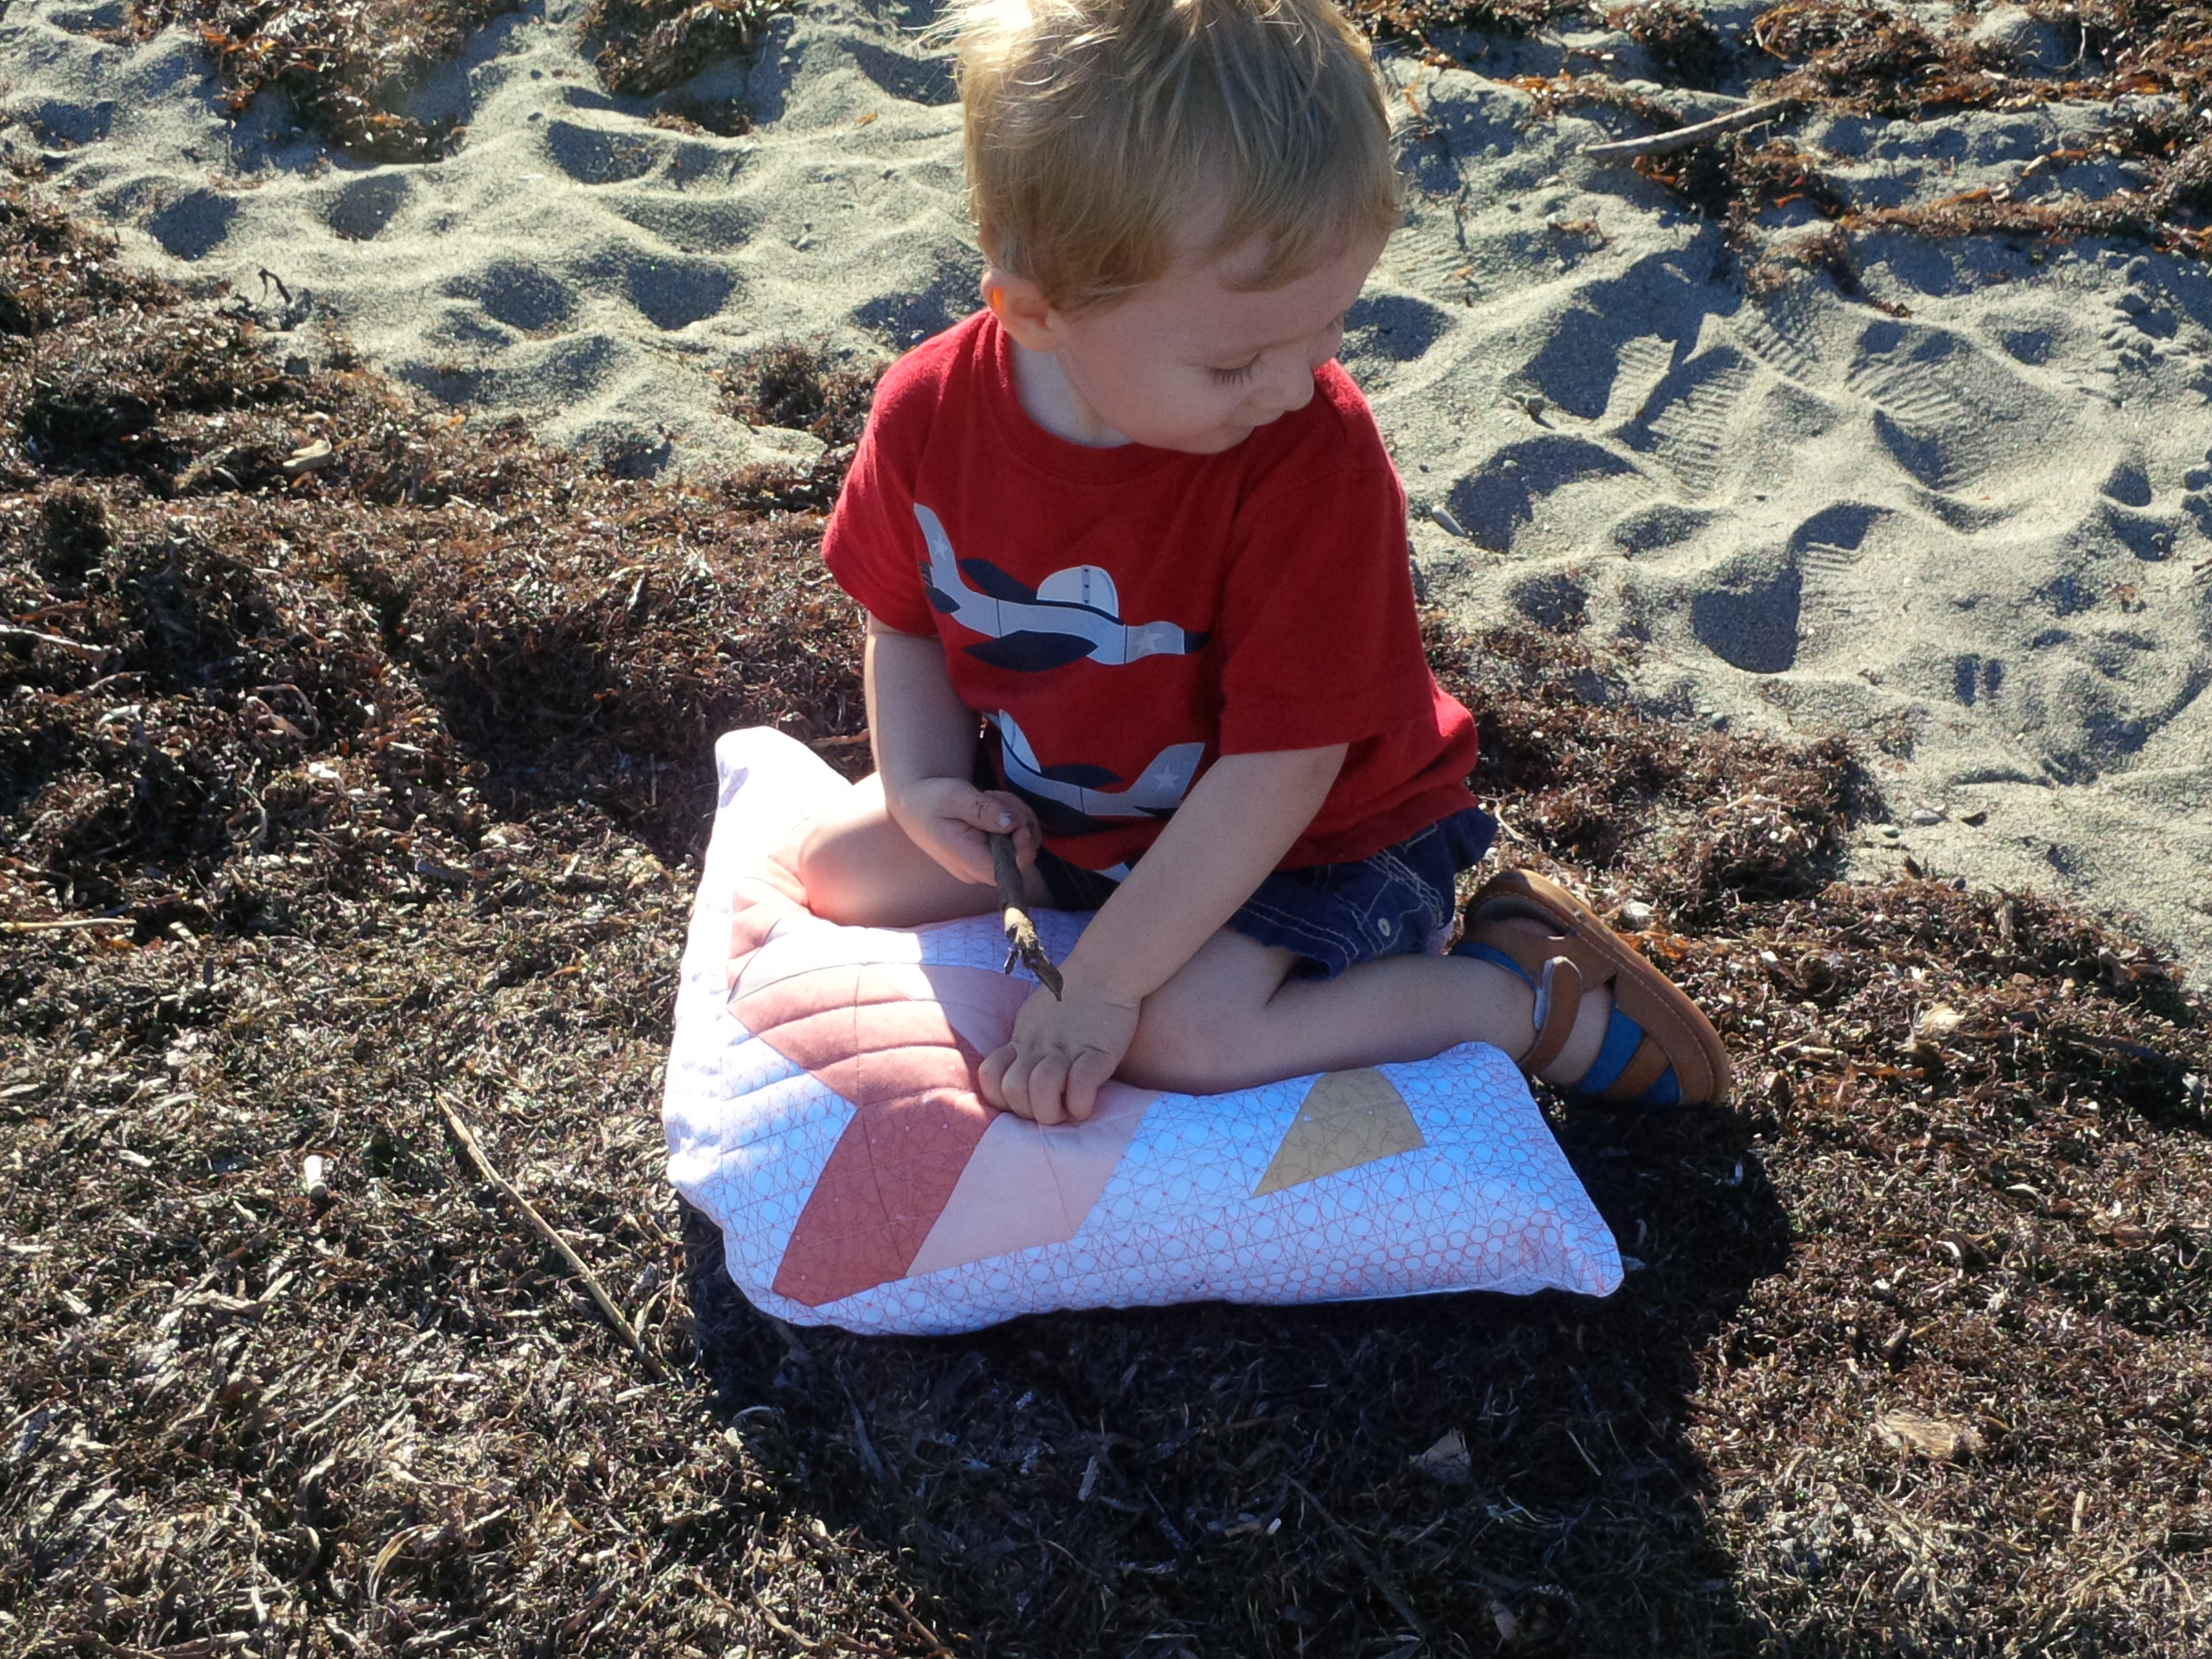
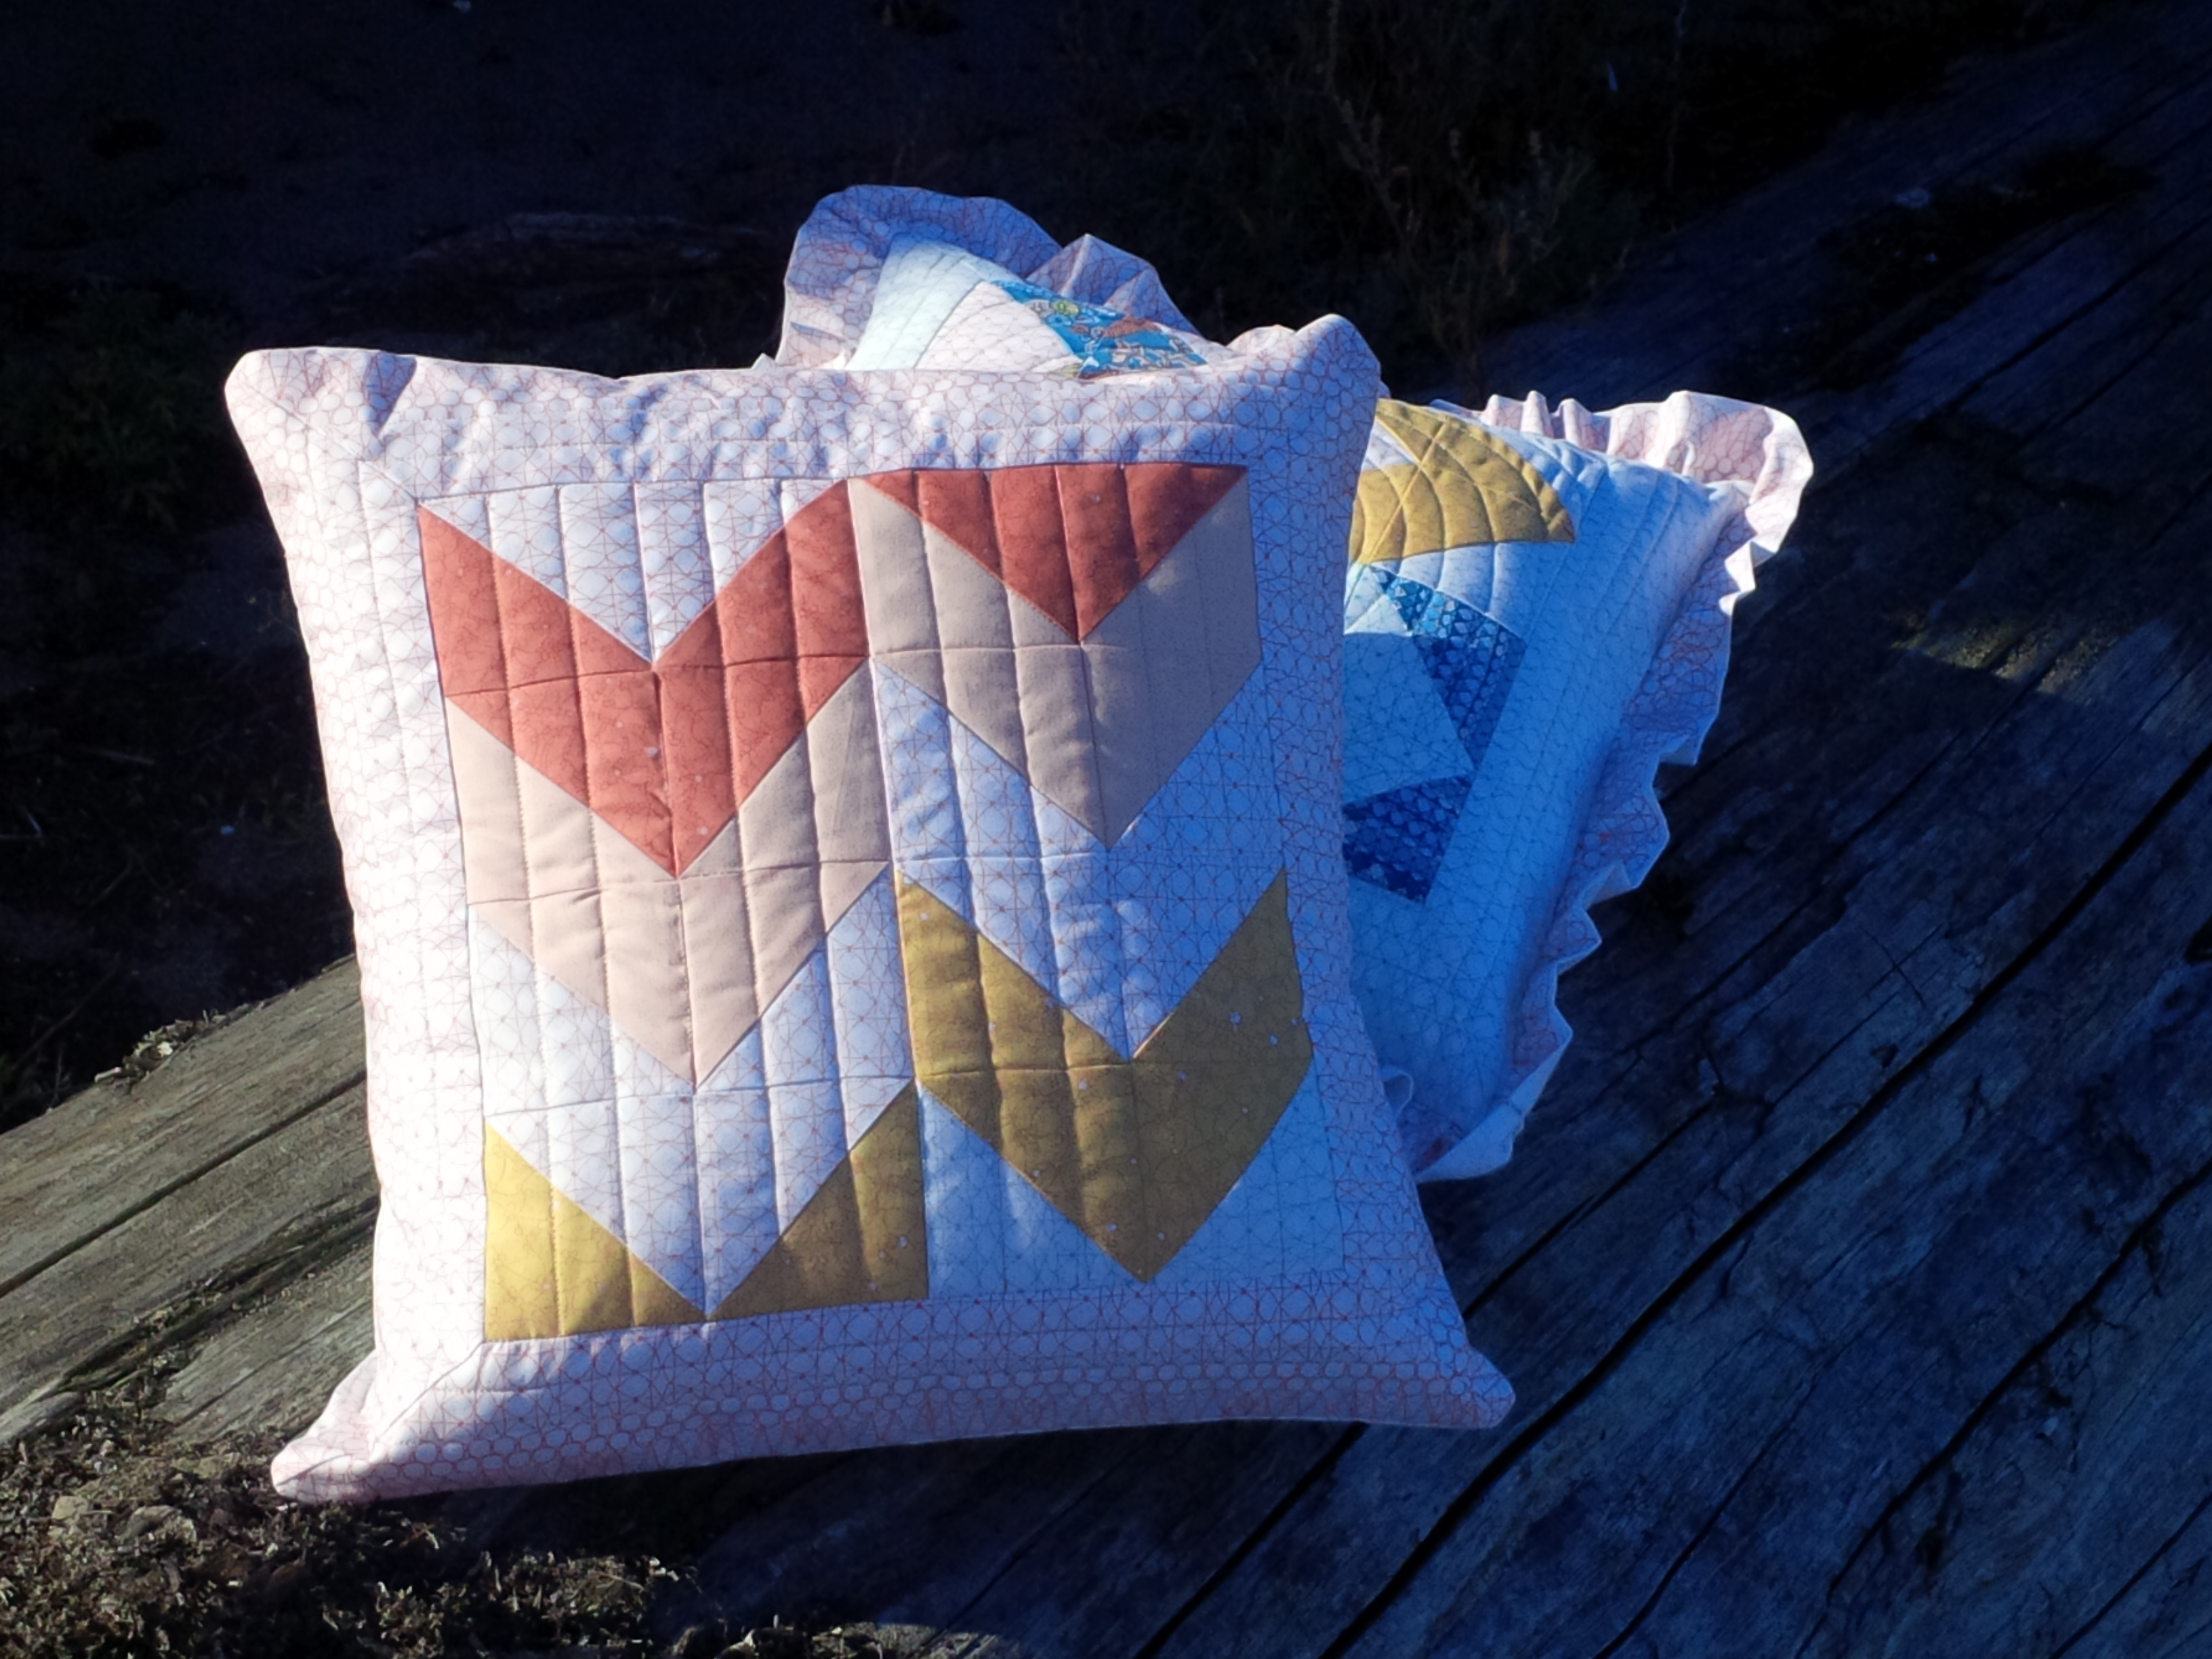
And of course, my favorite quilt from the book, Postage Plus!

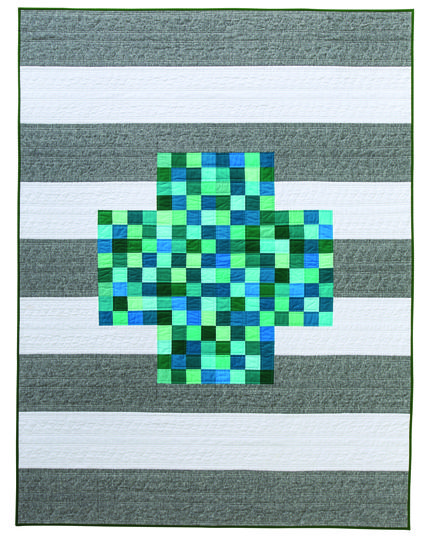
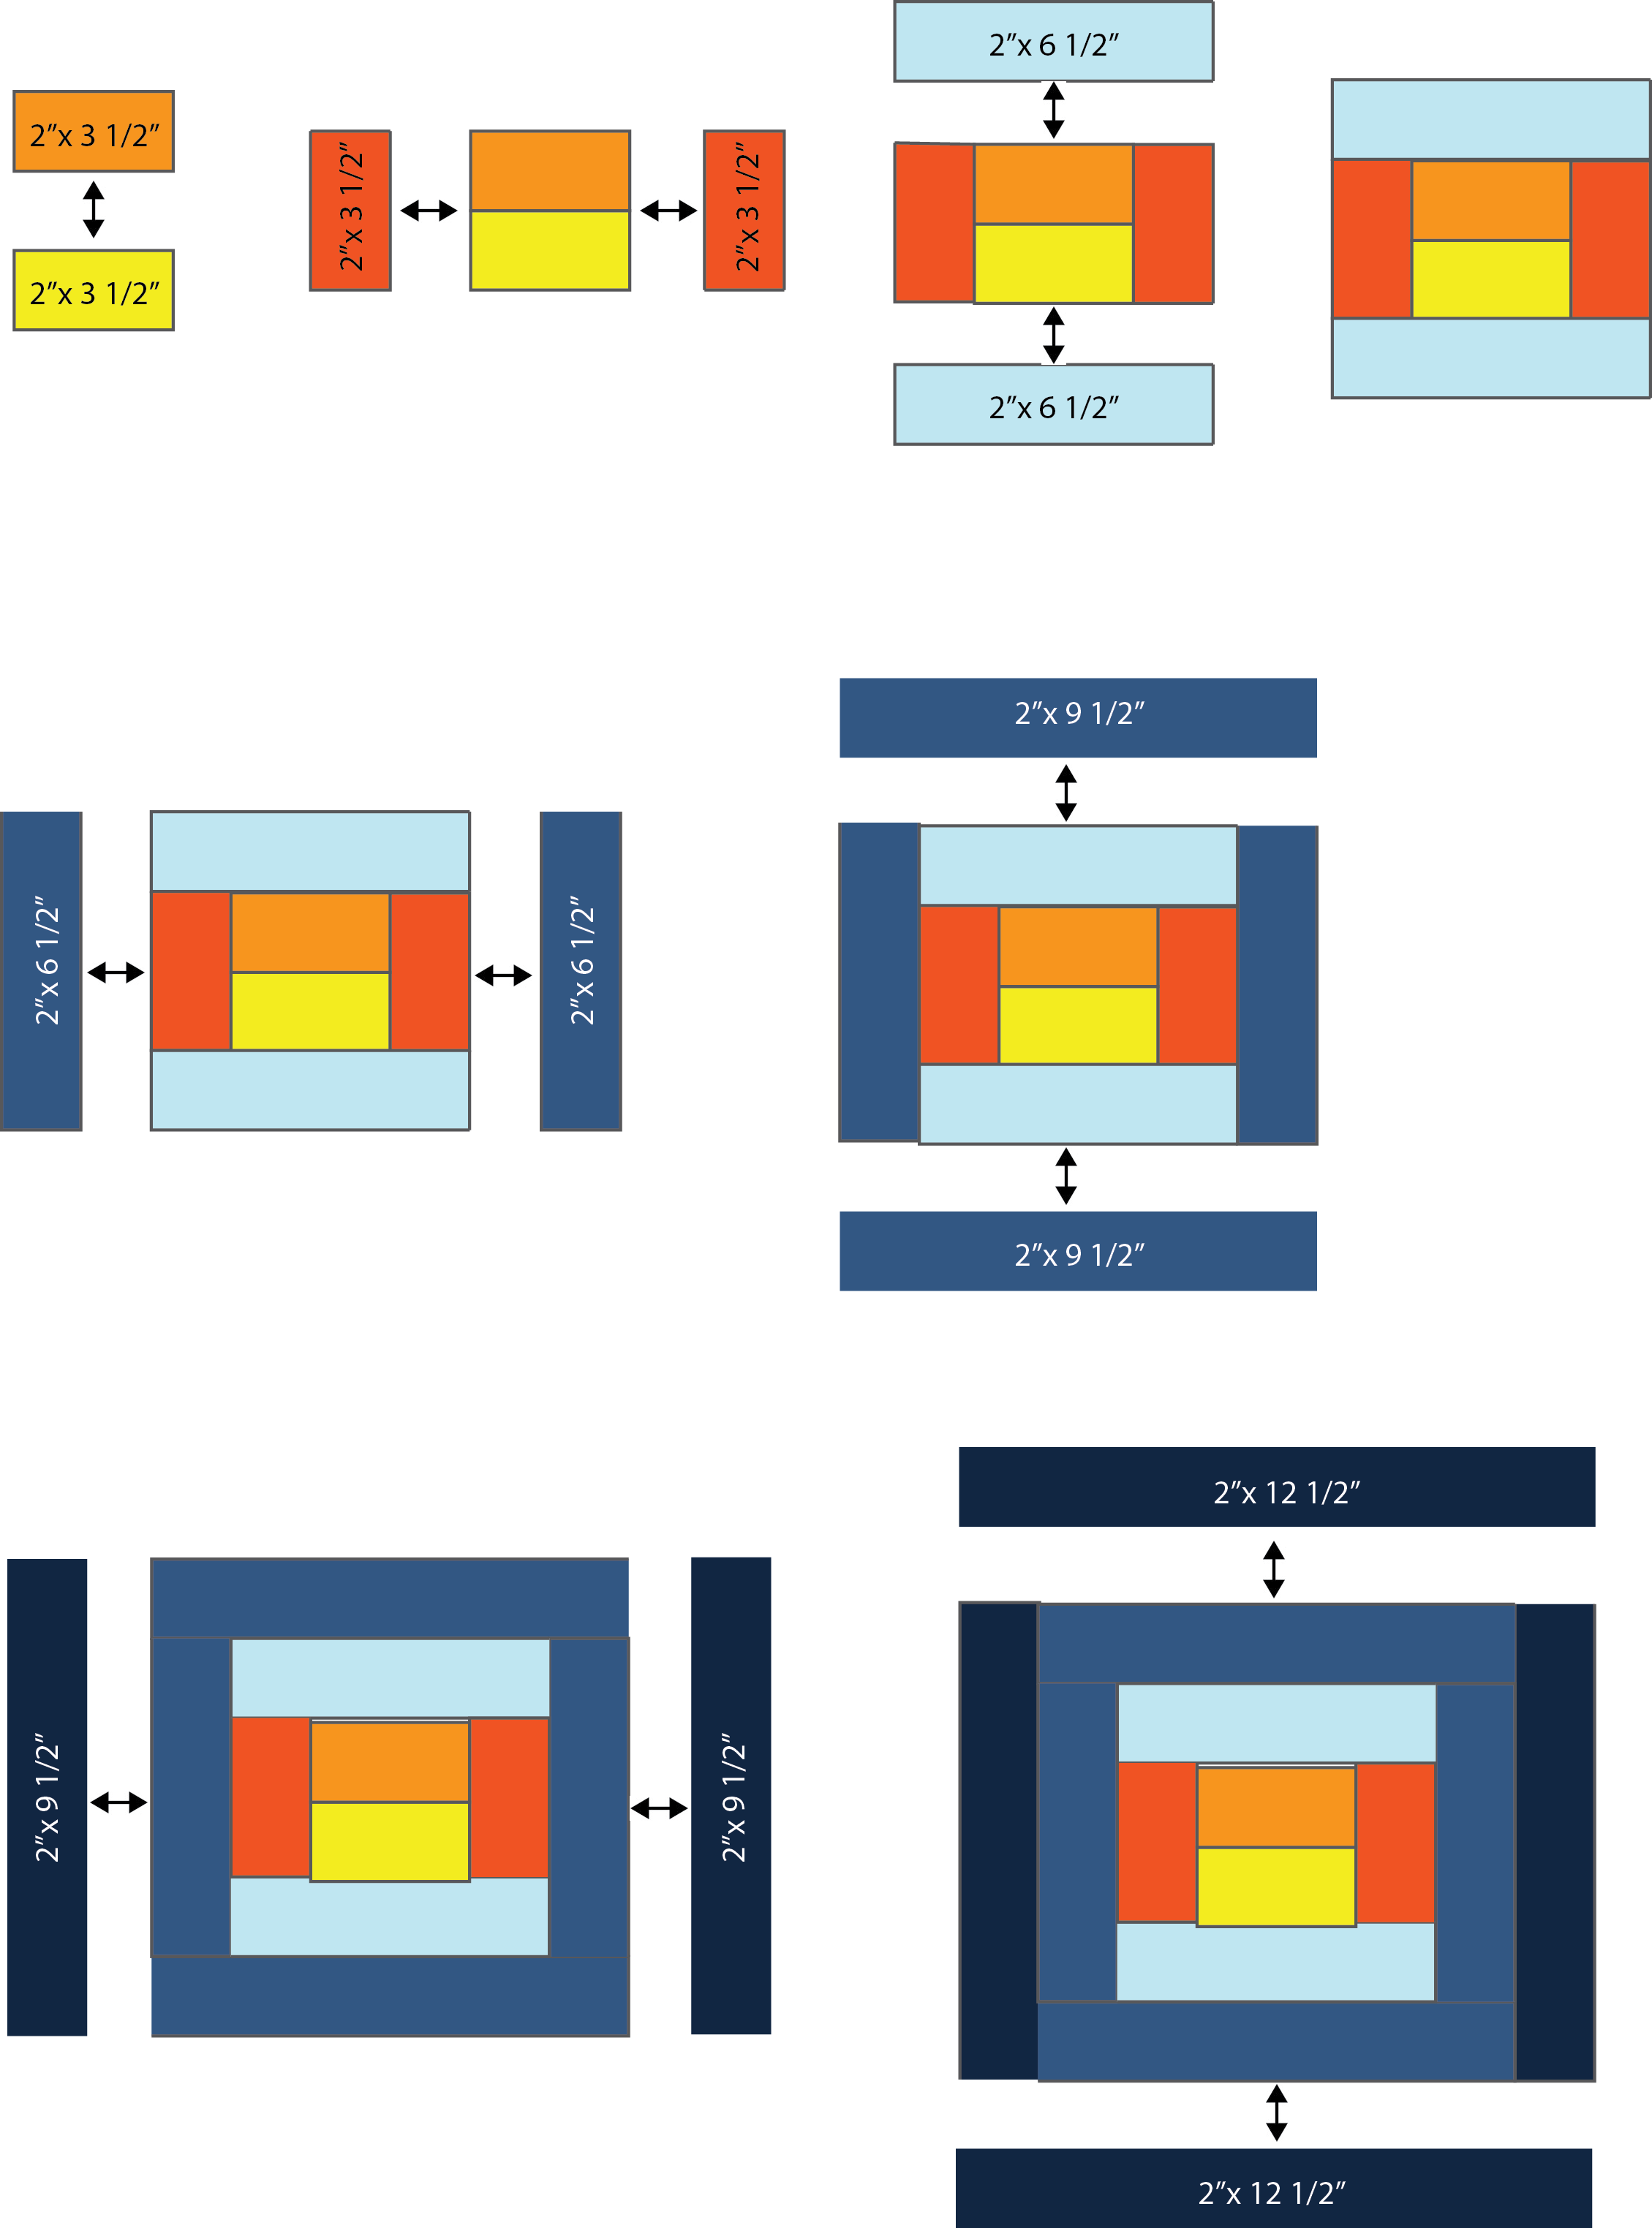
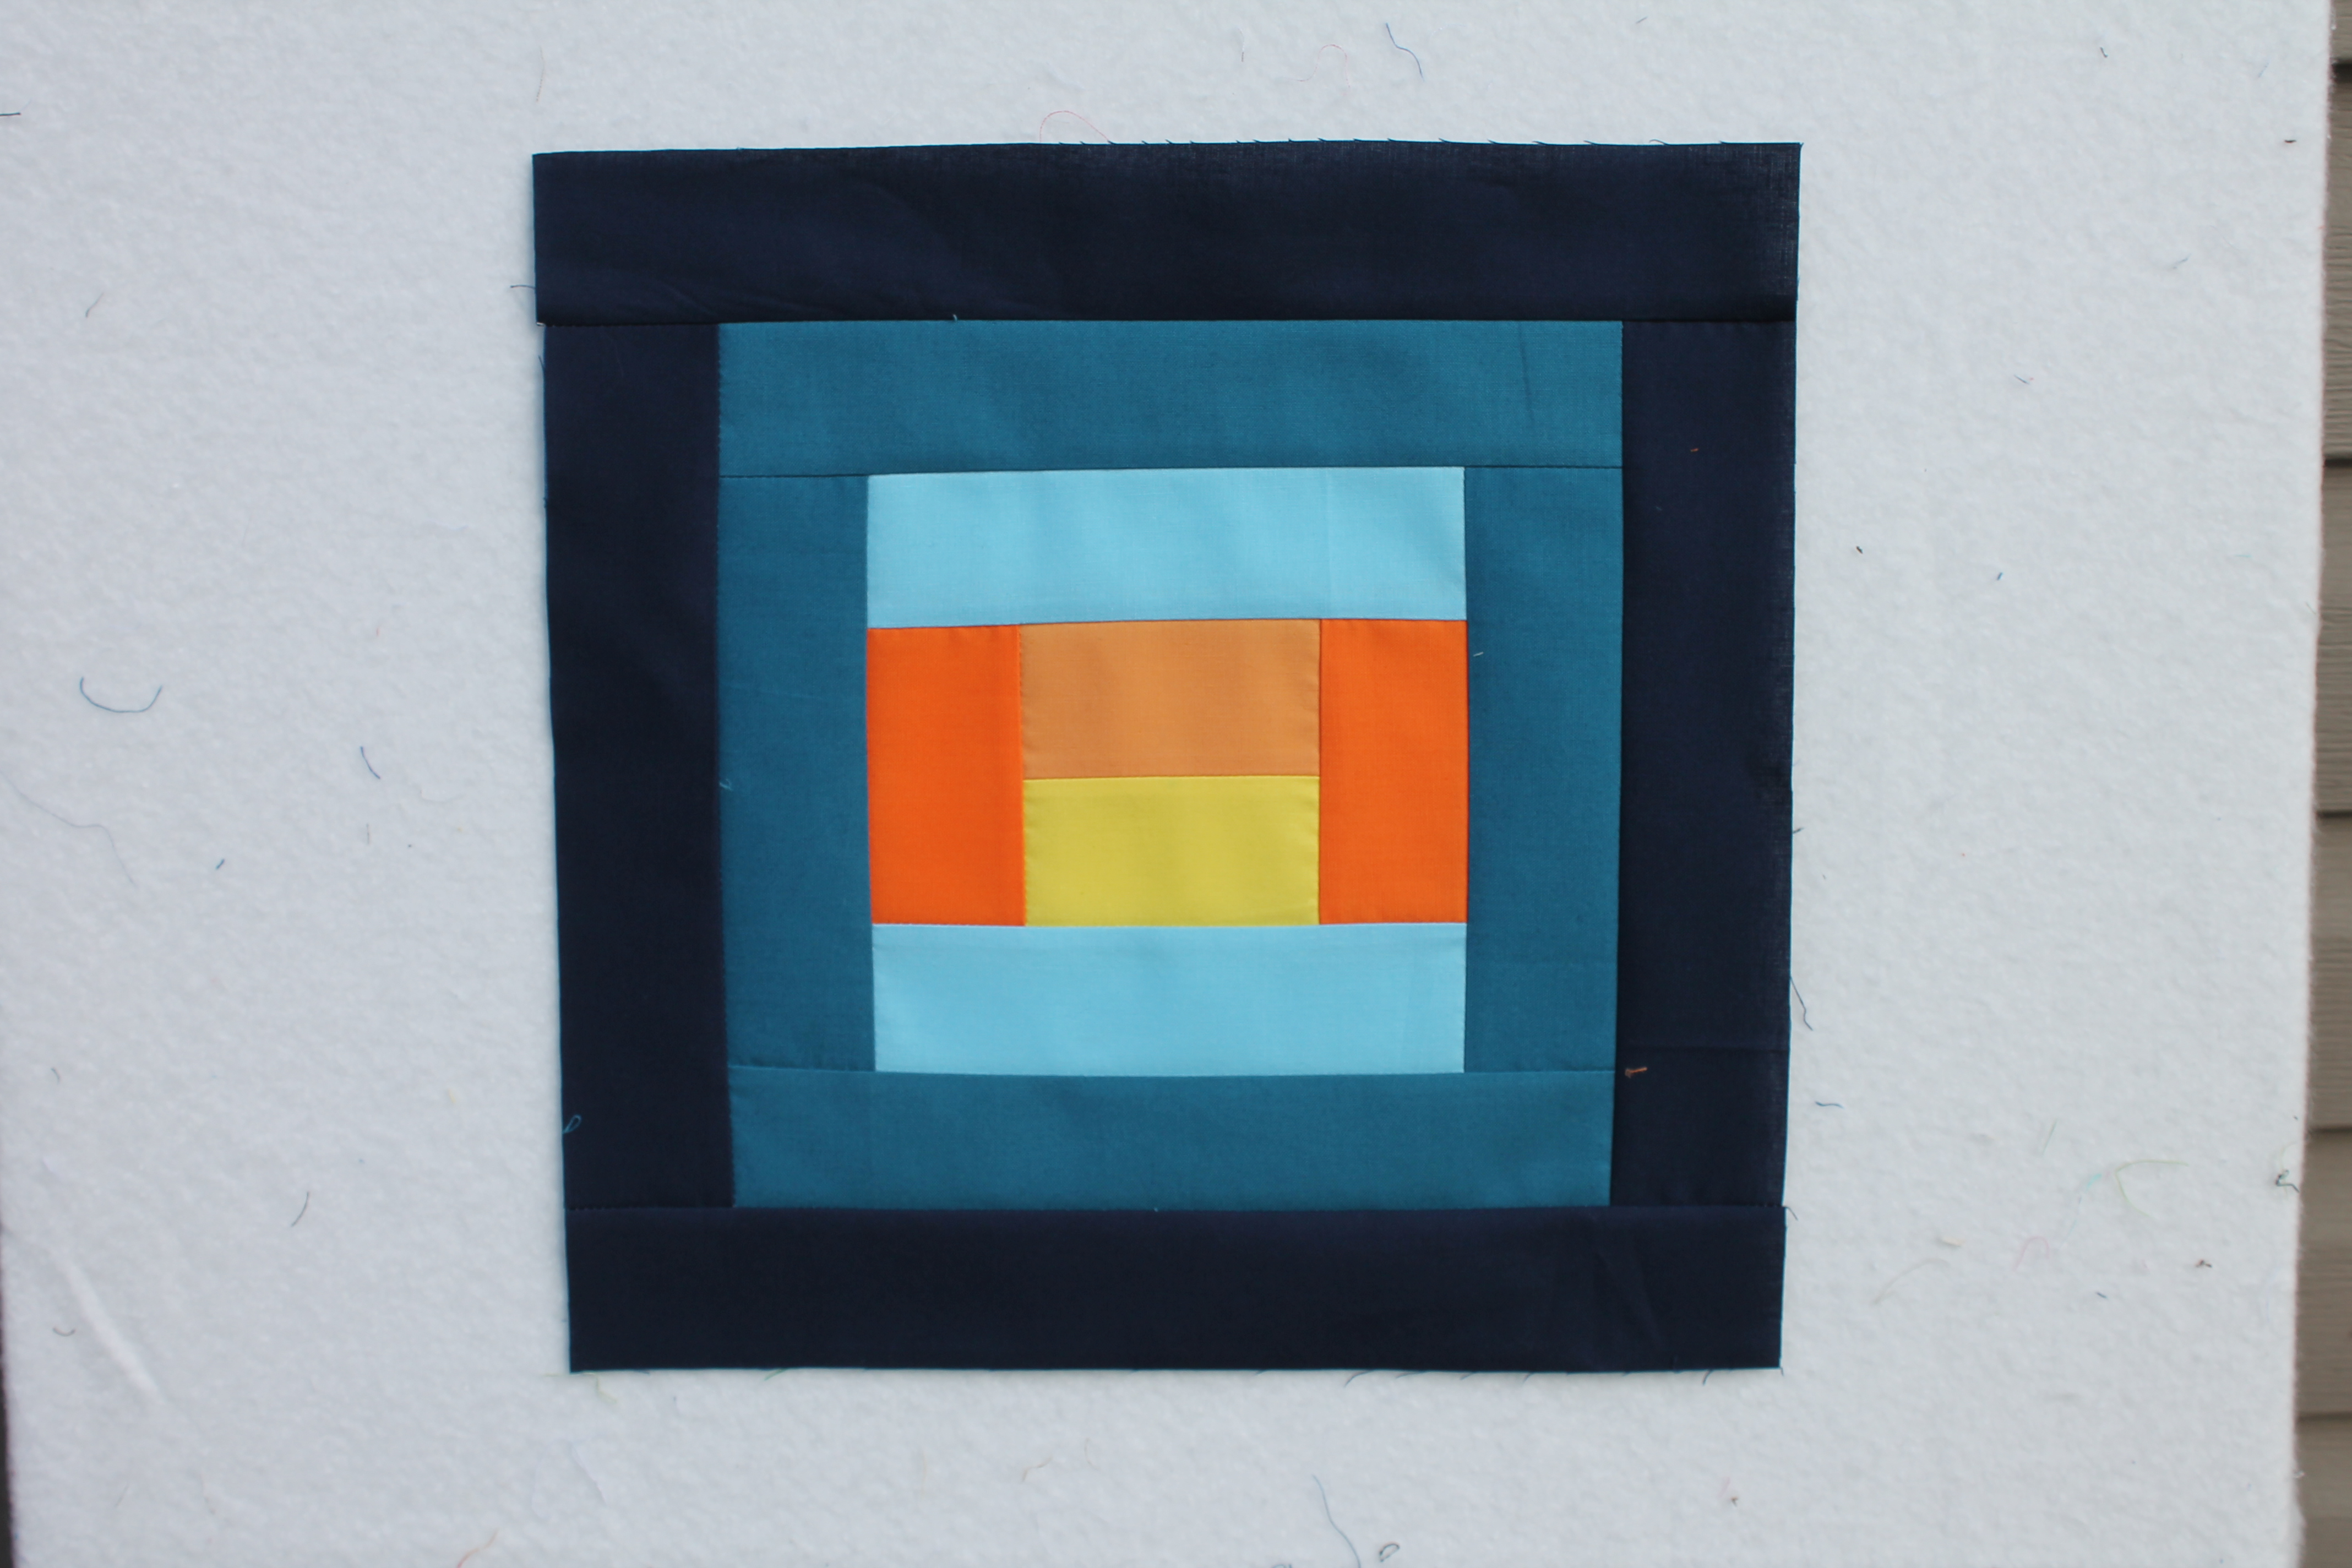
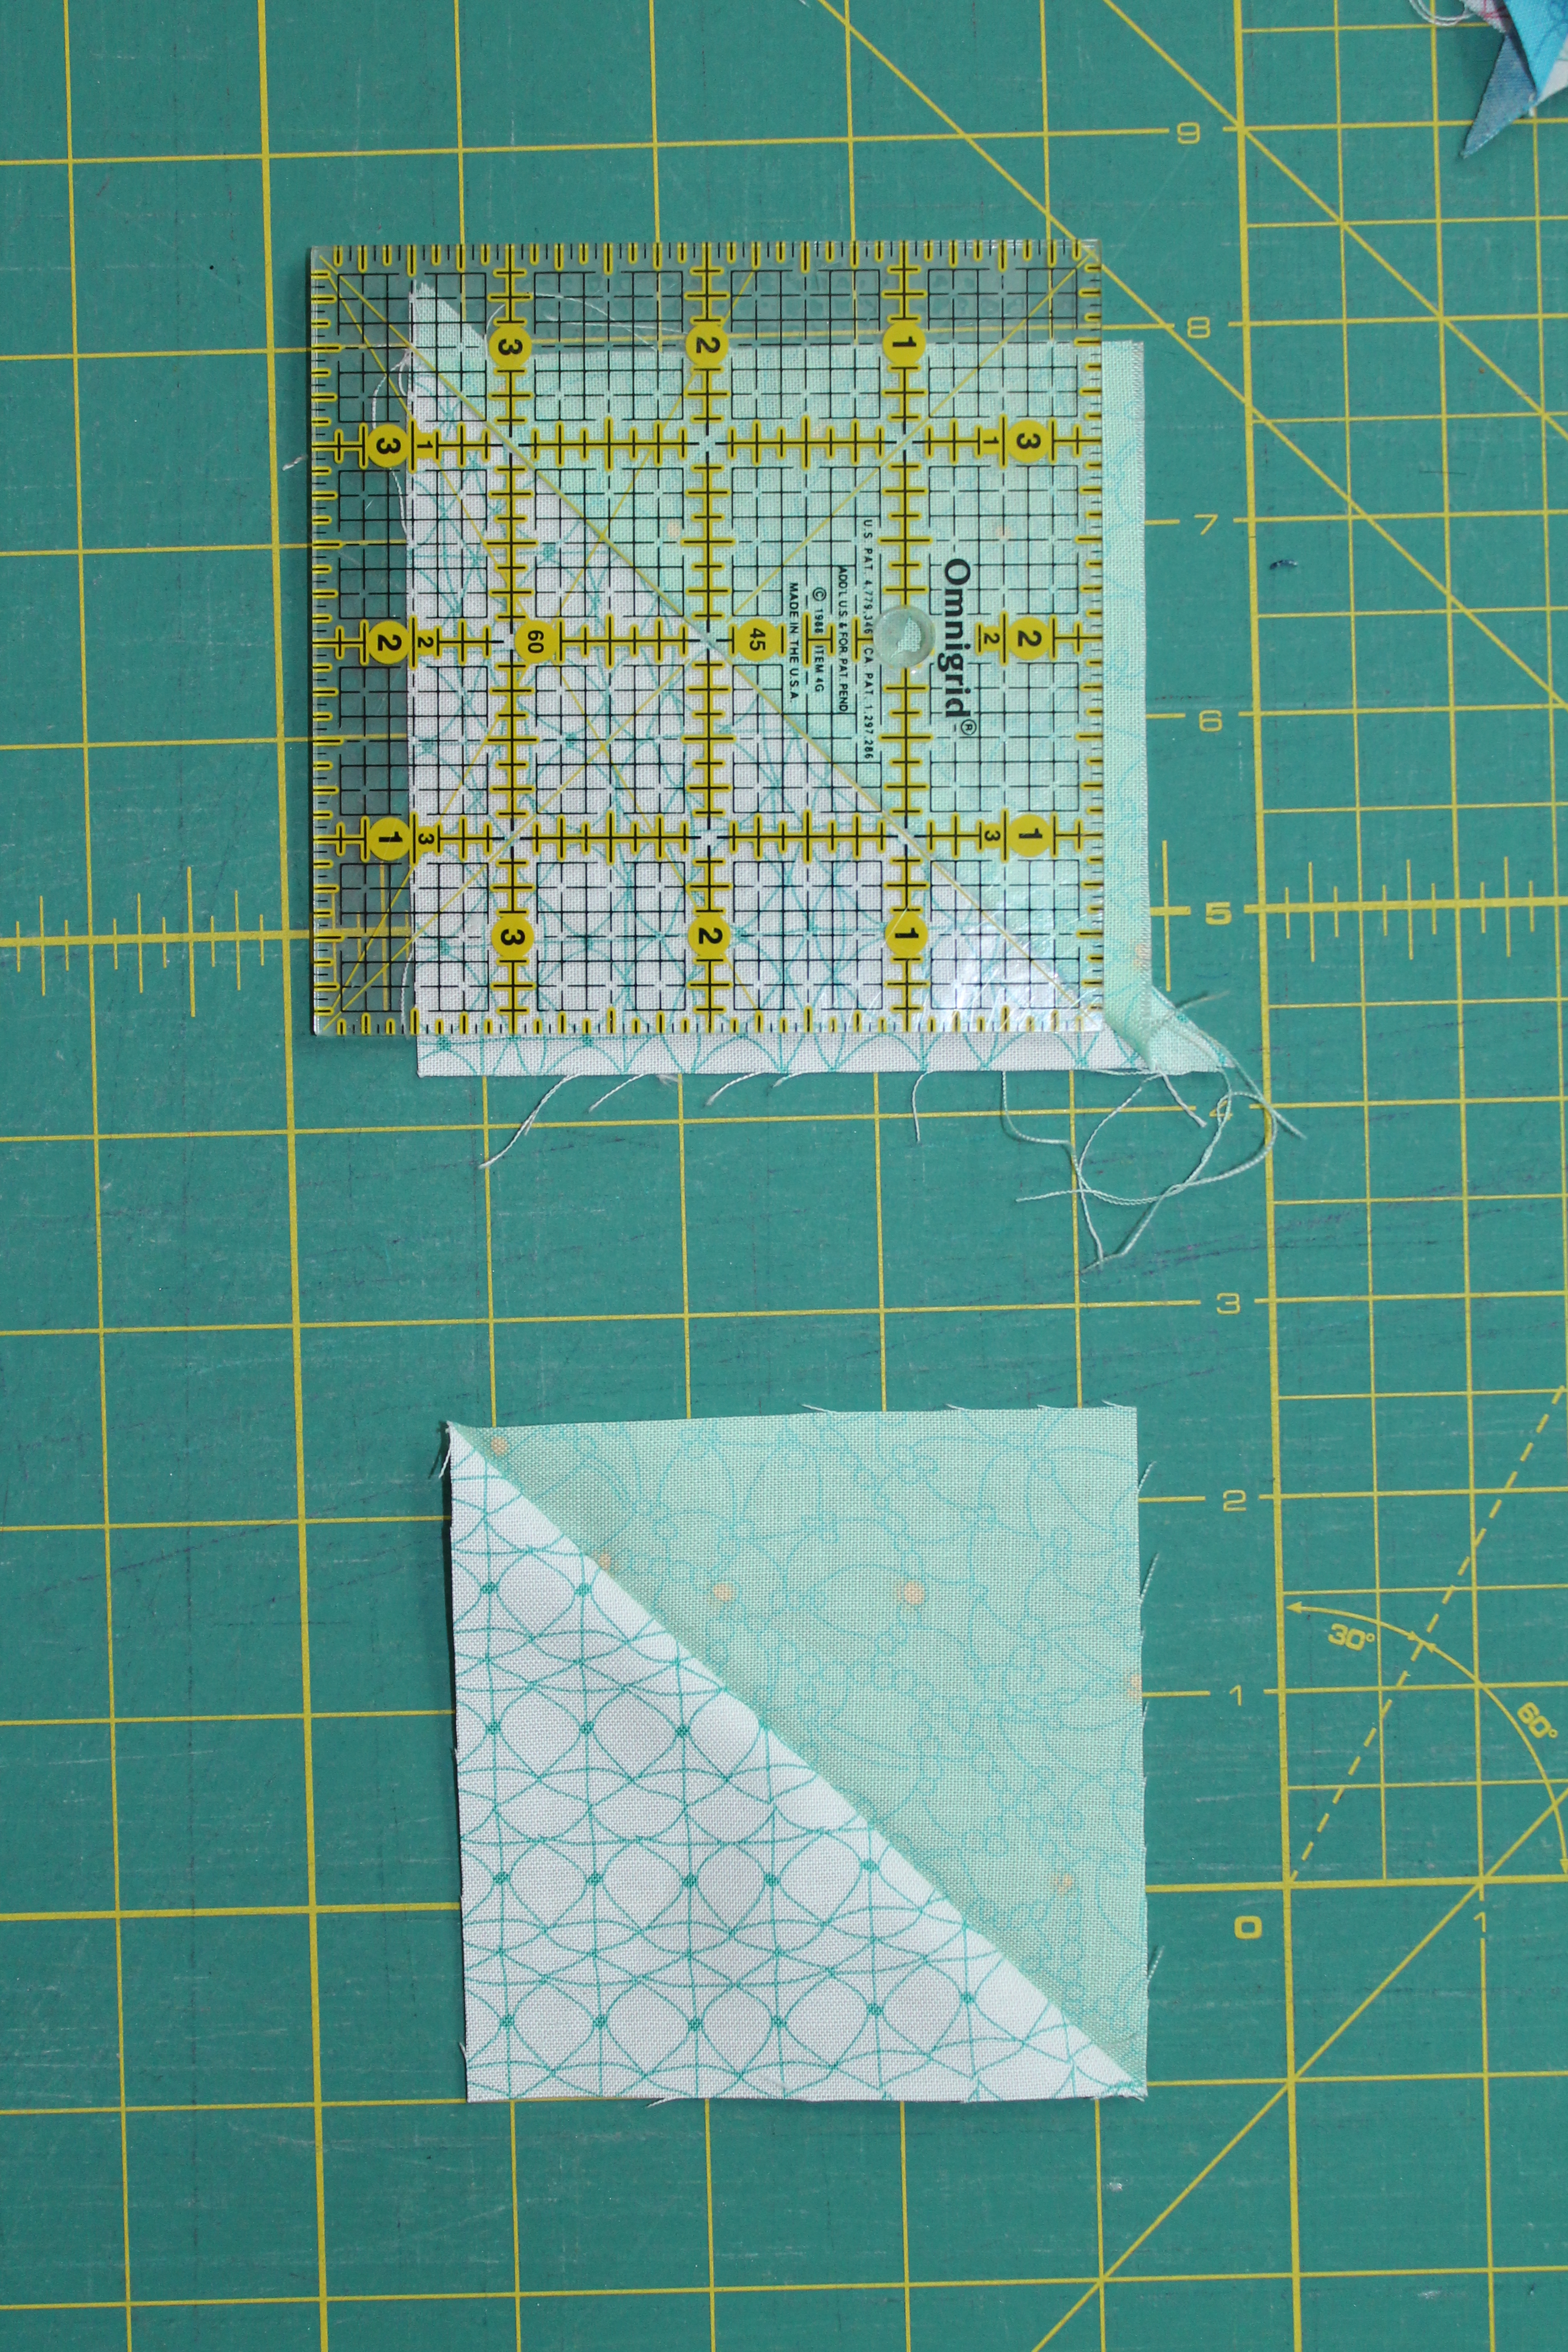
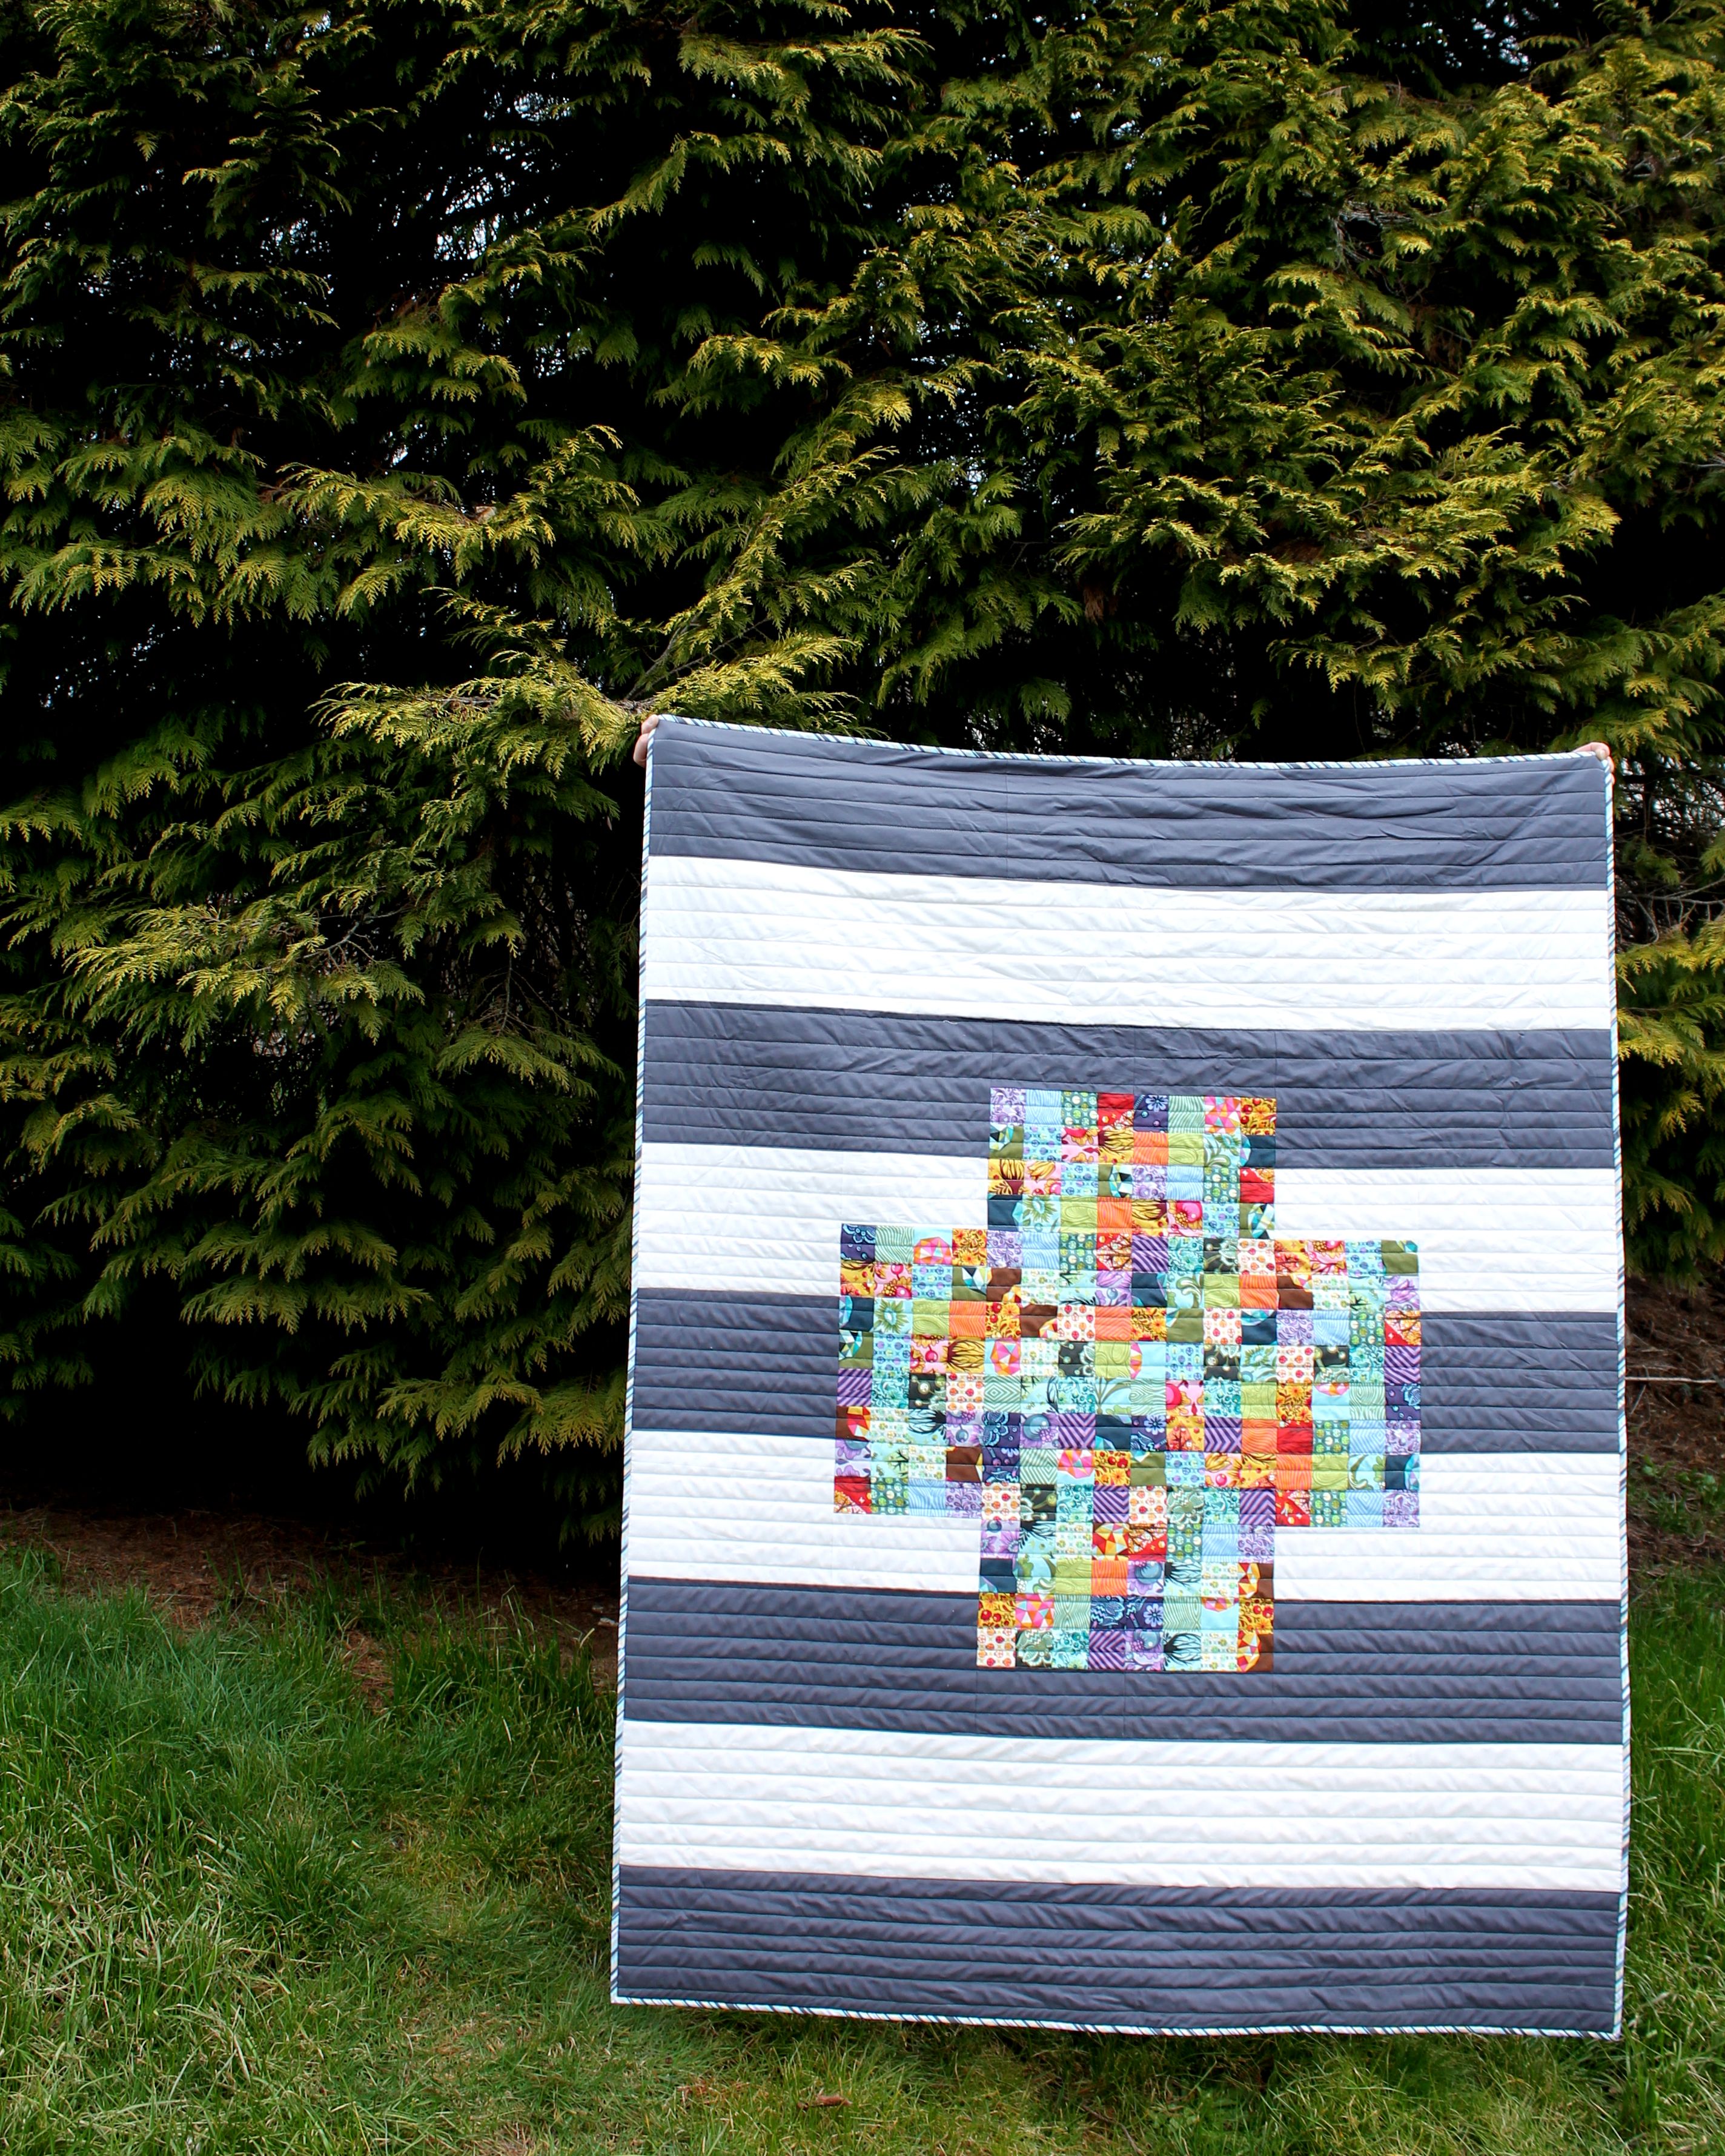
I knew this was the quilt for me to make. I have been hoarding half a jelly roll of Tula Pink Birds and the Bees, waiting for the right project to come along. The construction was SUPER FAST for this quilt. I made it in about 6 hours, so its perfect for a last minute gift or a quick fun project. It is also the perfect project to teach someone to quilt. The instructions are clear, concise, and piecing is easy enough to build confidence quickly.

I quilted in straight lines and used my two favorite Freespirit solids – Mist and Manatee – for the background stripes. This quilt lives on my couch and adds the perfect splash of color to my space.

I hope you enjoyed my stop. be sure to check out all the other Postage plus quilts today, and have a peek back at the prevous days to see all teh wonderful quilts! Cheryl and Paige will be runnig giveaways each day as well, so make sure to visit their websites for all the fun!

You can purchase your own copy of Modern Plus sign quilts directly from Cheryl’s Etsy Shop or Paige’s Etsy shop!

MODERN PLUS SIGN BOOK HOP SCHEDULE

Monday, March 12th
Cheryl @ Meadow Mist Designs
Paige @ Quilted Blooms

Tuesday, March 13th
Soma @ Whims and Fancies
Ann @ Brown Paws Quilting
Kitty @ Night Quilter <—YOU’RE HERE
Sophie @ Luna Lovequilts
Afton @ Quilting Mod
Shelley @ The Carpenters Daughter Who Quilts

Wednesday, March 14th
Jayne @ Twiggy and Opal
Jen @ A Dream and a Stitch
Abigail @ Cut & Alter
Yvonne @ Quilting Jetgirl
Sandra @ mmm! quilts
Karen @ Run Sew Fun

Thursday, March 15th
Linda @ Flourishing Palms
Bernie @ Needle and Foot
Liz @ Savor Every Stitch
Stacey @ Stacey In Stitches
Michelle @ From Bolt to Beauty
Patty @ Elm Street Quilts
Melanie @ A Bit of Scrap Stuff Blog

Friday, March 16th
Myra @ Busy Hands Quilts
Izzy @ Dizzy Quilts
Ruth @ Charly and Ben’s Crafty Corner
Christa @ Christa Quilts

Monday, March 19th
Jessica @ Quilty Habit
Cindy @ Hyacinth Quilt Designs
Jennifer @ The Inquiring Quilter
Julie @ The Crafty Quilter

Tuesday, March 20th
Tish @ Tish N Wonderland
Judy @ Sew Some Sunshine
Emily @ The Darling Dogwood
Wanda @ Wanda’s Life Sampler
Karen @ Tu-Na Quilts, Travels, and Eats
Katherine @ Sew Me Something Good

Wednesday, March 21st
Anja @ Anja Quilts
Kate @ Smiles from Kate
Sue @ Sevenoaks Street Quilts
Carole @ From My Carolina Home
Alison @ Little Bunny Quilts

Thursday, March 22nd
Debbie @ Esch House Quilts
Laura @ Slice of Pi Quilts
Beth @ Cooking Up Quilts
Janice @ Color Creating and Quilting
Joanne @ Quilts by Joanne

Friday, March 23rd
Cheryl @ Meadow Mist Designs
Paige @ Quilted Blooms

Until next time,

Happy Stitching!

Good Hair Day Blog Hop *winner picked*

Welcome to the Stacey In Stitches stop on the Good Hair Day Fabric Blog Hop! Today I will be gushing all about Kim’s new line of fabric, Good Hair Day.


IAPfront_GHD

When Kim showed me the line and asked if I would make something for her booth at Market, I immediately said yes! I love the sweet, sophisticated, retro look of the prints and the colors. Kim’s signature hand drawn style is so fresh and classic, and really takes the prints to the next level. Her attention to detail with color and print means that every individual pattern stands out, and all work together in a group. Paired with some of the Windham Artisan Cottons (a supple, tightly woven group of crossweaves), Good hair day is sure to make a splash in whatever project you choose to make. I couldn’t decide what to make and what prints to use, so of course I just HAD to make a little bit of everything!

IMG_4868

I have two FREE patterns for everyone for this line, available on the Windham website. Click here for your own copies =)

First up is the quilt Baubles. This design has been hanging around in my EQ files forever, and just needed the right line to match up with it. Good Hair Day fit the bill! It reminds me of the beach, and getting your hair braided and beaded while on vacation. I quilted the background using one of my favorite fillers, which perfectly complimented the lines and baubles. The baubles themselves are made using slice and turn applique, a super simple technique suitable for beginner quilters. I even included my quilting motif in the pattern in case you get stuck for ideas.

GHD_BaublesQuilt_Flat

GHD_BaublesQuilt

Then, I wanted to try and capture the feeling of freshly cut and styled hair, that fresh from the salon feeling. Using faux cathedral windows to create the curved diamonds shapes , Sparkle perfectly visualizes that salon day feel. I quilted it using a large all over swirl that gives the impression of big, beautiful locks of freshly curled hair. I used a solid white background to make the diamonds pop, but using the blonde braid print instead of a solid white would work as well and give the quilt some warm depth.

GHD_SparkleQuilt

GHD_SparkleQuilt_flat

When the quilts were done and bound, I found myself with a few more days before I absolutely HAD to send out the projects, so I pulled out one of my favorite retro dress patterns and got to work. I used McCalls M7081 pattern and a pair of high contrasting prints. The dress turned out amazing, and I definitely need a crinoline to go underneath.

GHD_McCallsDress

GHD_McCallsdress front

Then I decided that a couple of bags were in order. I pulled out my copy of Sara Lawsons Big City Bags, and picked my two favorites- a the Go Go Bag and a retro style Fireside Bowl Bag. Again, I paired some contrasting and complimentary prints, and used the low volume accessories print for the lining. I love the swivel closure, and even managed to find a matching zipper for the gorgeous cherry bobby pins!

GHD_GoGoBag

GHD_BowlBag

The fabric is hitting stores this month, and of COURSE I just love every little bit of it.

Each blog is giving away a Good Hair Day charm pack, and there will be two Fat Quarter Bundles up for grabs as well, on on Kim’s Blog, and one on the Windham Blog. Be sure to pop by the other participants and see what awesome projects they have to offer.

Monday, January 11  –   Windham Fabrics / Kim Andersson – I Adore Pattern

Tuesday, January 12 –   Erin Harris – House on Hill Road / Terri Carpenter – The Quilted Fox / Cath Mosley on Instagram

Wednesday, January 13 –  Adrianne Ove – Little Bluebell  /  Kristen Takakuwa – The Needies

Thursday January 14 –  Dan Rouse – Piece and Press / Cal Patch – Hodge Podge Farm

Friday January 15 – Stacey Day – Stacey In Stitches / Amy Gunson – Badskirt

Saturday January 16 – Madeleine Roberg – Domestic Strata / Darci Alexis – Darci Sews

Sunday January 17 – Miriam Blaich – The Berlin Quilter / Crystal Chadwick – The Cloth Albatross

Monday January 18 – Pati Fried & Laura Nownes – See How We Sew / Gillian Smith –Coding Crafter

Tuesday January 19 – Casey York – The Studiolo / Nicole Daksiewicz – Modern Handcraft


Now for the giveaway! One lucky reader will be taking home a Good Hair Day charm pack, thanks to Windham Fabrics. All you have to do is leave a comment on this post! Easy peasy! To win a second bonus entry, share this post with your friends and tell me in a SECOND comment! Twitter, Instagram, Facebook, or however else you can think of to share Kim’s wonderful collection and possibly win yourself some fabric! I will leave the comment section open until the end of the blog hop- Tuesday, January the 19th, when I will draw the winner. Good luck and happy sharing!


And the Winner is: Comment #29! Janie, who said “Everything you have created with this fabric line is beautiful. Thank you for the free patterns and the giveaway.”

Winner


Thank you Janie, and thank you everyone for the wonderful compliments!


Happy Stitching!

StaceyDay_Logo

Lanterns- A Tutorial

A few weeks ago I was invited to participate in the What Shade are You Blog Hop by RJR fabrics. I am always up for a blog hop, it gives me the chance to bring some of my Quilt Design a Day designs to life AND give away some great fabrics to a lucky reader!

Blog Hop 2015 logo C small

Back in December one of our inspiration photos, called Sparks and provided on a weekly basis by a QDAD member, really struck me with its colors and intensity. Taken during Snowmageddon, that particular QDAD design I had flagged in my head as one to do up as a pattern. The timing was perfect, as RJR sent the invite not a week later, and that design came to mind.

10363836_10152410670582294_7472710089444888399_n
QDAD Spark Photo Courtesy of Alyson@ The Hasty Quilter
Lanterns

Lanterns

I had a lot of fun narrowing down the colors to use from the Cotton Supreme Solids. RJR has 149 solids colors to choose from in the Cotton Supreme line. They have a beautiful drape, weight, and feel to them. They might actually become my new favorite.

I tweaked the design to make it lap sized. The construction is a basic log cabin with a few fun color placements. This design would look great in some of the other color offerings RJR has as well.

Dogwood

Cherrywood- 297, 282, 283, 289, 291, 294

Kelpie

Kelptastic- 342, 348, 349, 327, 328, 300

Patina

Winter Dogwood- 297, 282, 283, 289, 291, 294

Now, normally I wouldn’t just show you a quilt top, I like my quilts to be finished and bound and presentable. However, in this case I am saving this top to be finishe don a long arm. Quite possibly by me. Which is super super super awesome!

Alrighty, on to the good stuff!!

Lanterns


Lanterns Glow Tutorial

Finished Quilt: 54”x 66”

Finished block: 12” square

Fabric Requirements

1/4 yard medium bright yellow (Cotton Supreme 9617-337)

1/4 yard bright yellow-orange (Cotton Supreme 9617-140)

1/2 yard medium tangerine (Cotton Supreme 9617-276)

1/2 yard light blue (Cotton Supreme 9617-327)

1 yard medium blue (Cotton Supreme 9617-300)

2 1/2 yards navy for background (Cotton Supreme 9617-191)

1/2 yard royal for binding (Cotton Supreme 9617-345)

3 5/8 yards for backing

64″x 76″ piece of batting

Cutting

Tip: Use a light spray of starch or starch alternative before cutting to help keep the pieces from shifting and skewing while sewing. Spray on the wrong side and press from the right side of the fabric.

From the medium bright yellow cut:

20 rectangles, 2”x 3 1/2”

From the bright yellow-orange cut:

20 rectangles, 2”x 3 1/2”

From the medium tangerine cut:

40 rectangles, 2”x 3 1/2”

From the light blue cut:

40 rectangles, 2”x 6 1/2”

From the medium blue cut:

40 rectangles, 2”x 6 1/2”

40 rectangles, 2”x 9 1/2”

From the navy cut:

40 rectangles, 2”x 9 1/2”

40 rectangles, 2”x 12 1/2”

4 strips, 3″x 42″

2 strips, 3″x 19″

2 strips, 3″x 12″‘

From the royal cut:

7 strips, 2 1/4”x 42” for binding

Instructions

All seams are 1/4” unless otherwise stated. Pieces are sewn right sides together.

Take the medium bright yellow and bright yellow-orange 2”x 3 1/2” rectangles and sew them right sides together. Press the seams open to make the center squares.Take the medium tangerine 2”x 3 1/2” rectangles and sew them to either side of the center squares as shown. Press towards the center square. Take the light blue 2”x 6 1/2” rectangles and sew them to the top and bottom of the block. Press towards the center square.

Lanters Illustrations

Take the medium blue 2”x 6 1/2” rectangles and sew them to the sides of the block as shown. Press towards the center, and then sew the medium blue 2”x 9 1/2” rectangles to the top and bottom. Press towards the center.

Lanters Illustrations

Take the navy 2”x 9 1/2” rectangles and sew them to the sides of the block as shown. Press towards the center, and then sew the navy 2”x 12 1/2” rectangles to the top and bottom. Press towards the center. Trim and square the blocks to 12 1/2”x 12 1/2”.

Lanters Illustrations

IMG_4419

Sew the blocks together into rows of four as shown. In the odd rows the second and fourth block will be rotated, and in the even rows the first and third blocks will be rotated. Sew the rows together into the quilt top.

Sew the 19″ navy strips to two of the 42″ navy strips to make two side borders blocks 60 1/2″. Sew the 13″ navy strips to the remaining 42″ navy strips to make the top and bottom borders 53 1/2″. Sew the side borders to the side of the quilt top, matching ends and centers, and press towards the borders. Sew the top and bottom borders to the quilt top, matching ends and centers, and press towards the borders

Piece the backing together so it measures approx 64″x 76″. Layer the quilt top with batting and backing; baste. Quilt as desired. Join the royal 2 1/4″ wide binding strips using a diagonal seam to make a single long binding. Fold the binding in half and sew it around the quilt top on the right side. Turn the binding to the back and secure in place by hand or machine. Label and enjoy!

Lanterns


You could quilt each color individually, changing threads each time, to hide the quilting and let the blocks pop. Alternately, you could choose a medium blue thread and quilt in straight lines that radiate out at angles from the center of the block to mimic the flow of light, and then use a swirl in the yellow sections to soften out all the hard angles.

If improv is more your thing, you could easily make the blocks using varying width strips for a modern wonky log cabin look. Construct the blocks in the same order, using pieces with varying widths, building the log cabin outwards. Use the indigo round to bring the blocks to just over 12 1/2”, then square. Put them all together for some fun and funky movement to your Lantern Quilt.

I hope you enjoy making your own version of Lanterns Glow. I love to see what your make, so please send me some pictures of your finished quilt, or upload them to the Stacey Day Quilts group on Flickr. You can also tag me in instagram @staceyinstitches #lanternsquilt

RJR has generously donated a bundle of the same fabrics used in my Lanterns Glow quilt to give away to one lucky reader!

Simply comment below with an answer: What color are you and why? Entries will be open until 8pm Sunday, when I will draw a name using Random.org.

winner lanterns

Congratulations Michele!

The Winner was #27, Michele, who said “Beautiful quilt and I absolutely love the name for it!!! My favourite colour would be Aqua so #292, #291, and #289 are my colours!! I would love to make a quilt just like yours and it would be perfect for a gift to my BIL!! Thanks for the chance!!”

Thank you for entering Michele, and thank you to everyone who came by to visit!

*Full Disclosure* When I picked out my fabrics I did so without a color card, and what I thought was Navy was actually that beautiful royal almost purple at the bottom of the bundle. I am using it for the binding and back of the quilt. In the meantime, I found the correct color sku for the Navy and used that in the quilt as well as quoted it correctly in the instructions.

2015.04.03 B 2015.04.03 C

Enjoy your long weekend, I know I will be sewing and spending time with family (and eating chocolate, shh! Don’t tell my diet!)

Happy Stitching,

StaceyDay_Logo

Tidal Lace Blog Hop and Giveaway *giveaway closed*

Welcome to my stop on the Tidal Lace blog tour! I first met Kim through the Quilt Design a Day group and we got to know each other over time. I was thrilled when Kim approached me and asked if I wanted to make something for her debut line of fabric from Windham. Of course I said yes! I had a design in mind almost immediately.

 TL-BlogHopFIN002

 I love Tidal Lace so much. The colors, the texture, the OMBRE! Woot! Ombre. I thought a long time about all the wonderful things I could say about Tidal Lace. Kim did an outstanding job in her debut collection, and it shows. The prints are soft, delicate, and so very very versatile. The colors are a feast for the eyes, and overall Tidal lace it suited to so many different things, which you will see in the coming days as you hop from blog to blog. I absolutely adore the starlight blenders and the tidal lace border print. Oh, that border print! I have plans for that print, which may or may not include fussy cutting a whole lot of skirt panels. We will see.
Tidal Lace Wheel, borrowed from Kim with permission

Tidal Lace Wheel, borrowed from Kim with permission

When I saw Tidal Lace for the first time, I was really struck by it. I knew Kim’s inspiration-days sifting through antique lace with her grandmother, family vacations to the ocean, and how she connected the memories into the collection.  The stories really stuck with me. Most of us had someone in our lives, a mother, grandmother, favorite aunt, that taught us to sew or planted the seeds of creativity that later sprout and flourish. In my family, quilts were given for any occasion-new babies, weddings, moving out on your own or just because. My own grandmother instilled an appreciation of quilting into her children and grandchildren. I have memories of visiting my grandma at the local quilt shop, where she would let me play with jars of buttons and scraps, and of sitting in her basement making our first quilt together. I still have that quilt, and I remember how happy I was to be able to spend so much time with grandma.
IMG_5909
 I also started thinking about quilting, and how as quilters we use fabric to make connections and create memories. We create to express love, friendship, joy, and also in times of hardship and sorrow. Quilting forms threads, connections, between individuals, friends, and family. The sharing of ideas and inspirations, whether its blogging, instragram, or a casual conversation at work or in the grocery store, strengthens those connections. Every handmade treasure we gift, swap, share and show add more threads, until the connections form a delicate lacework that strengthens with each pass. Many of us have formed strong bonds of friendship with people we may never meet, all centered around the craft of sewing and quilting. We are part of a community, based on sharing and inspiring. I am honored to be able to express myself in fabric and thread, and be able to share the experience with others.
I used Tidal Lace to create a queen size quilt. I wanted something that would be simple, letting the fabrics shine and take advantage of the amazing border print. The pattern, which will have four sizes, will be coming around the same time as the collection is released is now available from my Craftsy shop. In the meantime I really wanted something to share with everyone. There were a lot of leftover half square triangles left over from the quilt, so I chose to make pillows to match the quilt. They whip up quick and we had a lot of fun at the beach taking pictures.
IMG_20140914_163530

H helping out

After the tutorial there is a Fabric Giveaway! Windham was generous enough to provide a full fat quarter bundle of Tidal Lace for each blog to give away! When you’re done here, hop on over to Anne @Play-Crafts and check out her awesome pillow! The full hop list can be found here, be sure to visit everyone and enter for your chance to win a bundle. There is a whole lot of talent packed into this hop, and I can’t wait to see what everyone else has planned for Kim!

The Tide Pool Pillow Tutorial

IMG_20140914_163034

Fabric Required:

An assortment of HST corner scraps-16 background and 16 prints. If you are cutting from scraps you want 8 squares 4″ of assorted prints and 8 of the background, cut in half to make 16 HST’s of each
4 strips of fabric 18 1/2″x 3″ for borders (I used the background print)
2 rectangles, 14 1/2″x 18 1/2″ for pillow back
1 square of batting 19″x19″
1 square of plain fabric or broadcloth 19″x 19″
*optional* a 6″x 90″ pieced strip for the ruffle (I used the narrow border print)
 an 18″ square pillow form

Instructions

1. Sew the print HST’s right sides together with the background HST’s to make 16 HST squares. Press and trim the squares to 3 1/2″.
 Trim squares
 2. Arrange the squares on your design wall or cutting table so that the HST squares form chevrons. Play with the layout until you are happy with it.
HSTsquares arranged

HST squares arranged

3. Sew the HST squares into pairs and then into the chevrons. Double check the layout on your deisgn wall

Double Check!

Double Check!

4. Sew the chevrons together to make the center of the pillow. Press well, square and trim.

5. Mark the seam allowance in the corner of the pillow center. Pin the border strips right sides together to the pillow sides, matching centers. Sew the border strips to the side of the pillow the marked corner of each seam allowance. Press the strips out, pin the top and bottom and sew in the same way, stopping and starting at the corner.

IMG_3850

6. Draw a line from the corner of the seam allowance to the edge of the strip. This will be the stitch line for the your mitred border. Do this for both sides for the top and bottom strips.

IMG_3852IMG_3853

 7. Fold the pillow right sides together on the diagonal so that the ends of the border strips are matched up. Push the seam allowances out of the way and sew down the line, starting at the seam allowance and stitching the edge.

IMG_3858 IMG_3855

8. Trim the seam to 1/4″. Repeat sewing for the remaining three corners, trim, and press all the seams open. Press the pillow top well.

IMG_3859

9. Layer the pillow top, batting and the broadcloth square to make a small pillow sandwich. Baste and quilt as desired. Trim and square the finished quilt sandwich.  * Now would be the time to make the optional ruffled edge. I use this tutorial,. If you don’t have a ruffler for your machine, a line of basting and then a gentle gather does the trick.*

IMG_3860

10. Take a 14 1/2″x 18 1/2″ rectangle. Fold one end over 1/2″ to the wrong side, and then 1/2″ again, so that the raw edge is covered. Repeat for the other rectangle. Topstitch next to the fold. Layer the pieces right sides together on the pillow front, so that the finished edges overlap by 4″. Stitch around the pillow 3/8″ from the raw edge. Trim the corners and finish your edges either with a serger or a zigzag/overlock stitch on your domestic. Turn the pillow to right side out through the opening in the back, stuff with an 18″ pillow form, and enjoy! The pillow finished slightly under 18″ square, giving the pillow some loft when the form goes in. 

IMG_20140914_163438

IMG_20140914_163358

Voila! I hope you enjoyed the tutorial!

On to the Giveaway!!

To enter, just leave a comment below on this post! Tell me what you would create to make a connection with someone, which is your favorite, or just how much you love the collection (because, come on, who wouldn’t love the collection!)

Tidal Lace Wheel, borrowed from Kim with permission

Tidal Lace Wheel, borrowed from Kim with permission

The winner will be drawn Sept 23 at 8pm PST. Make sure to visit the other blogs to see their awesome projects and inrease your chances of procuring this lovely bundle of joy!

Happy Stitching

StaceyDay_Logo

Blogathon Canada is Coming!

I am pleased to announce that Blogathon Canada 2013 is coming! Next weeks kicks off a celebration of Canadian Bloggers, hosted by Sew Sisters Quilt Shop. Whats even better is that my friend and president of the Vancouver Modern Quilt Guild, Holly, will be the a host blogger for BC! Woot Woot!

SewSistersQuiltShop

On November 18th, head on over to Holly’s Red Bike  for all the Blogathon Awesomeness! There are links to all the local BC bloggers (yours truly included), there will be giveaways and prizes, and if you haven’t seen Holly’s Rainbow Girl Quilt, you are missing out!!

I will be sharing a new quilt and a surprise pattern for a past project. Can you guess what it is?? Hint: tick…..

I look forward to seeing you all here on November 18th!

Happy Stitching!


Stacey

The Long Weekend Blog Hop!

I have decided to join the Long Weekend Blog Hop. The challenge is to make the Amy Butler Weekender Travel Bag. It is a challenging pattern, so by doing it all together we can support and help each other out. It is being hosted by Lori H. Designs and Fabric Mutt. There are tons of great giveaways too so be sure to check it out. Head on over for all the details! Once my pattern arrives I will be getting started on my Weekender Bag!