I have a big announcement today; I am officially having a sample sale! AKA: Stacey Ran Out Of Room And Has More Quilts To Make So Needs To Make Room Quilt Adoption Sale!
I will be listing quilts this week, and the sale will go live Sunday morning. There will be Finished quilts from my book, Child’s Play Quilts, quilts I have made just for fun, and some from the first unpublished book. There will also be a small selection of Work In Progress (WIP) quilts. Some WIPs may be flimsy tops only, some might be quilted but need binding.
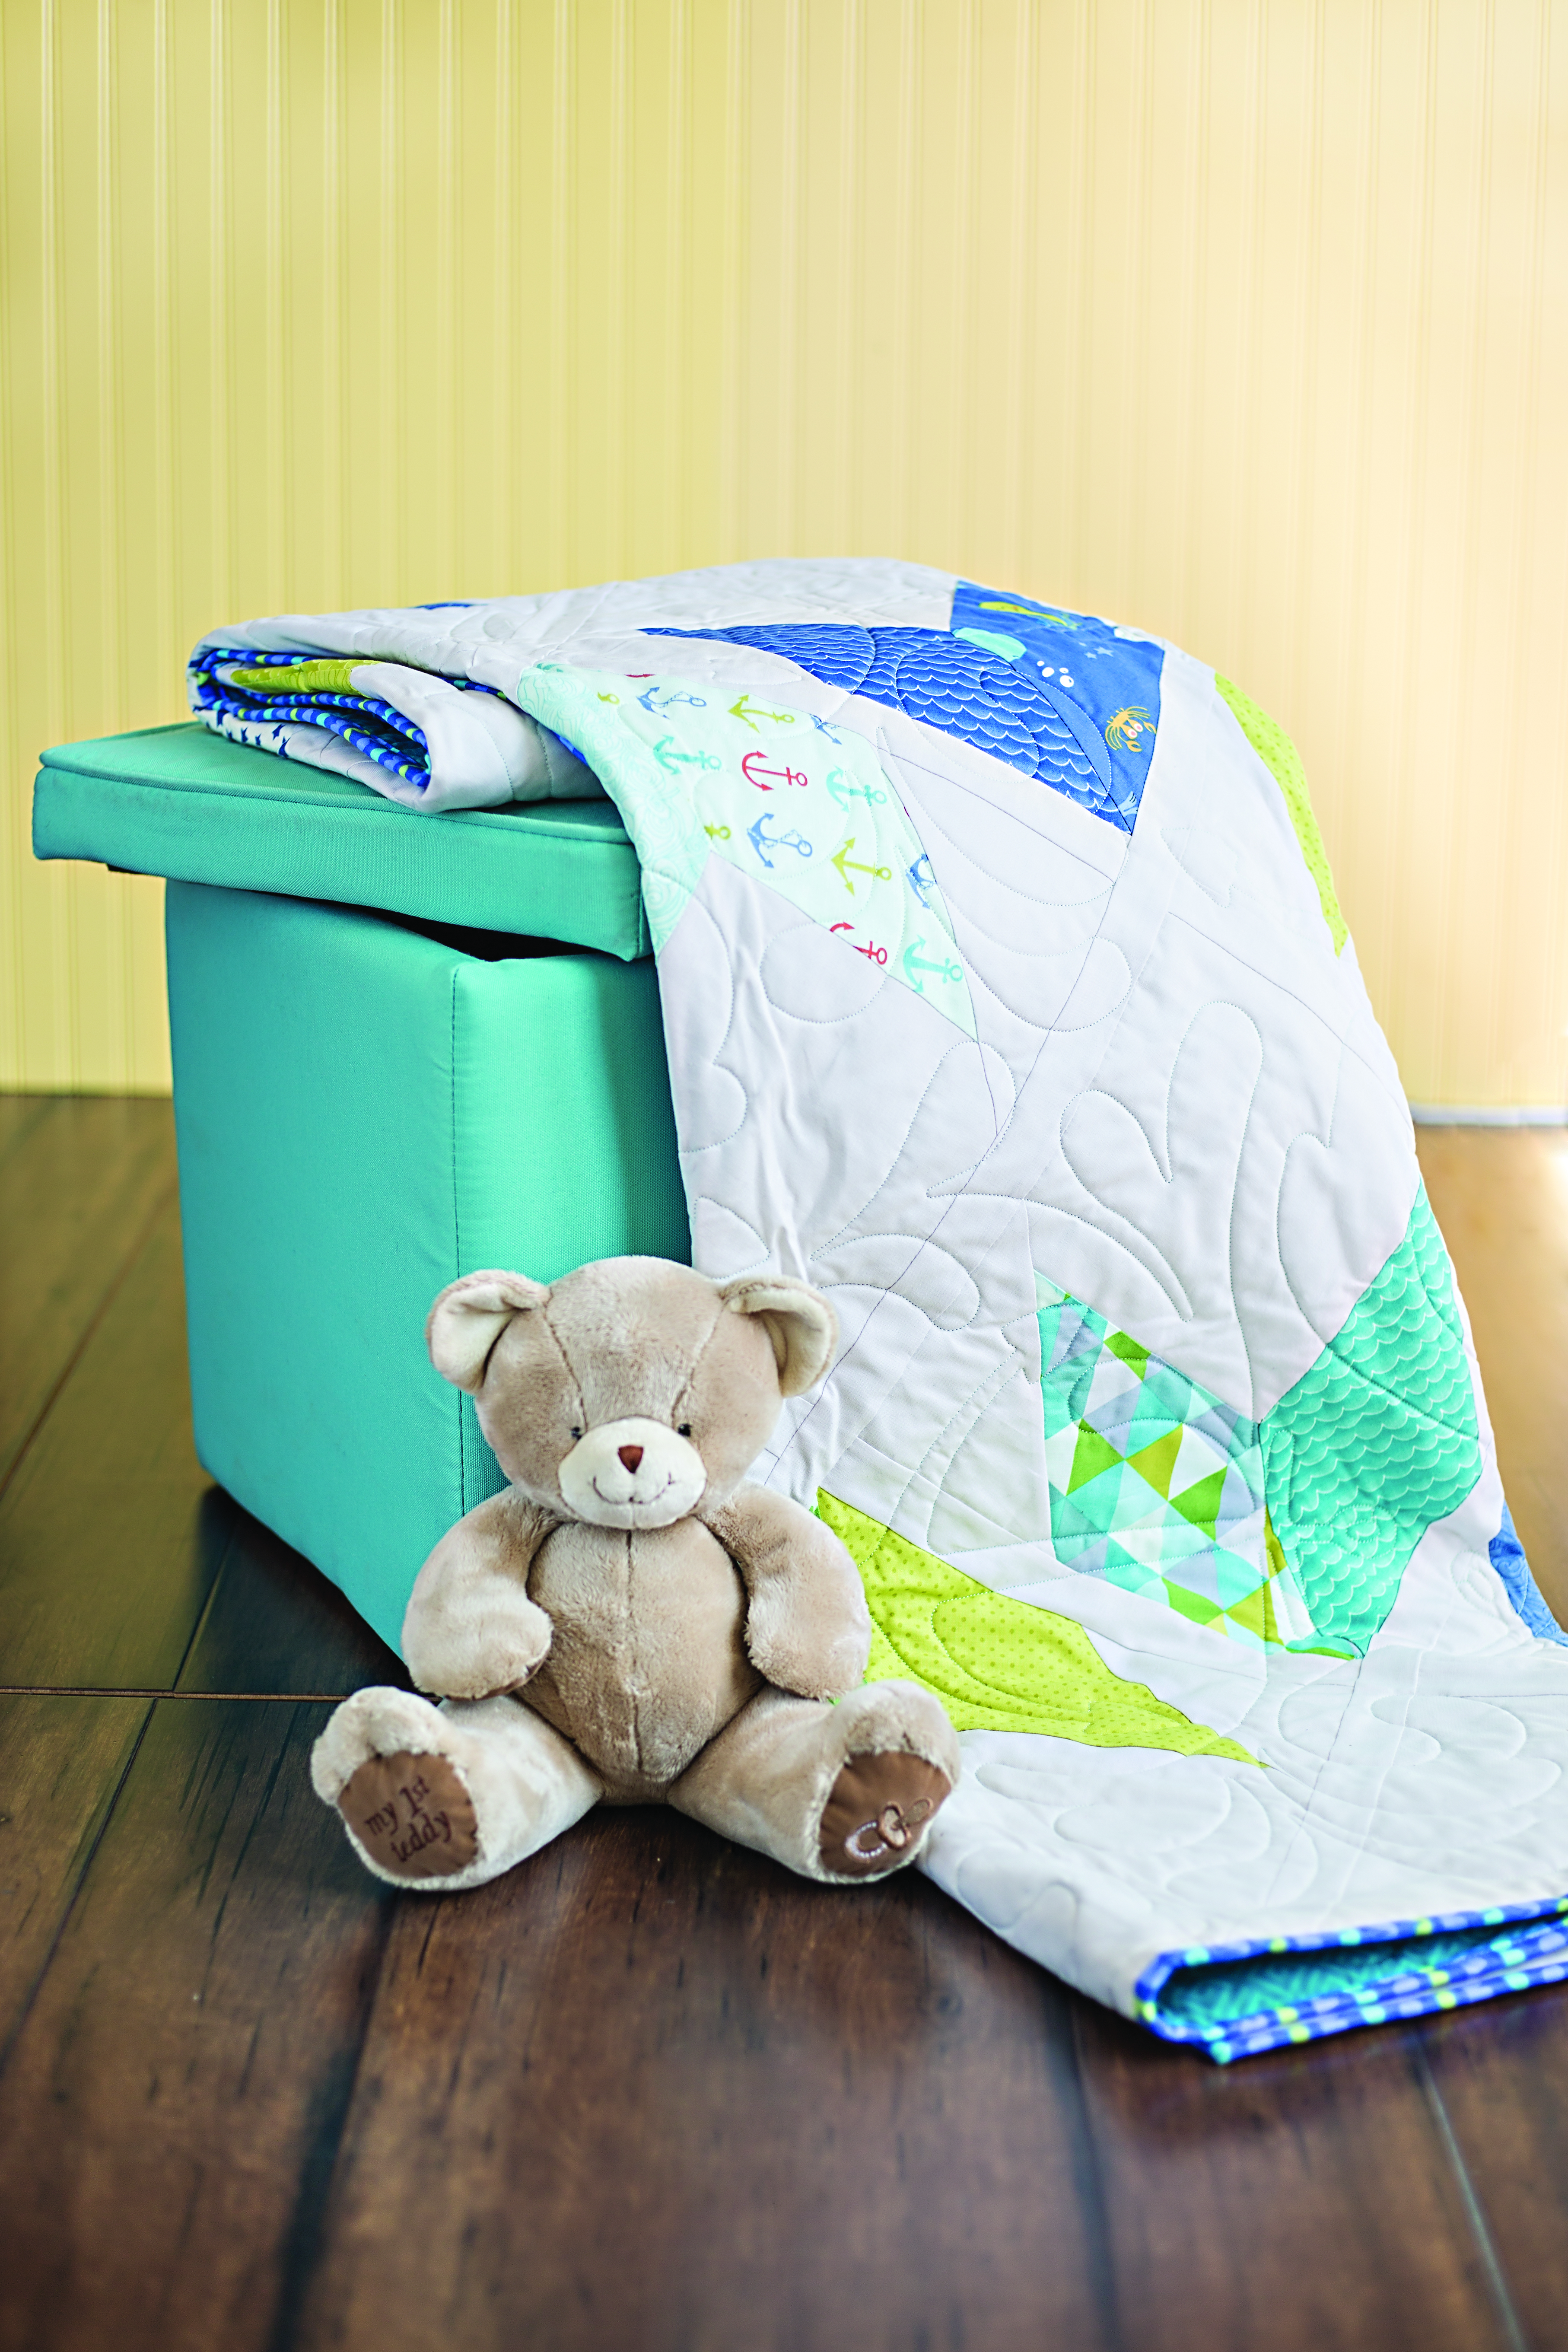
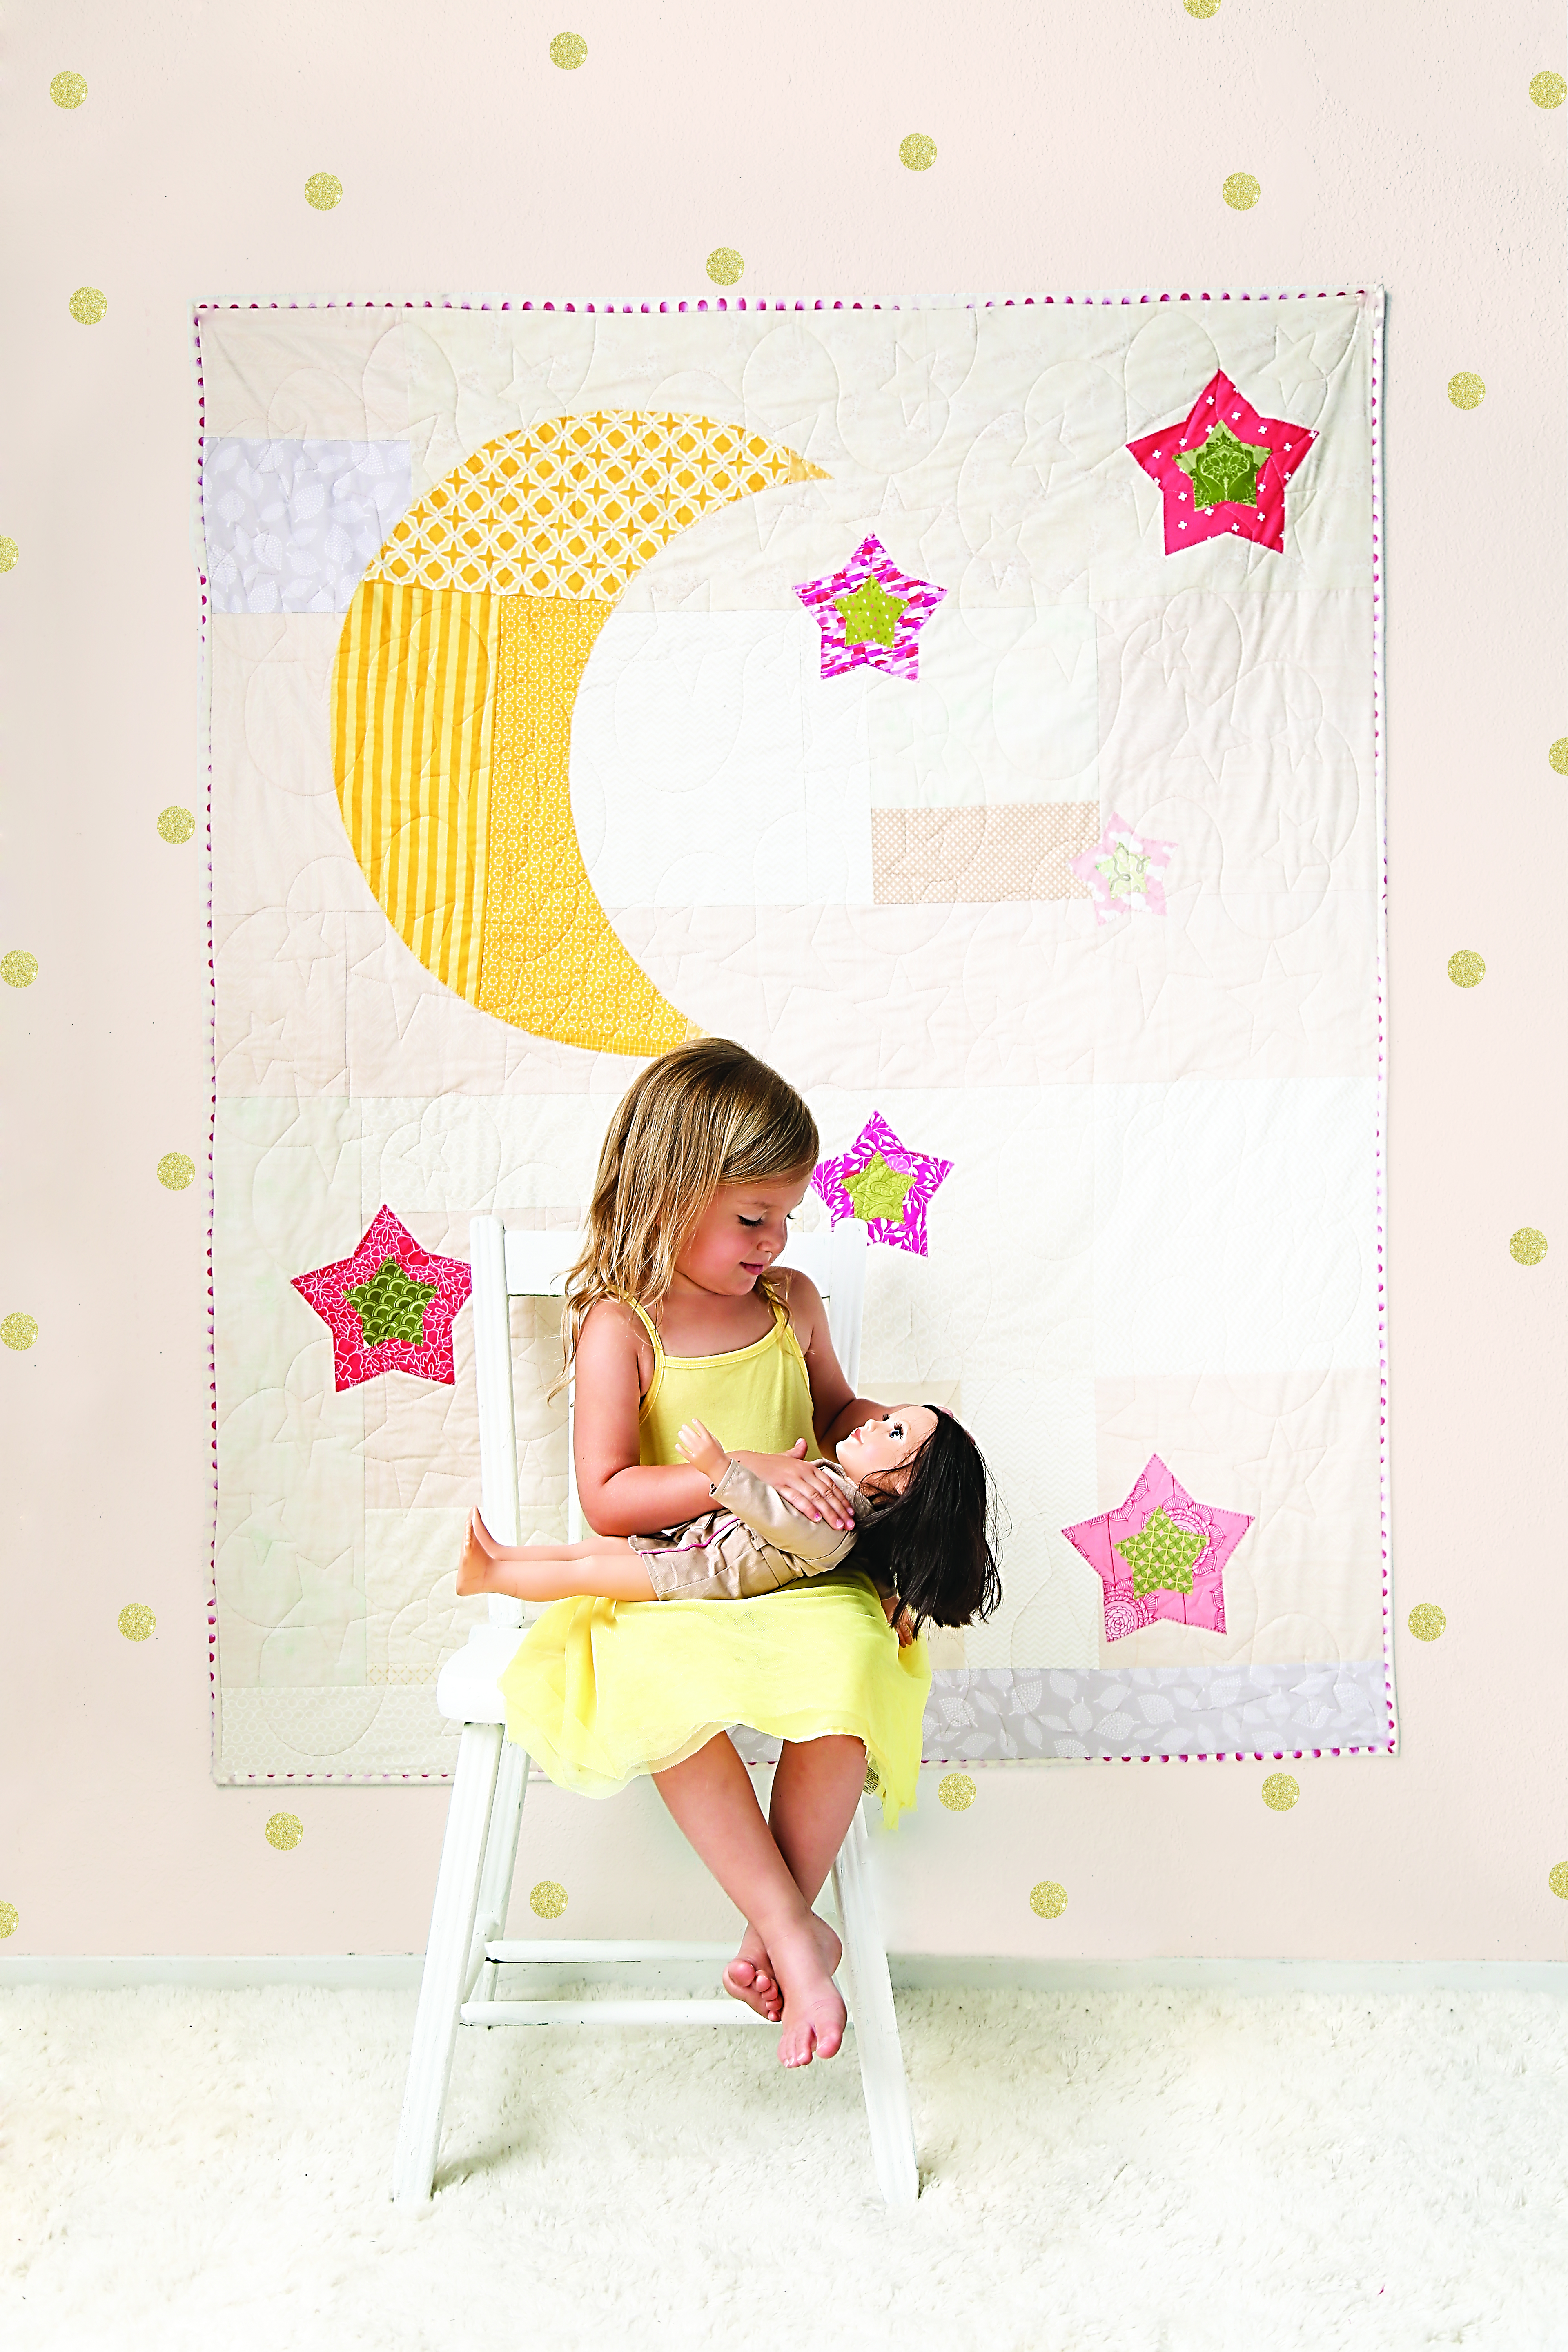
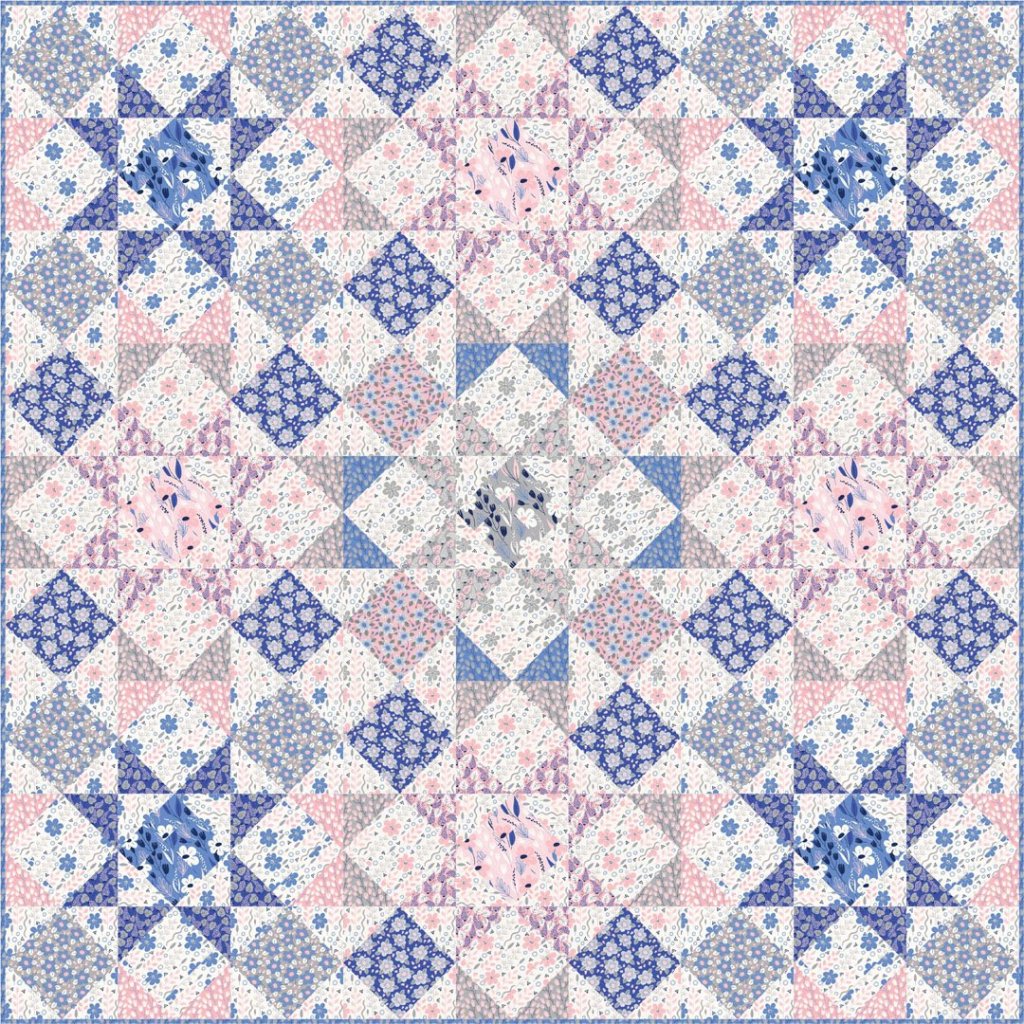
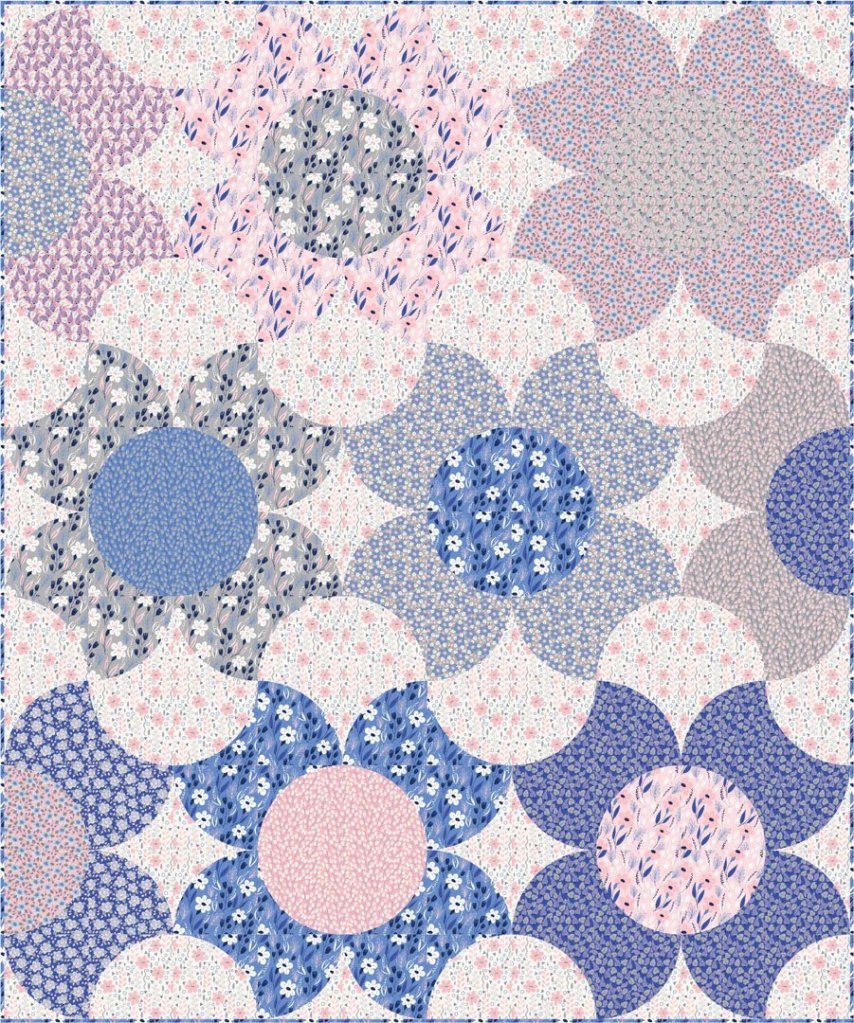
What does the Fox Say?Apple BlossomsTumbledRainbow BrightsButterfly KissesFishbowlPrismBows PeepStars ShineBig WheelsGumdropsBullseyeLadybirdStarry NightsI Love YouRaindropsLeafyStars of the Show
The prices will vary. I thought long and hard about the pricing models for these. Some take a lot more time, some take a lot more fabric. I have taken many things into account, and have settled on only charging for the cost of materials. For many of these samples my labor has been paid already, and I really want my quilts to find their forever homes. I am one of those maybe-not-so-strange-after-all people that tends to personify their art, and I know that each quilt has its perfect home, and have been ready to find them for a while. I have a hard time letting go.
I started off small in one of my Facebook groups, and I am feeling ready to start the quilt adoptions! I know that my own mental health and creativity is tied in with my stash of fabrics and quilts, and the sheer number has gotten overwhelming, to the point that I feel it affecting my sewing.
Thank you to everyone who has been following along and supporting me over the years. I am excited to me moving forward and making room for new quilts.
That’s right! All of my patterns will now be available as a PDF download.
Additionally, the Kaleidoscope pattern now has optional PDF templates and foundations to download. The kaleidoscope templates are quite large, and having them enlarged is a bit of a hassle. That’s not what I want for my patterns at all! So, so address the enlargement issues, the paper version of the pattern will have the option to download the templates in larger format paper to print at home. For those who have already purchased the pattern, I will add the download option to your order.
If you purchased from me at Heritage Festival of Quilts, please contact me directly.
Thank you everyone for your support. I have some new patterns coming this month that I cannot wait to share with you!
The next collection with Tula Pink is called Tiny Beasts, with a new selection of dots and stripes, also of the tiny variety. I really love the collection; not only are the prints excellent on their own, they can also be used like a blender print. The tiny dots and stripes round out the main prints, and of course solids are a quilters best freind!
First is Lend a Paw. This was such a fun quilt to design, I love making gradients and rainbows. the pieces are small, but the quilt is big, finishing up at 91″ x 91″! You’ll have no trouble fussy cutting this one if you want to, even though the cut pieces are smaller you’ll still get the full print in the pieces. I used my favorite print, the trash pandas, as a background feature. You could switch it up with whatever you wanted, from the ladybugs to solids. I used the tiny stripes/dots to complete the rainbow gradient.
Lend a Paw, 91″ x 91″, designed by Stacey Day
The next quilt is a more advanced quilt. I loved the hedgehog print, I thought it was so creative and clever and cute. Chatting with Tula about it led to an idea of dandelion fluff, which evolved into Just Dandy. This is a foundation paper pieced quilt with some bias tape applique. It is not for the faint of heart. The end result is spectacular. Its already popping up on Instagram in progress or completed, which makes my quilty heart so happy.
Just Dandy, 82″ x 82″, designed by Stacey Day
The final quilt I came up with is called Mini Menagerie. I wanted a large central block that would feature as much of the tiny print as possible. This is regular piecing, no special techniques required! I ended up hand drawing this one to make sure the the pieces all fit together as intended. it reminds me of a sunburst. I think this block will make an appearance again in the future. I want to color it for the upcoming Moon Garden collection, it would feature those large prints really well.
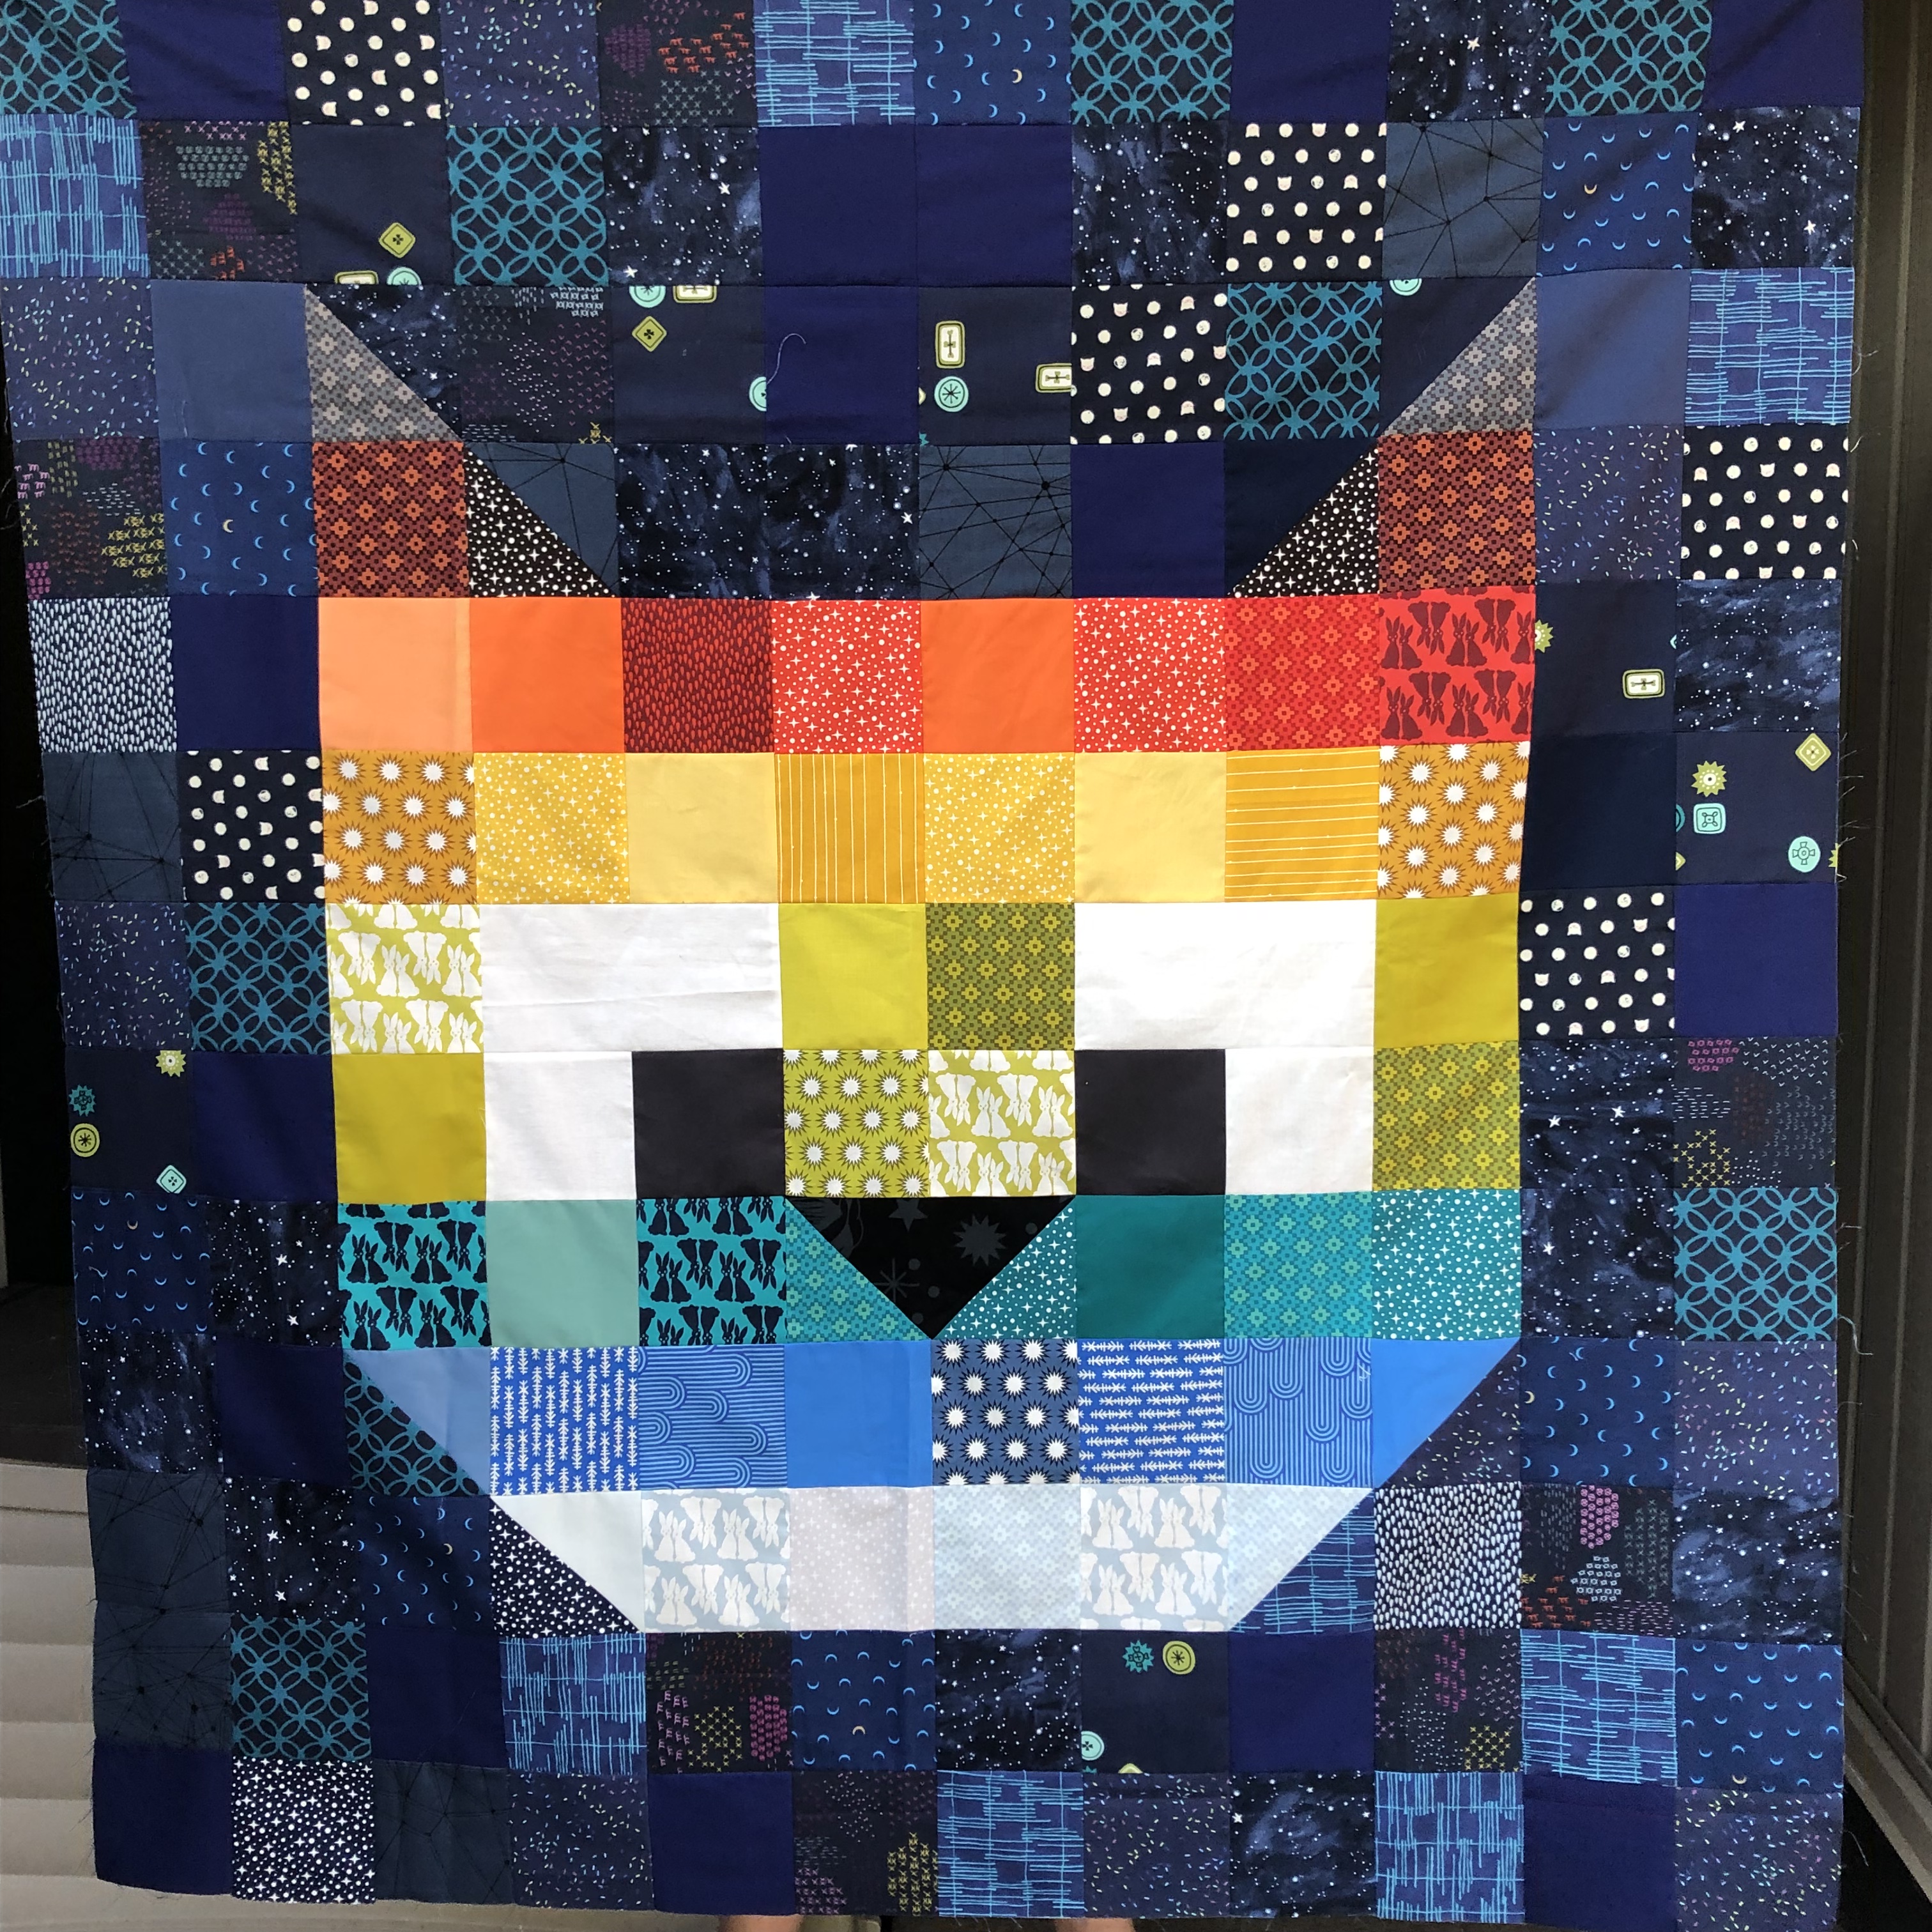
Welcome quilters and cat lovers all, to my stop on the Purr-fect Patchwork blog tour! My amazing quilting friend Pamela Jane Morgan, or @pammiejane for my Instagram peeps, has written a paws-itively purr-fect book that celebrates all things cats and quilts and creativity, not to mention some great puns, which we all know I am a huge fan of!
The project I have chosen to feature also happens to be the cover quilt for the book. Say meow to Laser Cats!!!
PEW! PEW! PEW!
Named for the infamous sketch on a very popular late night live television show, this quilt is a super fun and easy make. Need to whip something up for a baby shower or birthday? Laser Cats is your quilt!
My quilt is going to be finished and grace the bed of my tiniest human. He had a lot of fun picking the fabrics, and settles on a pair of charm packs I had laying around. My biggest challenge making the quilt was finding enough navy blue prints for the background. apparently I need to go fabric shopping (oh no!). I LOVE how the quilt turned out. I was a little worried that the blues wouldn’t show up against the navy, but kiddo was adamant that they all be used, and it worked out.
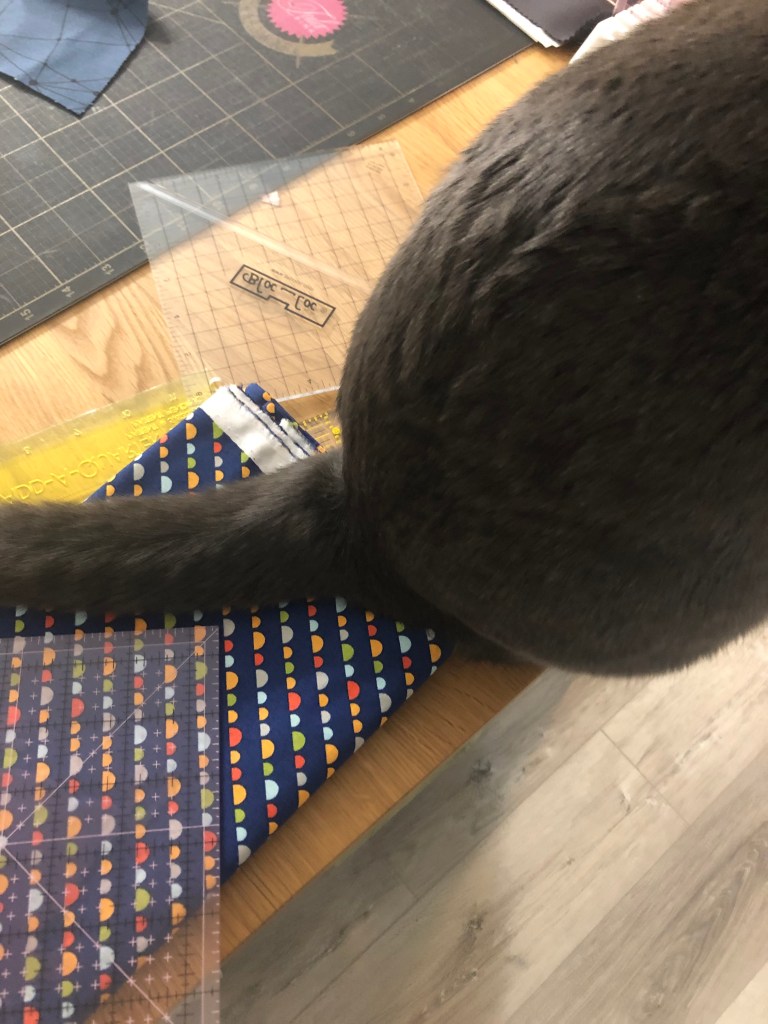
My helper cat supervised while I was cutting and sewing. She approves this book whole-heartedly.
She also put her seal of approval on the binding…..thanks Eevee…..
And on the finished quilt. I don’t know how she does it, but she managed to find the folded quilt top and sleep on it in the 5 seconds I put it down before pictures…*sigh*
See that little face? She knows exactly what she’s doing! As quilters, we know if the cat approves then the quilt is a good one.
I need to be honest, it was really, really hard to pick just one project from the book. Pam has done an amazing job curating a variety of sewing projects to appeal to every sewist. From bags to pillows to quilts, you are sure to find your next favorite project. I already have a list going of what I am going to make, and for who. Christmas gift giving is mostly taken care of at this point, and all from Pam’s book!
so, in order to celebrate and share teh amazing projects with you, I am giving away an ECopy of Purr-Fect Patchwork!
The giveaway is open to every one!
2 WAYS TO WIN
To win an e-copy of Purr-Fect Patchwork, please leave a comment below telling me a funny story about your cat (or other pet if you don’t have cats) Winners will be announced and contacted after the end of the Blog Tour, by August 30th. WINNER!! number 20, congratulations!Jiff289!!
For a chance to win a grand prize bundle from Pamela Morgan you must visit each of the blog tour stops and comment. Pam has a grand prize bundle of goodies for one lucky winner, including her book and a bunch of sponsor goodies you won’t want to miss!
Want to buy your own copy of Purr-Fect Patchwork? Shop Here!
For day two of my pattern roundup, I will be featuring P&B Textiles. I have been working with P&B Textiles since 2014. I work mainly with panels and artist prints for P&B. It’s challenging work, and I enjoy it. The artists at P&B are indeed artists; from the realistic style of Alaska Wildlife Artist Jon Van Zyle to the whimsical styles of Teresa Ascone and Sally Walsh, the prints are vibrant, colorful, and an absolute joy to work with.
There are a good number of quilts, so I’ll be going in alphabetical order.
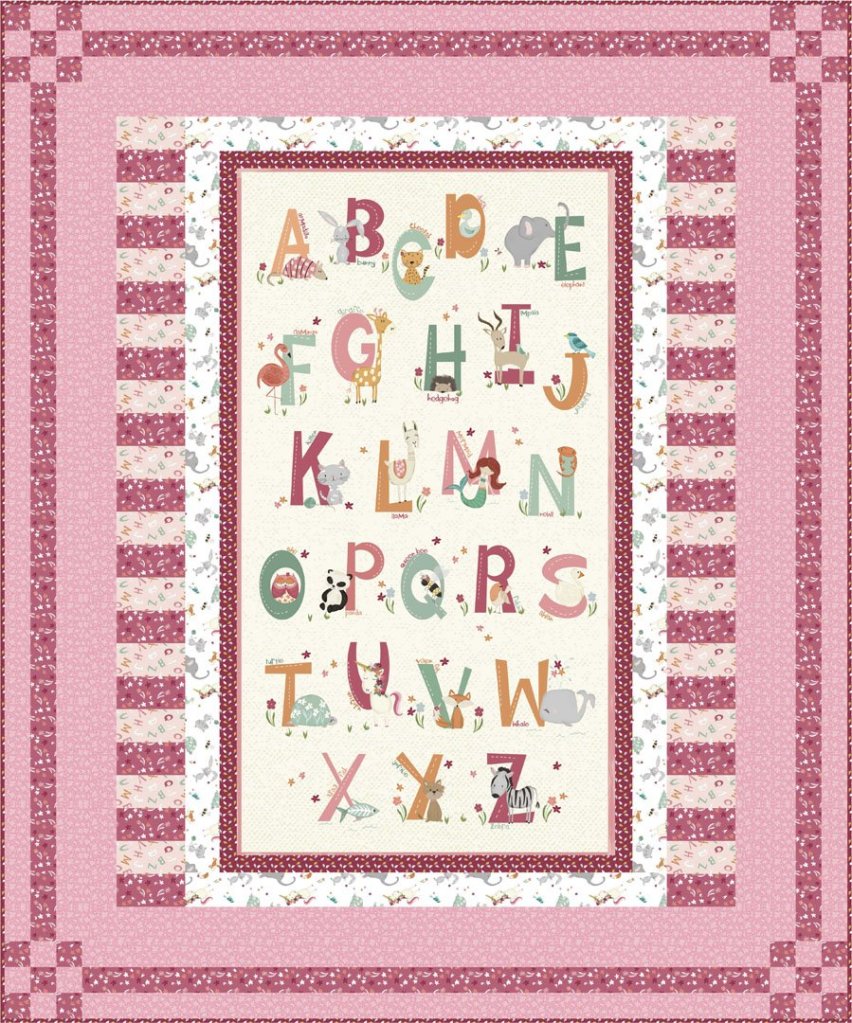
First up we have Animal Alphabet. They wanted a simple, beginner friendly quilt to feature the large panel. I made it baby quilt sized, perfect for gifting! The panel came in two colorways with adorable supporting prints.
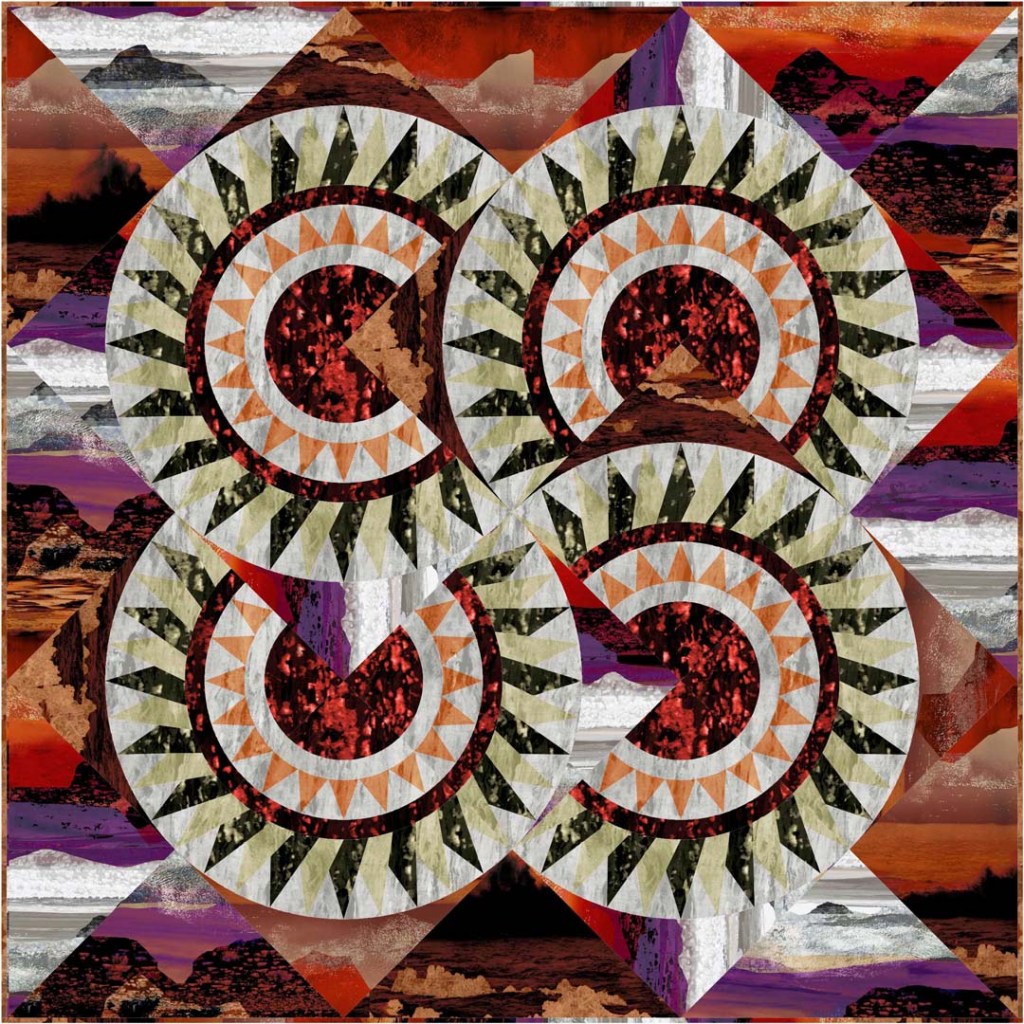
Next up is a pair of quilts I designed for a collection called Sedona. The collection came in full color and monochromatic, and both quilts could be made in either. The border print was stunning and needed its own feature quilt! This collection reminds me of my mom; totally her colors!
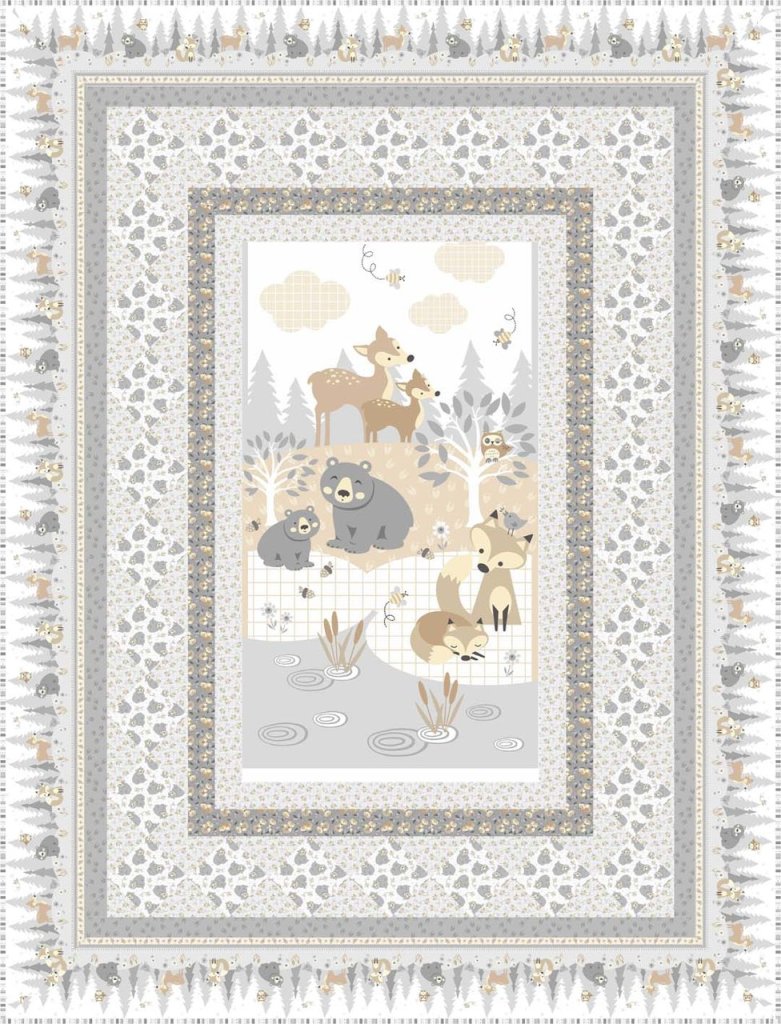
Then we turn around and head back to another fun children’s collection, Little Critter. I adore the baby animals featured in this collection; the prints are soft and whimsical, the palette is fully neutral so you can add pops of whatever colors you want to it.
Now, may I direct your attention to Living Coastal, a bright and vibrant sea creature themed collection. I love sea life, and live near the coast. Some of my best memories were made on the west coast of Vancouver Island. I am so excited to be able to bring my children to the exact same campground this summer that my parents used to take us to as kids.
After that we welcome Magnificent Animals; a collection inspired by the wilds Alaska. Having taught on an Alaskan Quilt Cruise two years ago, I can personally recommend this collection. The bold, bright colors are exactly what you would expect to see on a sunny day in Alaska. I even had the privilege to observe some of the same creatures, from a safe distance of course! (Growing up in Northern Alberta, you know NEVER to approach bears. Or Moose. Or Canadian Geese…..)
Meadow Lane looks exactly like it sounds; soft, inviting florals in a varied palette. Perfect for cuddling up in while sipping a hot beverage and reading a book outside on a warm spring morning.
For some hot and sunny inspiration, Tropic Gardens is perfect for you! Let the deep jewel tones and high contrast prints transport you to a tropical paradise of blooming flora. I love making lone stars and variants, this quilt is definitely expert level but oh-so-gorgeous and well worth the effort required.
Finally we come to Equinox; a collection of blender prints to add a pop of color to any project. Equinox is the perfect pairing of bold patterns and monochromatic palettes.
Some of these collections released last year, and I apologize if they become difficult to find. I promise to keep on top of things from now on.
I hope you find something to inspire you, and as always I would love to see your quilts made from my patterns! Tag me on Instagram @staceyinstitches with your quilty makes.
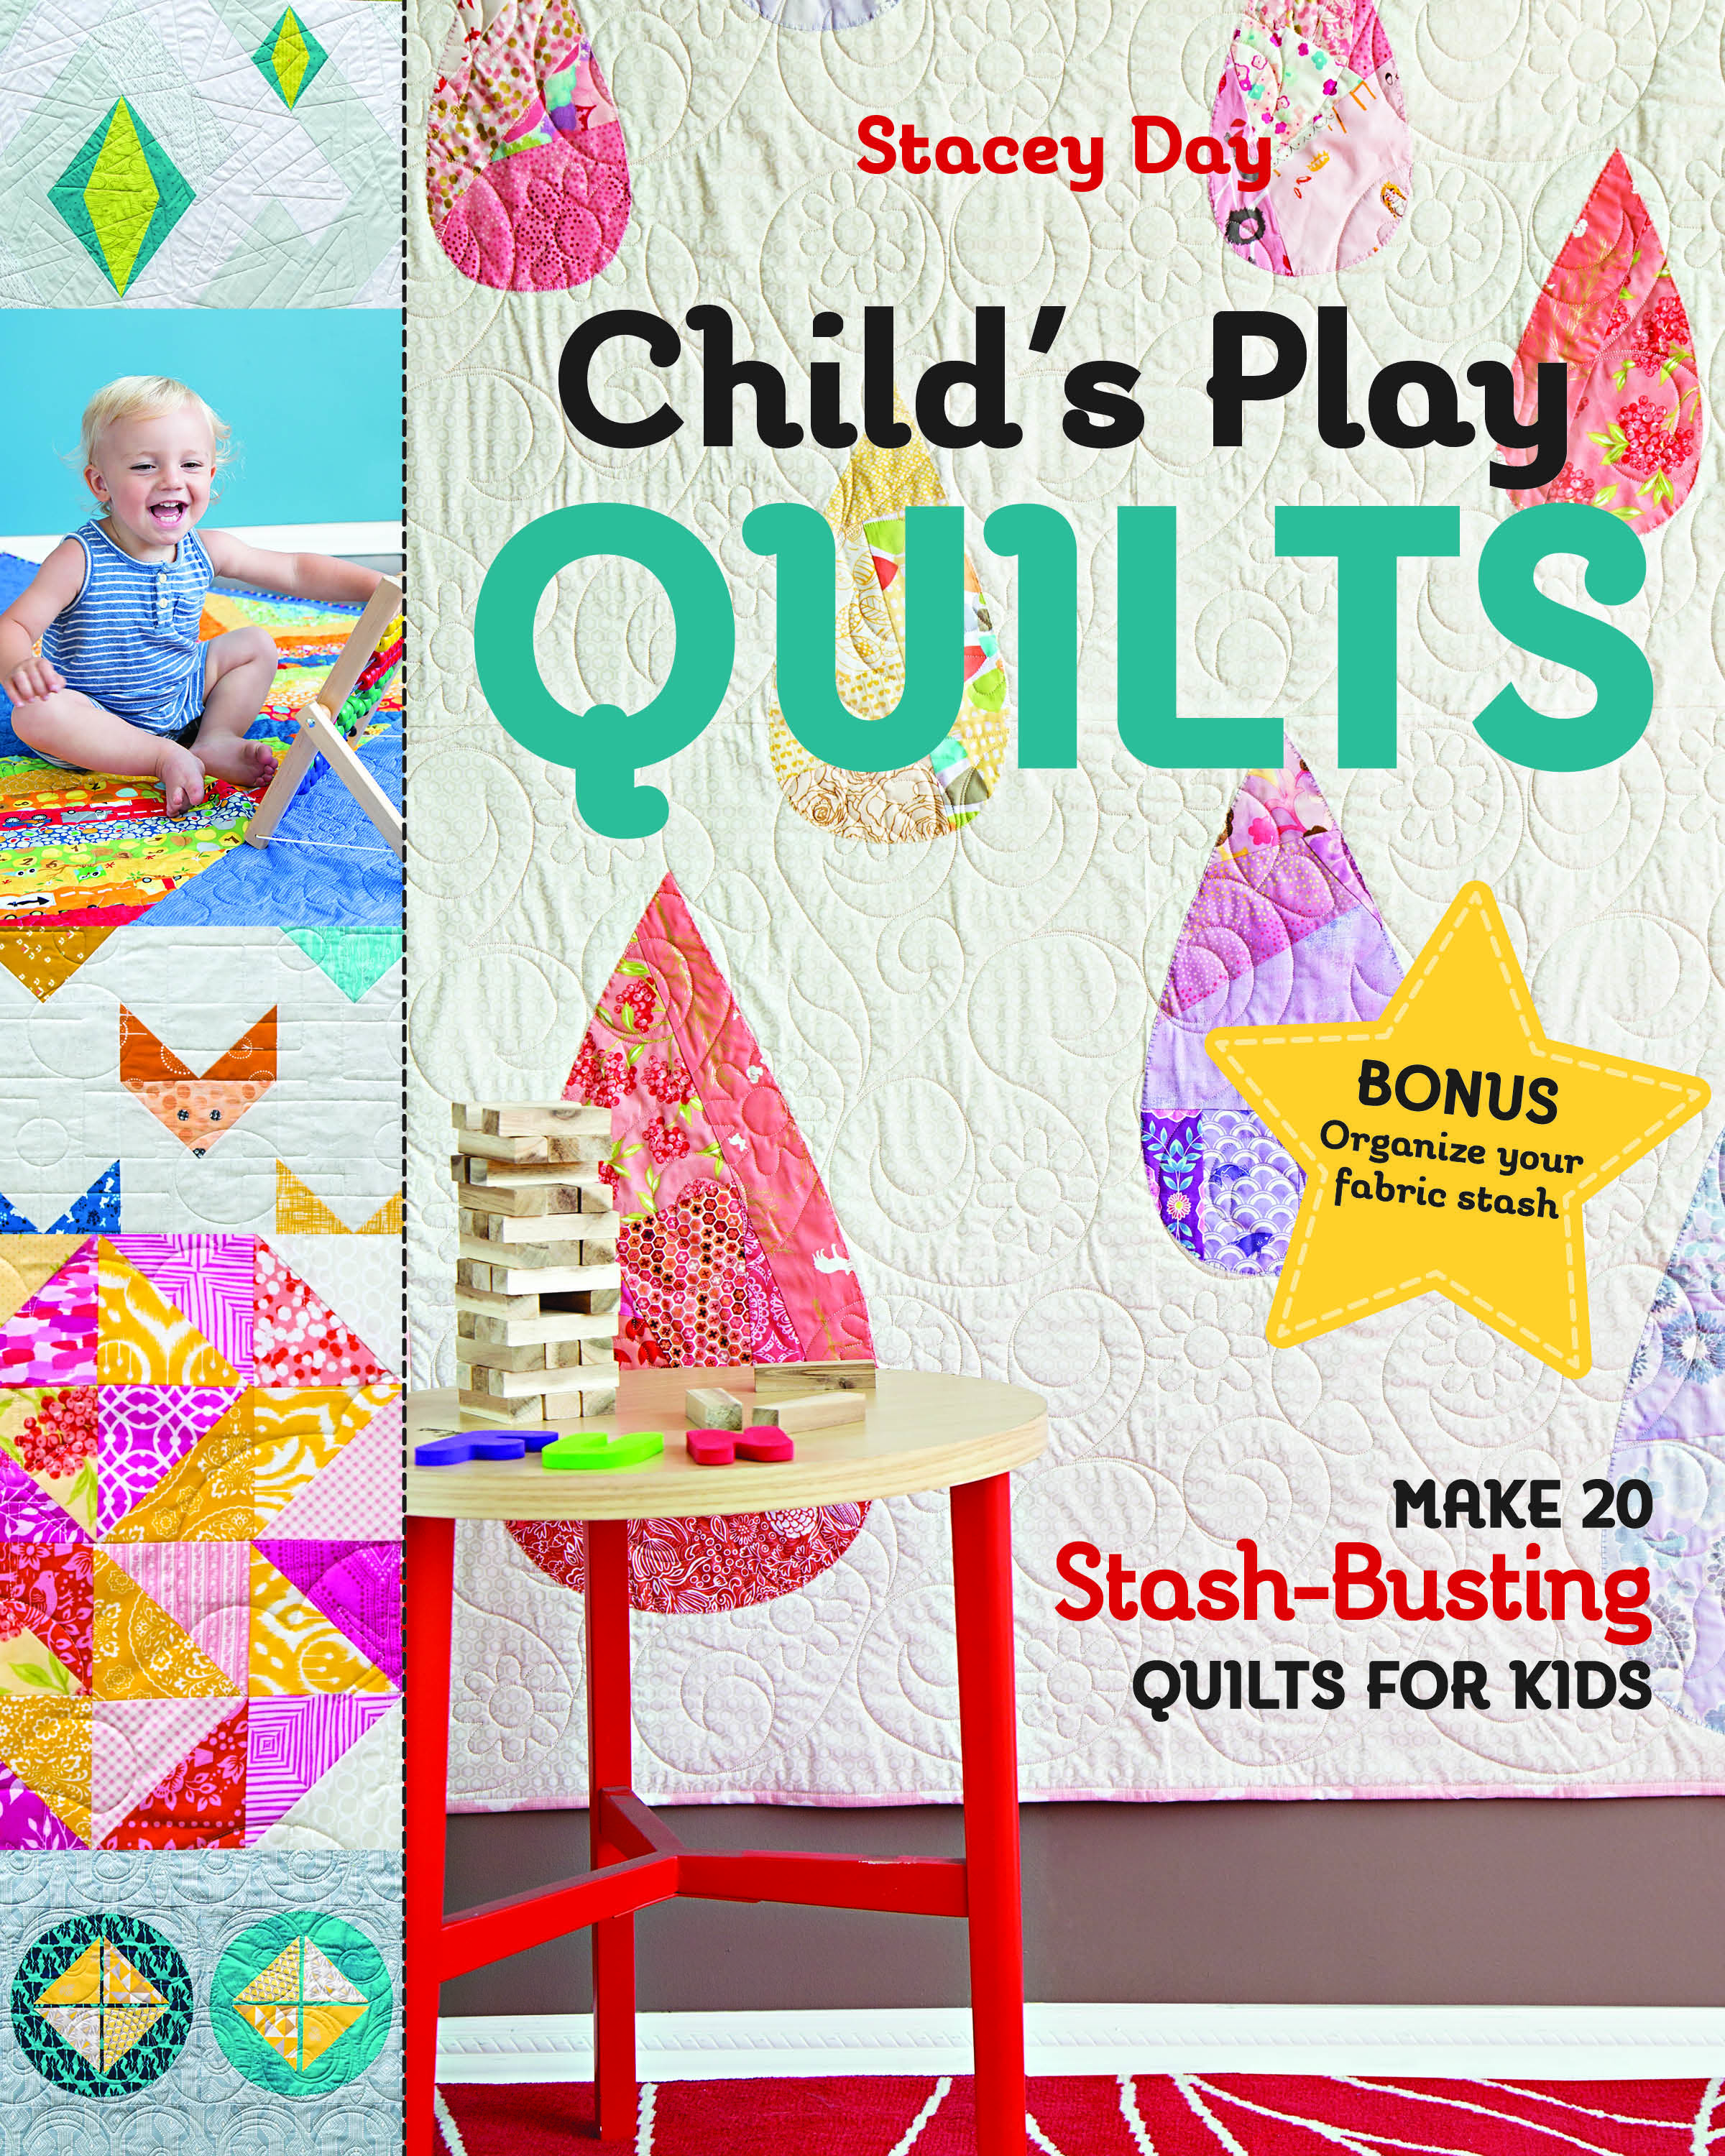
Welcome to the official launch and the kickoff of the online book tour for my brand new book, Child’s Play Quilts!
It has been quite a journey from rough sketches to finished book. 40 quilts, 20 patterns, 2 years, 1 new baby, and countless hours later, I finally have a hard copy in my hands. I will fully admit to shedding tears of joy. It has been a surreal experience up until this point. I love the finished result and I know you will too! Every little bit, from the fabric choices to the designs, the batting to the quilting and binding, every element has been carefully curated with children in mind. I wanted my quilts to be fun, friendly, and colorful!
Rainbow Brights. Photo courtesy of C&T Publishing
There are 20 patterns, split between pieced and applique. I have also included a large section of sorting and organizing your scraps and stash, making it quick and easy to pull fabrics and to create a balanced collection of print and color. The color section is direct and gives my formula for successful fabric pulls. A huge thank you to Anne Sullivan of @play-crafts who took some wonderful photos to illustrate that chapter.
Pinwheel. Photo Courtesy of C&T Publishing
The next two weeks are going to be filled with fun and photos of quilts from the book, made by a wonderful group of people whom I have come to know over the years I have been quilting. Each individual volunteered to feature a quilt, and many have made their own versions. Each has been amazing and I can’t wait for you all to see them.
Starry Nights. Photo Courtesy of C&T Publishing
I am also giving away two signed copies of my book, one here on the blog and one on Instagram. Make sure to follow along each day to enter!
Here is the schedule of participants. They are a truly talented group of people, so you won’t want to miss out. Click a name to visit their website or Instagram feed on their day, and be sure to come back and leave me a comment. You can leave one comment each day, and each is an entry to win a book. Of course, if you simply cannot wait to win a book, I also have signed copied available in my Etsy shop, which you can find by clicking here.
Thank you all so much for your support over the years. I am truly grateful for each and every one of you, more than words could possibly ever express. This has been an incredible journey to make it here.
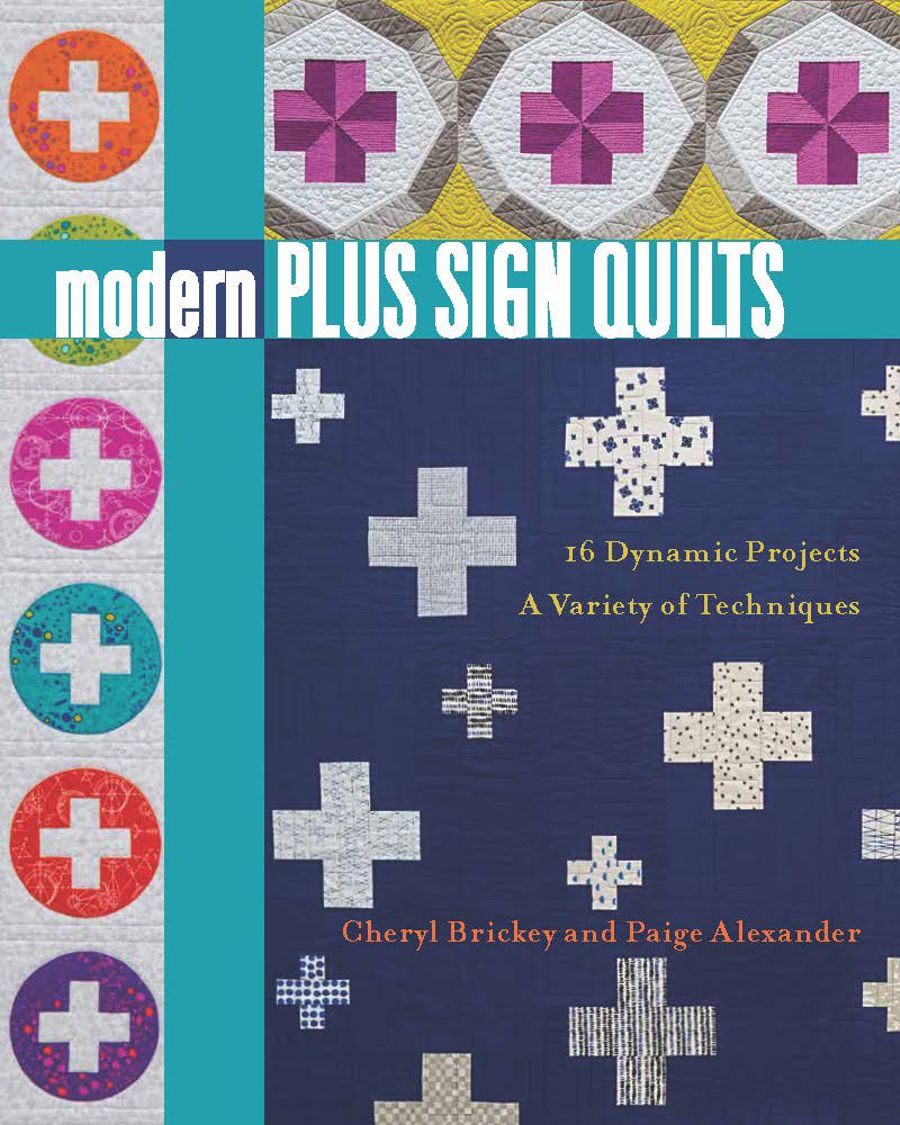
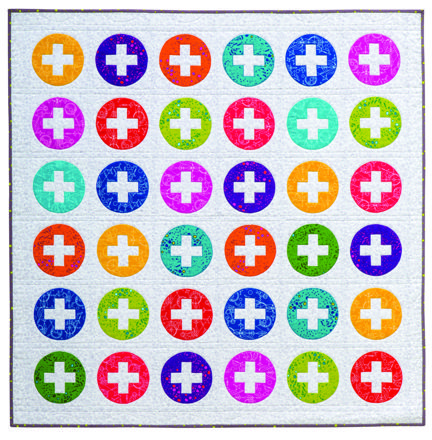
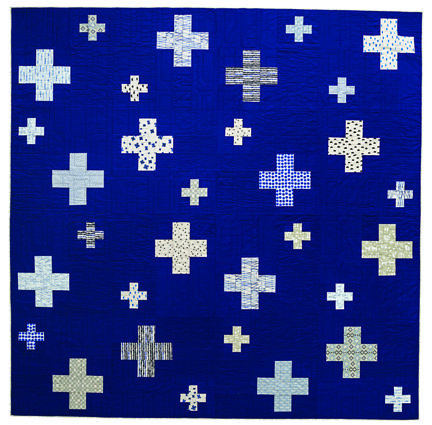
Welcome to my stop on Day 4 of the Modern Plus Sign Quilts blog hop! I am here to wax poetic on behalf of Cheryl Brickey of Meadow Mist Designs and Paige Alexander of Quilted Blooms , two wonderfully talented designers who have taken the simple Plus Sign block and turned it into 16 extraordinary quilt designs. I knew immediately upon seeing the cover of Modern Plus Sign Quilts that I needed to have it in my library.
Each quilt is a unique take on the plus sign. There is a project for every skill level, from fun and simple to gorgeous and complex. Flipping through the book, there was no question which quilt I wanted to make, and what fabrics I wanted to use. I was immediately drawn to it out of all my favorites.
My third favorite quilt is Cute as a Button. I love the negative space plus signs. I want to make these extra large for a full size bed quilt!
My second favorite quilt is Celestial. It is one of the cover quilts, and I could immediately picture this is soft and bright yellows with a deep twilight navy background. This will be the next quilt I make for the boys.
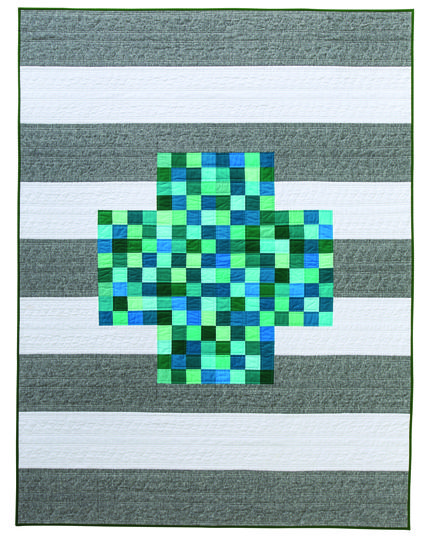
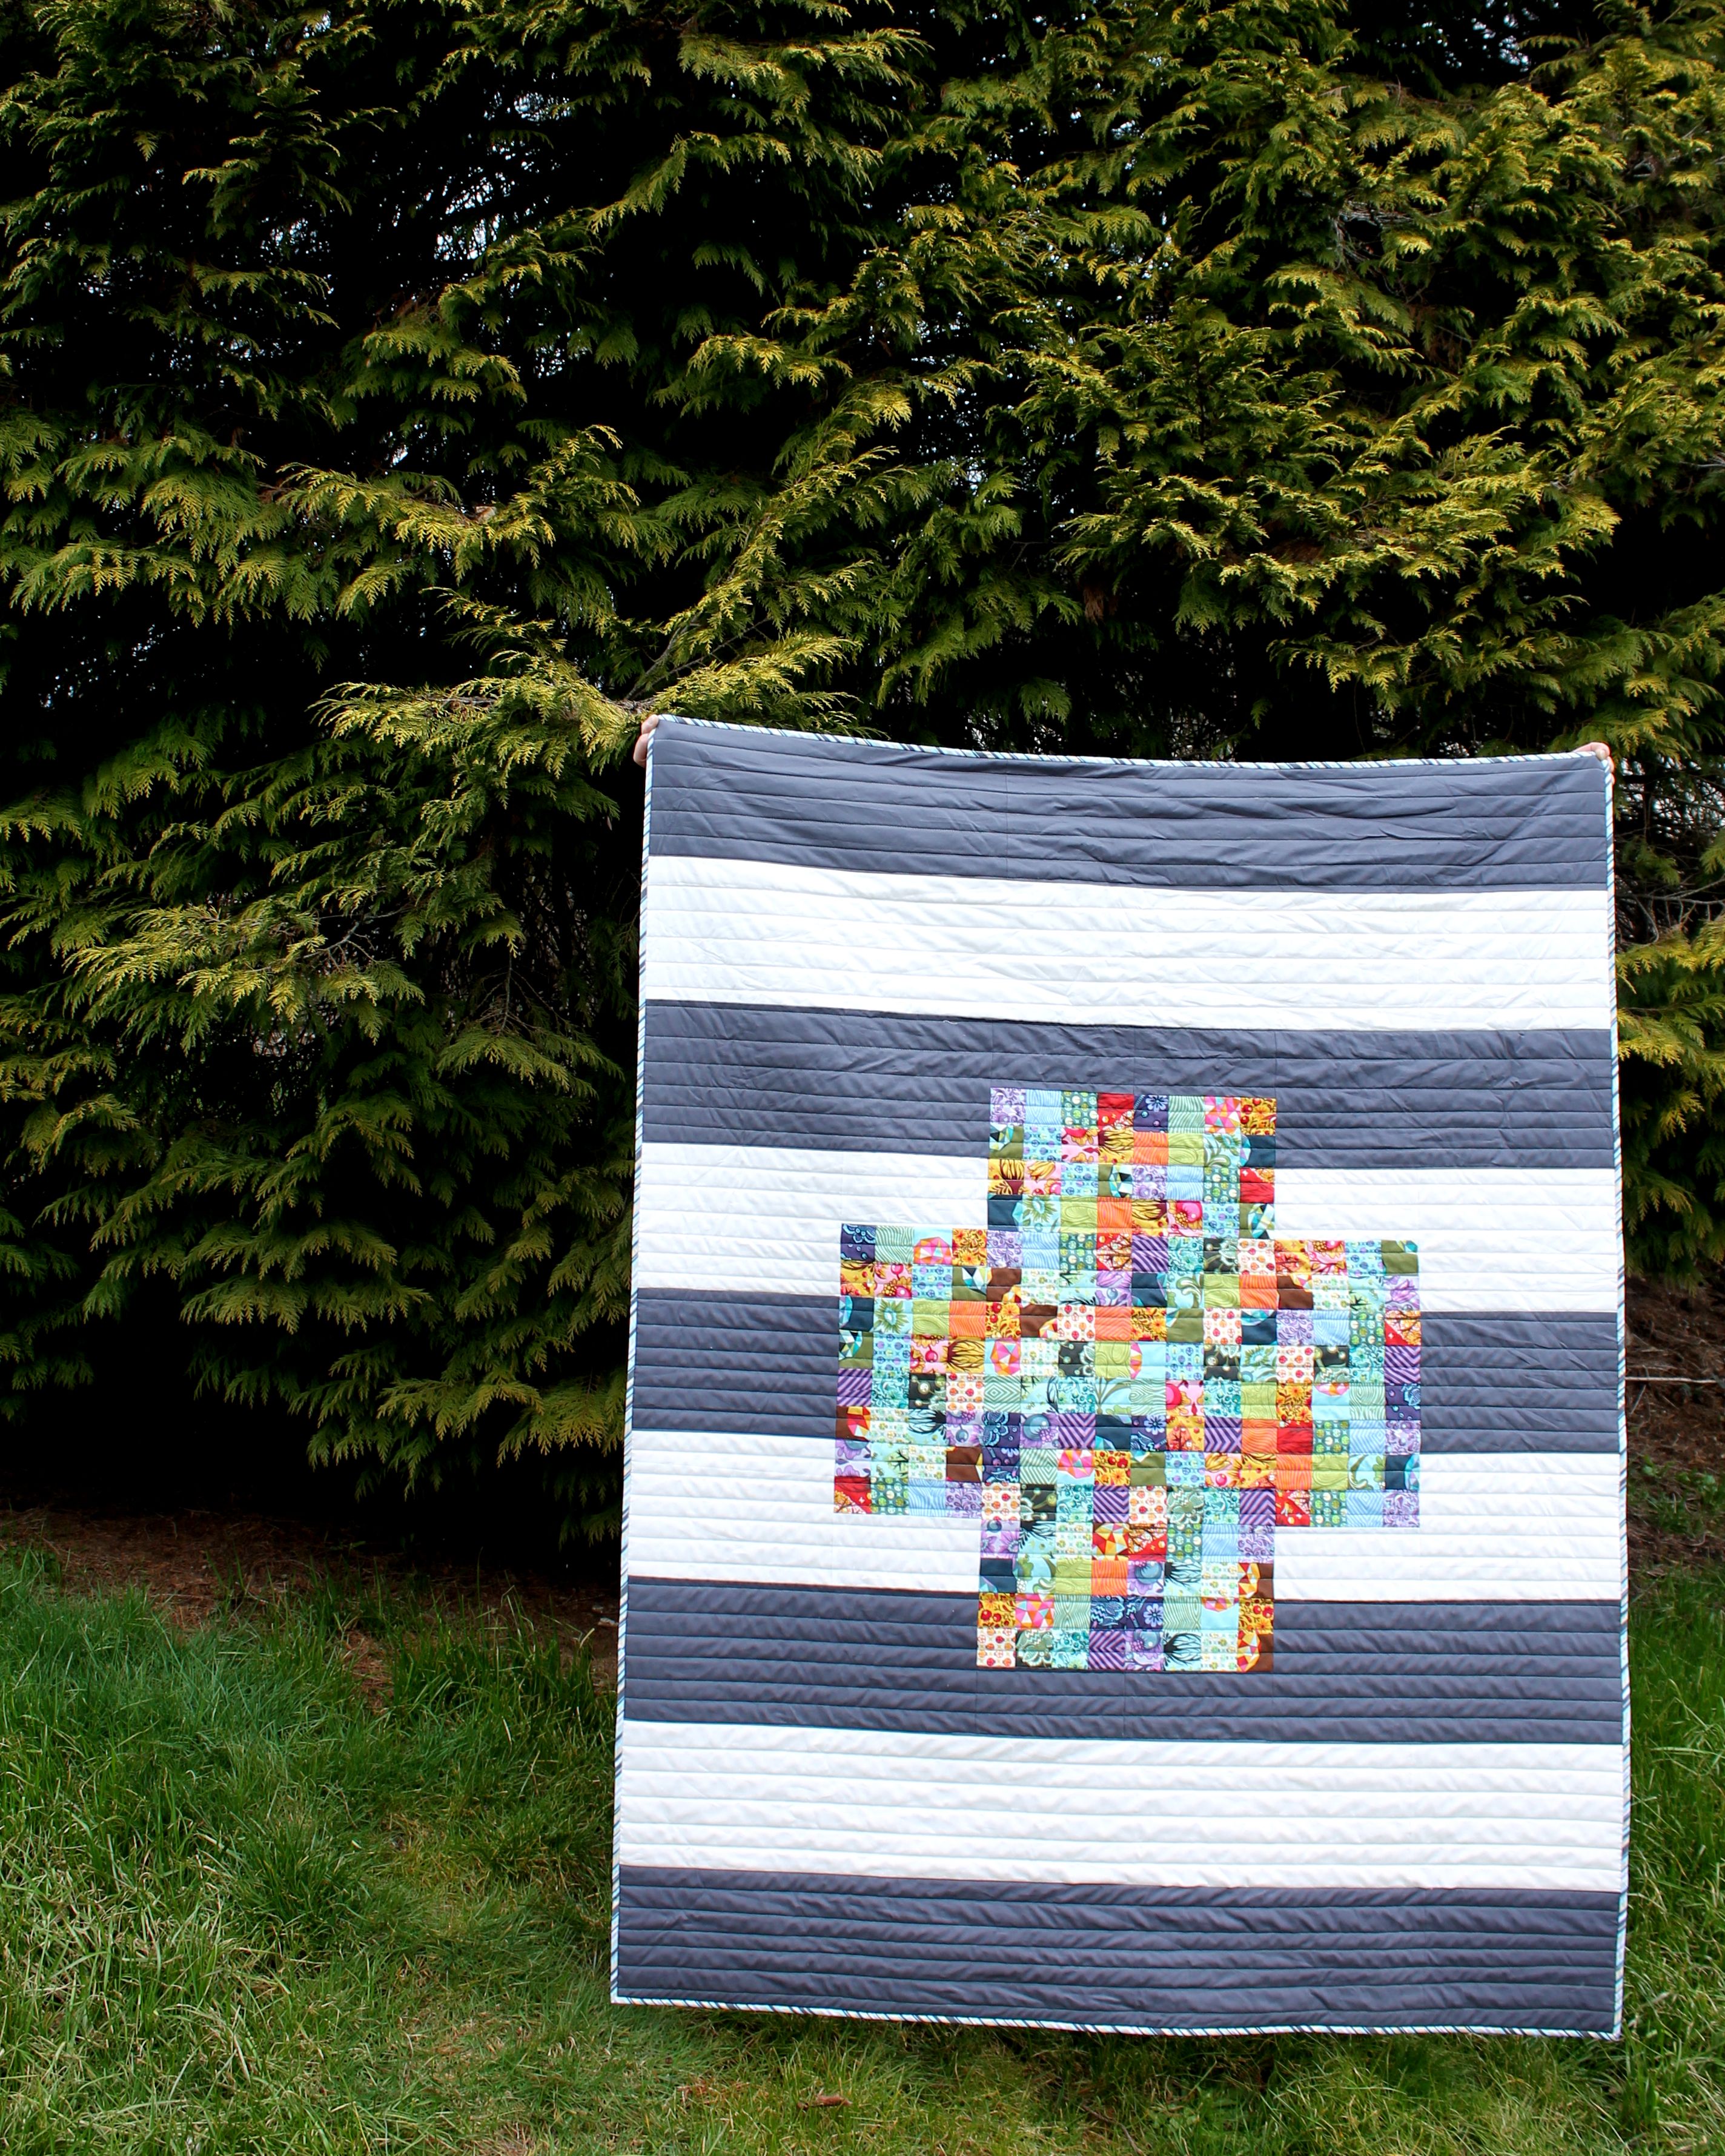
And of course, my favorite quilt from the book, Postage Plus!
I knew this was the quilt for me to make. I have been hoarding half a jelly roll of Tula Pink Birds and the Bees, waiting for the right project to come along. The construction was SUPER FAST for this quilt. I made it in about 6 hours, so its perfect for a last minute gift or a quick fun project. It is also the perfect project to teach someone to quilt. The instructions are clear, concise, and piecing is easy enough to build confidence quickly.
I quilted in straight lines and used my two favorite Freespirit solids – Mist and Manatee – for the background stripes. This quilt lives on my couch and adds the perfect splash of color to my space.
I hope you enjoyed my stop. be sure to check out all the other Postage plus quilts today, and have a peek back at the prevous days to see all teh wonderful quilts! Cheryl and Paige will be runnig giveaways each day as well, so make sure to visit their websites for all the fun!
Today I finally finished my latest pattern for Dear Stella Designs. Say hello to the Garden Path quilt pattern.
Garden Path- Featuring Garden Sanctuary by Rae Ritchie for Dear Stella Designs
I love Rae Ritchie’s artwork and design style so when I get to play with her fabrics I really enjoy myself. I have the fabrics to make this quilt as well, once it’s done I am going to gush some more about it then put it on my couch. The pattern is a basic Foundation Pieced pattern available for purchase in my Craftsy shop.
I also wrote a free pattern for this collection that is available from Dear Stella Designs called Rose Hedge. It’s a fun variant on a log cabin block. I love the little sleeping hedgehogs!
Rose Hedge – Featuring Garden Sanctuary by Rae Ritchie for Dear Stella Designs
We also reworked one of my older designs for a new collection from Dear Stella so be sure to pop over and check it out.
The Meadow quilt has been reworked for the Life’s a Beach collection. I love the flamingo print and the watermelons.
Meadow – Featuring Life’s a Beach
All of my free pattern links can also be found in the Free Patterns tab of the menu bar above.
This past Quilt Market in St. Louis looked like a fun one. I wasn’t able to attend in person but I did have a plethora of quiltings hanging throughout.
Today I want to show you my latest for Timeless Treasures and Dear Stella. Each quilt has a free pattern attached to it.
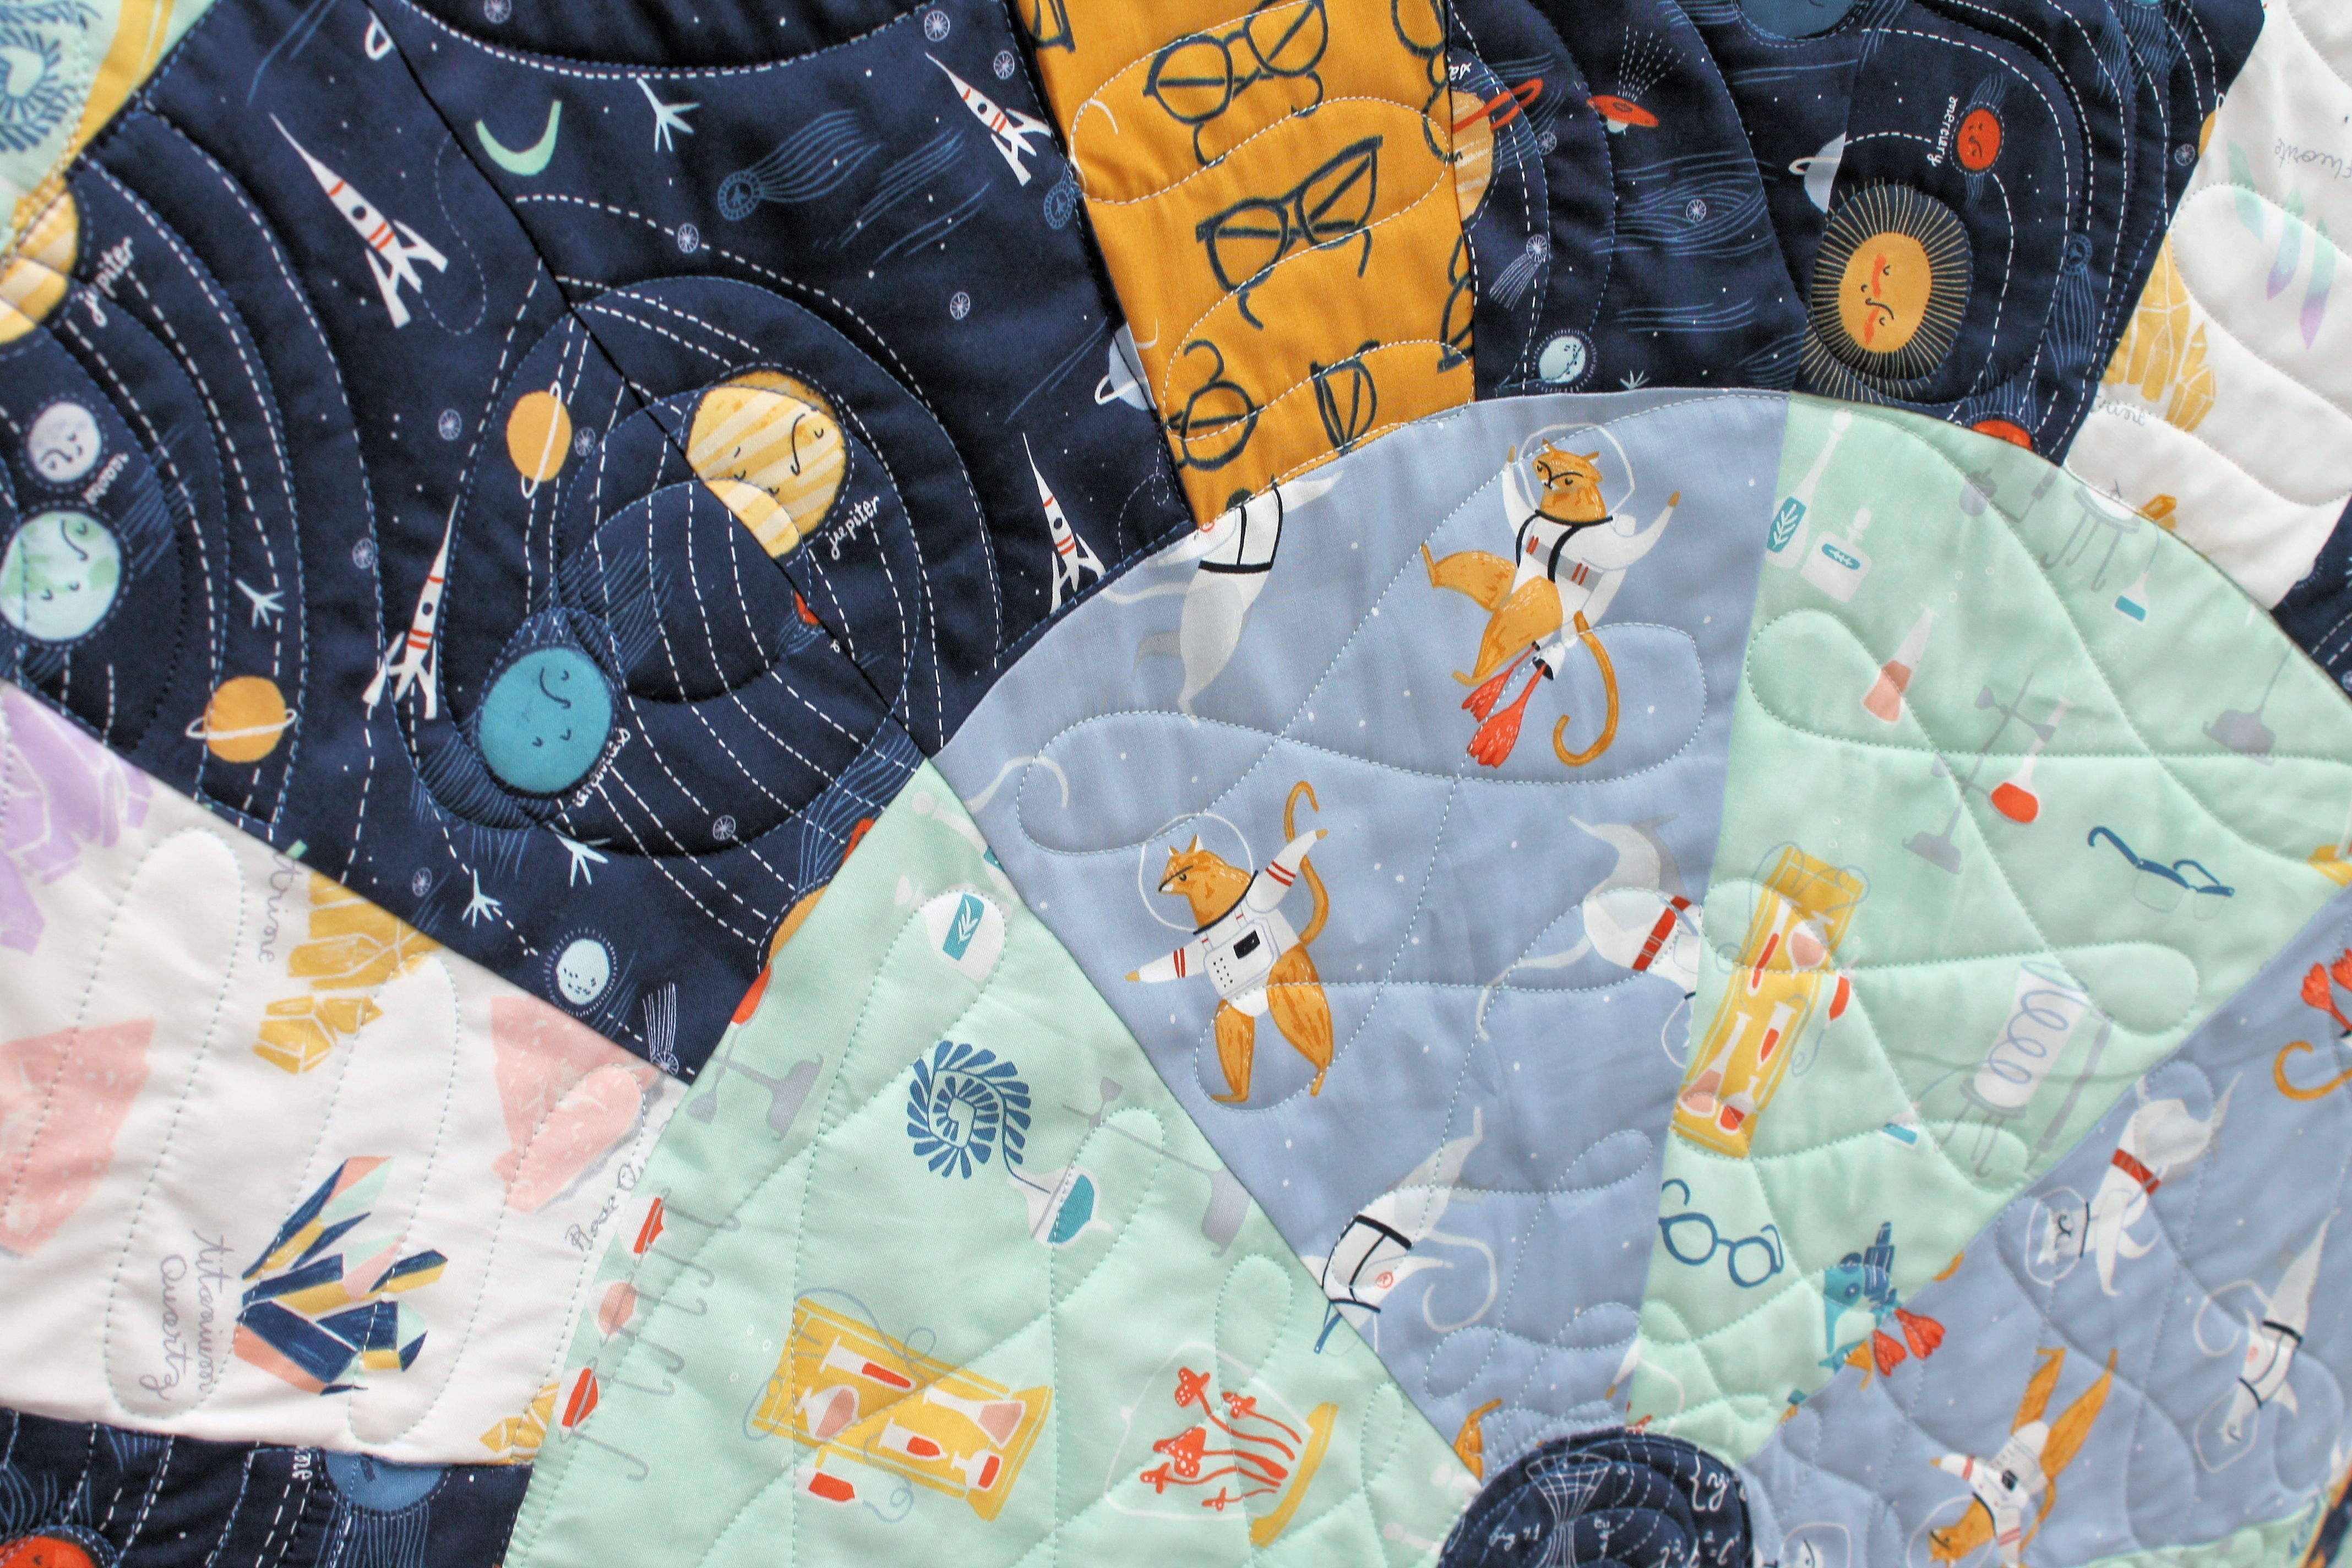
First up, and probably my favorite, is the Space Station Quilt for Supernova by Rae Ritchie. I love Rae’s design style and it is always a pleasure to work with her prints.
My older son helped me pick the fabric placement for this one. He loves space and one days he wants to be an astronaut/karate kid/hockey player. This quilt gets to live at home with us. HE was absolutely thrilled when “his” design was picked for the collection, and doubly so when he saw the finished quilt. The pattern is available HERE from Dear Stella.
Next is the pattern CHOMP! for the Dark and Stormy Collection I just LOVED the sea theme and immediately thought of sharks popping out of the water. During the process I am pretty sure my family managed to come up with more than a dozen unique shark puns as name suggestions for the pattern.
The shark teeth can be made 3D or pieced. I thought it was clever to use the pirate head print for the teeth. Tee hee! You can find the pattern HERE.
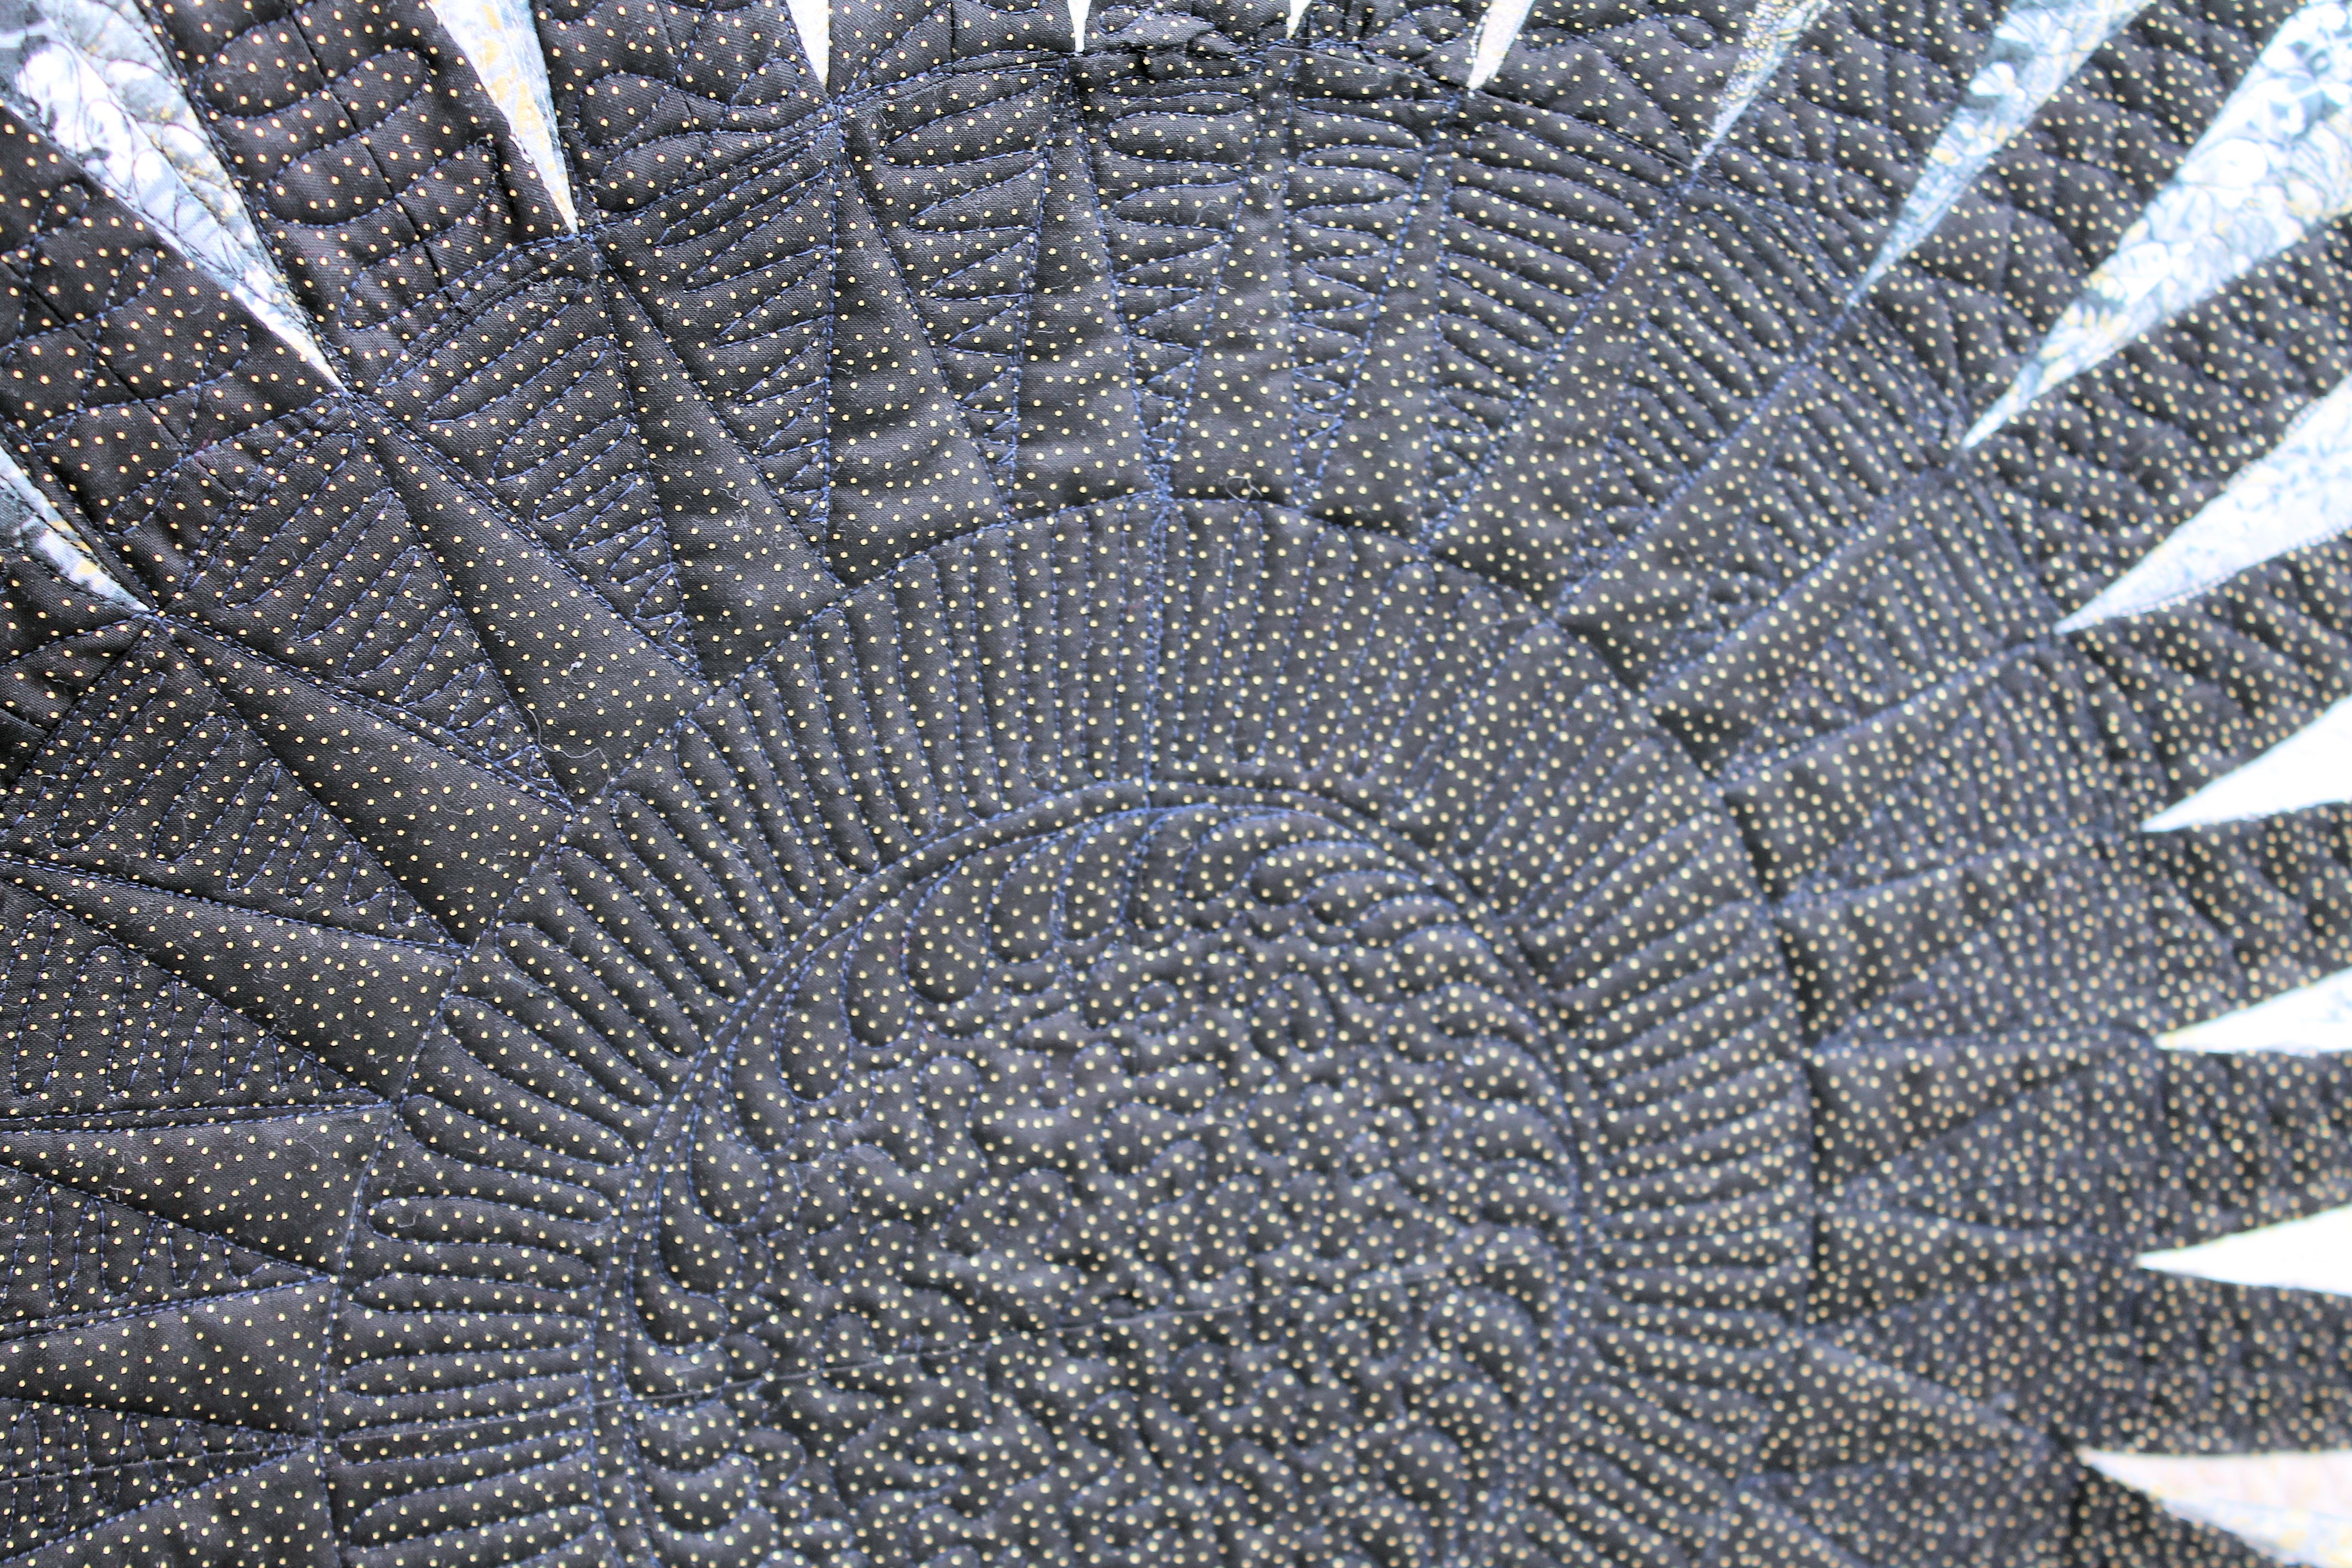
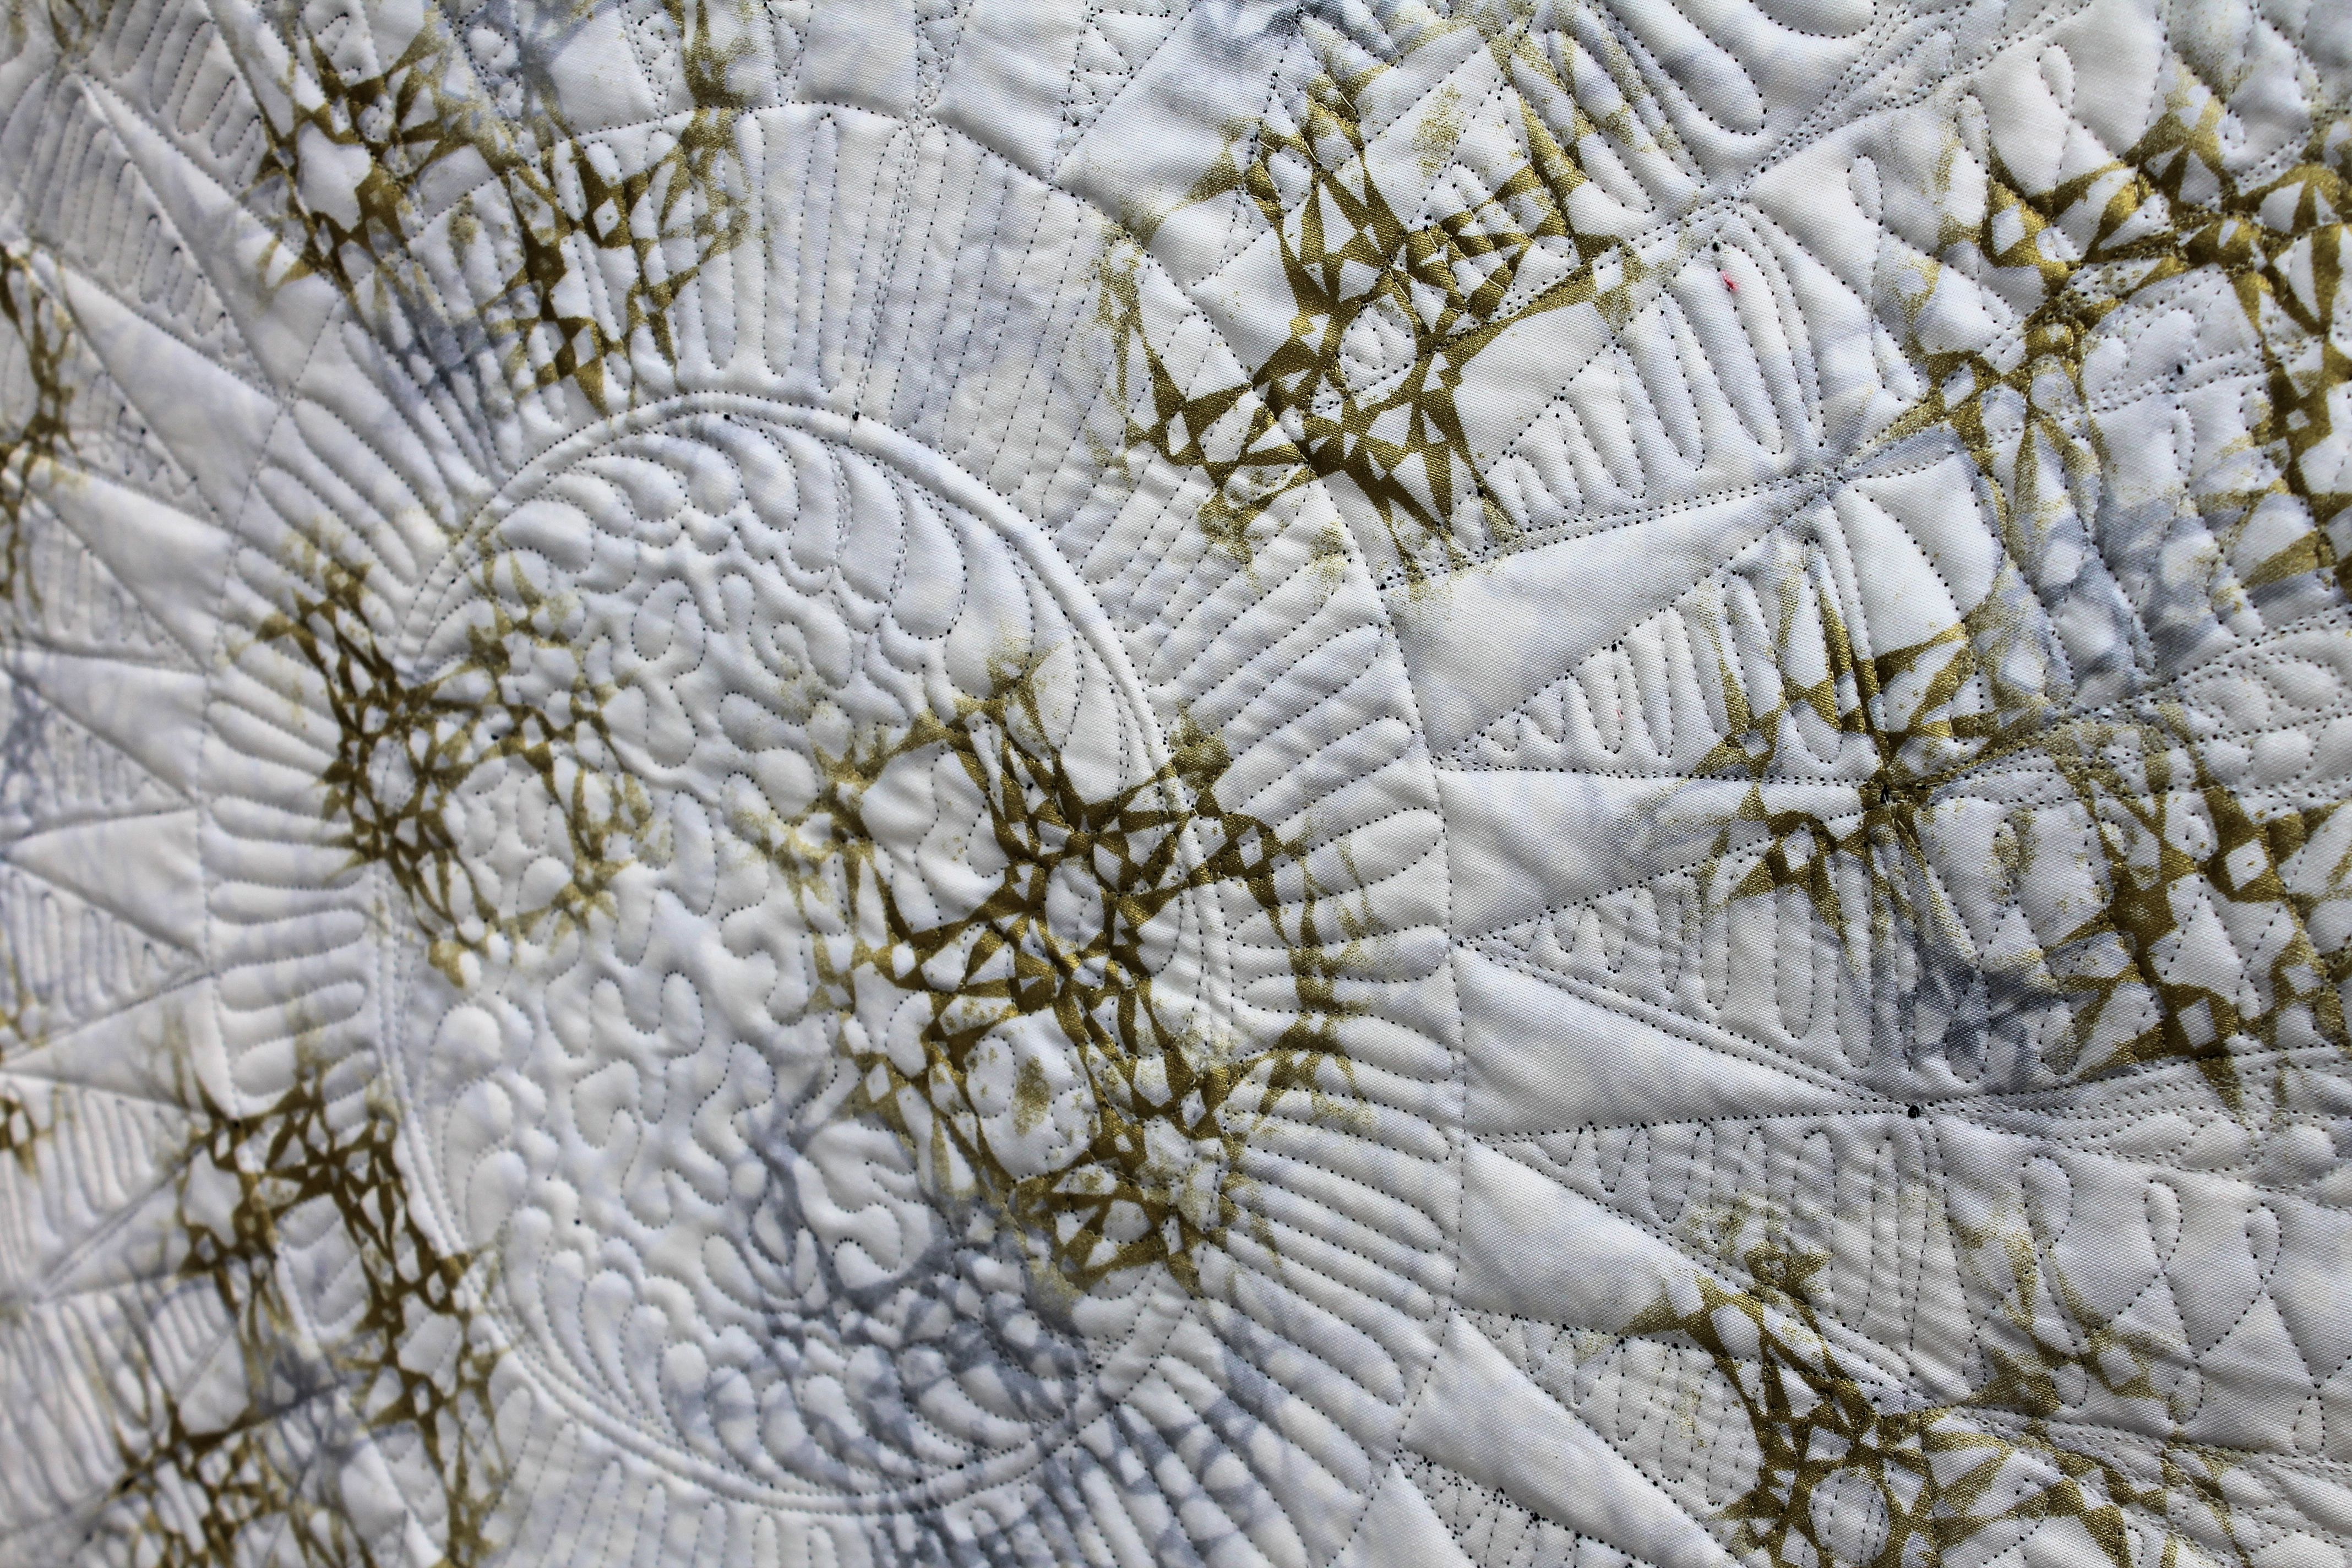
For Timeless Treasures I got to play with a more traditional collection, Zephyr by Alice Kennedy. There are 22 neutral and greyscale hues in 15 unique prints. I loved how they all played together, and the varying levels of contrast meant I could create a lot of depth and texture without adding color.
The first quilt, Halo, is my favorite. I grew up in northern Alberta and at night, with the moon shining brightly, you could often see (what we called) “moon dogs” haloing the moon. The shimmering ice crystals were my inspiration for this quilt. You can find the pattern HERE.
I probably overquilted it, but I don’t care! The black spaces were calling to me. I used a deep navy thread for a subtle glow against the black fabric, and to prevent eye strain while I was quilting. I quilted a series of loops, swirls, straight lines, and circles. This quilt gets to live at Timeless headquarters in New York. (Does that mean I get to say I have art hanging in New York? I’m going to say YES!)
The second quilt, Marbled, I wanted to play with simple shapes that make a complex texture. I wanted a tile wall-inspired flow and form to the quilt. Pretty sure I succeeded with that. You can find the pattern HERE.
Today is my turn for the RJR What Shade Are You blog hop! I love participating in blogs hops, it gives me a chance to create something just for me, and have a little fun with all of my wonderful followers (Hint: FABRIC!) This is my second appearance in the blog hop. My first was back in 2015 with my Lanterns quilt Tutorial. It felt like only yesterday, and the ways my life has changed in such a short time, from there to here, is truly amazing. From a new house, to a new baby, to new opportunities within the quilting world, the last 2 years have been busy and scary and WONDERFUL.
RJR makes Cotton Supreme Solids. They are a dream to sew with. The fabric is the perfect weight to mix with anything, and you have 197 rich, delicious hues to choose from.
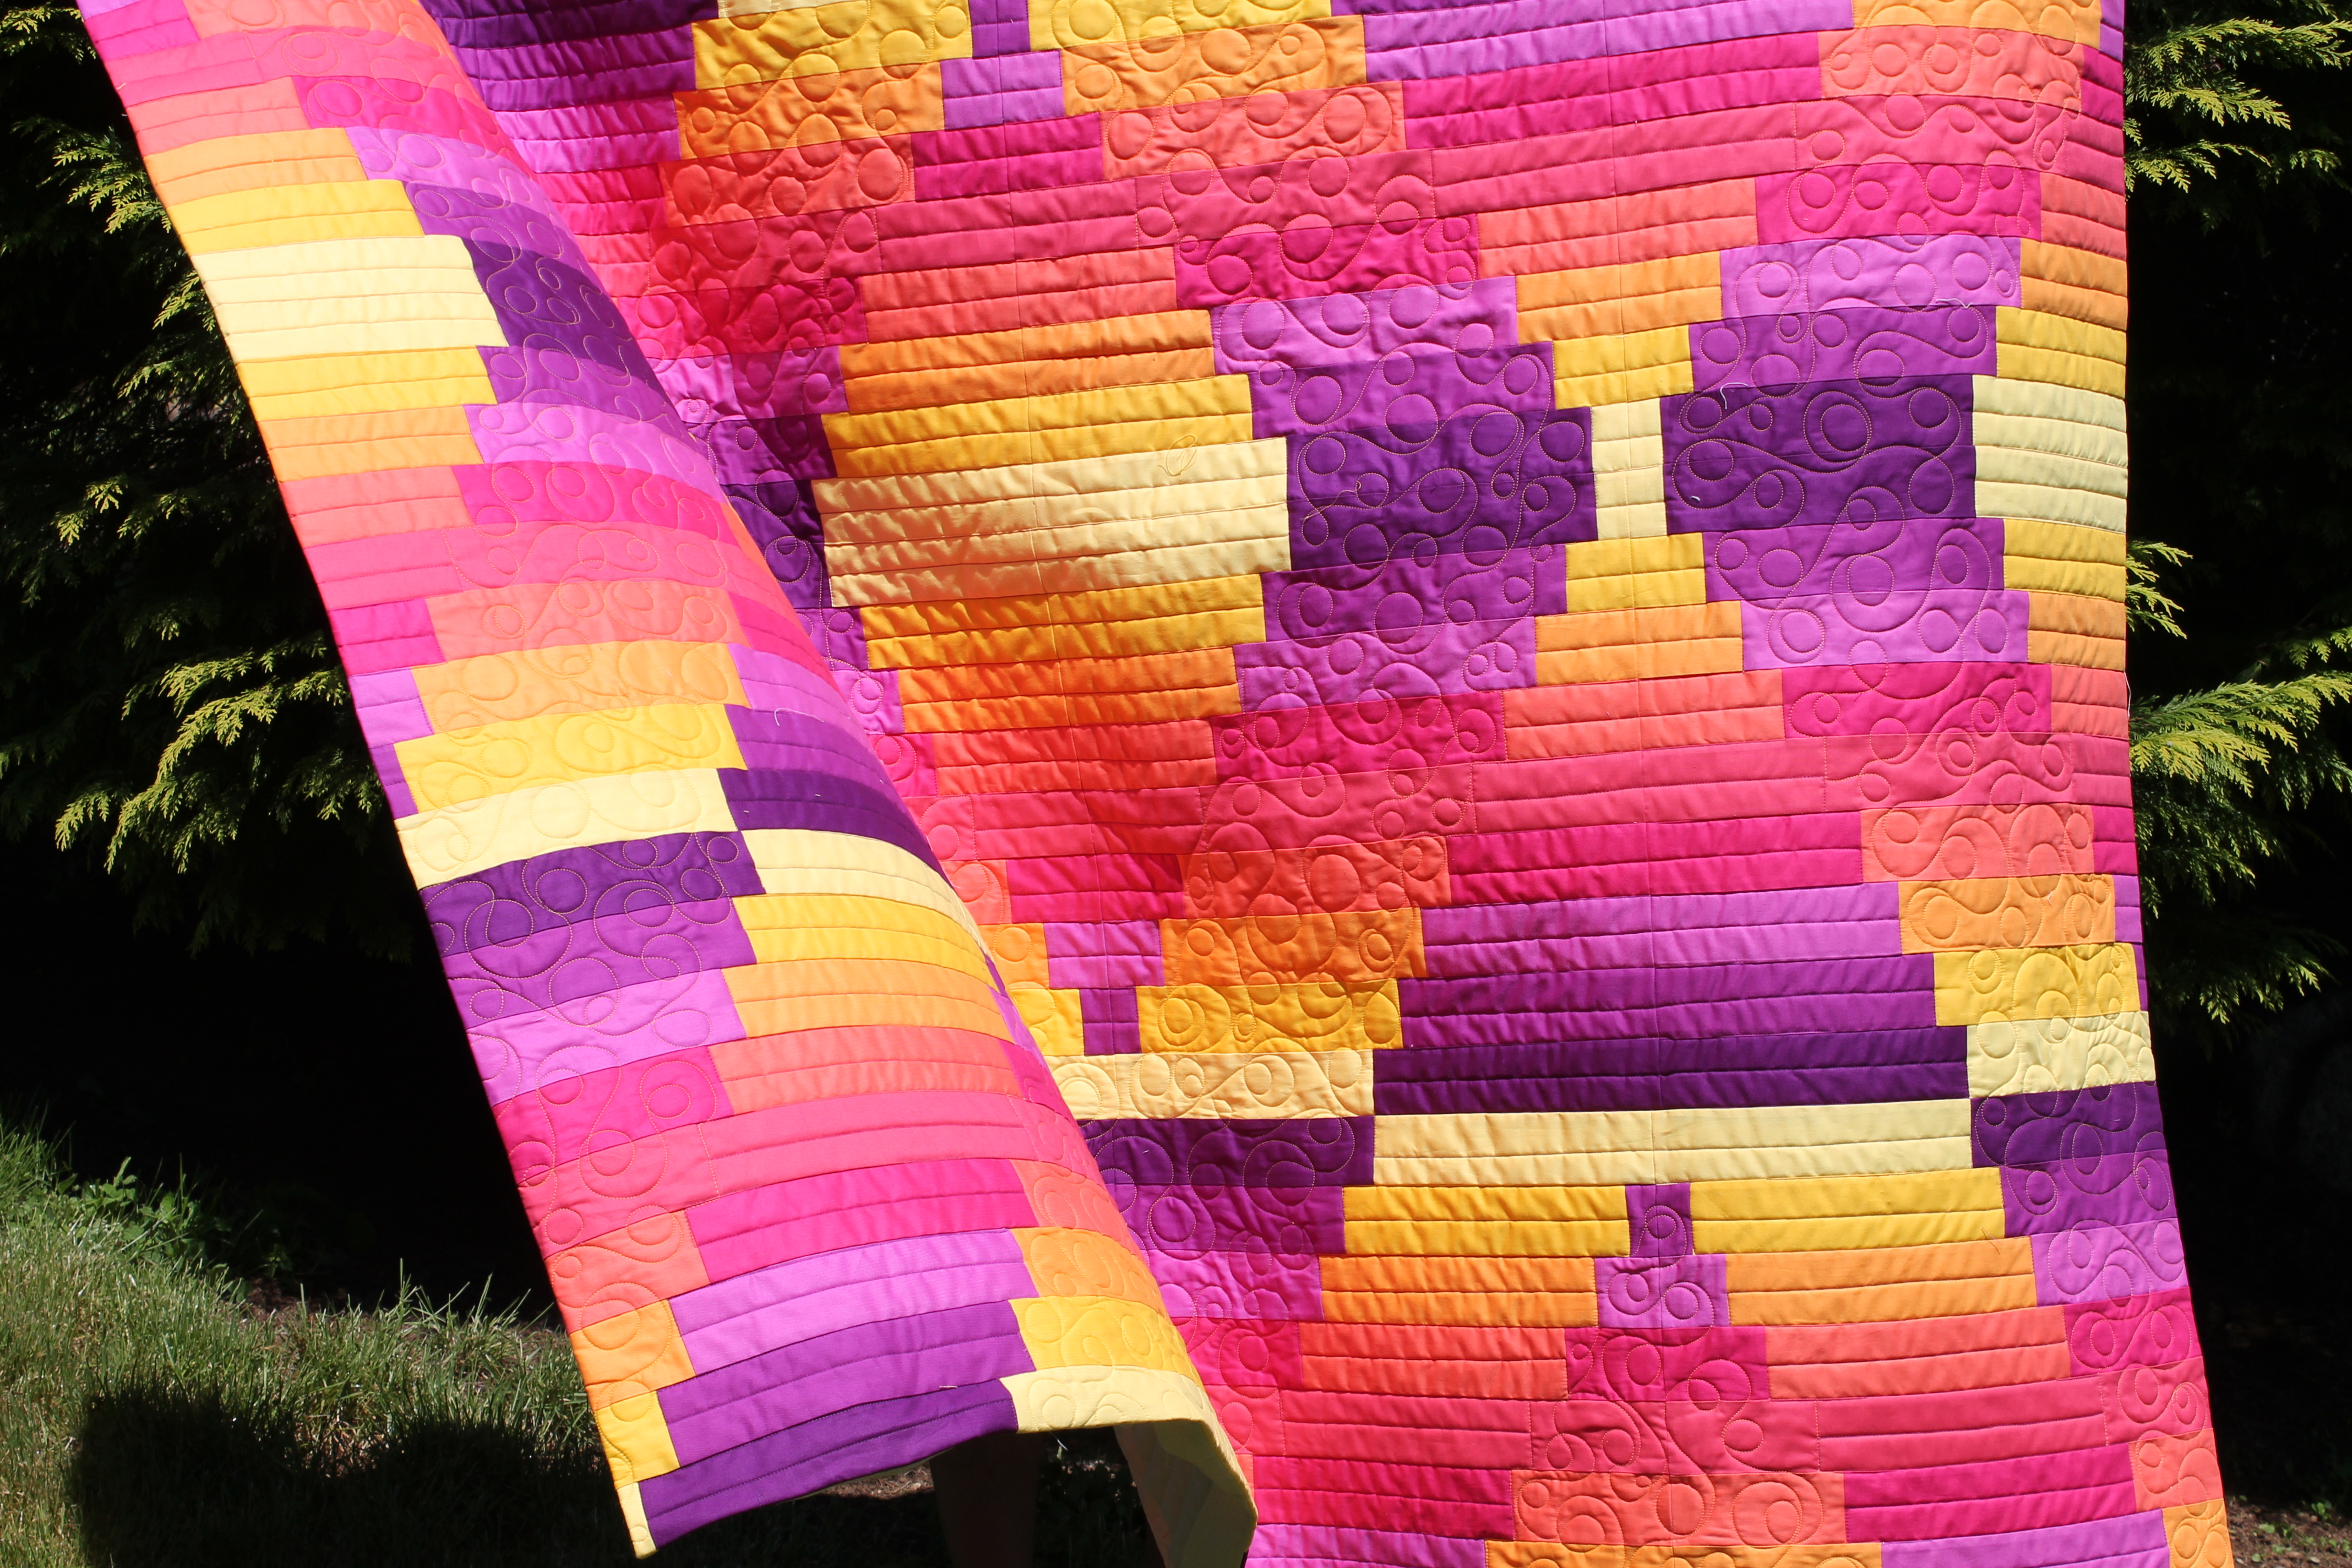
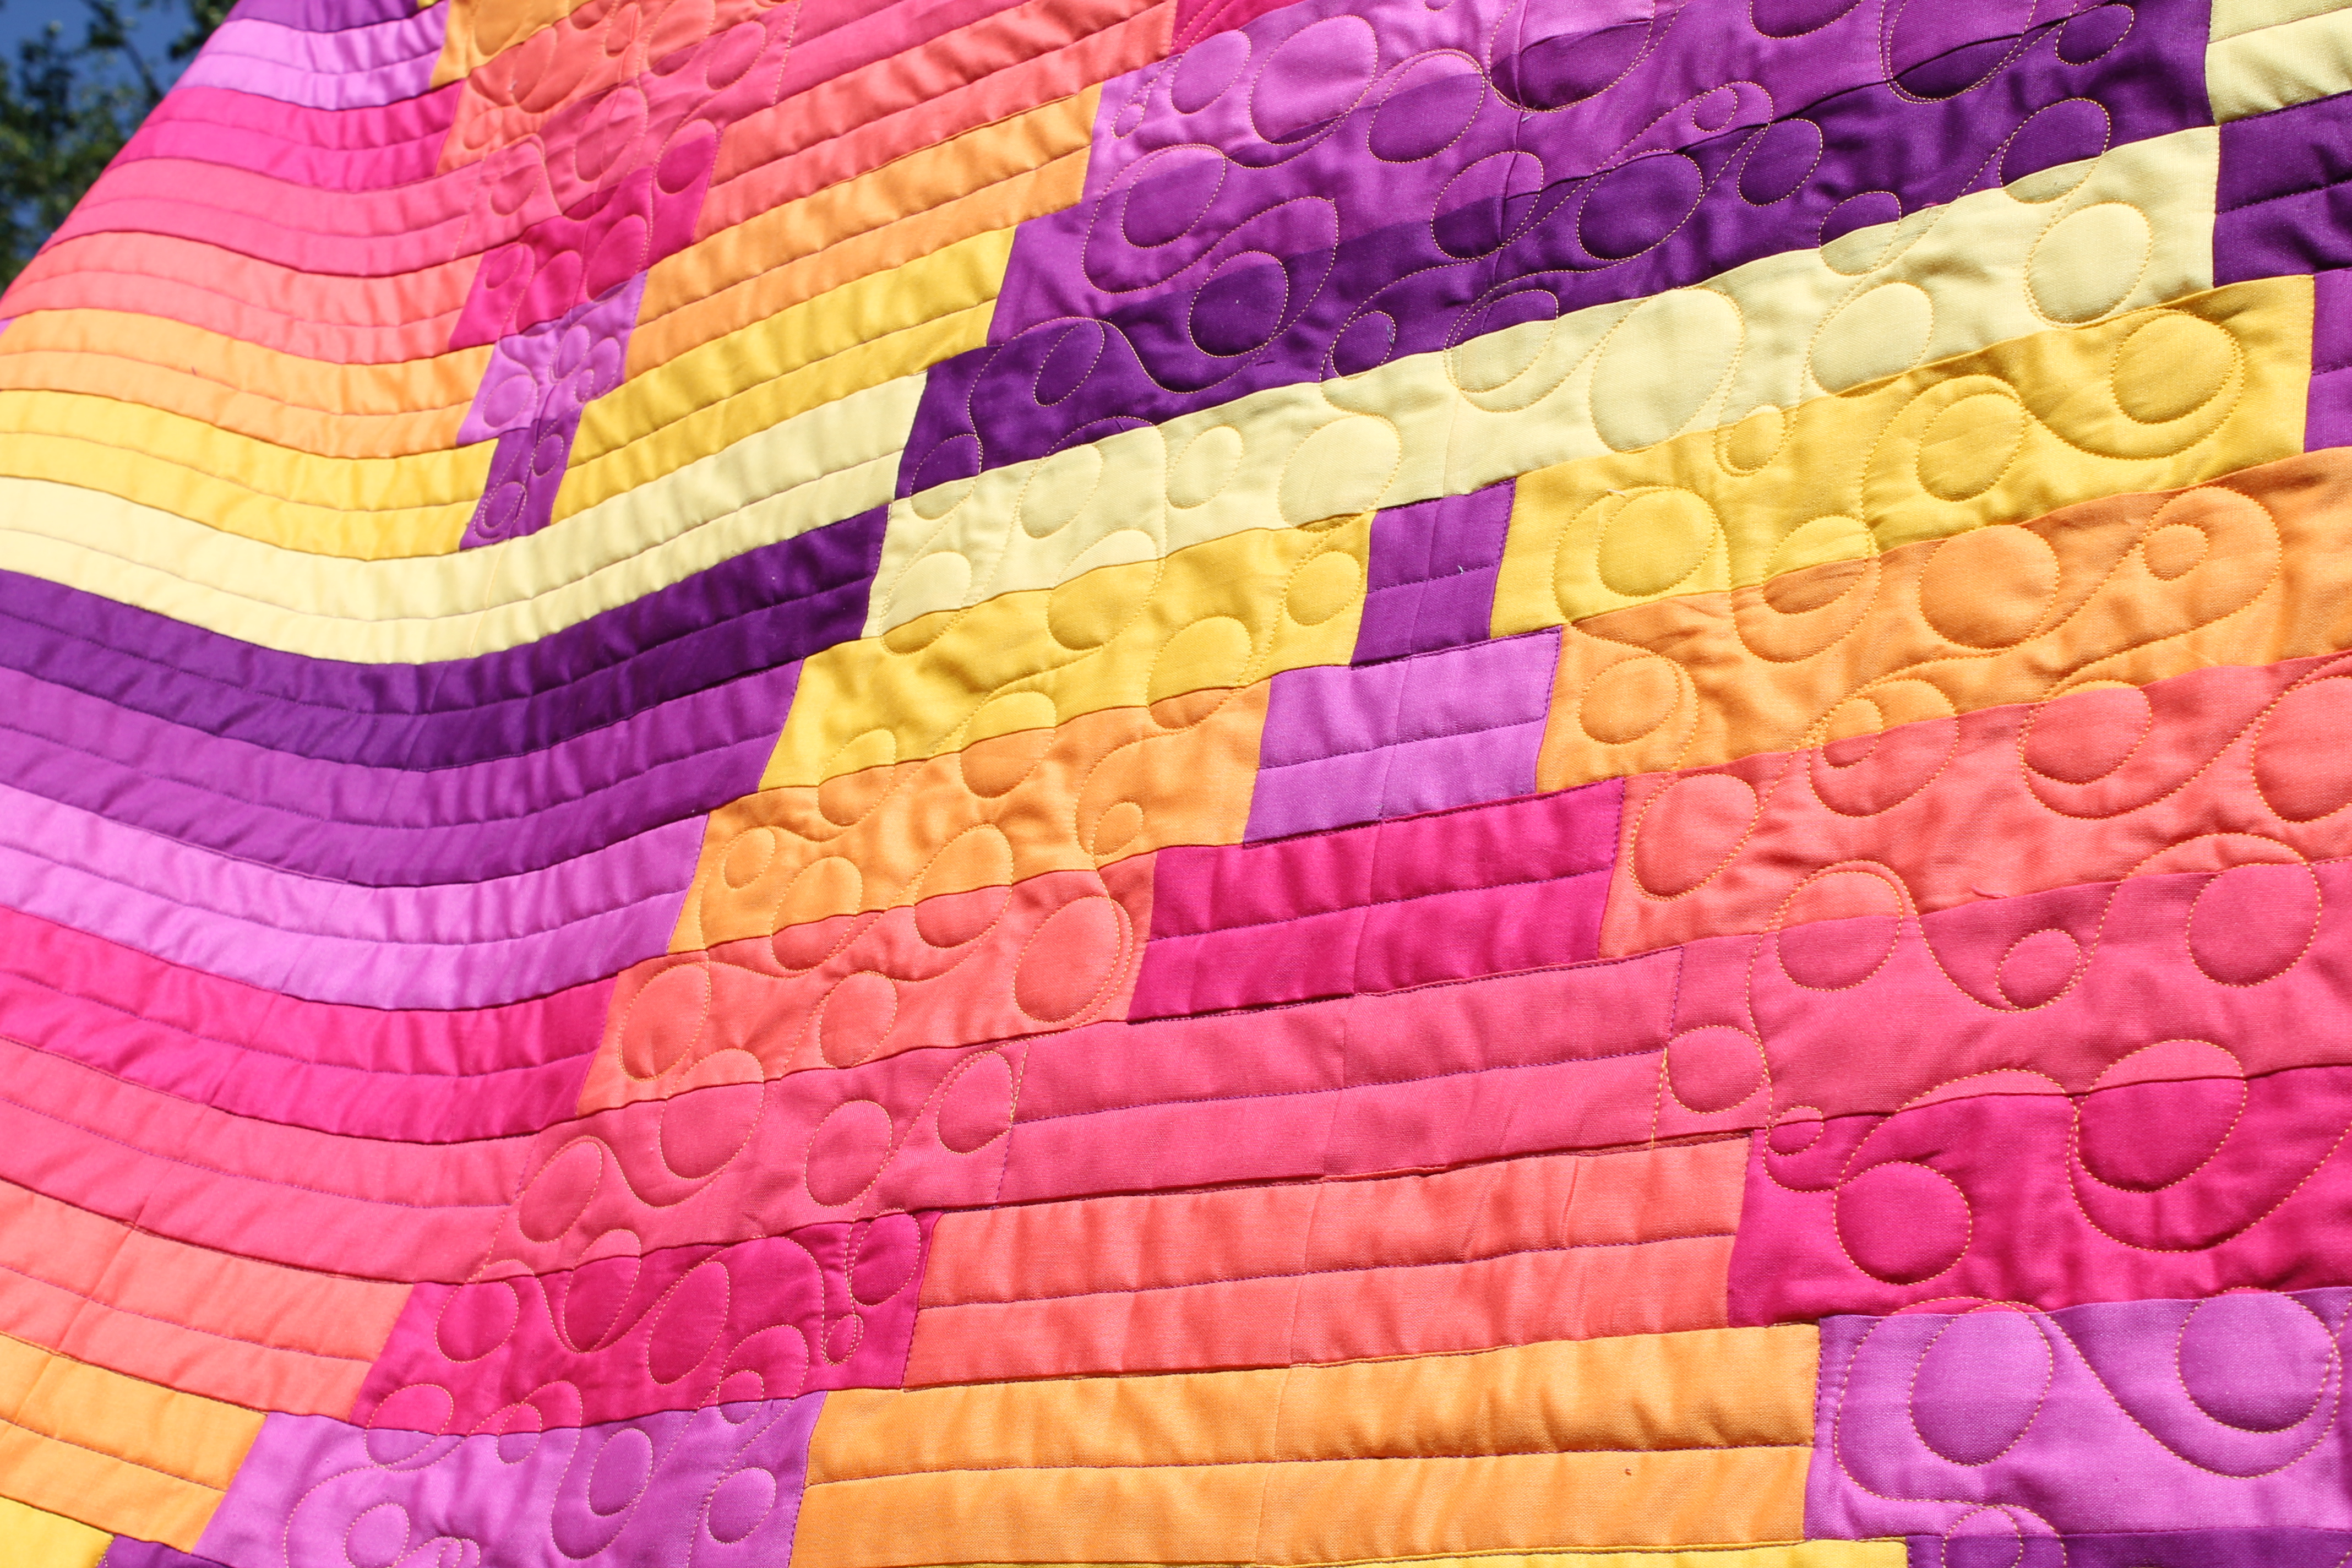
Now let me introduce my newest creation, Heat Wave!
I LOVE everything about this quilt. The colors, the layout, the quilting, everything. I’m sure somewhere there is a grouchy quilt police officer wagging a finger and chanting “Stacey, you are being prideful. You can’t just TELL PEOPLE you LOVE your own work.” But you know what? The hashtag for RJR is #quiltwithlove . So I just threw this quilt over their head, because I LOVE IT! I want to shout that love from the rooftops!
I picked an analogous gradient of my favorite warm colors and went to town. Each color is a color I love individually, and together they make a perfect sunset inspired palette.
Heat Wave is the perfect example of how a small change can make a huge difference. I had mocked up a different layout for these blocks, something eclectic and busy and kinda neat, but in my near-coma-like sleep deprived state I sewed half the blocks as a mirror image of the first. And I didn’t notice until I started laying the blocks out. After a little head scratching (because I STILL hadn’t noticed what I’d done) I turned the blocks around and VOILA! Heat Wave was born! I still had to take a picture so I could purposefully do what I just did accidentally (and then FINALLY realized what had happened), but the top came together quickly after that and it couldn’t have turned out better.
The next step was quilting, and I had Heat Wave hanging over the bars of Penny(my Tin Lizzie Apprentice) for almost a week while I pondered. Then I realized it was Wednesday (again, I blame the sleep deprivation). Now I know some blogs are really good at showcasing just a top. Me, not so much. So she needed to be quilted, and quilted now. The funny thing is once I had her loaded on the frame, the quilting just fell into place. I recently returned from a family vacation, where I was able to meet up with a quilting friend. She once told me an anecdote from a famous longarm quilter (don’t ask who, I really can’t remember) and it always stuck with me. The moral of the story is when it comes to thread choice, always take the risk. So I did. I matched the yellow and violet fabrics in my quilt, and then used each color exclusively with the motif. Violet with the straight lines and yellow with the curled meander. The contrasting thread and patterns really worked well to highlight the secondary patterns in the quilt, and reigned in the pre-quilted color chaos.
To top off the perfection of this quilt, I chose to face it instead of binding to keep the colors flowing. Paired with the first really nice sunny day we’ve had in weeks, it felt like magic taking her outside to photograph. Even H wanted his turn with the camera! (We now have a lovely montage of grass growing.)
Now for the fun part (and the reward for reading to the end)! One lucky follower gets to win a bundle of the gorgeous Sunset Palette I curated for my quilt.
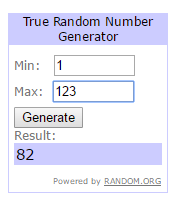
To enter, follow me here or on Instagram @staceyinstitches, and leave a single comment telling me 2 things: Where you follow me, and what your favorite color is! Easy peasy! I will draw a winner at 4pm PST Tuesday.
Congratulations to number 82, Deborah! I will be in touch soon!
There is also a second giveaway on the RJR Instagram Account. Log on and follow RJR Fabrics instructions to enter.