Flying Finish


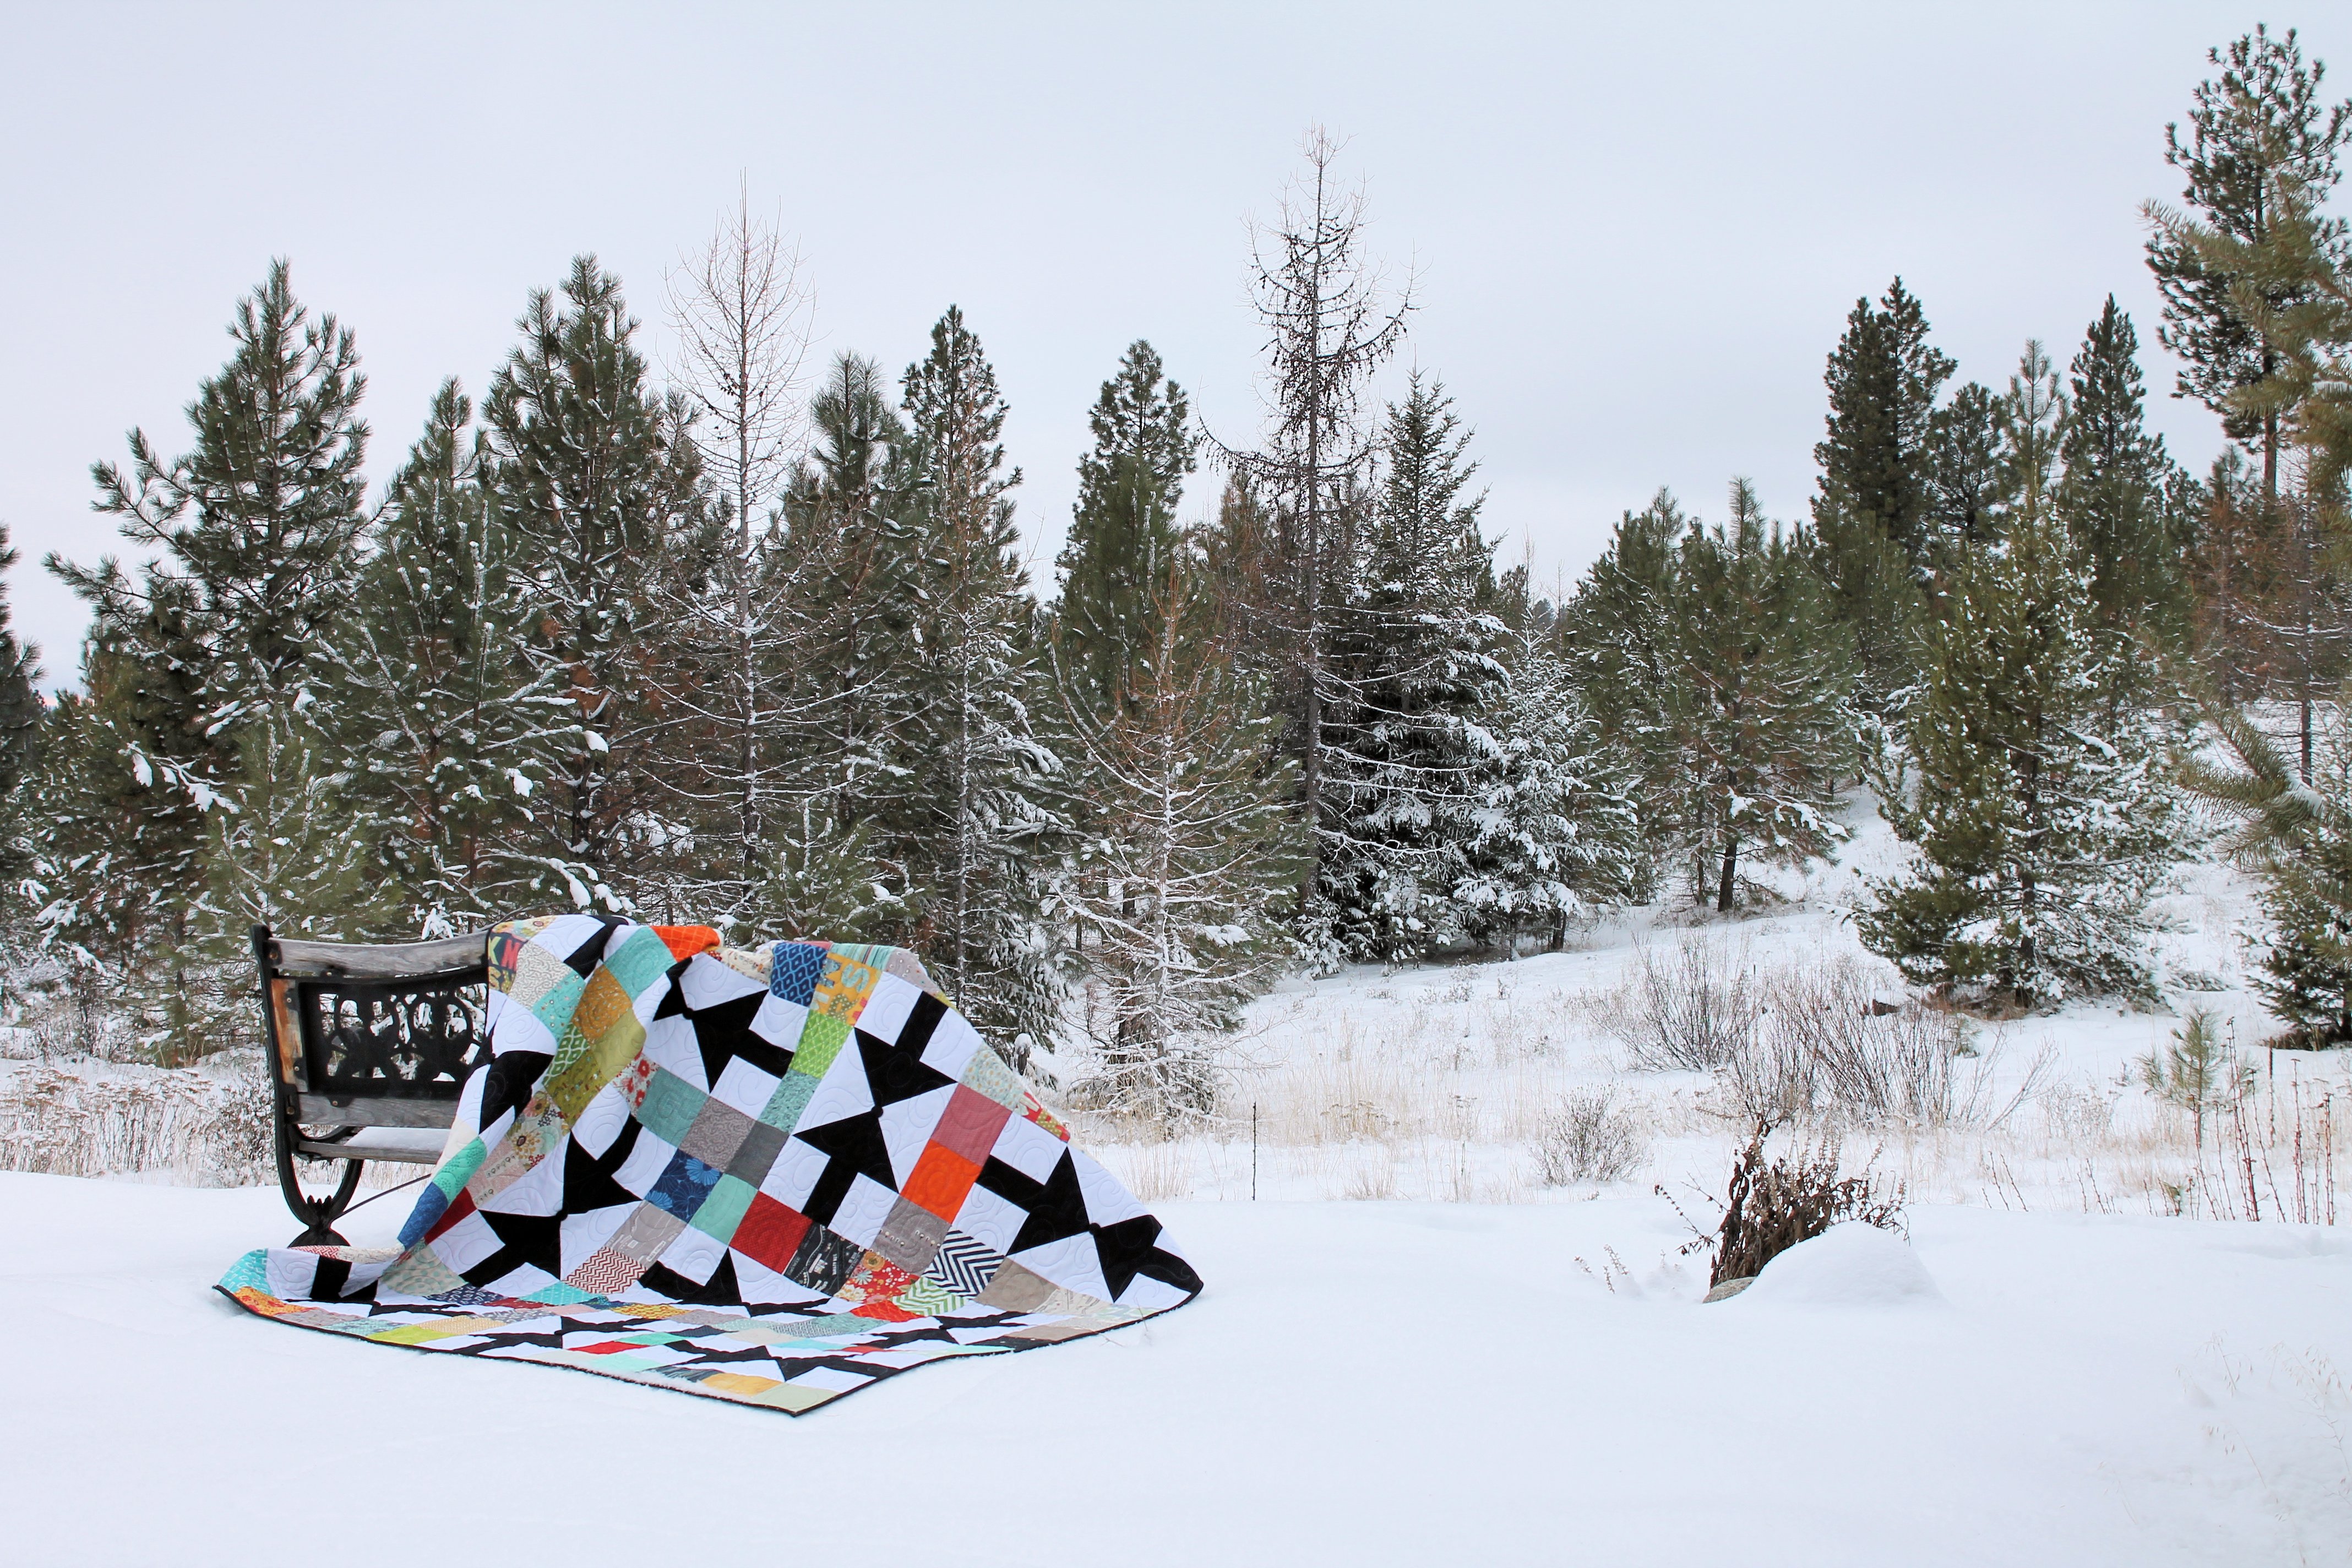
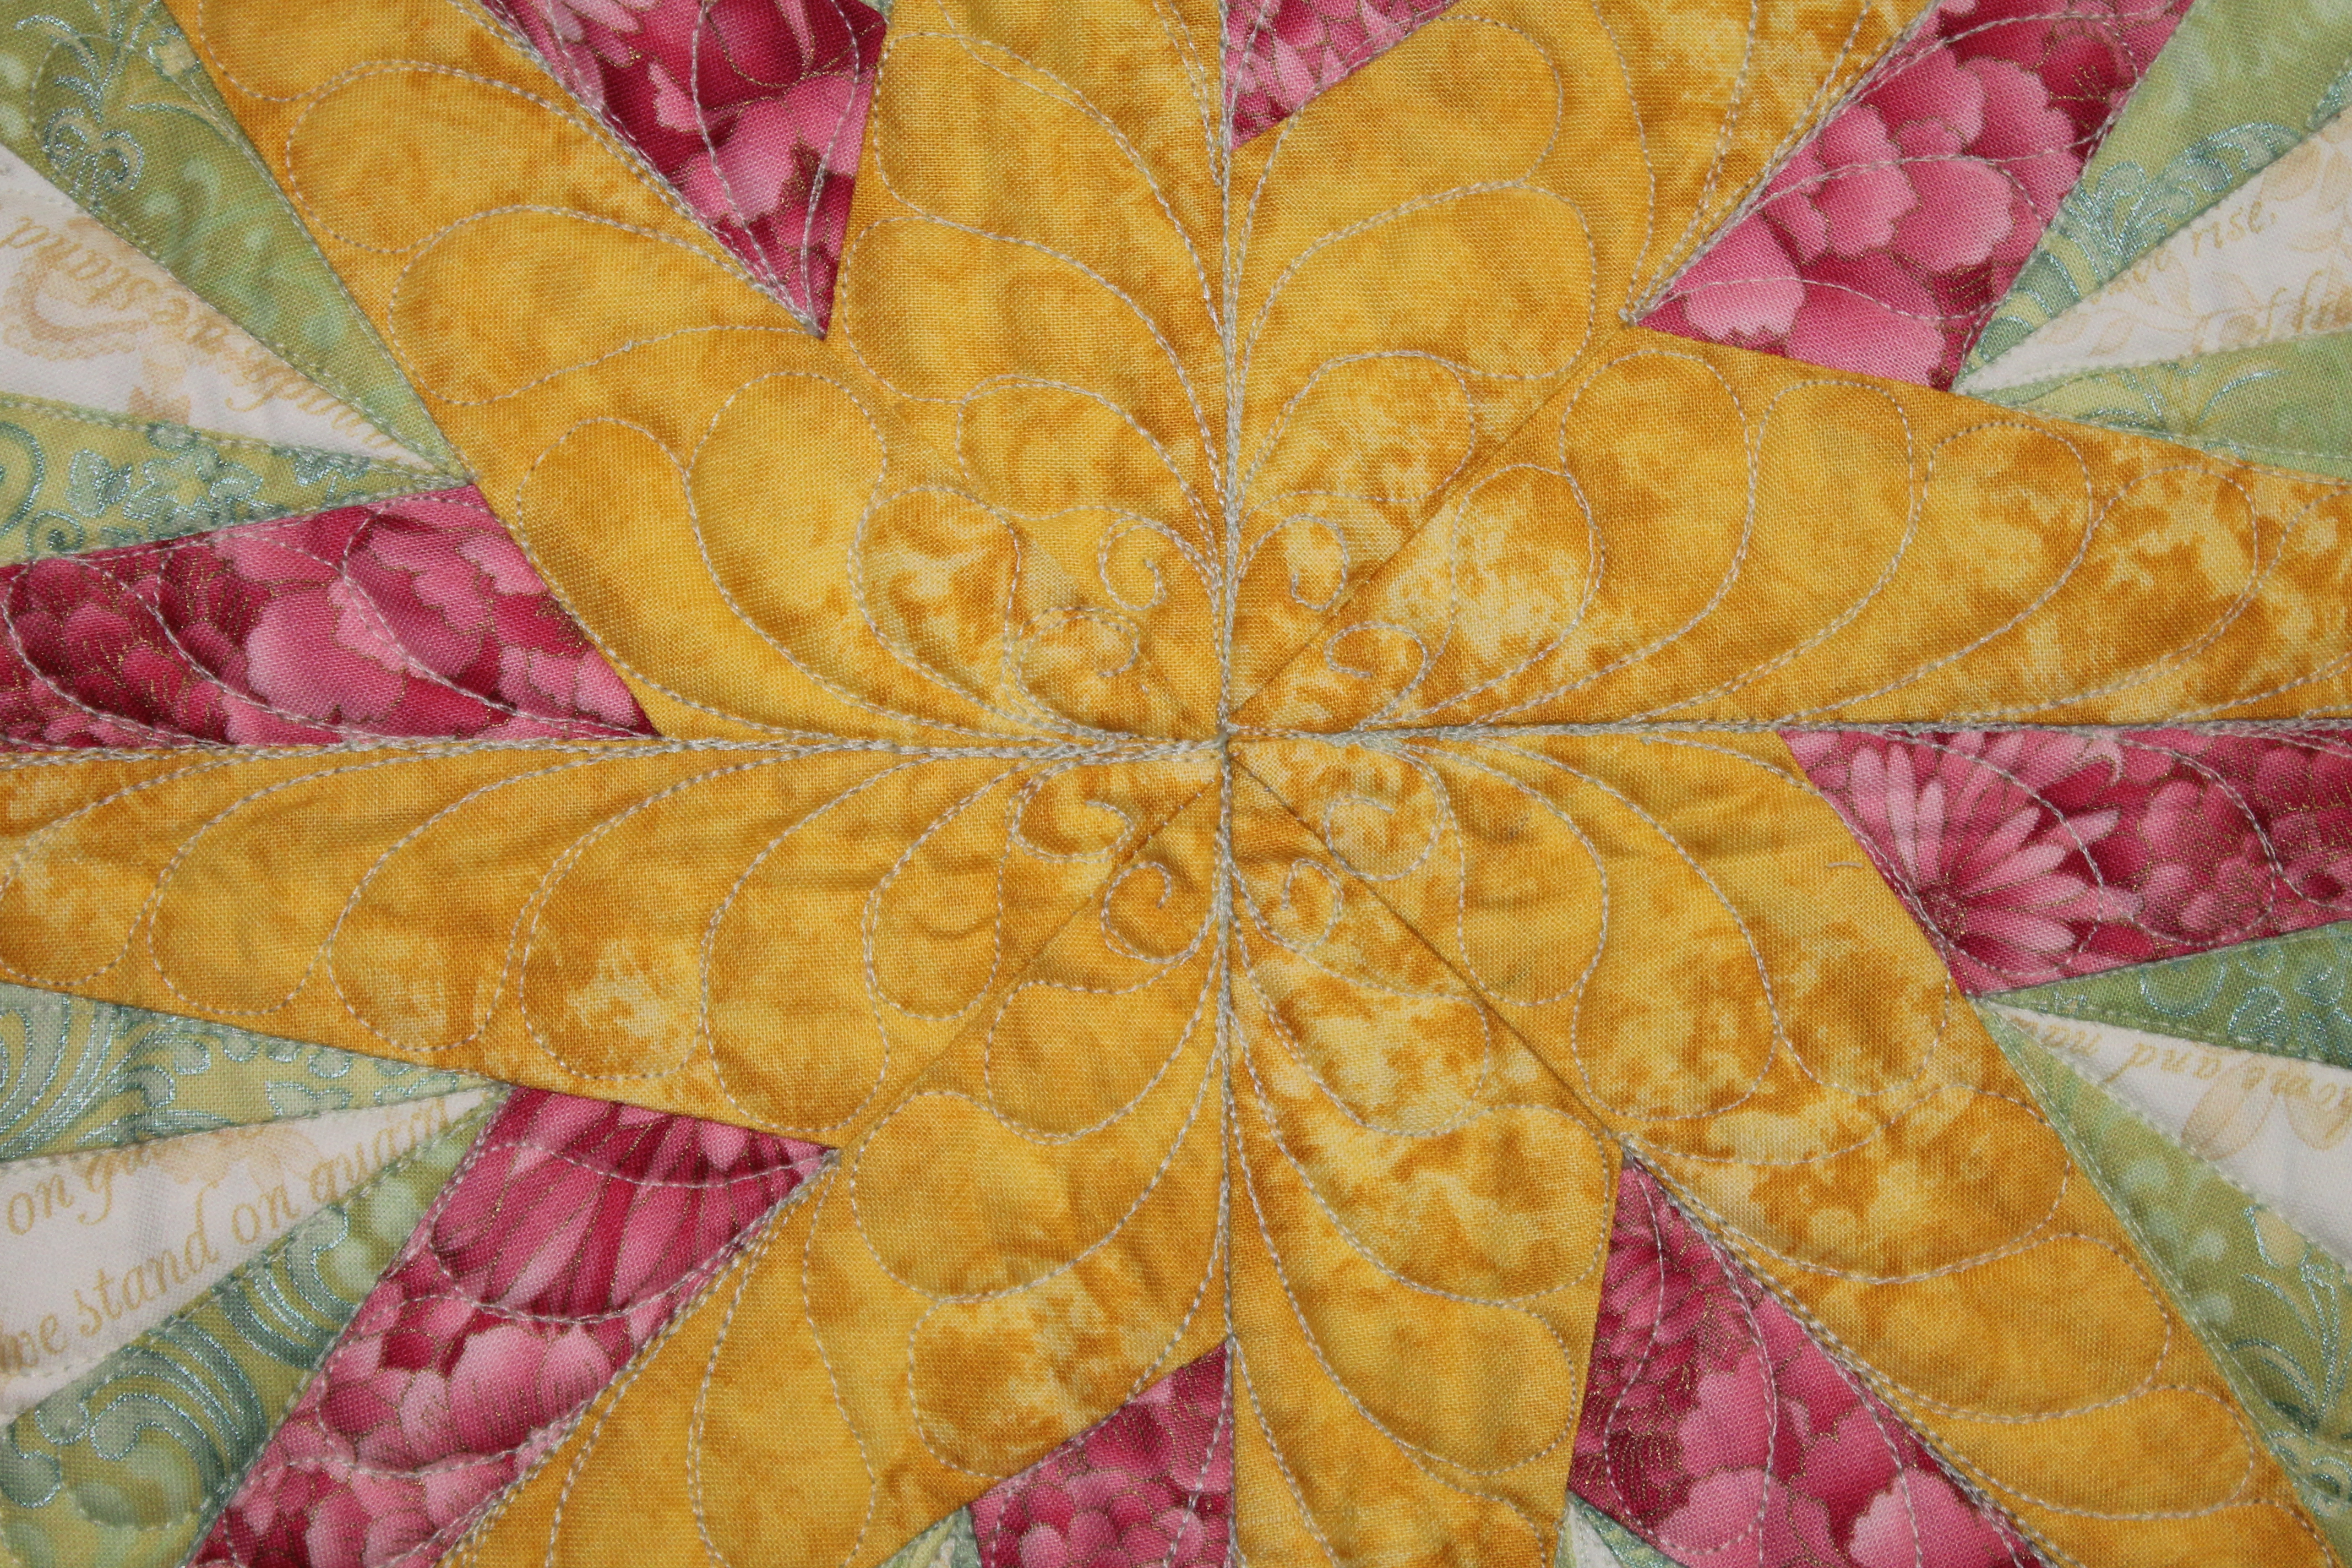
This weekend two of my favorite quilts went winging their way down to the AQS Paducha show! Sapphire Star and Sherbert at the Beach, hands down two of my favorite quilts, were accepted. I was thrilled to find those emails in my inbox, let me tell you! I wish I could be flying away to the show to see them, and the quilts from my favorite quilters! I think there is another Myers-Badger quilt making the rounds and they are always STUNNING.  Sherbert at the Beach was accepted into the new Modern Quilt category, while Sapphire Star is in the Traditional Wall hanging from a Pattern Category.

I managed to finish up my Riley Blake project for the MQG Riley Blake Basics Challenge. I even finished it in time to enter the contest! Woot woot!

Quilts 002
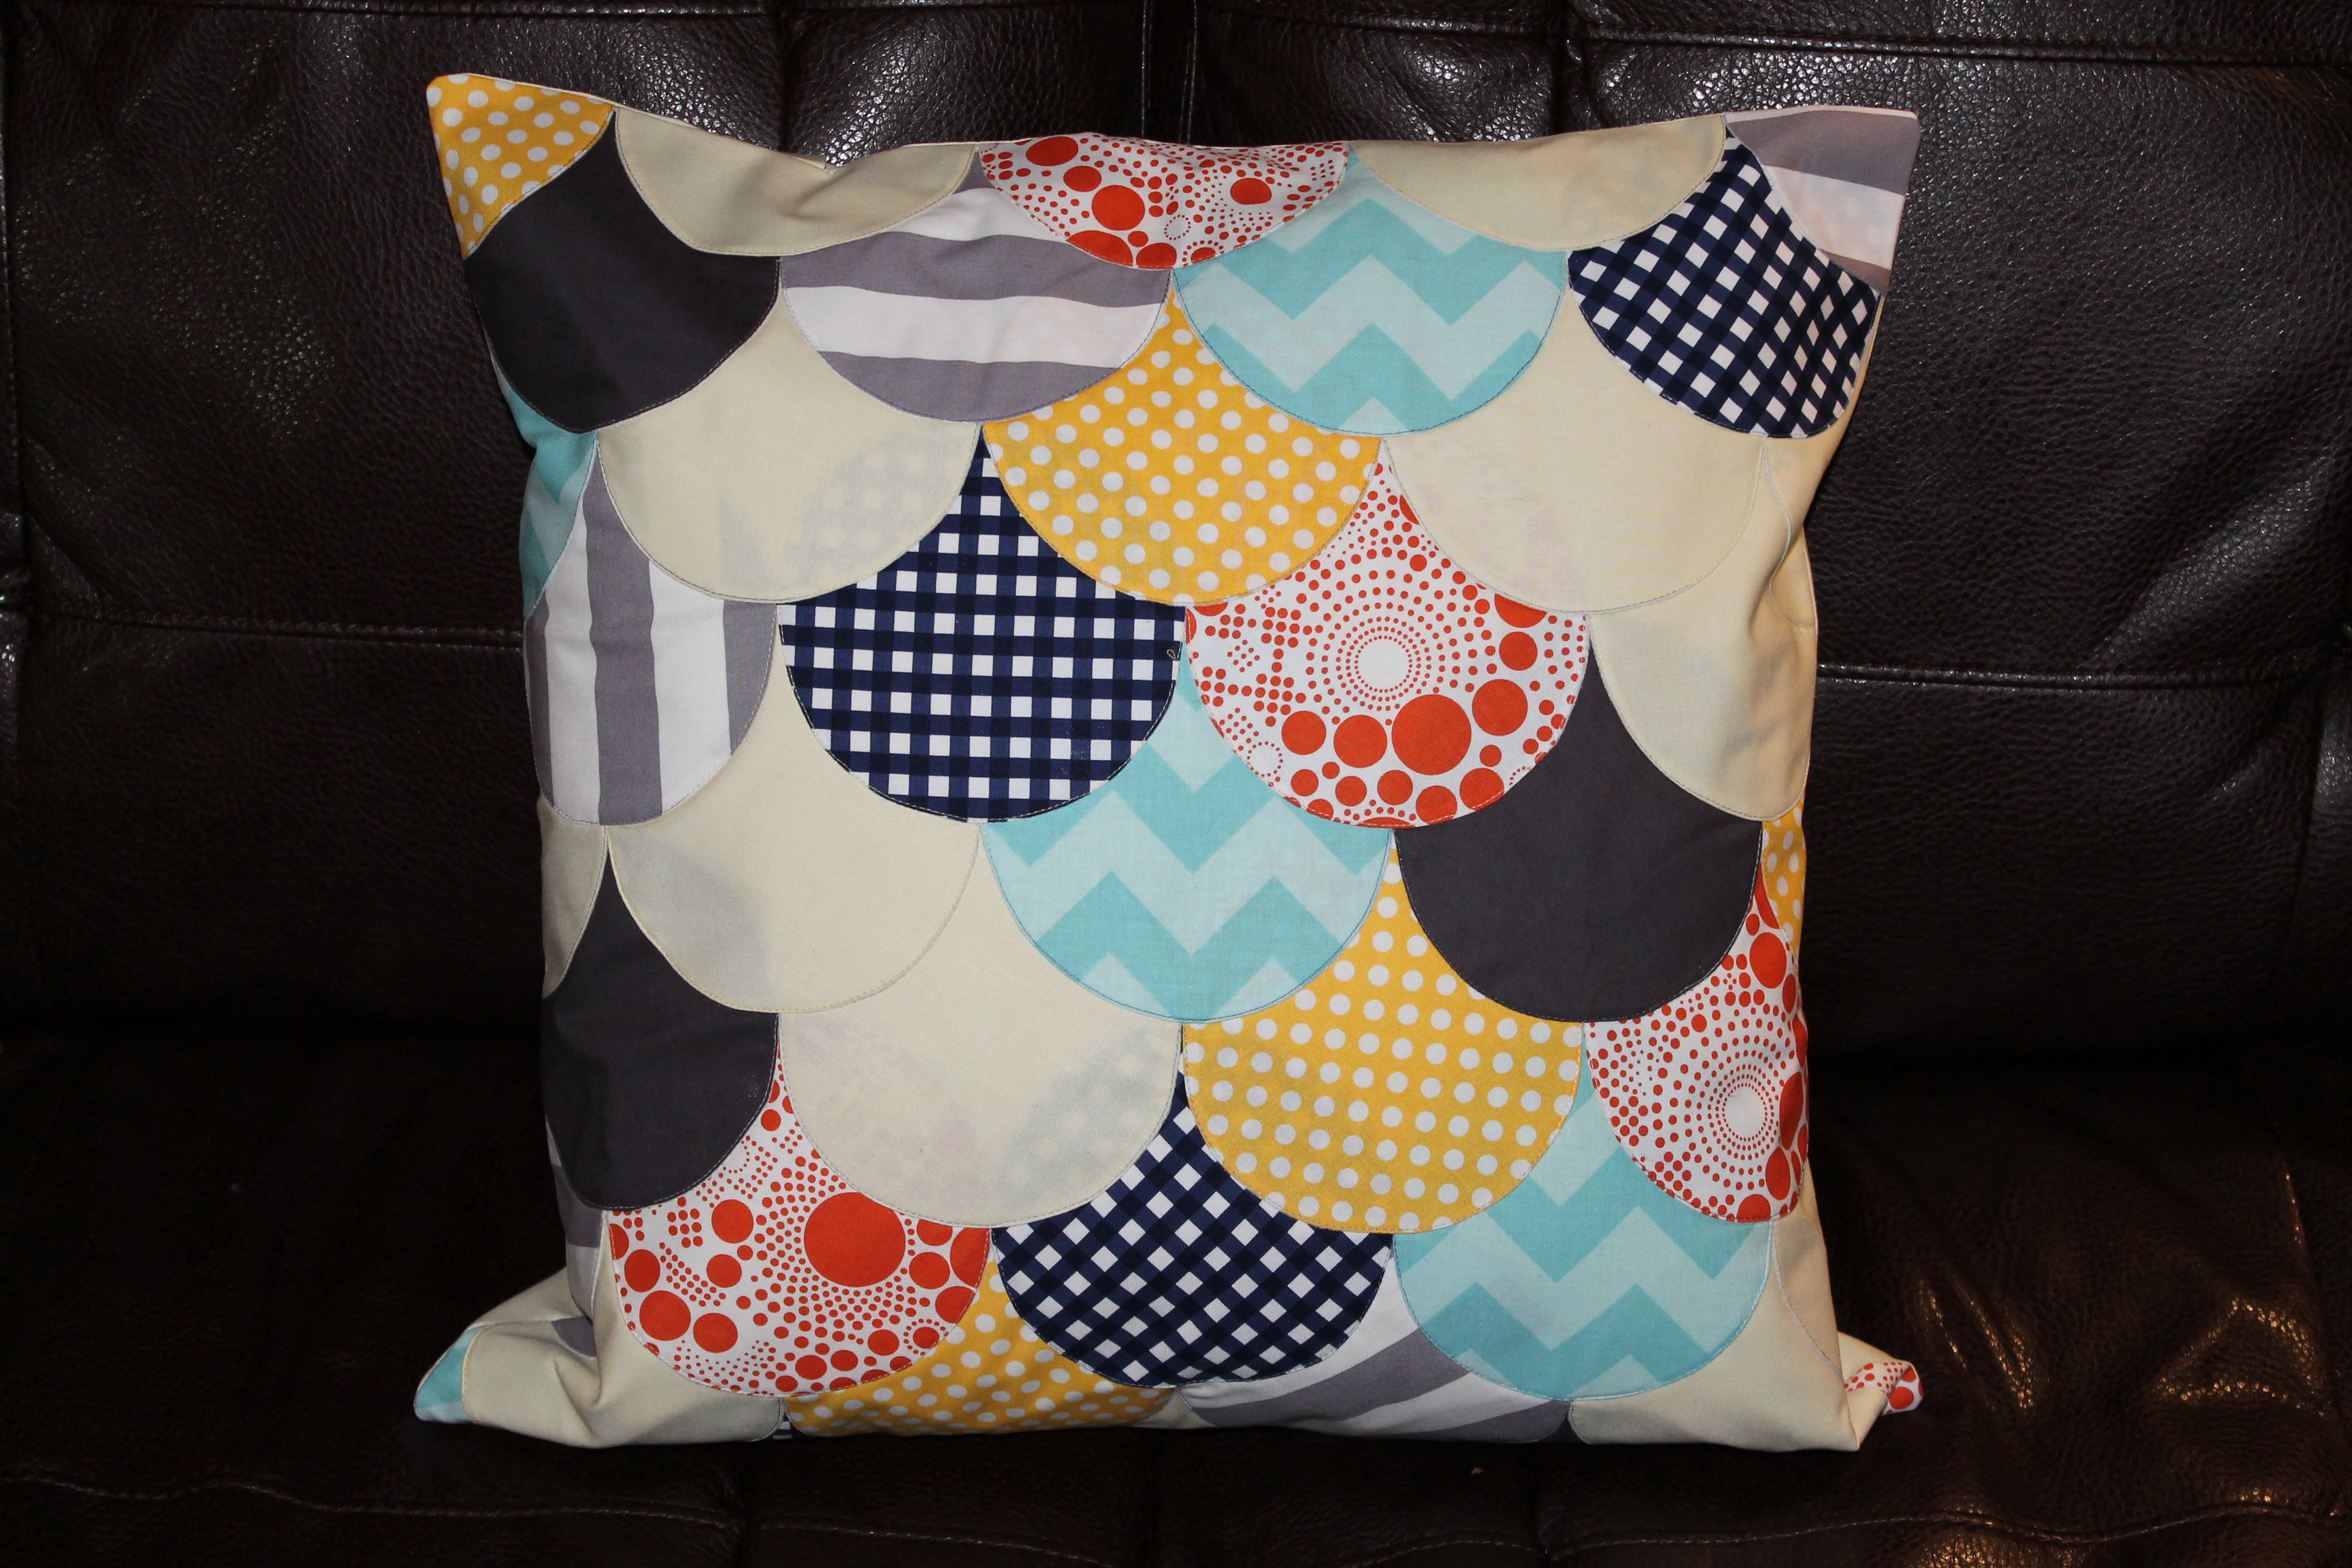
This is only the second pillow I have ever made. The zipper is a vertical zipper. The pillow form was the same size as the finished dimensions of the case, but I don’t think it is puffy enough. I might scrounge around for a 22″ insert. The pillow is 20″ finished, and the scallops are finished edge applique. I used Free Spirit Designer Solid in Chamois for the negative spaces, which I thought would be more off white, but is definitely a yellow hue. The pillow is a sample as well as the challenge entry. Gotta love the whole dual aviary demise with a single hard round object.

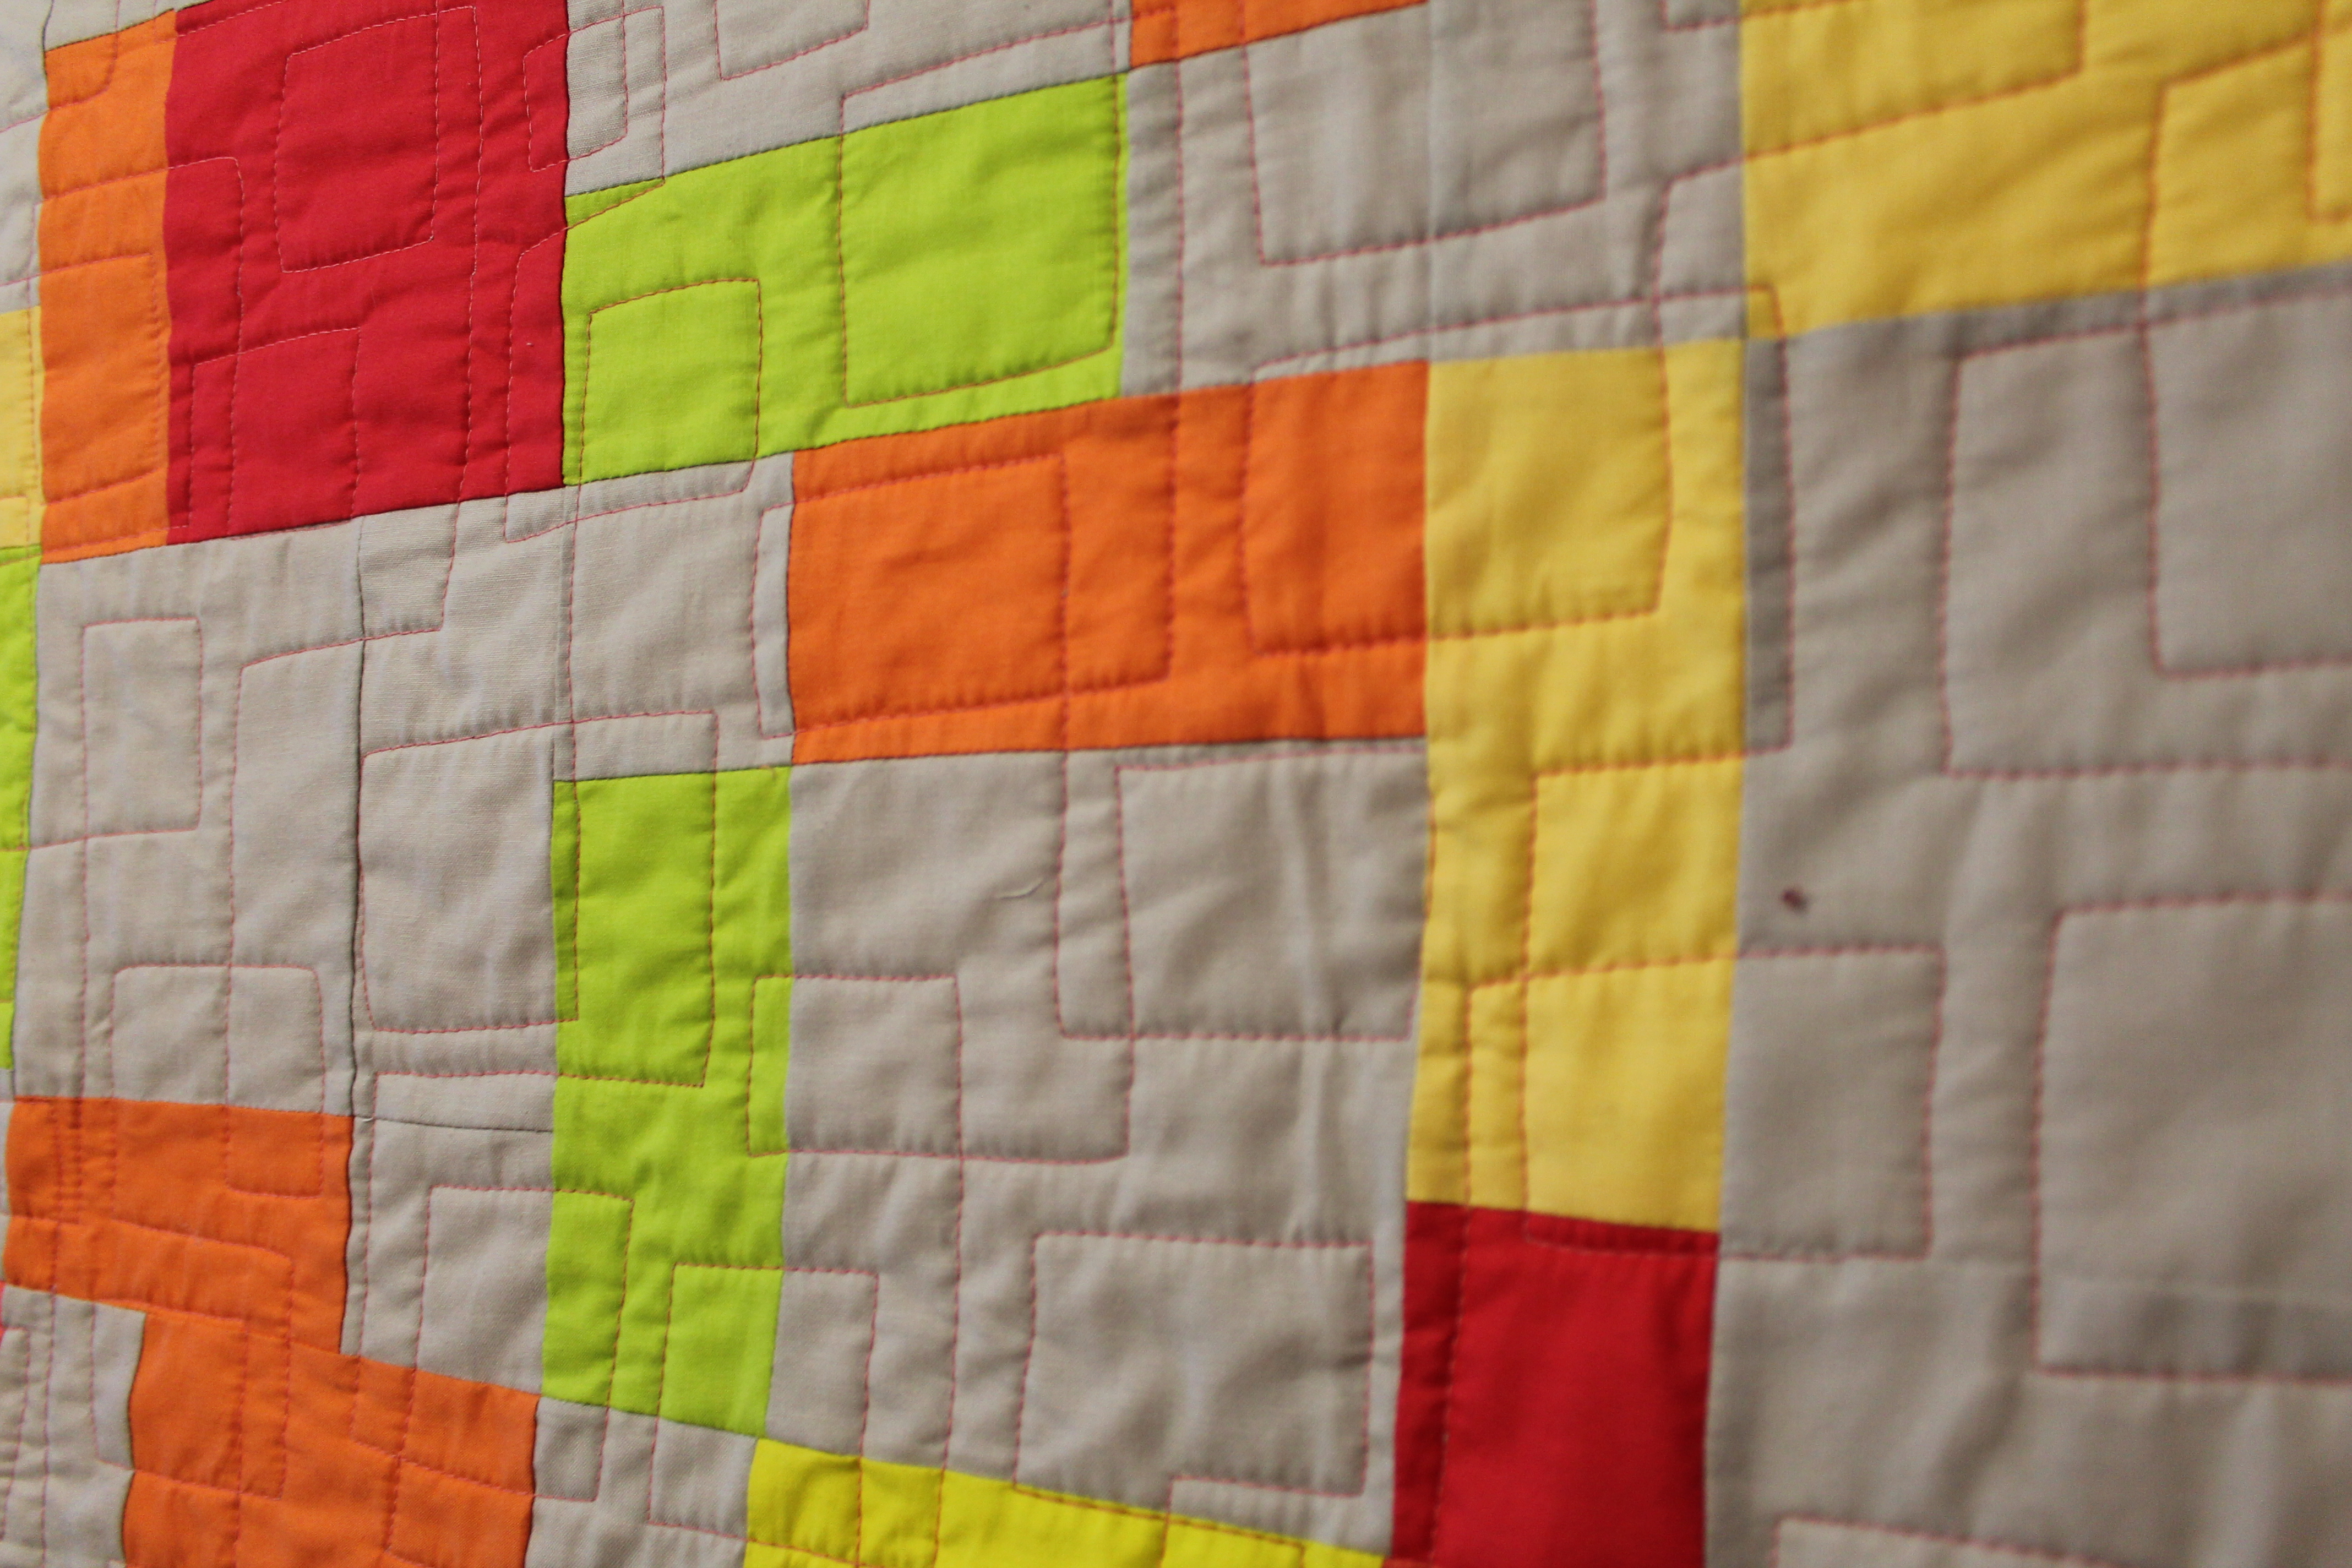
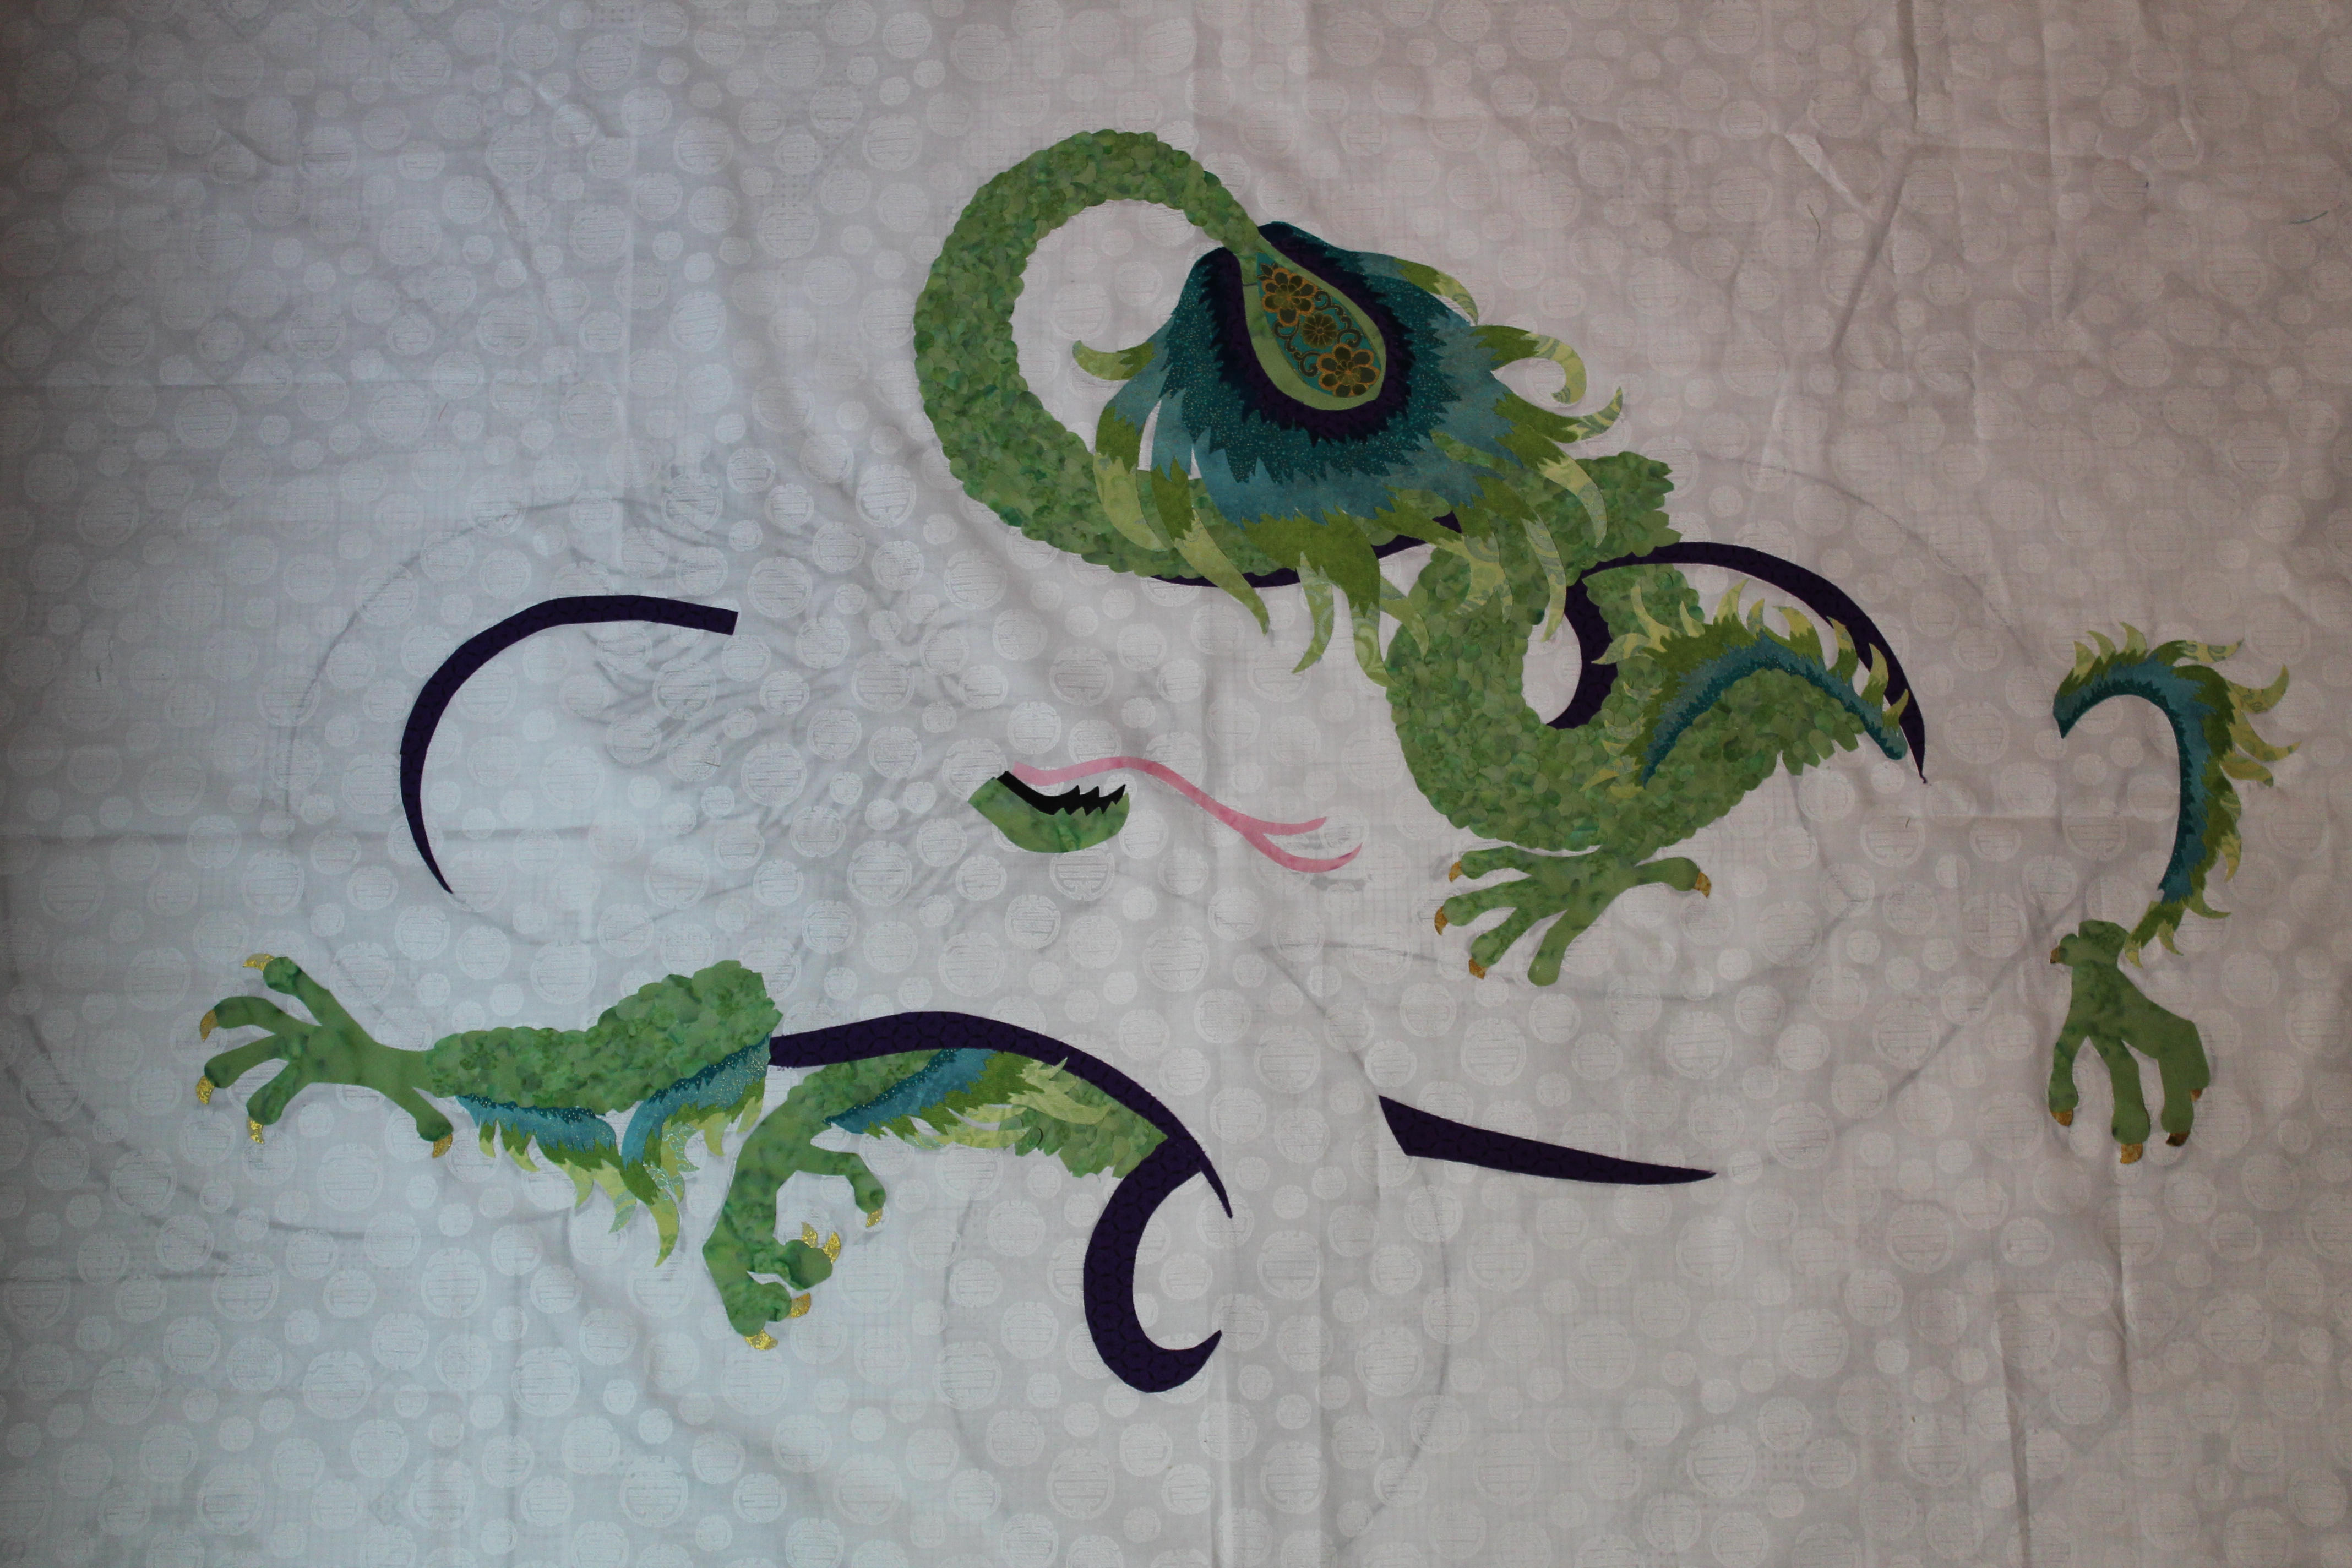
I also finished my Trend Tex Challenge quilt for the Canadian Quilters Association Quilt Canada. The show is in Ontario this year, which is much too far for me to travel, and it sounds like a lot of fun. I would love to see all the different quilts, especially because this year they have also introduced Modern Quilt Category. I would love to see what makes it in! Not to mention the stellar merchant mall. There are a plethora of modern online quilt shops in Ontario.

Quilts 005
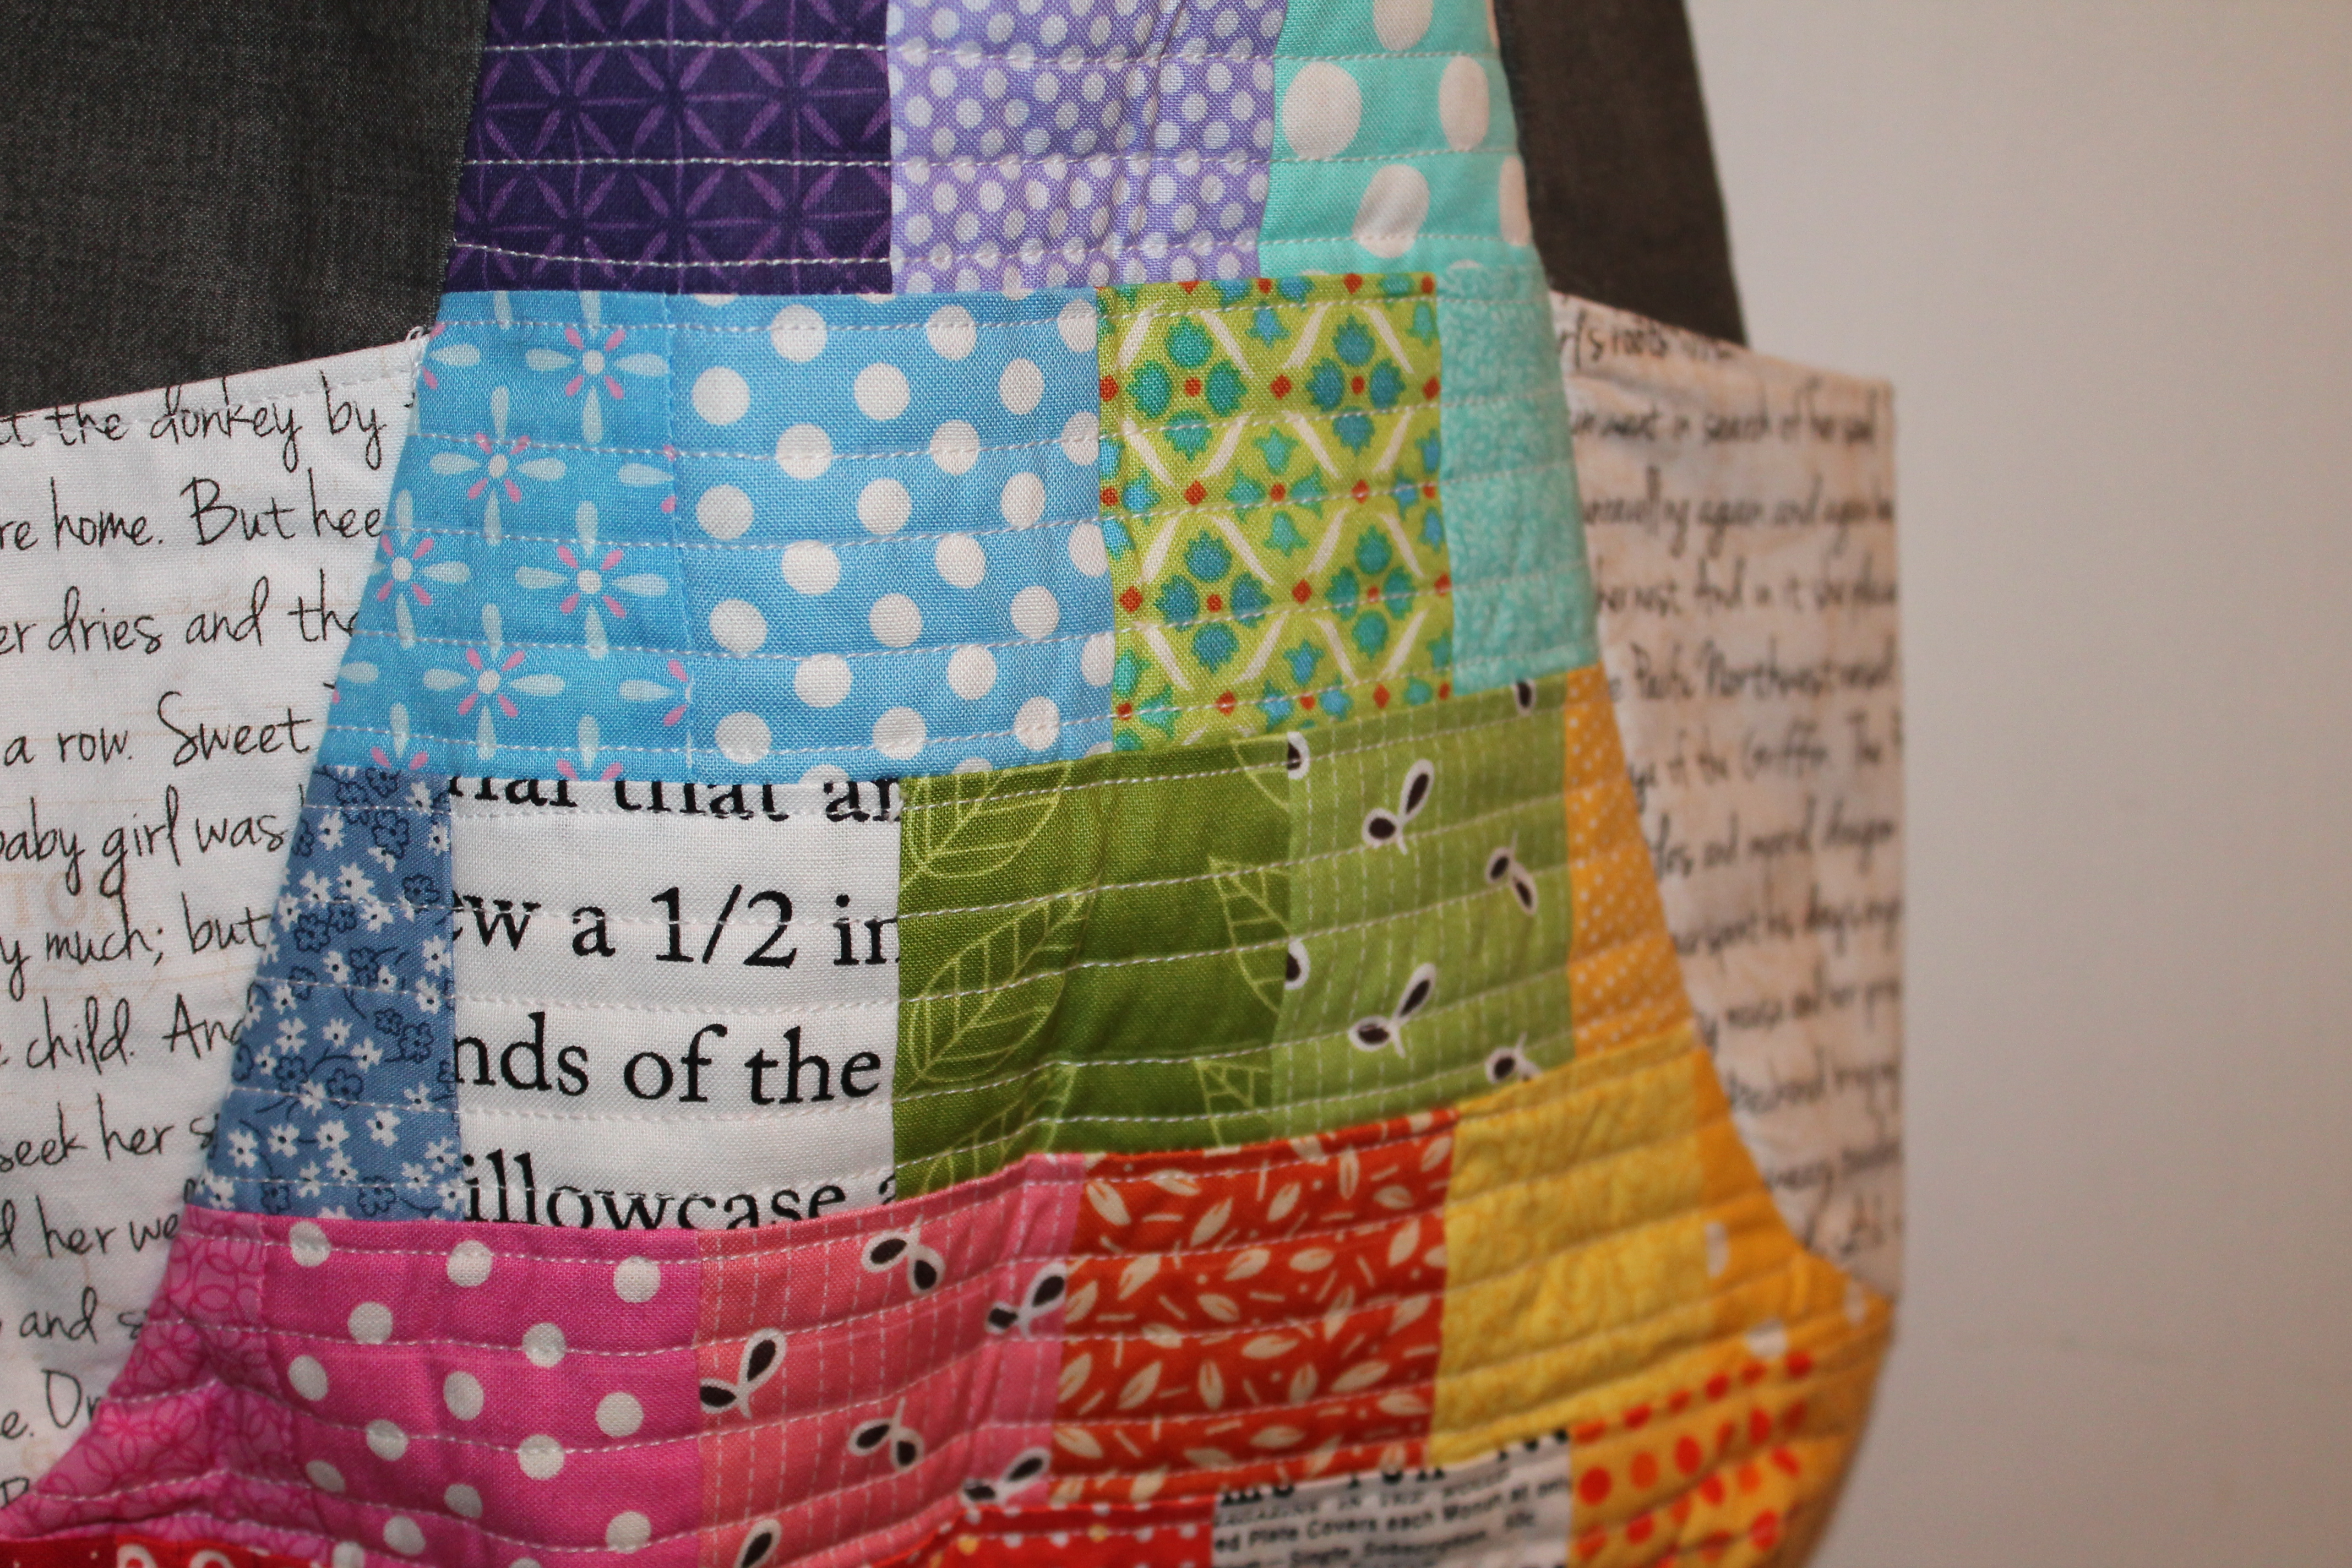
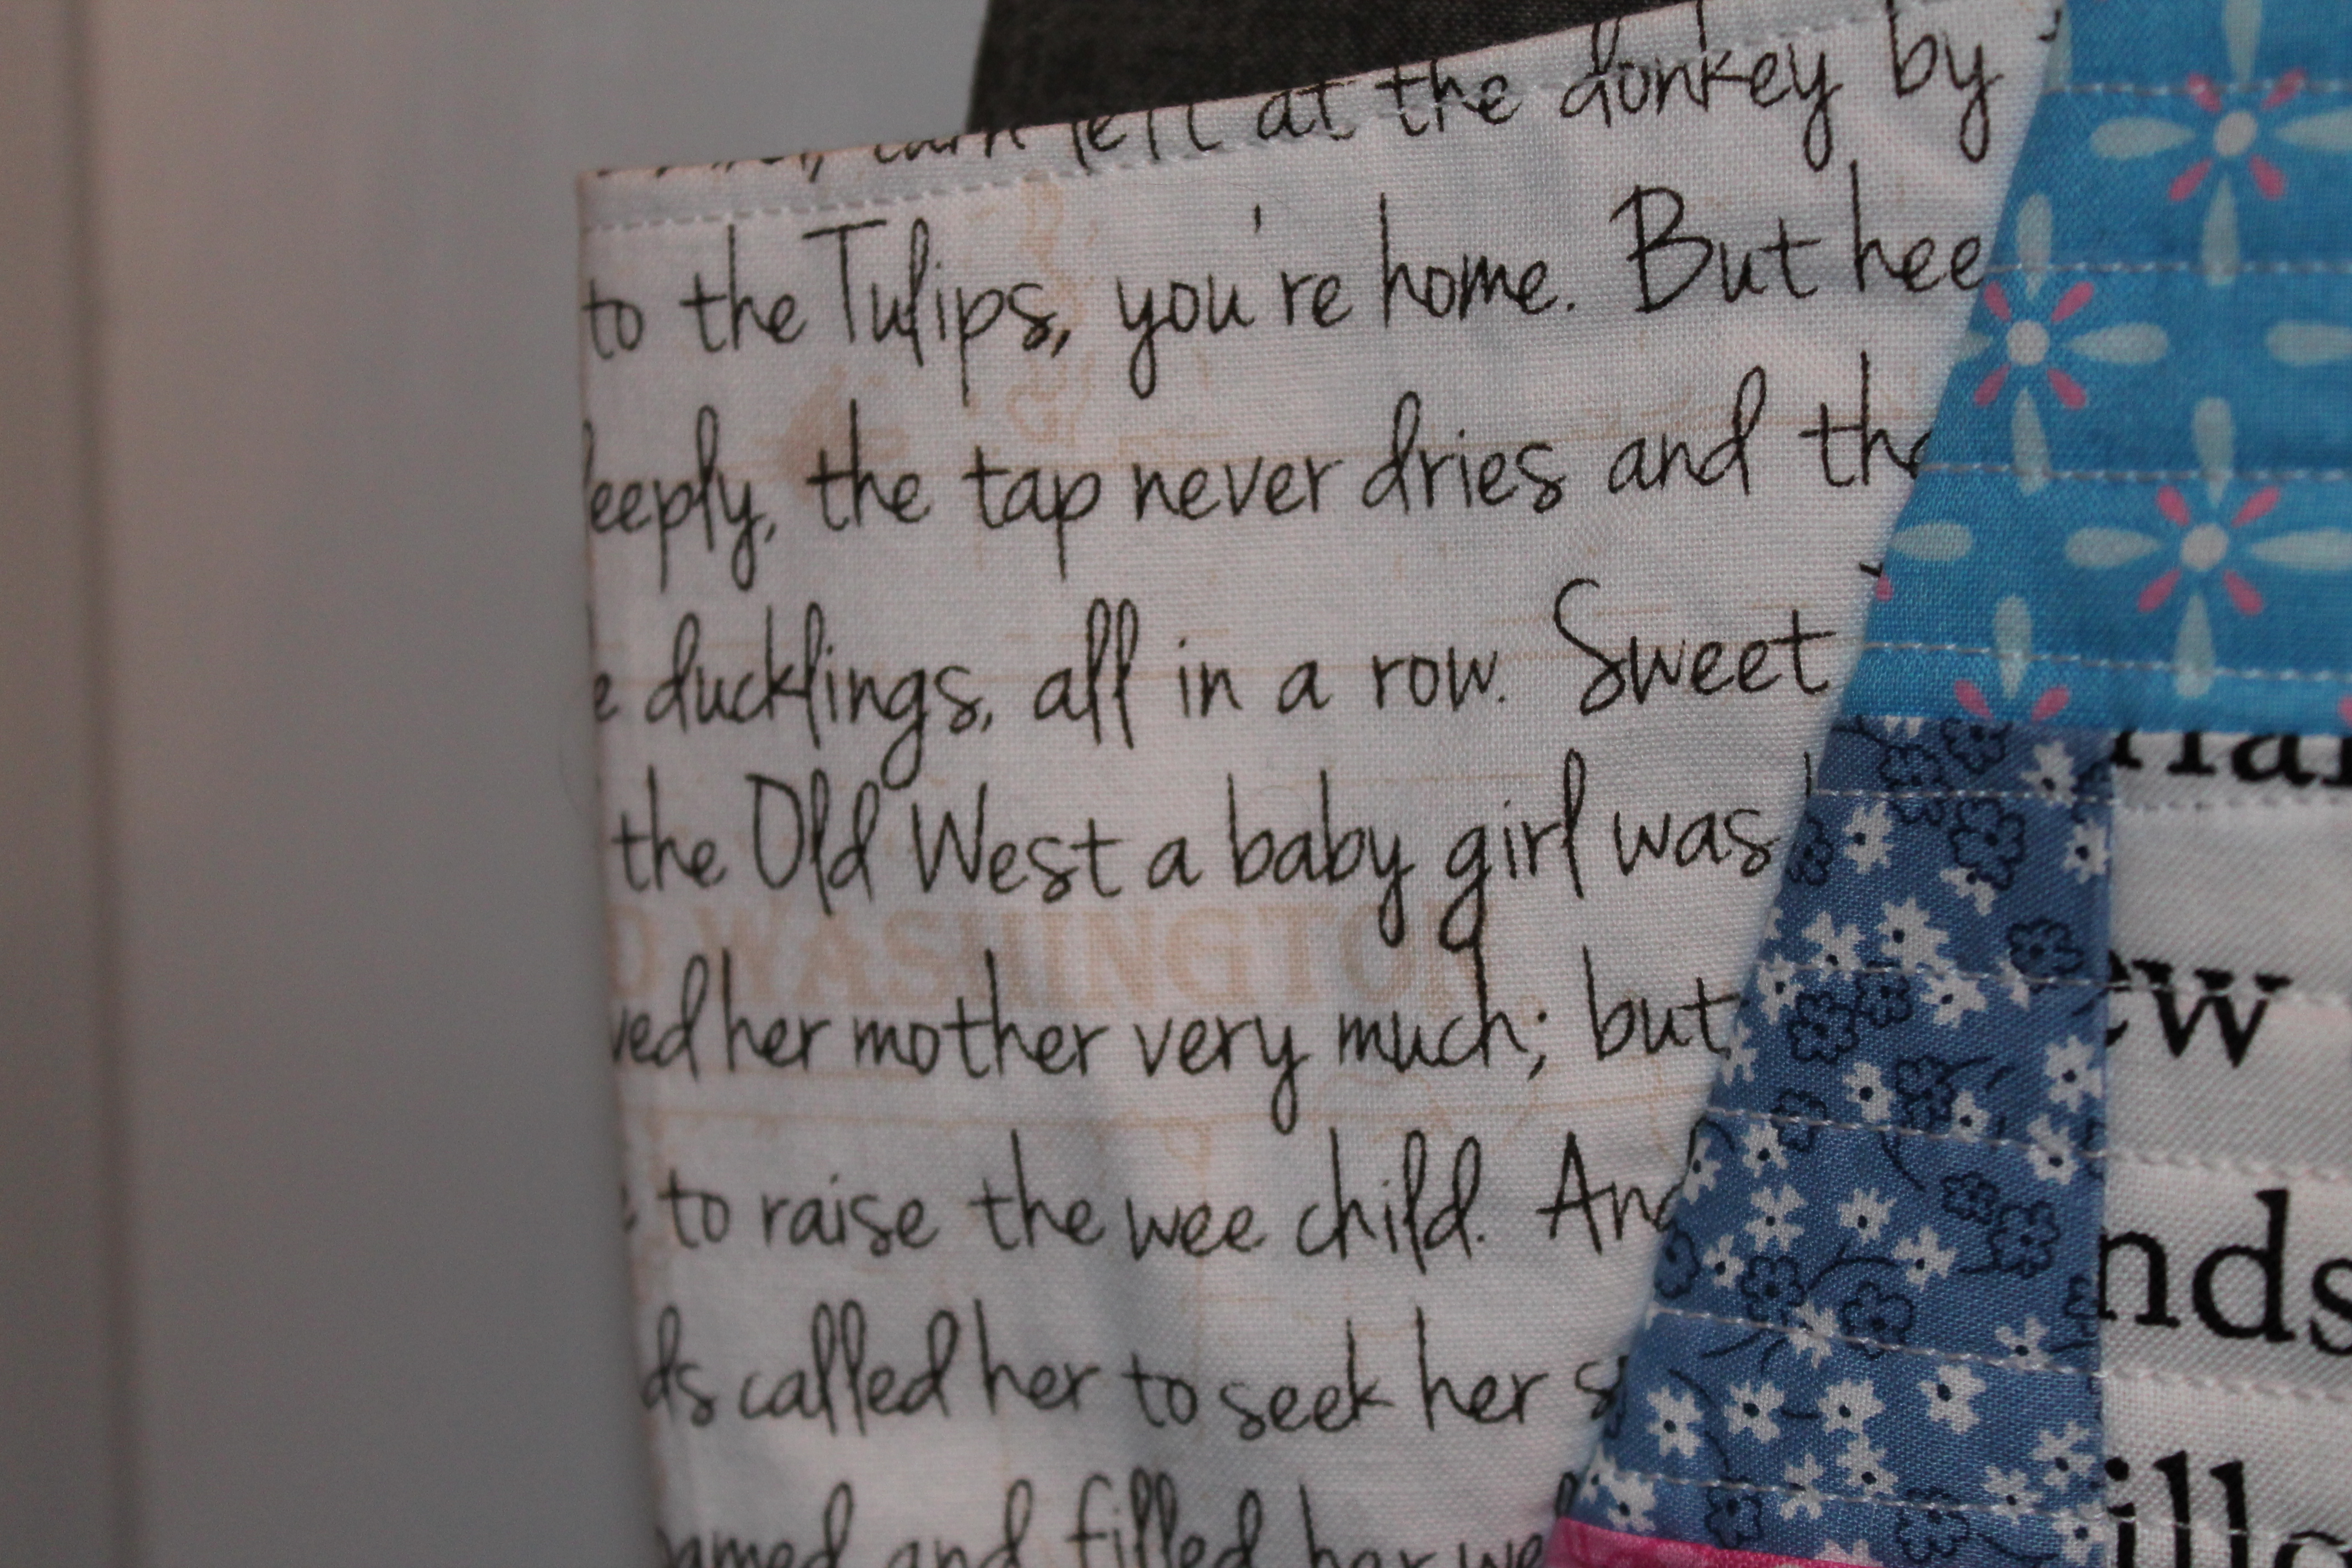
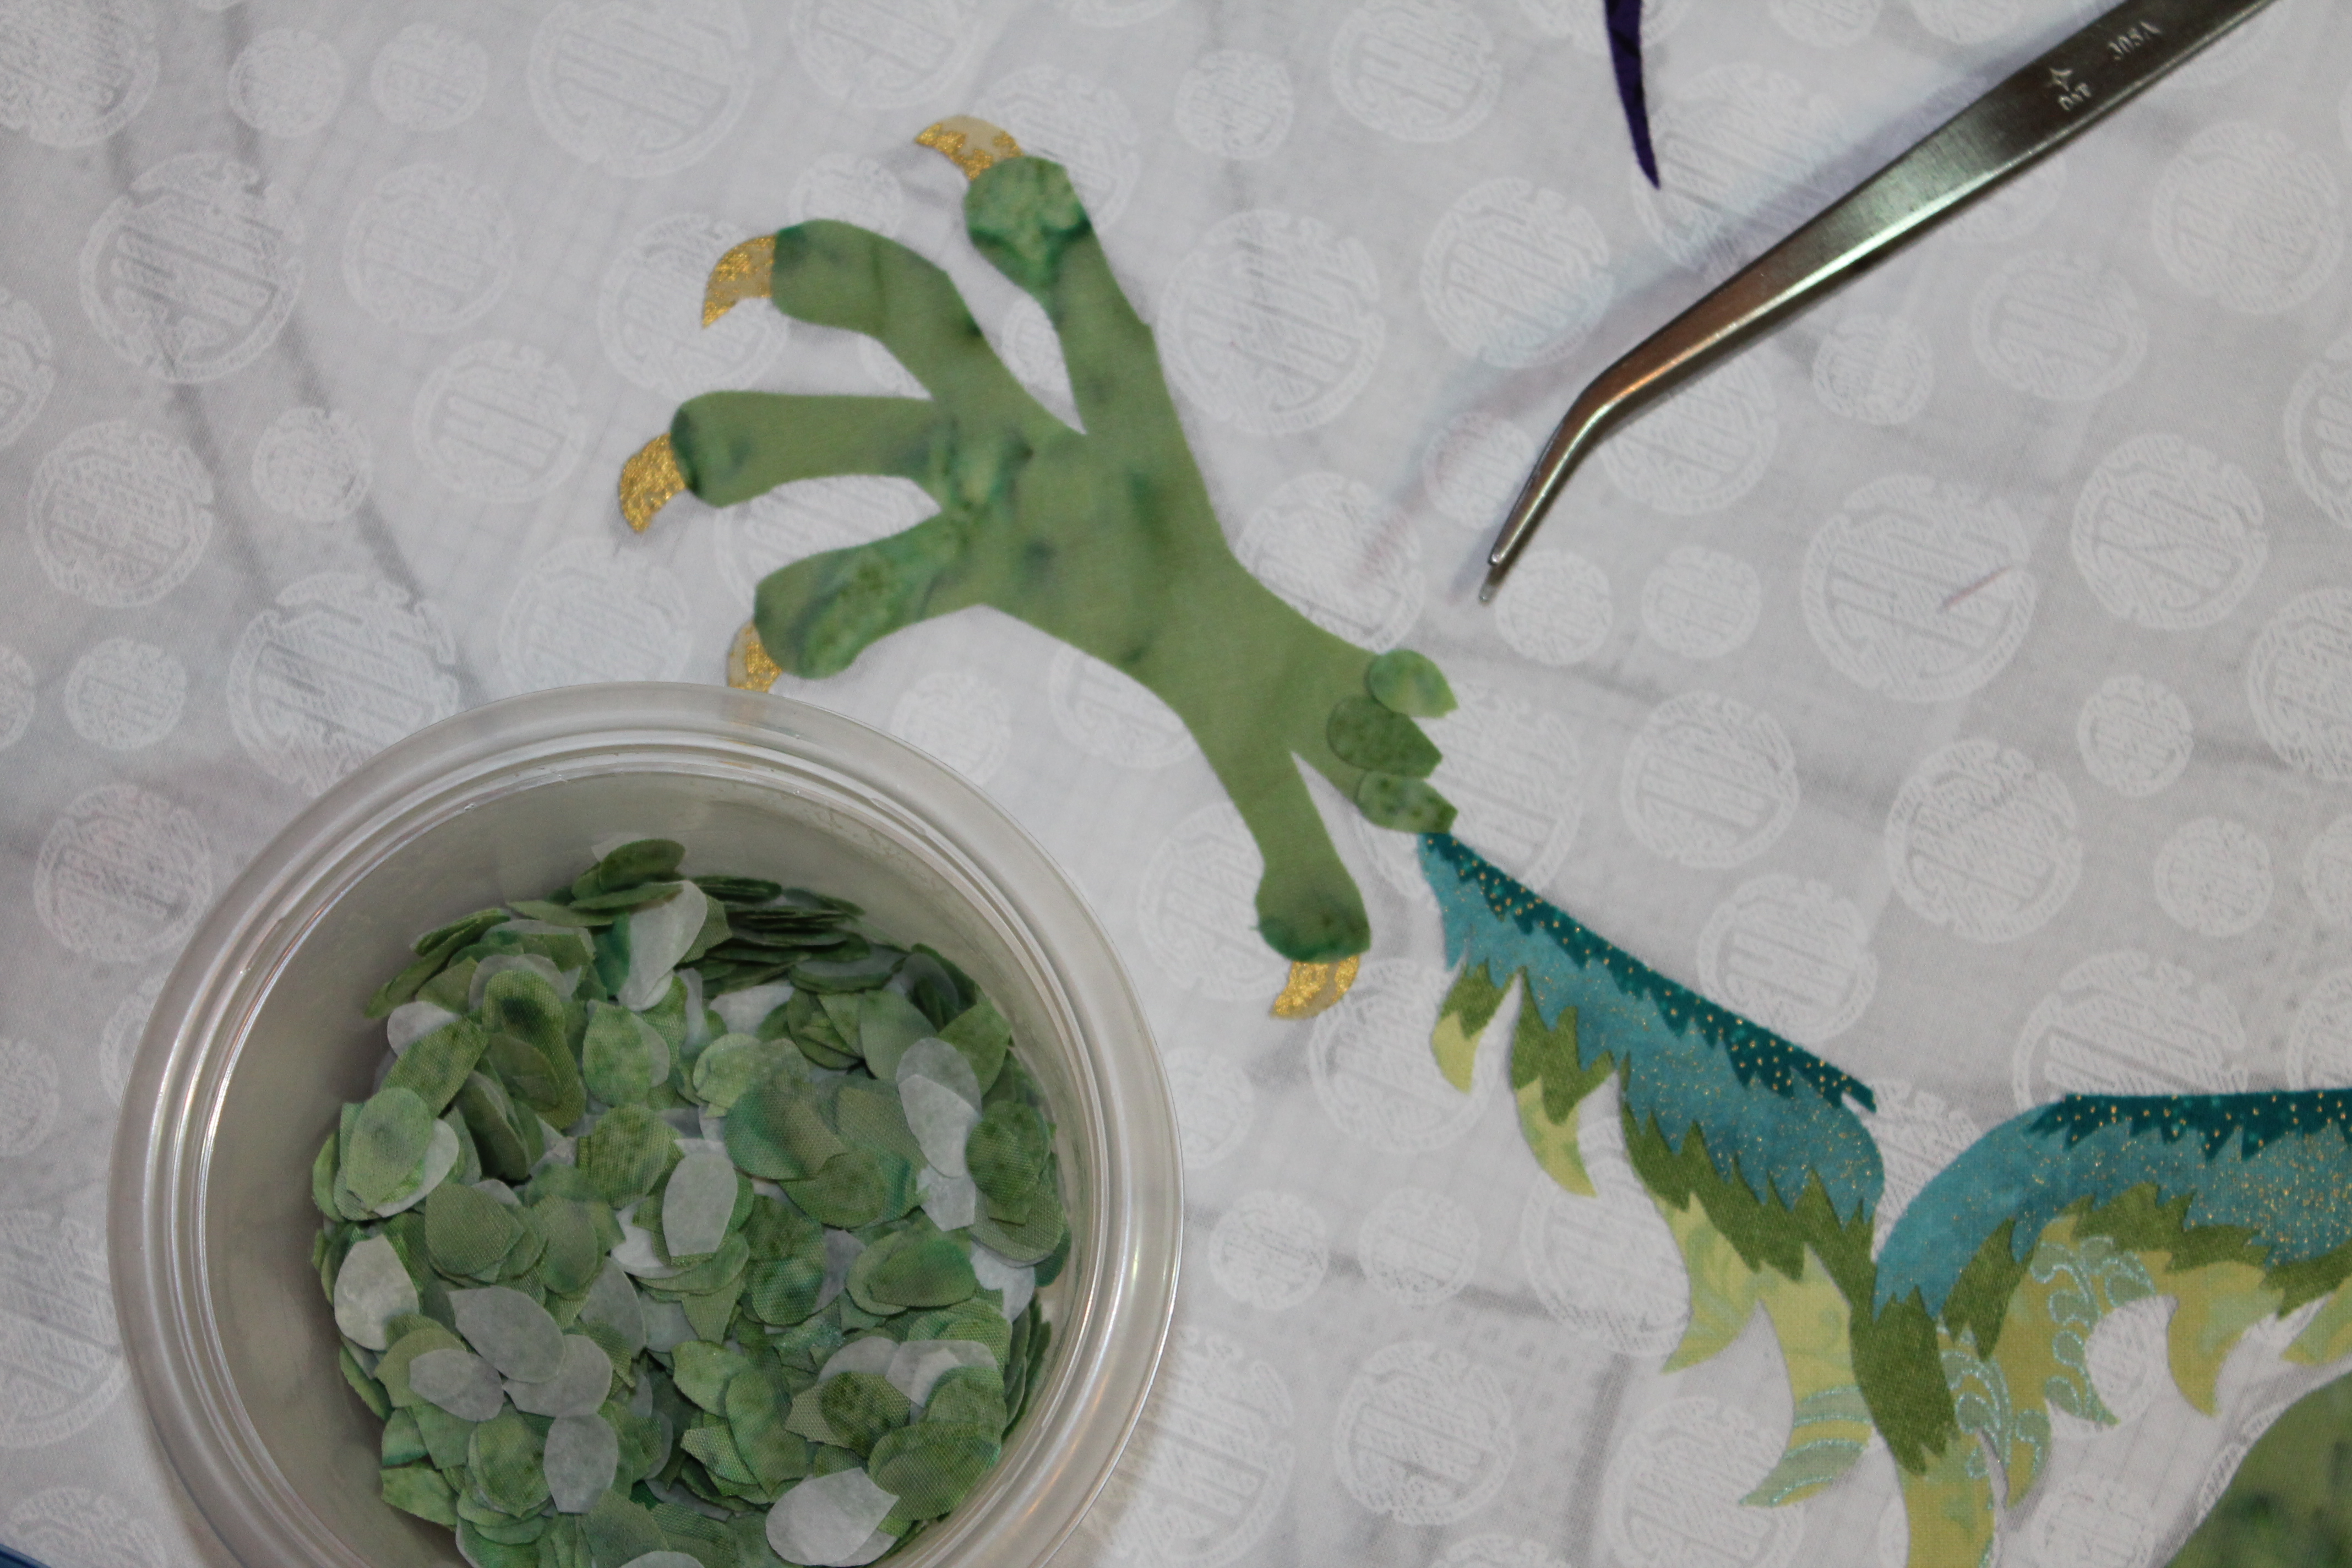
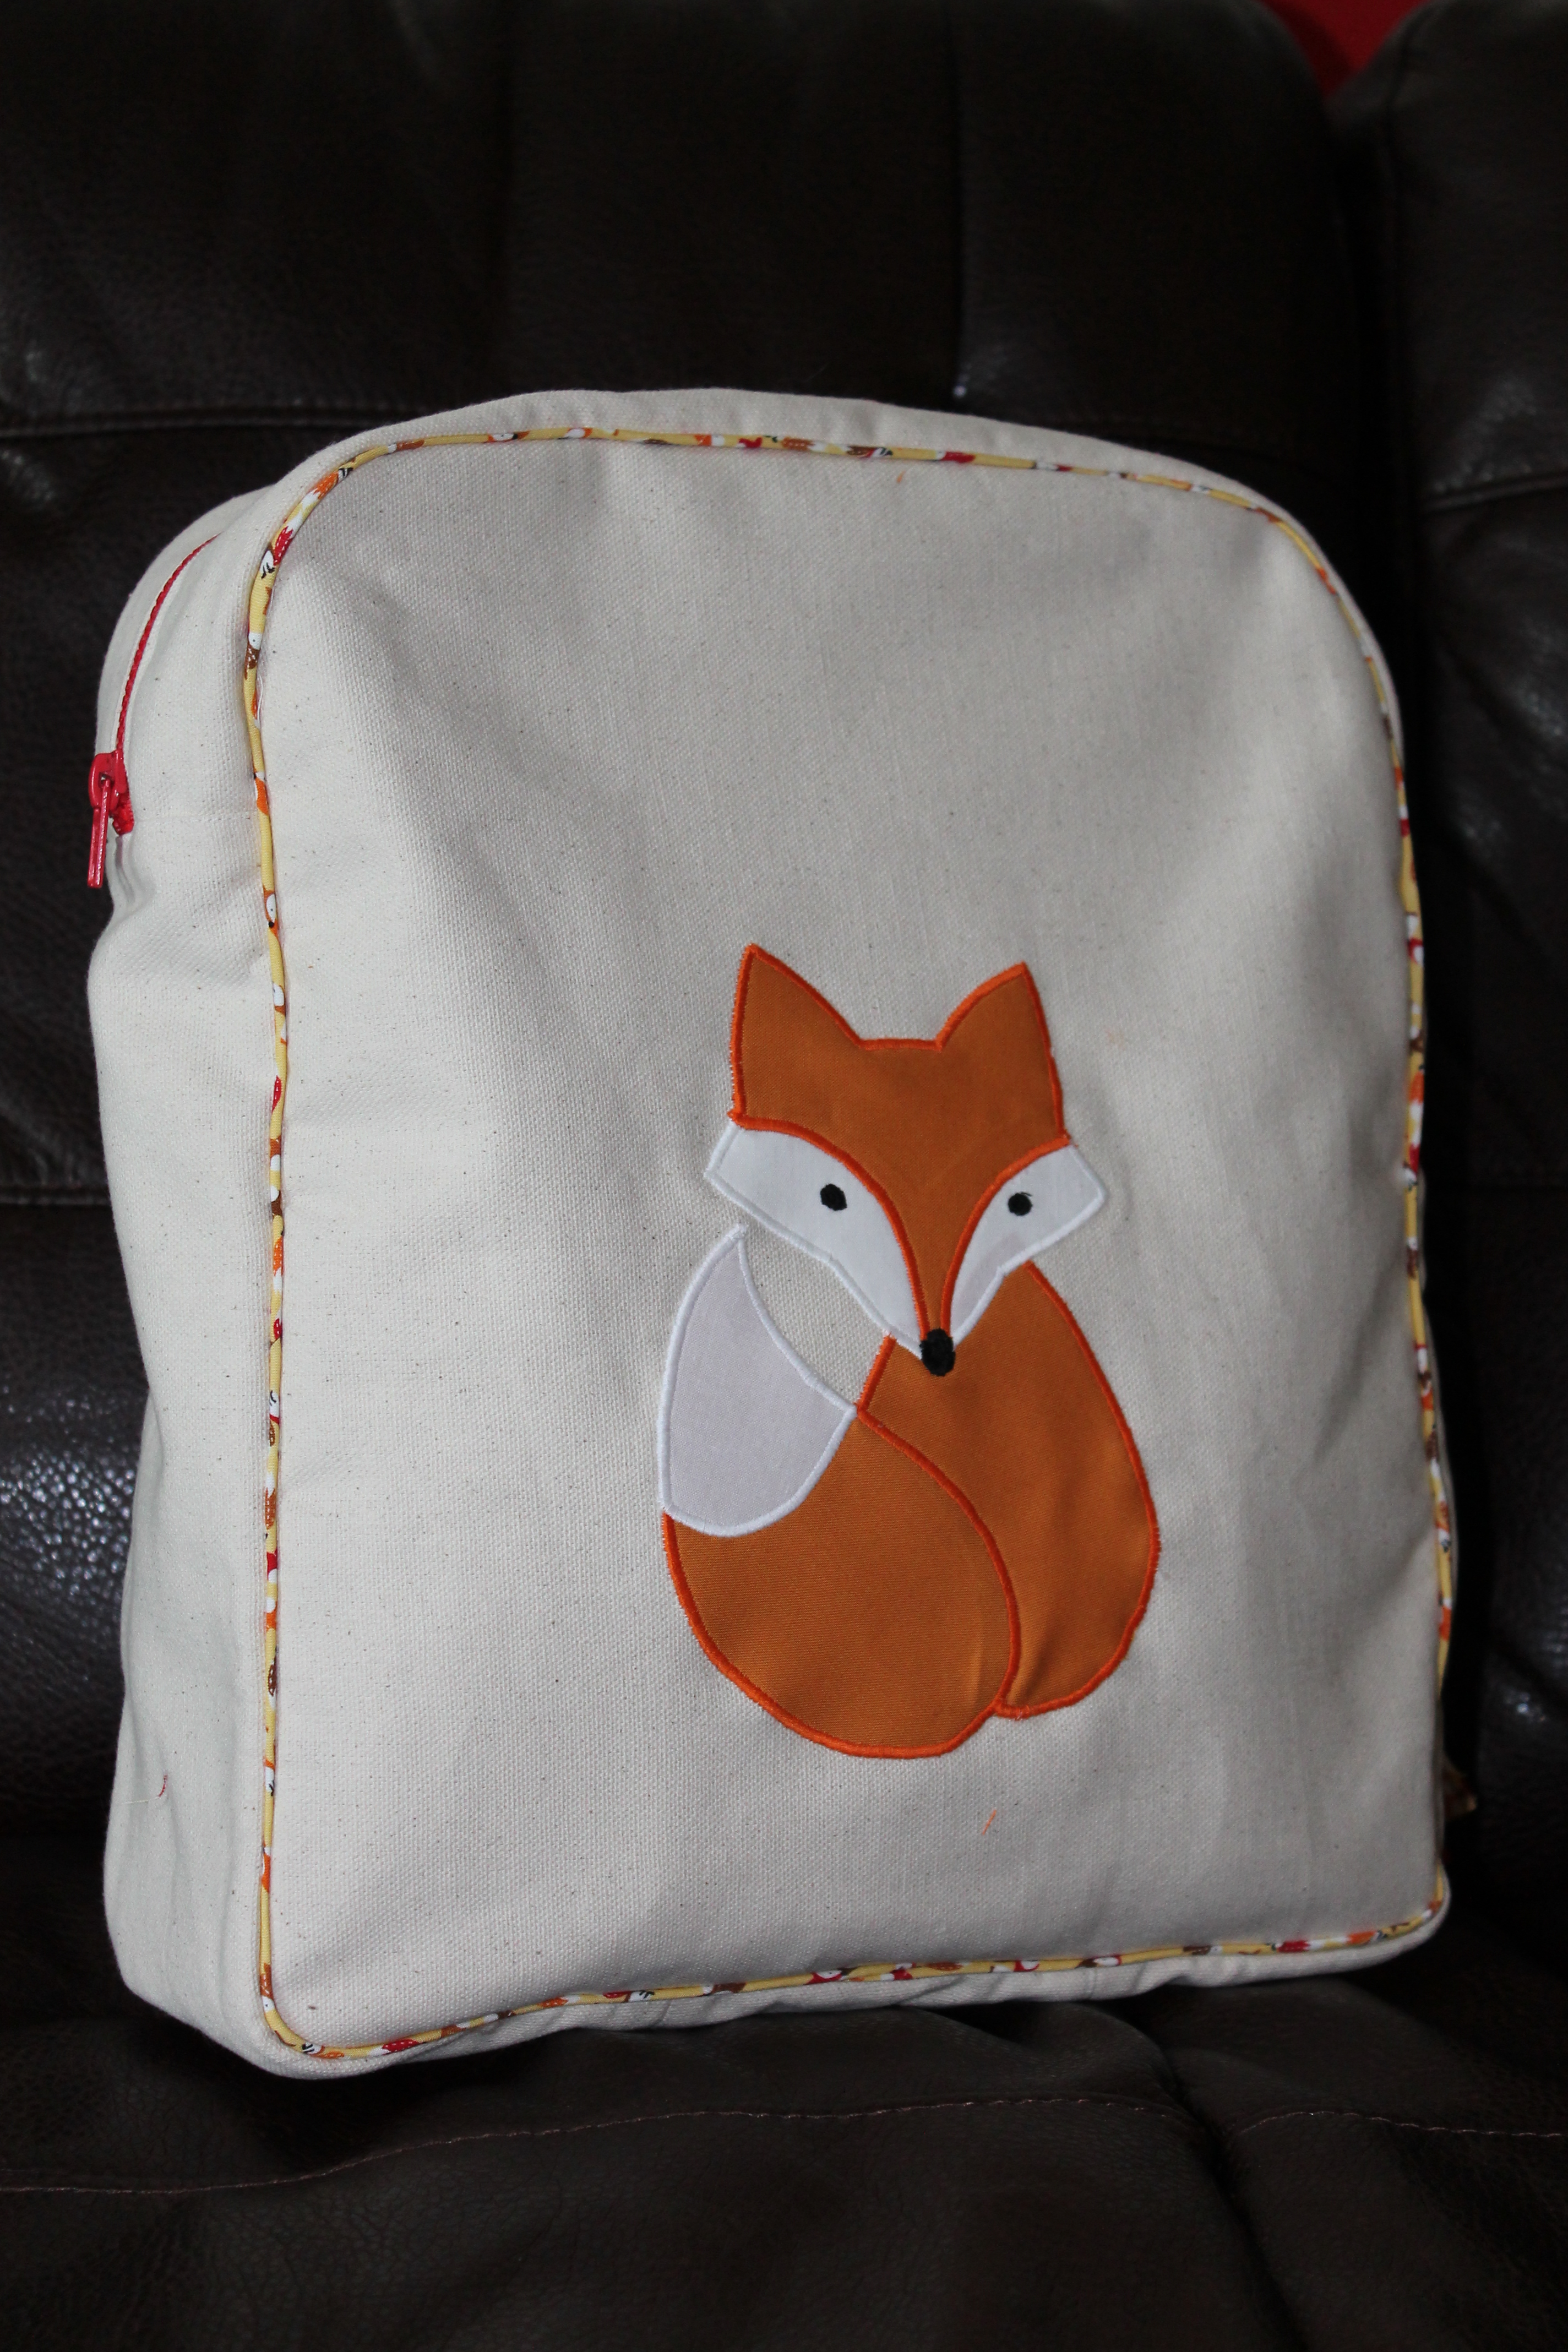
I free pieced this puppy, and matchstick quilted it. I don’t think I will be repeating that anytime soon. The quilt is 18″x20″ approx, and it took me 5 bobbins and way more time that it ever should have. But it looks great!!

Quilts 010
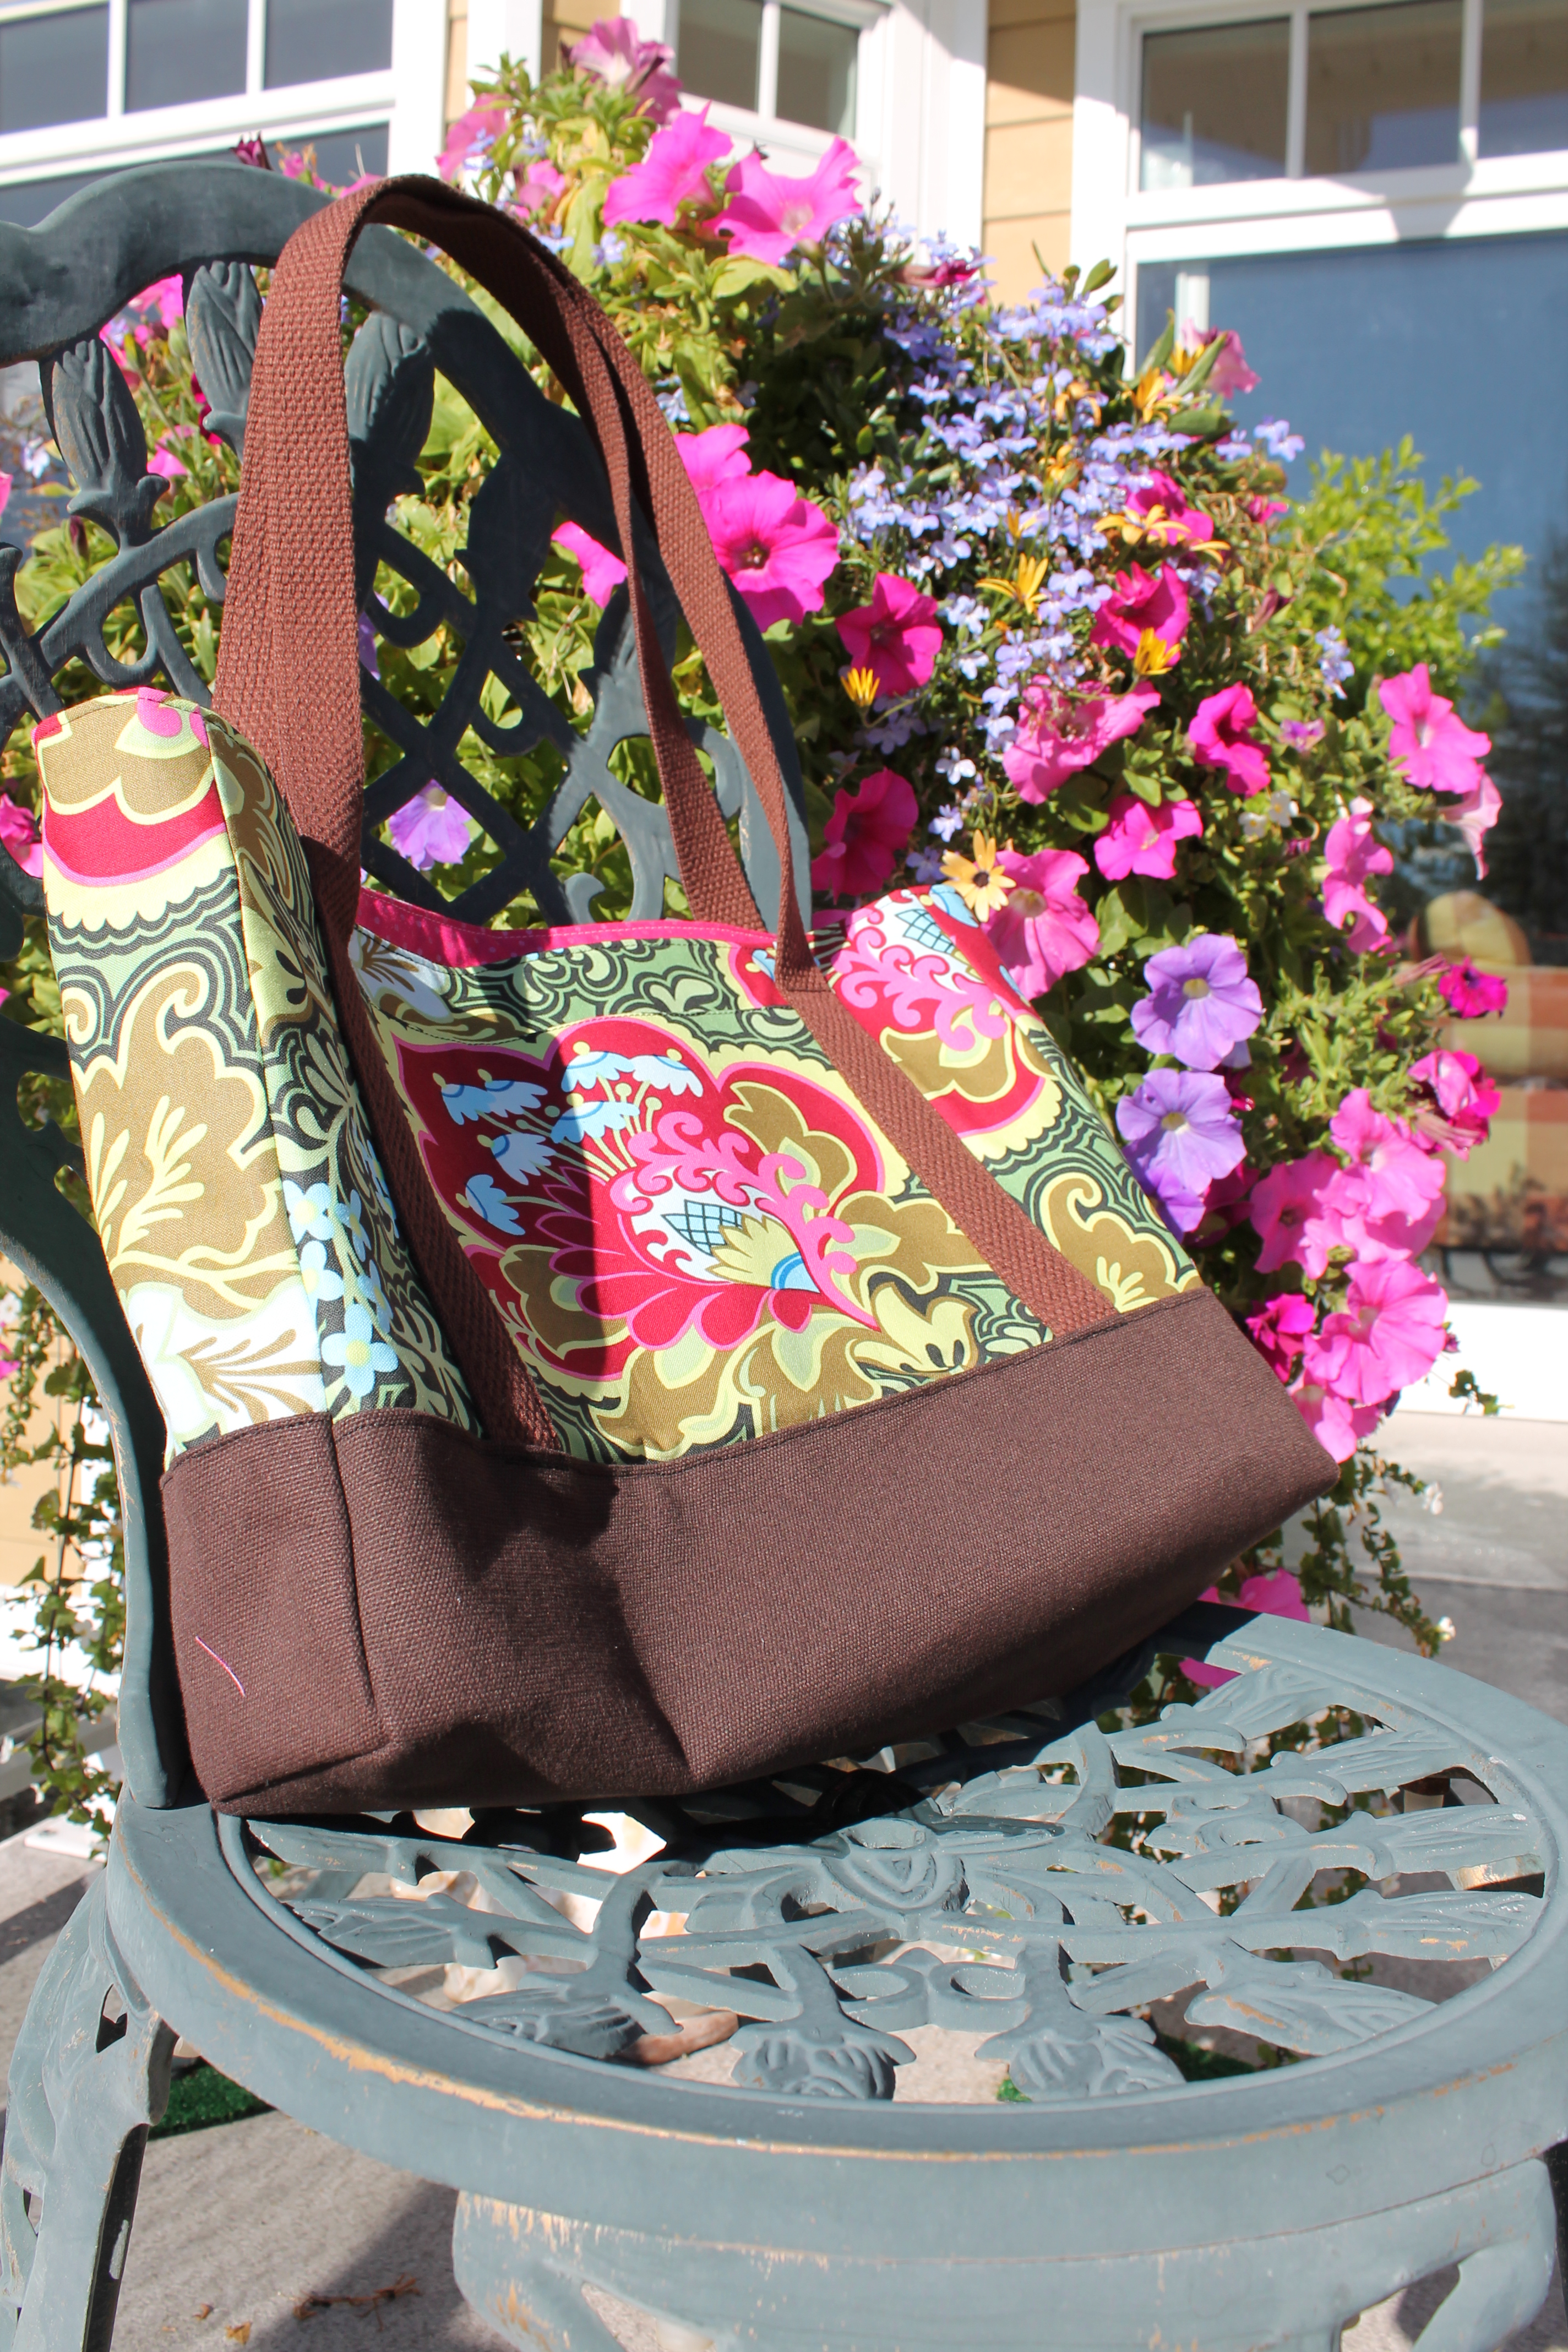
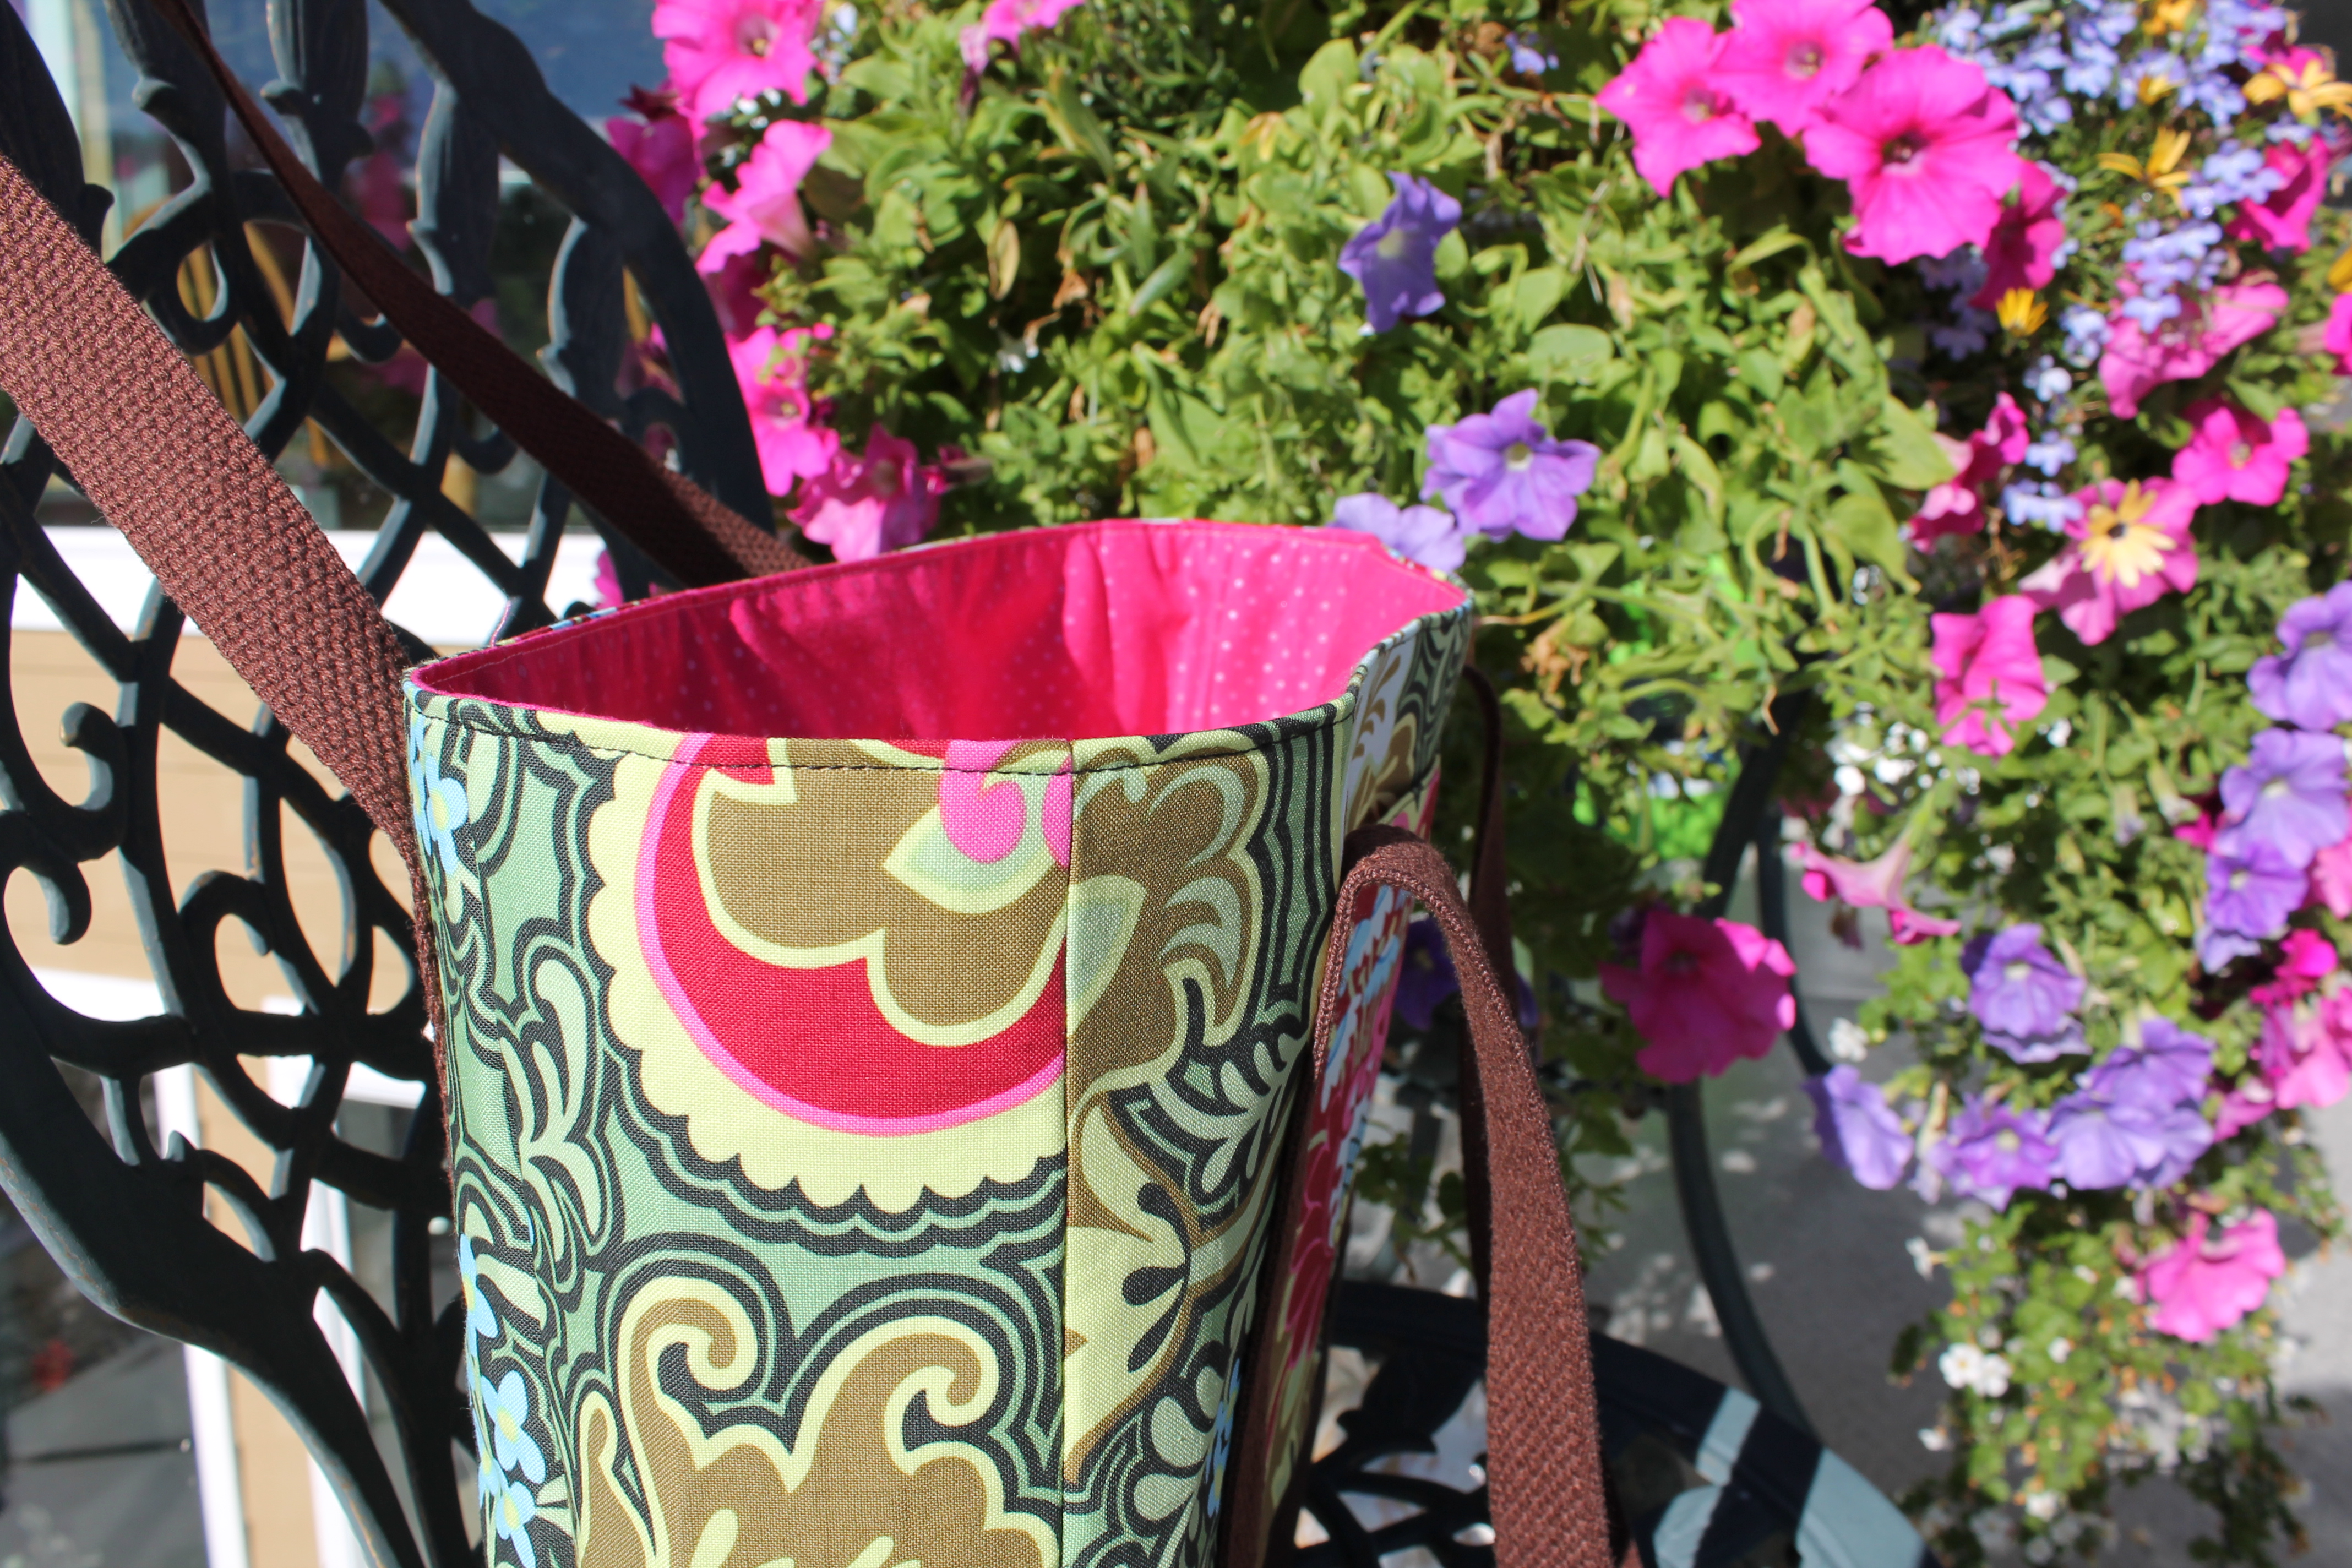
This quilt will be auctioned off with all the other Trend Tex Challenge quilts. I hope whoever get it loves it as much as I do!

The Vancouver Modern Quilt Guild should make a great showing in the Modern categories. I think a dozen members entered multiple projects. I entered three myself.  I will keep you posted =) Until then…

Happy Stitching!

Stacey

My first pattern….In Print!

This is my very first published pattern, and I am so excited to be able to FINALLY share it with you!

I always have quilt designs floating around, and when Fat Quarterly put out a call for submissions for their scraps issue, I knew exactly which quilt to make.

Presenting Putting on the Ritz!

Putting on the Ritz

Putting on the Ritz

We took the pictures over the holidays at my parents home. It’s always a gorgeous winter wonderland up on the mountain. Nothing like fresh air and snow to get your heart going! It also makes the perfect backdrop for a fun, colorful quilt shoot.

Putting ont eh Ritz

You can’t see it from here, but there is a drop off behind the bend that goes down a few feet. My darling hubby scaled the embankment just so I wouldn’t have footprints in my pictures. I’m a lucky gal!

You can find Issue 16, and pretty much any other Issue, here. The Scraps issue is chock full of fantastic scrappy patterns that will bust through those scraps in no time!

I would love to see your version of Putting on the Ritz! Send me a photo of the completed top or quilt and I will be sure to share it on the blog.

Happy Stitching!

Stacey

Christmas 2013xx 149

The Very Finished Caterpillar

Today was a perfect day.

I spent the morning taking a lesson from Joan at Maple Leaf Quilters on her long arm!! WOOOOOO! It was so much fun! I love quilting on the long arm! (can’t you tell I am happy?)I had always wanted to take a lesson from her, and finally found a day to do it. It was very different from free motion quilting. You use your whole body. Its like a dance, the Gammill Two-Step. So of course we had to blast some 90’s pop hits to rock out to. =)

Quilting!

Quilting!

I brought my son’s Hungry Caterpillar quilt with me to finish. It was going to be his 1st birthday present, but now it can be his 2nd birthday present. Strike one off the WIP list! I chose a simple large stipple called Inkblot and some rainbow variegated thread. It looks great, and the rainbow thread is both colorful and hidden at the same time.

IMG_00000214Maple Leaf Quilters is located in beautiful Tsawwassen, BC. Yes its spelled correctly =) Its 1 block from the waterfront and a lovely, light filled space perfect for quilting. If your going to be in the lower mainland for a time or don’t mind sending your quilts out, I highly recommend them! I will be using them for all my large quilts from now on. I love the look of a long armed quilt, and it is very hard to achieve the kind of tension on the layers you can get from the long arm set up. My space is also limited behind my machine, which makes quilting larger quilts….. challenging, as a nice word.

IMG_00000212

When I got home the little guy was so excited about his quilt that he couldn’t wait for mommy to bind it, out of the bag and on to the floor for a game of “Night Night Baby” Normally he tucks his Pooh-Bear under all the blankets and cushions in the house, but this time it was all about him! He was not happy when I took the quilt to square and bind, and insisted on “helping” me sew the binding on. Read: press the Automatic Thread Cutter every 8″ or so. But I don’t mind, because he is warm and snuggly, and very much a little boy who doesn’t want to be snuggly, so I take what I can get!

Night Night Baby

Night Night Baby

The afternoon was spent at the park with the family for an afternoon of play and a photo shoot. The bright colors really stood out in the playground! It was a rare sunny day today, normally it rains from November to April, so we took full advantage.

January 012

Hubby is getting really good at holding quilts. No fingers or toes sticking out!

January 038

As an added bonus to the day, there was a pair of bald eagles sounding off in a tree in nearby. They really are huge, majestic birds, but the sound they make seems so undignified! Squawk Squawk! Maybe trying to trick the resident seagulls a little closer, or fighting over who has to clean the bathroom? Either way, its one of the very few times I wish I had a mega zoom lens.

January 006

Right at the top of the center left tree, you can make out the little brown and white blots. =)

I hope your day was a good one wherever you are!

January 013

Happy Stitches,

Stacey

Blogathon Canada Day!

Welcome Everyone from the Blogathon Canada Blog Hop!!
SewSistersQuiltShop

My name is Stacey, and I live in Beautiful British Columbia, Canada. I have been blogging here for just over a year now. I love to quilt, and Paper piecing stars and compasses are my favorite. I am a founding member of the Vancouver Modern Quilt Guild, and I love it! I am a self-described Hybrid Quilter, not fully traditional, not fully modern, but fully a quilter! I love to write patterns, and I work as an X-Ray Technologist to support my quilting addiction.

I hope you enjoy your visit.

I am so excited to share my newest quilt with everyone- Sherbert At The Beach!

Sherbert at the Beach

Sherbert at the Beach

Sherbert at the Beach is my Michael Miller Cotton Couture Challenge quilt. I gets its name from a memory of the summer, when I took my little guy to the beach on a hot day. We had ice cream and it dripped all over the sand, too fast for us to catch it. It was a great day that I will always remember. When the challenge was announced at the August guild meeting the bright, citrus palette immediately brought the idea of bright fruity sherbert to mind and the memory of that day. Having only worked with Kona solids at that point, the Michael Miller Cotton Couture was a pleasant change for me. I like the texture and the weight of the fabric. It is almost a voile weight. Very light, easy to sew.  I chose a  Free Spirit Designer Solid in Sandstone as by background color to keep the colors popping without looking like a neon sign. I also used it for the backing and binding, and threw my extra blocks onto the back. WHAT?! A Pieced back you say! That’s right, I finally did it!

The quilt consists of 16 Disappearing Nine Patch blocks. Those were a lot of fun to make once I got over the fact that I was technically making each block twice. I chose random color placements and some I even cut off-center for some variety. Overall it worked out great and this quilt is probably the most truly modern thing I have ever made.

Quitling Detail

Quilting Detail

I chose an overall meandering square design for the quilting. I saw the design used by Melissa Corry of Happy Quilting some weeks ago, and I immediately thought if it when I was preparing to quilt.  I free motion quilted mine however, and getting those points perfect takes some practice! Not all the lines are perfectly straight, which I think gives it a great organic feel. I used a YLI Coated Cotton Quilting thread in Rose  for the top and Mettler Metrosene for the bobbin. The balance between the two threads was amazing and you cannot see the colored thread on the back.

YLI Rose

YLI Coated Cotton Thread in Rose

I was very impressed with the thread. I was afraid that the weight combined with the coating would not go over well, but it is specially made for machine quilting, which definitely shows when you are quilting. I highly recommend trying some out!

Quilting Detail

Quilting Detail

Thank you everyone for for coming over for a visit! There will be lots of exciting things happening here at Stacey in Stitches over the next few months, so feel free to follow along!

As promised, here is the free pattern I promised you all! Some of you may recall the Quilted Clock I made for my FLiRTS swap partner. There was enough interest to turn that clock into a pattern. Enjoy!

Quilted CLock Pattern

Quilt CLock Templates

Happy Stitching,

Stacey

Teaser

Its fun working on a quilt that is not mine. One of my fellow VMQG members made a knitted wrap shawl for me in exchange for quilting her sampler quilt. At first I was hesitant. I always had a hard time quilting my own things, how on earth was I going to be able to do it for someone else? I managed to procrastinate for about 3 weeks, but finally I pulled out the quilt and had a grand ol’ time quilting it. Nancy hasn’t seen it yet, so I will wait to post the finished pictures of her quilt. I think I am going to make her wait until show and tell at the next meeting to see it. 😉

I think I might need to think about a long arm……


StaceyNancy's Quilt 008


Swappin’ Fun

Happy Thanksgiving!


This week marks the send date for my FLiRTs Swap on Flickr.

This go round I really wanted to make something fab, and I was hoping to get a bag that I have been eyeballing FOREVER.

I made a Quilted Clock for my partner.I am happy with how it turned out, and thankfully my parter commented about it so I know she is going to love it!

The Quilted CLock

The Quilted Clock


I designed the pattern in my EQ7 and pulled some great fabrics out of my stash. The clockwork I picked up from the local craft shop. Getting the clock hands to fit and still turn without brushing against the fabric was a bit of a challenge. I ended up building the back up layer by layer until it was the right thickness, then enclosing it in a little pouch made from the backing scraps, and hand sewing it to the back of the clock.  I am thinking about posting a tutorial or the pattern if there is enough interest.

I received my item in the mail just before the long weekend. I was so super stoked and happy I giggled like a maniac and my good old hubster though I had lost my mind.

My Partner made me this Gorgeous, Wonderful, SUPER AWESOME 241 BAG!

Rainbow 241 Bag

Rainbow 241 Bag

I love this bag!!

October 211It has some of my favorite collections in it- Flea Market Fancy, Madrona Road….

October 213I love that she used the cream text print from Madrona Road for the sides.

October 212love Love LOVE!!!!


Happy Stitching!

Stacey

August Recap

Well, it is well into September now, I guess its time to finish up with August =)

The last couple weeks have been busy around here, but not much sewing getting done. I have a few nifty things in the works that I cant wait to share with you, but you will have to be patient!

Monday night is the monthly Vancouver Modern Quilt Guild meeting. I am excited for this one, it is in our new venue at teh Trout Lake Community Center. For those of you who have been to or live around Vancouver, BC, its a lovely spot in East Vancouver with parks, playgrounds, and a big bright new center. This month we are having a brown bag tote swap. Members who want to participate make a tote bag, put it in a brown paper bag, and put it on the table. Then you randomly chose a bag. No partners, no worries, just make a bag and go!

I decided to use the Renegade Tote Bag Tutorial from Renegade Seamstress. I loved how simple it was to put together, but with the right fabric it really wows! Since we were on vacation, I took the opportunity to purchase some new fabrics from the local quilt shops, and I found this beautiful Amy Butler print that screamed “MAKE ME INTO A BAG!” So of course I had to. When fabric screams, you listen! Its the Gothic Rose print from her Belle Collection in Burgundy.

Belle Gothic Rose in Burgundy

Belle Gothic Rose in Burgundy

It paired well with a chocolate canvas and webbing. I still opted for stabilizer even though I was using the canvas, and I am happy with the results. The bag holds itself together well.

August 308

Belle Bag

At this point in our vacation my camera was almost dead, but I did get some lovely pictures on the patio at my parents house. I love this bag so much that I am making a second one. I have just enough fabric left over. The pattern is quite generous.

Belle Bag

Belle Bag

The lining is a bright pink blender that I pulled off a sale rack. I think it is Disco Dots but I cannot remember for sure.

I also FINALLY finished my best friends wedding present. She got married in February and to my regret I was unable to attend. Her photos were amazing and the venue was breathtaking, and so inspiring, that I made her a photo album wall hanging.

Photo Album Wallhanging

Photo Album Wallhanging

I Love all her photographs. the contrast beween the whites and the blues and greys, I loved every minute of making this quilt.

August 227

I also managed to finish up some more City Sampler blocks. They haven’t seen the hot side of an iron yet, but they are done! You can find them in the Tula PInk City Sampler QAL Album.

Keep your eyes peeled in mid-October for a little something fun!

Happy Stitching!

Stacey

The Wedding Quilt

A coworker of mine has been gearing up for her best friends wedding all year. She has been all over the place planning parties, a stagette, showers, and helping with the details of the big day. They have been friends since high school, and she wanted to do something really special as a wedding present. She asked me come up with a quilt that would capture her friends crazy and quirky nature, while still complimenting her wedding colors.

I suggested a free-pieced low volume log cabin block inspired by a WIP posted by Anna at Play-Crafts.  She took one look and loved it, so we went out and picked up a stack of low Volume fabrics. Some Batiks, a lot of Comma, and some random pieces, with some colorful pops and a gorgeous Disco Dots backing in teal, and we had a quilt!

The Wedding Quilt for KT

The Wedding Quilt for KT

The blocks are 12″ finished. I cut a ton of random strips from the low volume fabrics, and built them up log cabin style randomly around the center piece. KT sent me her favorite pictures from the last year, and I used Iron on photo transfer paper to attach them to the blocks. Next time I may print right onto the fabric, as the transfers have a very bad habit of melting near heat, and they did not want to secure properly.

Lovely engagement photo!

Lovely engagement photo!

I quilted the entire thing in straight lines in a windmill pattern, so the lines are all in different directions, skipping around the photos.  The blocks were sewn together randomly so there is technically no up or down to the quilt. This way no matter how the quilt is laying she can see the pictures.

Thw quilting

The quilting

I double stitched the binding. I like the look of 2″ binding, it turns over snugly and has a low profile around the edges. The black really sets off the quilt.  I have a really easy technique for finishing the binding, I am working on a tutorial.

Binding

Binding

I had so much fun making this quilt. All free pieced, no borders, no rules! A very freeing experience, and I think is one quilt option that will make another appearance in the near future!

Happy Stitching!

Stacey

August 108

A WIP update

The last couple weeks have been filled with some WIP’s that I have finally complete. The Hoffman Challenge Quilt being the most notable, because I actually wrote about it! I also had a couple commissions and a personal quilt going as well at that time. One is at the quilting stage, and the other two are Finished. Phew!

First up is the First Years Memory Quilt

This was a very fun project to take on. I was contacted through a mom group on Facebook, she was looking for someone to make a quilt using her daughters clothes from her first year. The theme was sweet and simple, and I love how the quilt turned out.  It finished at 45×60, the perfect size for a toddler bed.

Isla Kate

Applique from a skirt lining

July 002

The finished quilt.

The clothes were adorable. Its always hard cutting into someones cherished pieces of clothing, but it gets easier when I think about it as transforming instead of destroying. =) Now the pieces will live on a a quilt, and each time she looks at it she will remember a part of her daughters first year.  I try to preserve a memorable part of each outfit, whether it is a bit of applique, some silkscreening, or a tulle skirt with a bow. My favorite block in the quilt is in the center of the 3rd row up. It was a princess dress with a bow and tulle overskirt, and a satin lining. I used the satin lining for the name on the bottom, and then gathered the overskirt into the 6″ block.

 I also finally hung the mini wall hanging I made a couple months ago. It was supposed to be for a swap but my machine tension was all goobered. Once I got the tension issues fixed I took it to the Free Motion Quilting Class that the Vancouver Modern Quilt Guild put on. It was a great class, and not just because I got to go sew on a Sunday afternoon! It was super informative, and I managed to get the tension issues ironed out.

August 054

Compass Star Mini Quilt

The finished size is 24″x24″. I used some of my coveted Kaufman Fusions stash for the green spikes between the Star points, and some leftover ivory text print from the Canadian Cottage line by Robyn Pandolph. The entire color scheme was insired by a pink/green batik in my stash. I used it for the outside corners.

August 058

Quilting detail-spikes

August 055

Quilting detail-star

I designed the quilting pattern myself. I have been practising my feathers, and I am very happy with how it turned out. I used a very very pale seafoam green thread for the quitling, and it worked very nicely with all the colors involved. This one is hanging in my kitchen until my mother comes to visit. Then I am sure it will be found somewhere in her house, which is fine by me =)

Happy Stitching!

Stacey


Busy Busy Bee!

Its been a busy busy month here at Stacey In Stitches. Between custom orders, bees and personal projects, I find time to go to work and clean the house somehow. I am lucky that my husband knows how to do dishes and laundry, or we would be wearing paper bags stuffed with newspaper, because it has been so cold and rainy here lately.

I ordered and received my Tula Pink City Sampler book. I ‘need’ to get some more fabric for it, and even though I haven’t started any blocks yet it is on my list. Right after the Dragon Quilt, a couple custom orders, and my Bee blocks.

For the Star Block Bee, I chose Swoon blocks. All my Hive-mates agreed to make one for me. I am very excited for this one, its going to be a large quilt. I chose a pallet based on the Broken Herringbone print from Madrona Road in Citrus. I ordered them online, and the colors coordinate really really well.

The bundle I compiled for the Swoon Quilt.

The bundle I compiled for the Swoon Quilt.

I am using a Free Spirit Designer Solid in Chona Brown for my background, it really makes the colors stand out. It is warm and the color is rich and saturated. I have never worked with a FreeSpirit solid, but so far I am very happy with it. The hand is quite soft and it irons nicely, the weight is really good, not as thick as a Kona, and a nice tight weave like an Art Gallery.

Background cut and ready to go

Background cut and ready to go

I have also been working my tail off with this years Hoffman Challenge Quilt. The challenge fabric is much more vibrant in person, the online swatches really do not do it justice.  I decided to do another Dragon Quilt, this one on a smaller scale than before. The progress is good, everything is cut out, it just takes time to lay it all out. I will keep updating as it gets closer to the deadline.

End of Day One

End of Day One

End of Day 2

End of Day 2

Tools of the trade....

Tools of the trade….

I also participated in a side swap with my DQS partner on Flicker. She make me a beautiful crochet basket. Its massive and holds all my quilt books from the visit with my grandmother this weekend.

Crochet Basket from AnnaMichelleQuilts

Crochet Basket from AnnaMichelleQuilts

Lovely Large Handles

Lovely Large Handles

I made her a scrappy pillowcase. I used the Inverted Star Tutorial by Common Threads and enlarged it to make a 14″ pillowcase. The inside is lined and the zipper tape is enclosed. I forgot to take pictures of the inside/back before I sent it off. I used a large scrap of Grunge by Basic Grey for the background. It makes a nice background for a scrappy project, with just a hint of color and some great tone on tone movement. I free motion quilted the entire pillowcase.

Scrappy Pillowcase- Inverted Star Block

Scrappy Pillowcase- Inverted Star Block

Quilting Detail

Quilting Detail

I also had the great fortune to make it to the Free Motion Quilting workshop set up by the Vancouver Modern Quilt Guild. I spent lots of time fiddling with my machine until the tension was just right, then away we go! I finished that project, more on it later.

I also made a Custom Toddler Backpack (back in May!) I don’t know how I forgot to write about it, but it turned out super cute and she is really happy with it. The fox applique I made myself, as well as the piping. The lining and piping is a Timeless Treasures print, and the canvas is water repellent. Very important when making things for little ones! I used the Toddler Backpack Tutorial from Crazy Little Projects and modified it slightlyby adding inside pockets, padded straps with webbing, and piping. You do have to be careful when cutting out the side panels, you want to measure the diameter of the bag before cutting to make sure they are long enough. It will vary depending on your curves.

Foxy Toddler Backpack

Foxy Toddler Backpack

Foxy Toddler Backpack

Foxy Toddler Backpack

Foxy Toddler Backpack

Foxy Toddler Backpack

Foxy Toddler Backpack

Foxy Toddler Backpack

Phew! Nice long recap! Lots of big stuff happening around here. Hopefully I will have much more progress on the Dragon Quilt to show you, and perhaps some Tula Pink blocks as well!

Until then, Happy Stitching!

Stacey