I have some new free patterns available with the release of Tula Pink’s latest line ; Everglow!
Everglow is a neon lovers dream, with 4 new feature prints and 8 electrifying colorways. I have three patterns for the line, and I had so much fun designing to feature each of the elements in the line. Hippos, giraffes, lions and elephants take center stage in this whimsical collection. My favorite print is the Lion, and I love the orange/green colorways that go with it. My close second is the hippo. The small details, like the birds and the body shadows under the water really bring the print to life.
Now, on to the quilts!
First up is Sparkler. This quilt features fussy cutting and precision piecing to create a block exploding with color. I wanted the animal prints to really stand out. My inspiration for this quilt was fireworks. I love how bright and loud they are, and how fireworks spark joy for those who watch. I wanted the same feeling in this quilt. I love how the supporting stripes, dots, and fairy flakes bring the center star to life around the print.
Next, I wanted to use the supporting prints – pom pom, stripes and fairy flakes – as the feature, especially those stripes! They are bold and eye catching, and there’s so much you can do with them to create visual interest in a quilt. With that in mind, I went about playing with blocks and layouts to create Stained Glass. The quilt is stunning, and the construction is deceptively simple – its the same block in 8 different colors! the same print in each section of the block, and the layout does all the work. I highly recommend this quilt for any skill level-beginner to advance!
Last but not least, there is High Voltage. This IS an advanced skill level (you know me, there’s one in every collection!) I wanted a quilt that looked fast, like electricity or lightning, to match the feel of the neon prints. Like argon through a glass tube to create bright light.
You can find each of these patterns in the Projects section of the FreeSpirit Fabrics Website.
I have a big announcement today; I am officially having a sample sale! AKA: Stacey Ran Out Of Room And Has More Quilts To Make So Needs To Make Room Quilt Adoption Sale!
I will be listing quilts this week, and the sale will go live Sunday morning. There will be Finished quilts from my book, Child’s Play Quilts, quilts I have made just for fun, and some from the first unpublished book. There will also be a small selection of Work In Progress (WIP) quilts. Some WIPs may be flimsy tops only, some might be quilted but need binding.
What does the Fox Say?Apple BlossomsTumbledRainbow BrightsButterfly KissesFishbowlPrismBows PeepStars ShineBig WheelsGumdropsBullseyeLadybirdStarry NightsI Love YouRaindropsLeafyStars of the Show
The prices will vary. I thought long and hard about the pricing models for these. Some take a lot more time, some take a lot more fabric. I have taken many things into account, and have settled on only charging for the cost of materials. For many of these samples my labor has been paid already, and I really want my quilts to find their forever homes. I am one of those maybe-not-so-strange-after-all people that tends to personify their art, and I know that each quilt has its perfect home, and have been ready to find them for a while. I have a hard time letting go.
I started off small in one of my Facebook groups, and I am feeling ready to start the quilt adoptions! I know that my own mental health and creativity is tied in with my stash of fabrics and quilts, and the sheer number has gotten overwhelming, to the point that I feel it affecting my sewing.
Thank you to everyone who has been following along and supporting me over the years. I am excited to me moving forward and making room for new quilts.
That’s right! All of my patterns will now be available as a PDF download.
Additionally, the Kaleidoscope pattern now has optional PDF templates and foundations to download. The kaleidoscope templates are quite large, and having them enlarged is a bit of a hassle. That’s not what I want for my patterns at all! So, so address the enlargement issues, the paper version of the pattern will have the option to download the templates in larger format paper to print at home. For those who have already purchased the pattern, I will add the download option to your order.
If you purchased from me at Heritage Festival of Quilts, please contact me directly.
Thank you everyone for your support. I have some new patterns coming this month that I cannot wait to share with you!
The next collection with Tula Pink is called Tiny Beasts, with a new selection of dots and stripes, also of the tiny variety. I really love the collection; not only are the prints excellent on their own, they can also be used like a blender print. The tiny dots and stripes round out the main prints, and of course solids are a quilters best freind!
First is Lend a Paw. This was such a fun quilt to design, I love making gradients and rainbows. the pieces are small, but the quilt is big, finishing up at 91″ x 91″! You’ll have no trouble fussy cutting this one if you want to, even though the cut pieces are smaller you’ll still get the full print in the pieces. I used my favorite print, the trash pandas, as a background feature. You could switch it up with whatever you wanted, from the ladybugs to solids. I used the tiny stripes/dots to complete the rainbow gradient.
Lend a Paw, 91″ x 91″, designed by Stacey Day
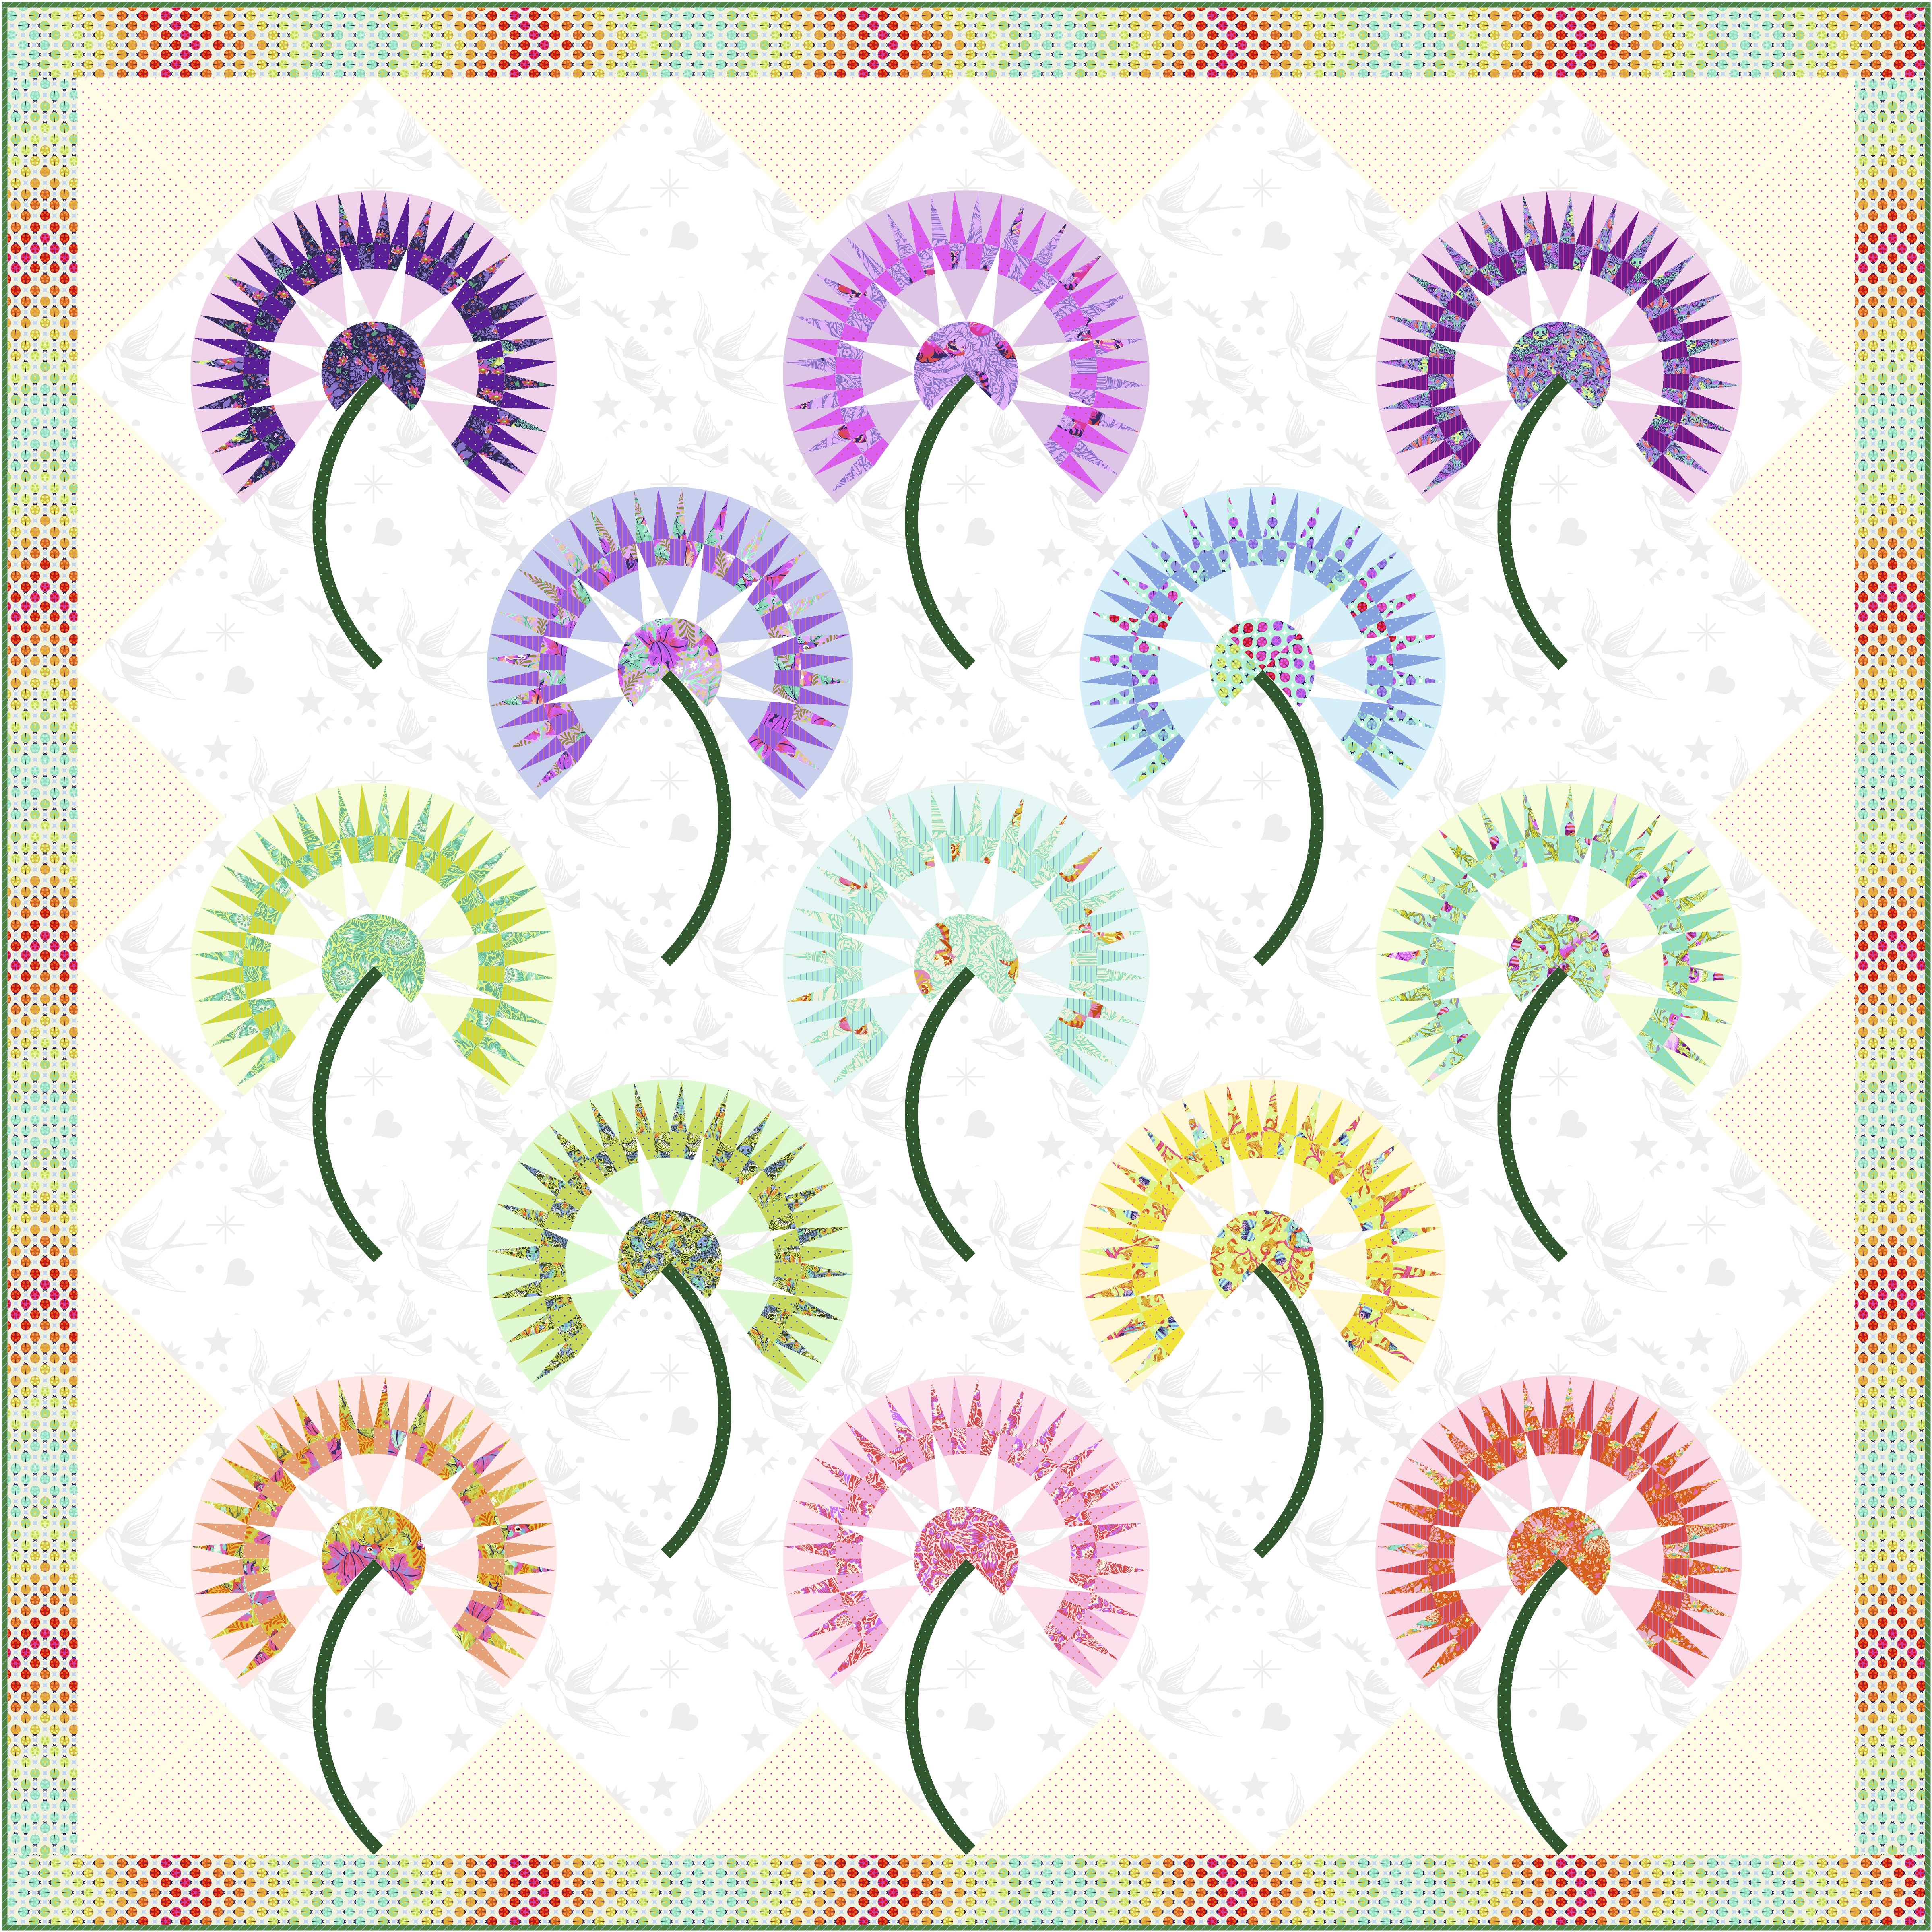
The next quilt is a more advanced quilt. I loved the hedgehog print, I thought it was so creative and clever and cute. Chatting with Tula about it led to an idea of dandelion fluff, which evolved into Just Dandy. This is a foundation paper pieced quilt with some bias tape applique. It is not for the faint of heart. The end result is spectacular. Its already popping up on Instagram in progress or completed, which makes my quilty heart so happy.
Just Dandy, 82″ x 82″, designed by Stacey Day
The final quilt I came up with is called Mini Menagerie. I wanted a large central block that would feature as much of the tiny print as possible. This is regular piecing, no special techniques required! I ended up hand drawing this one to make sure the the pieces all fit together as intended. it reminds me of a sunburst. I think this block will make an appearance again in the future. I want to color it for the upcoming Moon Garden collection, it would feature those large prints really well.
The Daydreamer Collection by Tula Pink has to be one of my favorite fabric lines to date. So much so, that I am still making quilts with it! I just adore the flamingos, the ombre prints, the tiny fruits, the jaguars, the butterflies…. it makes me want to travel where there are sunny beaches and clear ocean water. The collection also saw the release of 22 new solids, Unicorn Poop and Dragons Breath. Most of the quilts have the complimentary solids included somewhere in the design. They do an amazing job of adding resting spots for the eyes, or adding to the rainbow effect for each quilt.
I had a field day designing quilts to showcase Daydreamer.
First up is my personal favorite, Imagination. This is an advanced foundation paper pieced quilt. It has a LOT of pieces and needs a LOT of patience, but the end result is 1000% worth it! just take a look at #tulapinkdaydreamer and #imaginationquilt on Instagram to see how people are just killin’ it with this quilt! @quilting_elissa was the first person to finish hers, and she showcases the quilt to its absolute best. Go check her out!
The Imagination Quilt, 84″ x 84″, designed by Stacey Day
Next up is another personal favorite, Hibiscus. I really wanted to make a floral inspired quilt, one that would showcase the gorgeous border print and make best use of the ombre jaguars. Again, this is a more advanced quilt because of the number of pieces, and the color shift between the blocks. There are no tricky seams or templates needed with this one, just patience and determination. The border has mitred corners, but if you aren’t up for them, traditional straight borders will also go nicely. If you are going to change it, I recommend making the side borders first, then measuring and sewing the top and bottom. Organization is key with this quilt. The Hibiscus is the perfect size for the guest bedroom or the vacation house.
The Hibiscus Quilt, 70″ x 81″, designed by Stacey Day
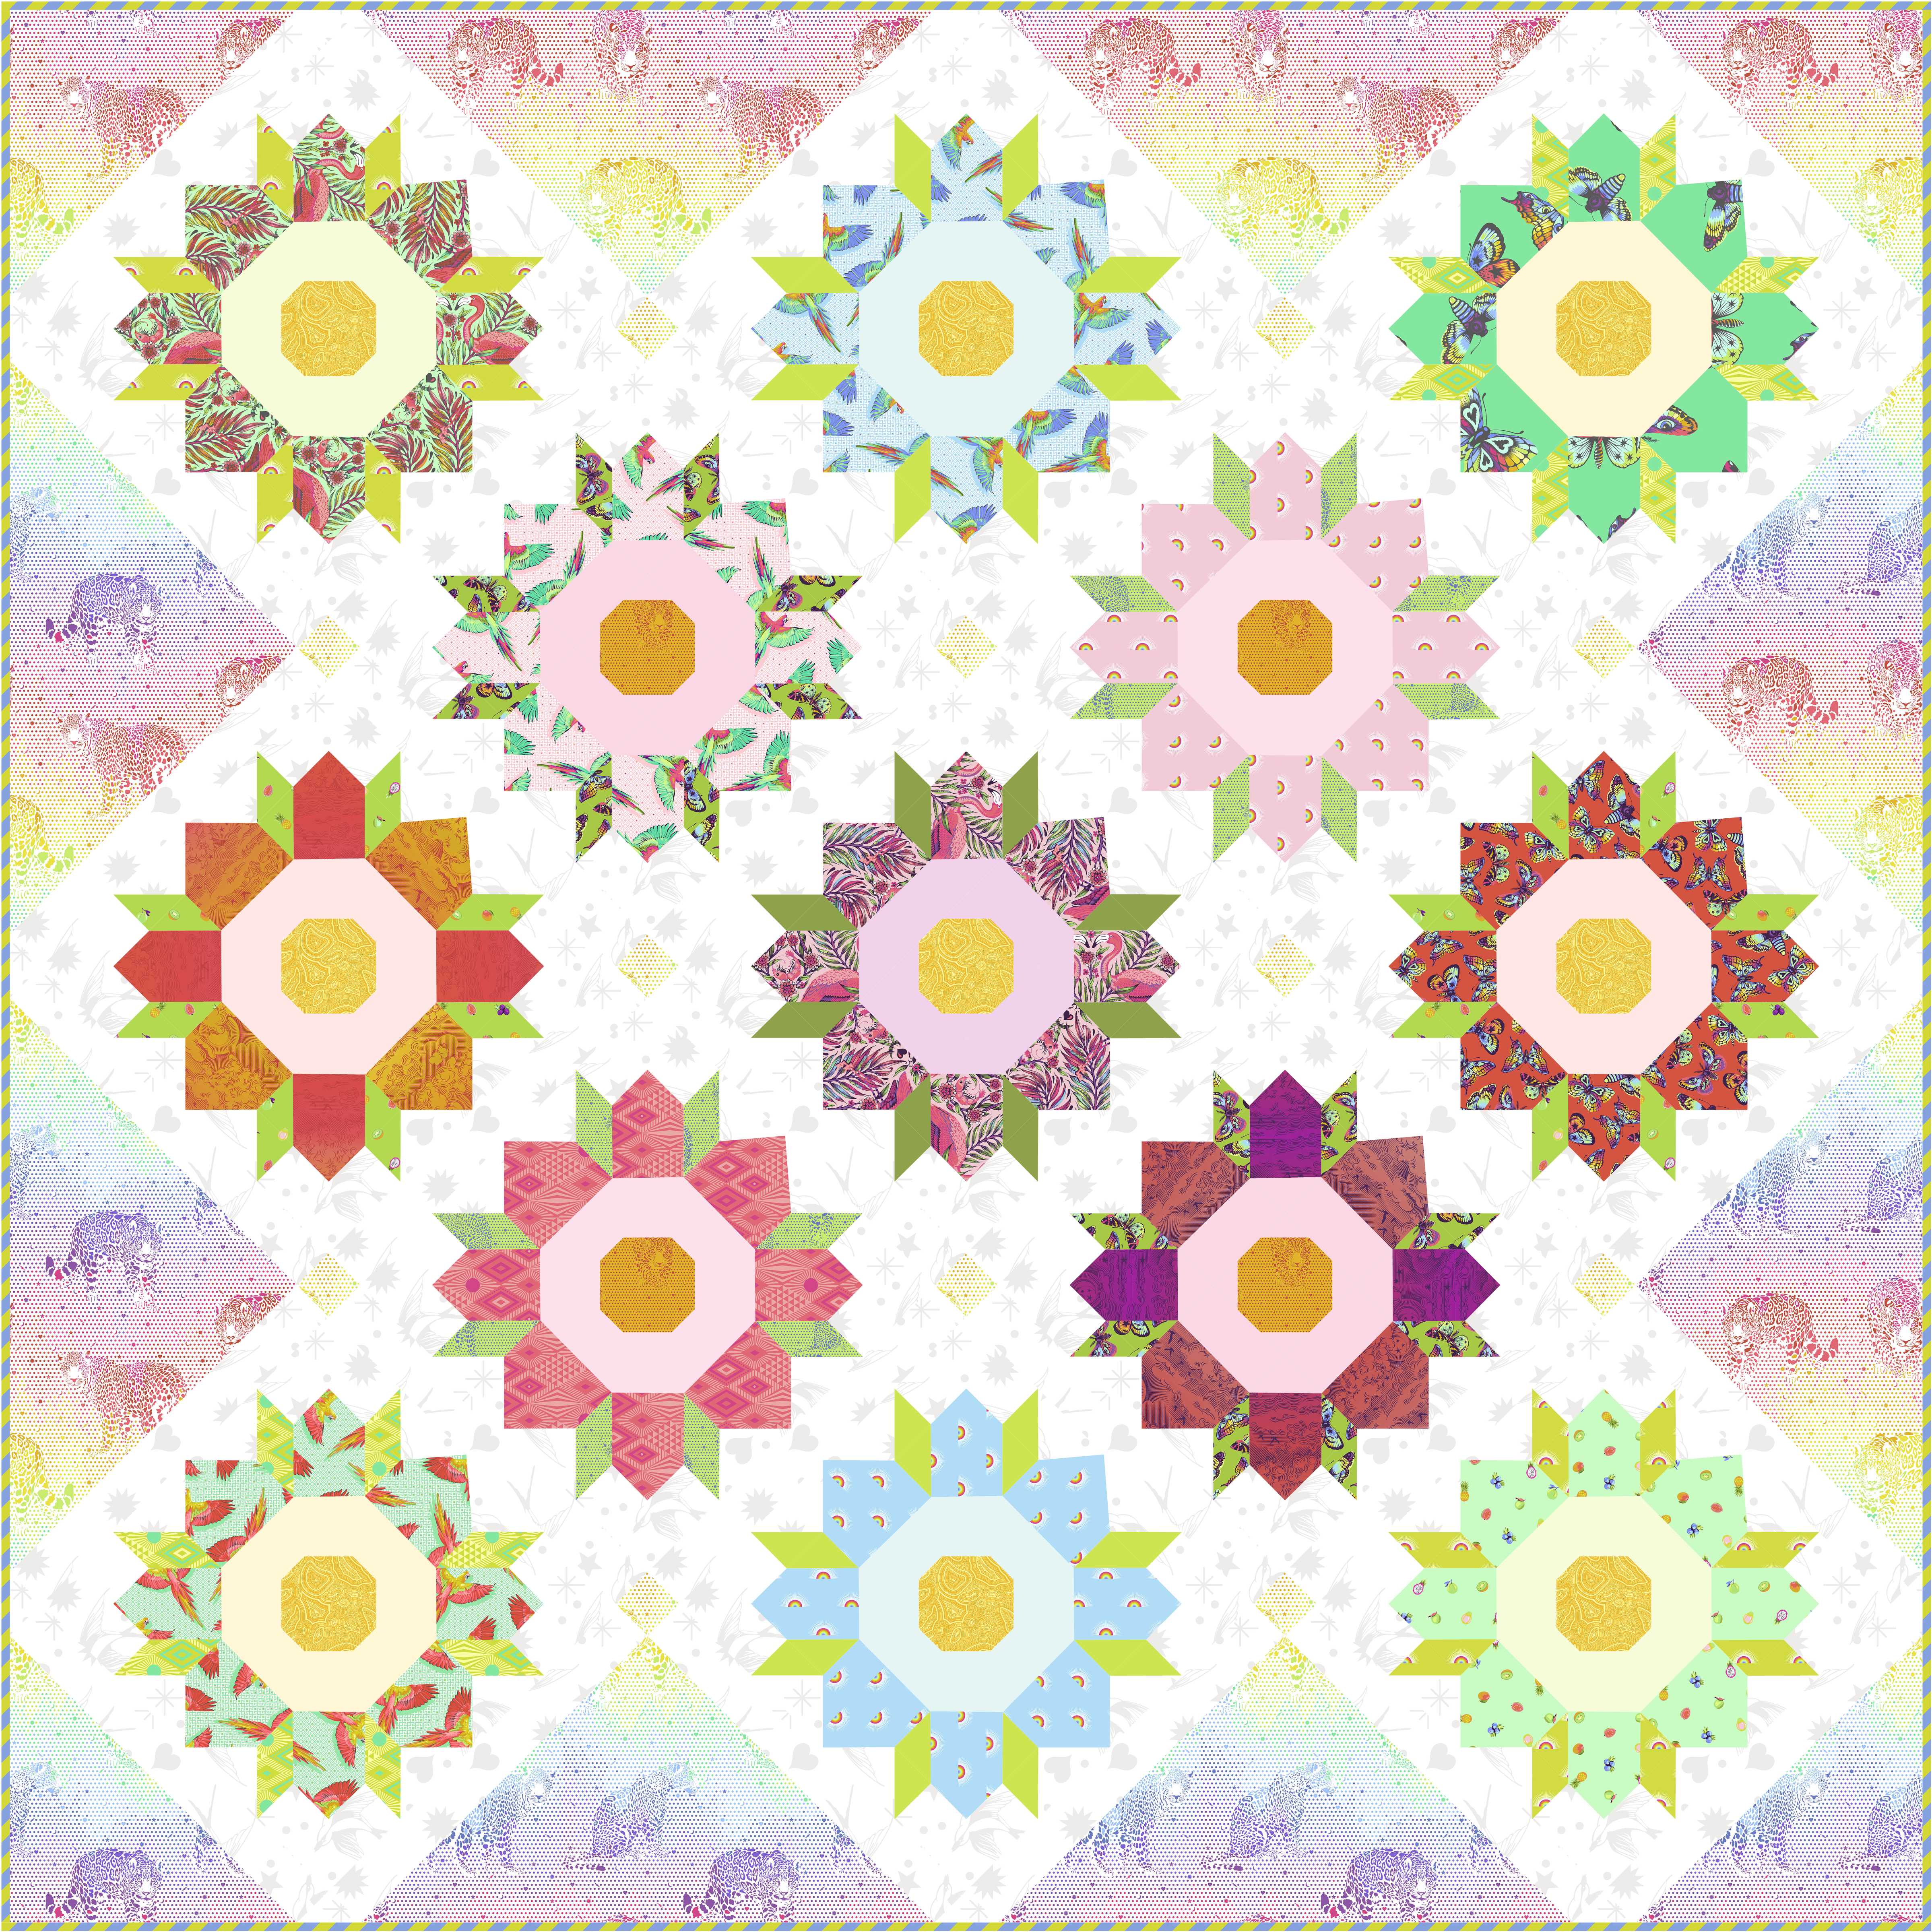
Then we move on to another floral inspired quilt, Chrysanthemum. I was really on a floral kick with this one (its the tropics, need all the flowers!) I would call this one intermediate, but a confident beginner could definitely make it. The units of each block are all stitch-and-flip. All straight seams and no templates. I really wanted to make something that looked complex but was easy to put together, and show off that rainbow jaguar print.
The Chrysanthemum Quilt, 85″ x 85″, designed by Stacey Day
The next quilt, Tumble, has big open blocks to show off the print. Tula had a hand in the final design of this one, she has such an amazing sense of color and design. She rearranged some of the prints and added the gradient sashing, and elevated the original design to its final form. Tumble is confident beginner friendly, with some fussy cutting, and simple to put together. You need to pay attention to the solid placements in the sashes when making it.
The Tumble Quilt, 71″ x 81″, designed by Stacey Day and Tula Pink
Daydreamer also offers some factory cut quilt kits. I am thrilled that one of my earlier quilts made a comeback. This quilt has been asked after for years, it was a kit exclusive with the Tabby Road collection. Tula recolored it for Daydreamer and is again available as a kit exclusive. Say hello to Sunshine Daydream! There is a lot of fussy cutting with this one, for each individual butterfly and the spikes. Paired with the Manatee solid from Freespirit, this is a must-make! Kits are available through your local quilt shop.
The Sunshine Daydream Quilt Kit, 70″ x 70″, designed by Stacey Day and Tula Pink
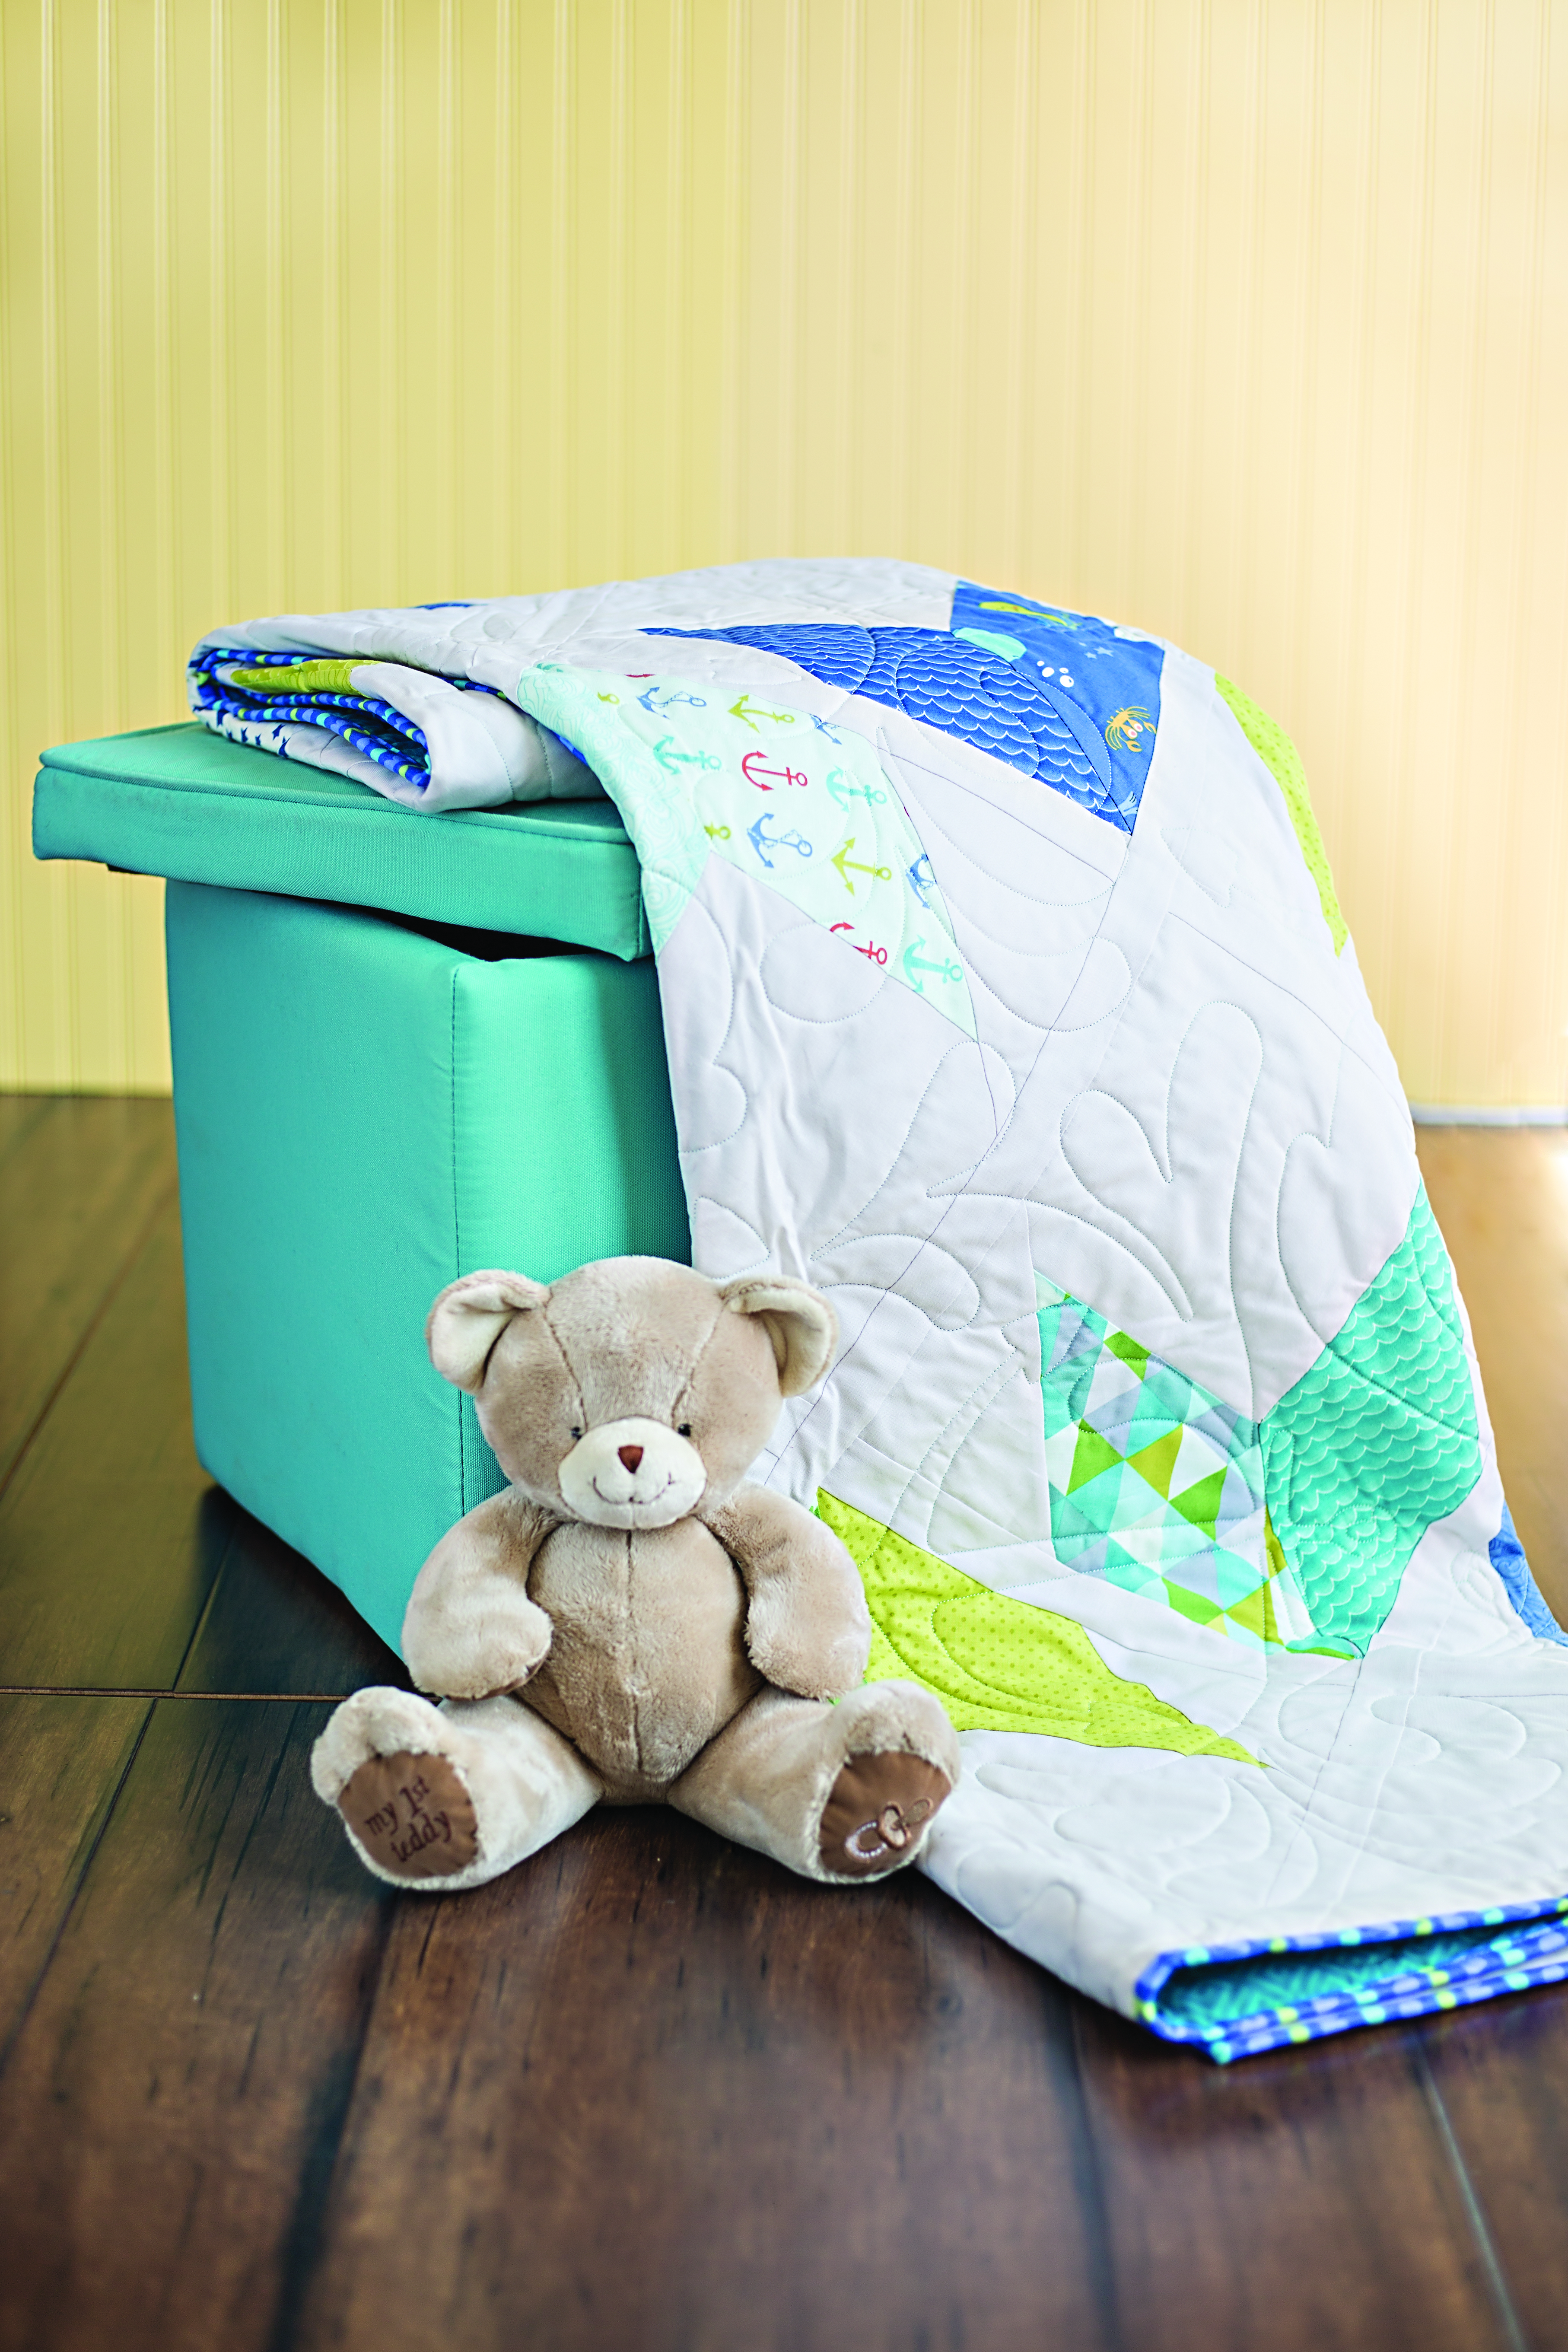
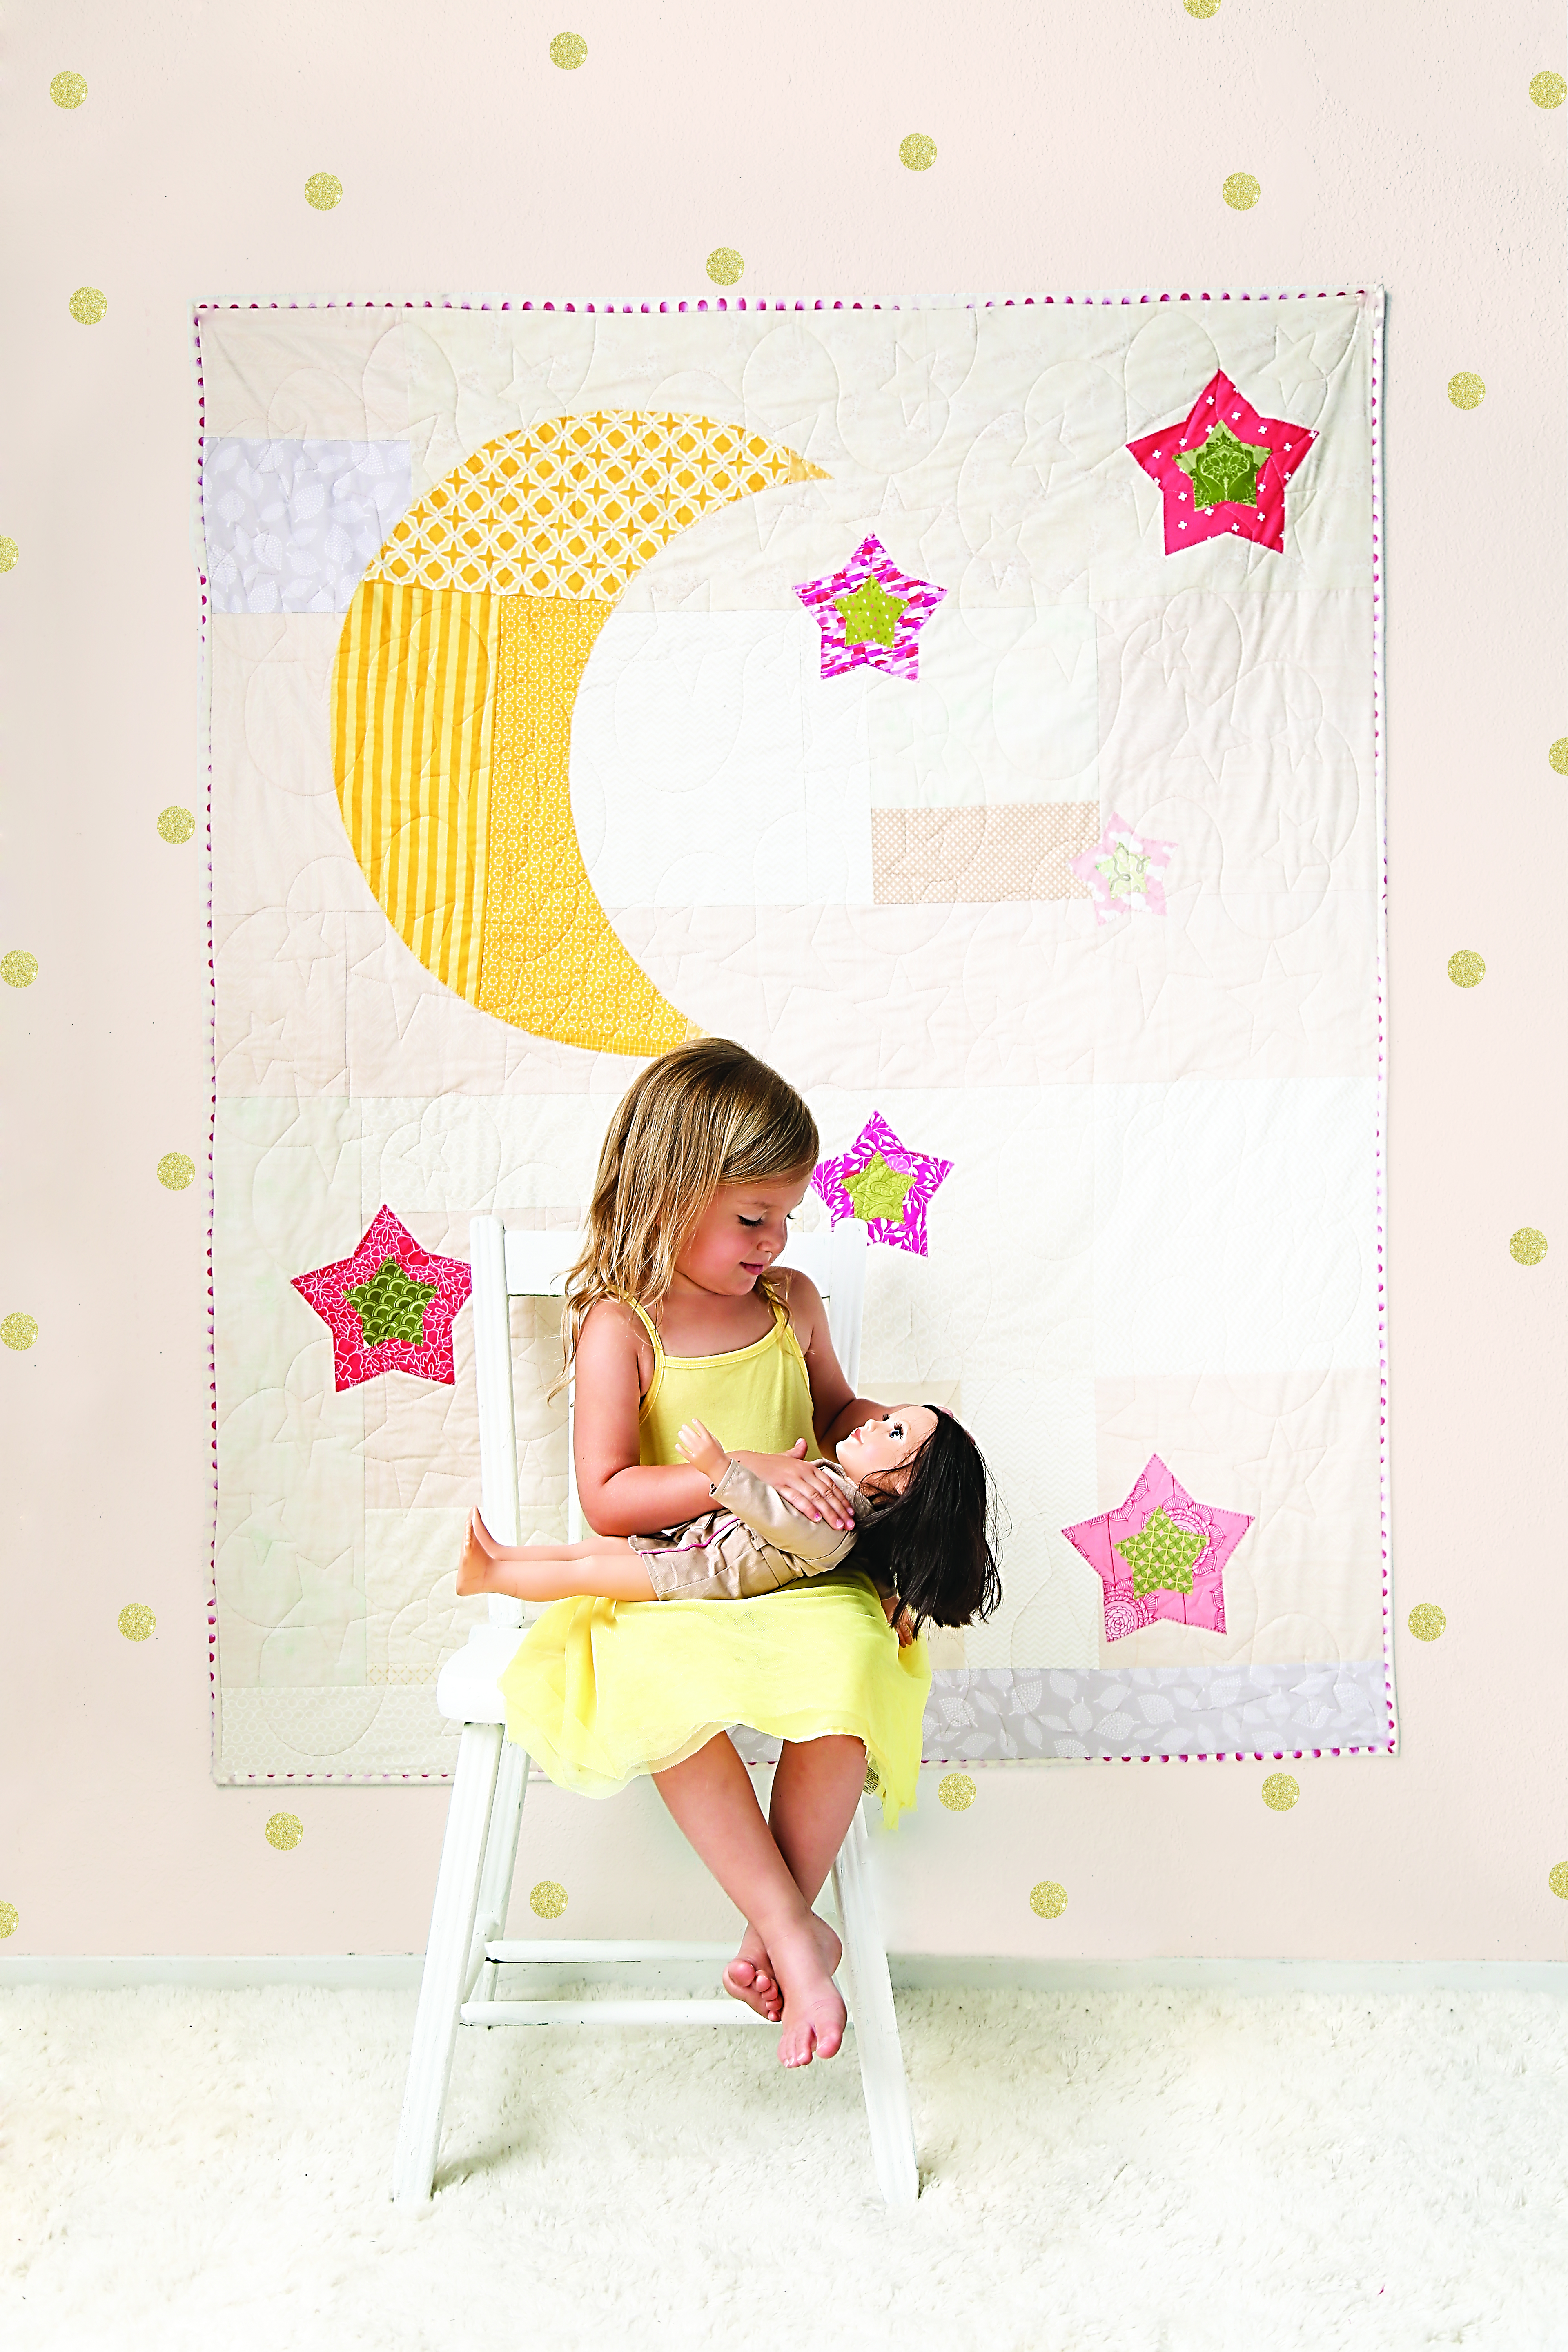
I also did up a couple fun kids quilts with Daydreamer and Unicorn Poop (my kids absolutely love that name). The duo were published though AQ Magazine, and I’m super happy how they turned out. The first is a baby quilt, made using charm squares. Perfect for the leftovers from your larger project.
46″ x 51″ Sweet Dreams Baby Quilt by Stacey Day
The second is a cute kids quilt with a 3D element-the bottom of each scoop of ice cream is a lift-the-flap style element. The cones are paper pieced, and the cone domes are applique. I used a different decorative stitch for the top of each. For some extra fun factor I took little bites out of some of the cones.
Month of Sundaes, 64″ x 71″, Designed and quilted by Stacey Day
I still have one more Daydreamer quilt in the works, but its a secret for now. I am really excited for its release, coming early next year!
That’s all for now, I still have lots to talk about.
Welcome quilters and cat lovers all, to my stop on the Purr-fect Patchwork blog tour! My amazing quilting friend Pamela Jane Morgan, or @pammiejane for my Instagram peeps, has written a paws-itively purr-fect book that celebrates all things cats and quilts and creativity, not to mention some great puns, which we all know I am a huge fan of!
The project I have chosen to feature also happens to be the cover quilt for the book. Say meow to Laser Cats!!!
PEW! PEW! PEW!
Named for the infamous sketch on a very popular late night live television show, this quilt is a super fun and easy make. Need to whip something up for a baby shower or birthday? Laser Cats is your quilt!
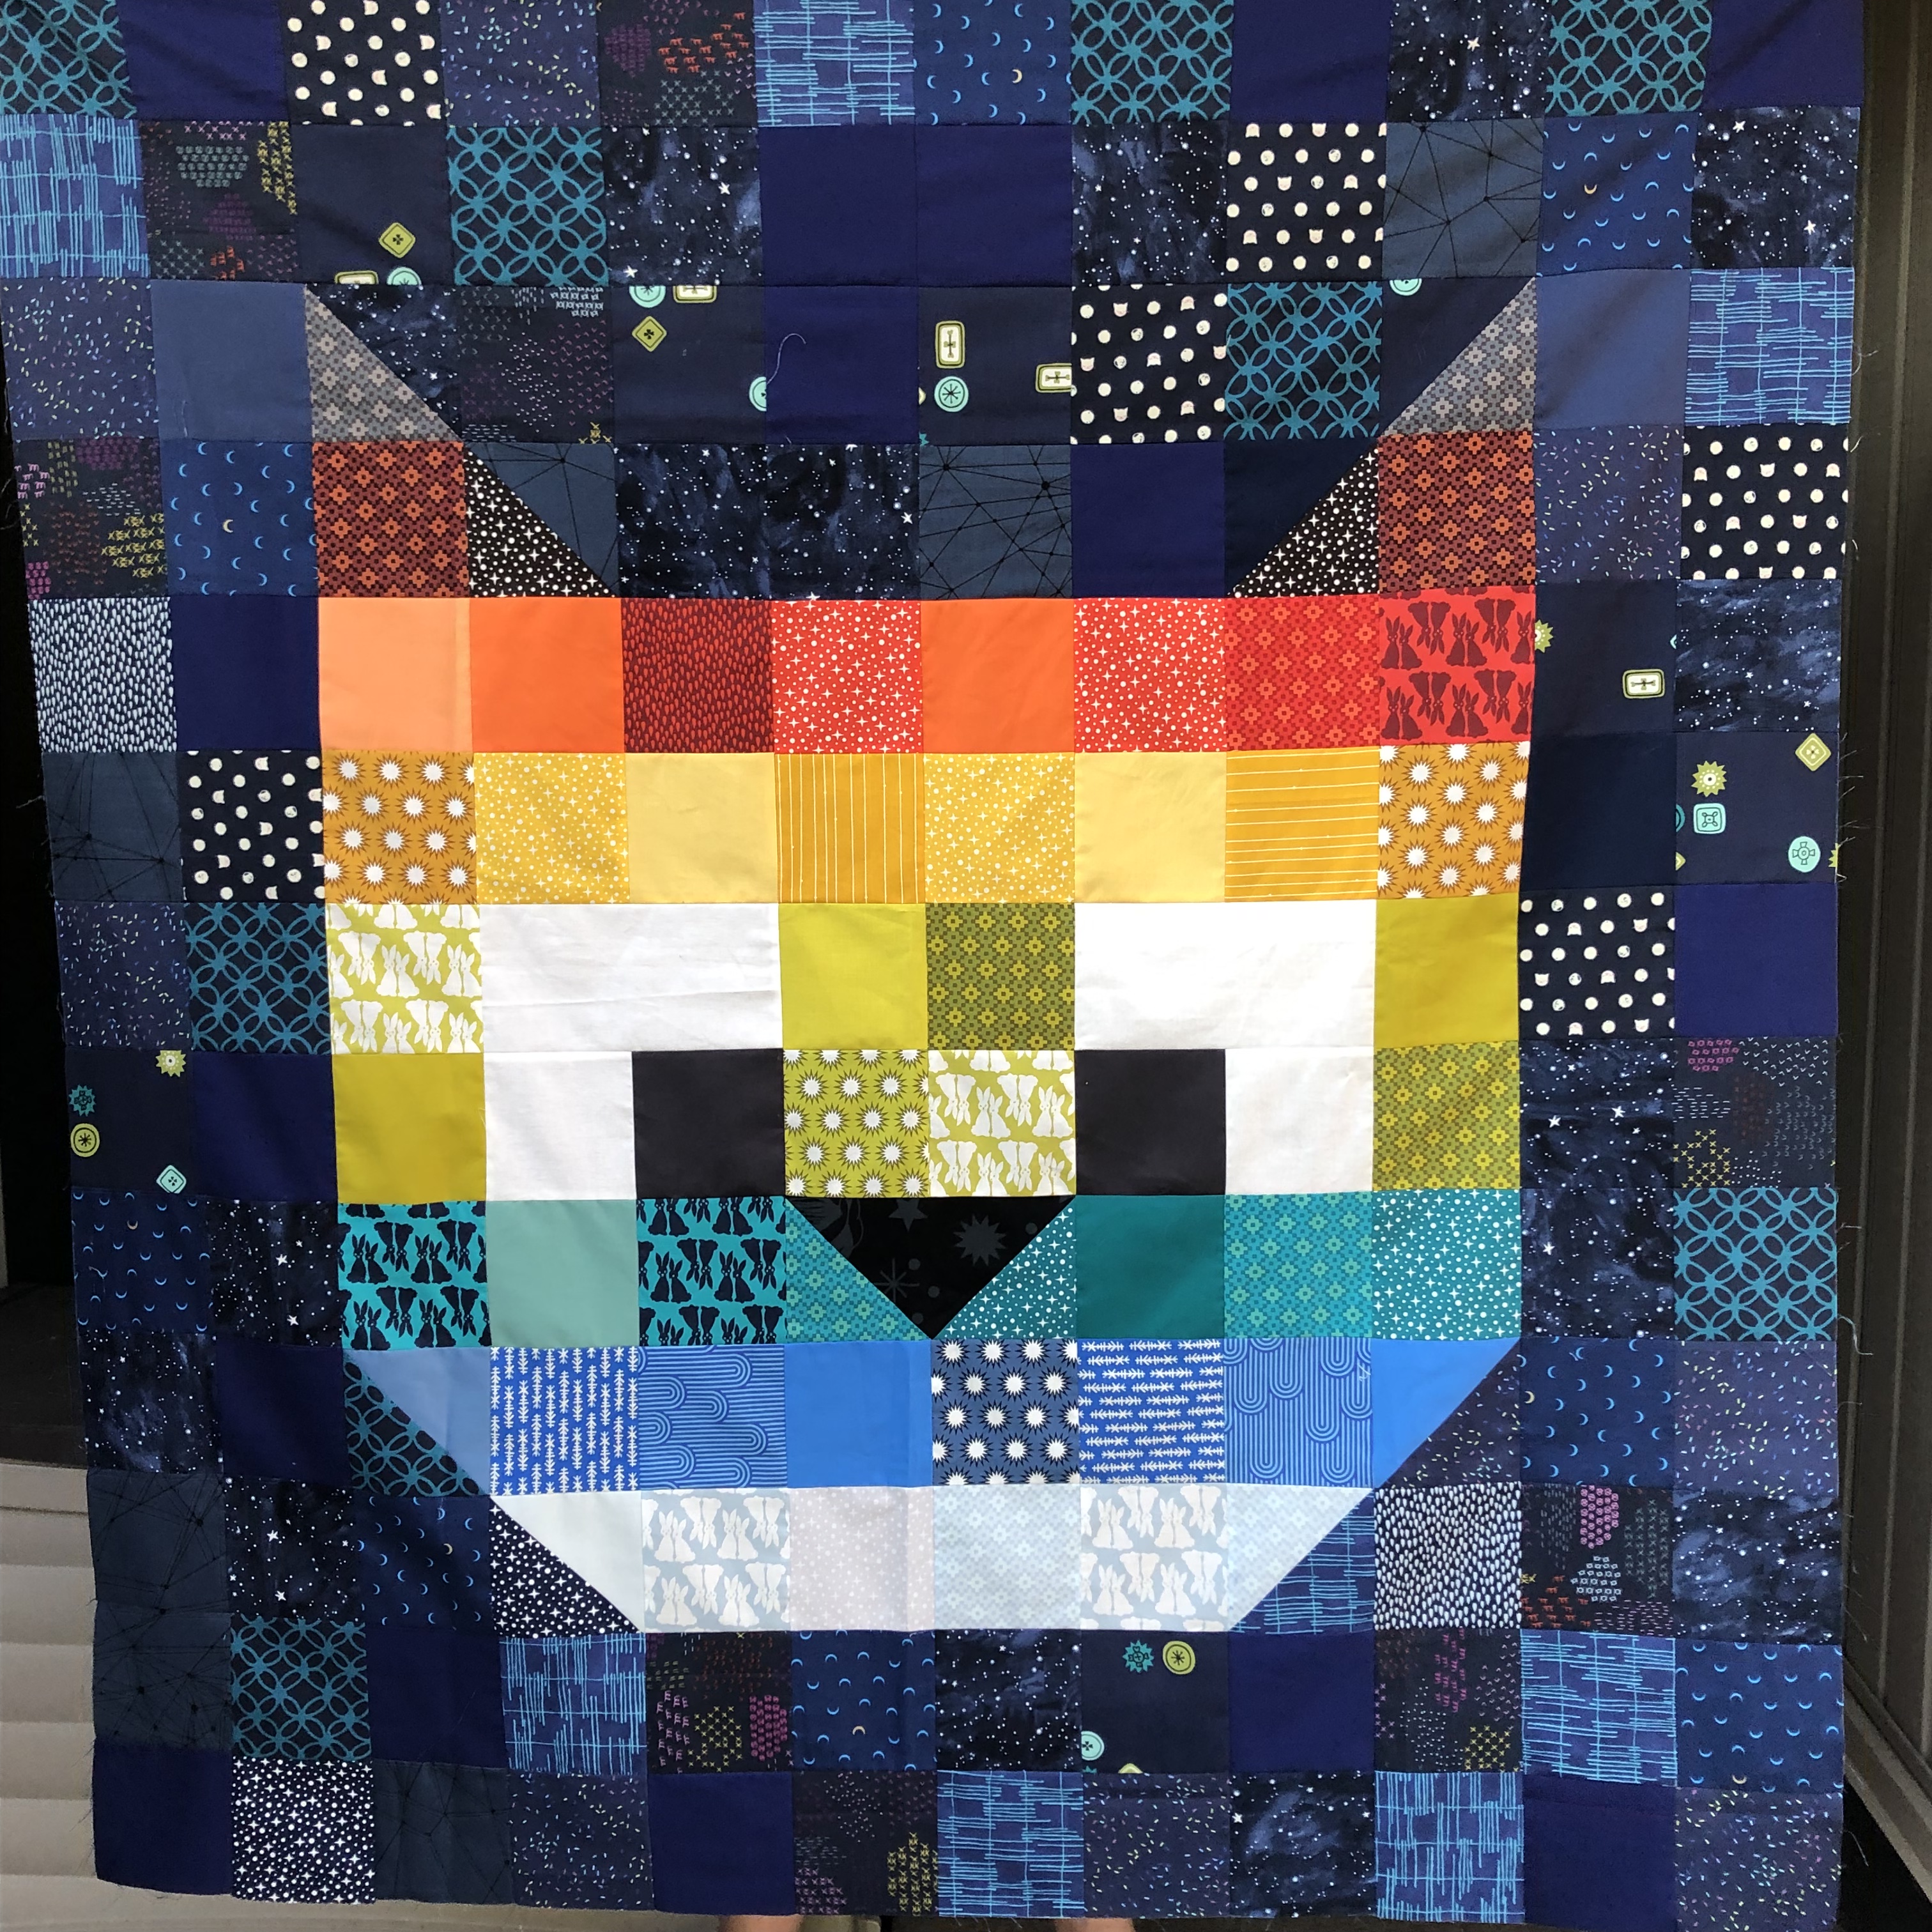
My quilt is going to be finished and grace the bed of my tiniest human. He had a lot of fun picking the fabrics, and settles on a pair of charm packs I had laying around. My biggest challenge making the quilt was finding enough navy blue prints for the background. apparently I need to go fabric shopping (oh no!). I LOVE how the quilt turned out. I was a little worried that the blues wouldn’t show up against the navy, but kiddo was adamant that they all be used, and it worked out.
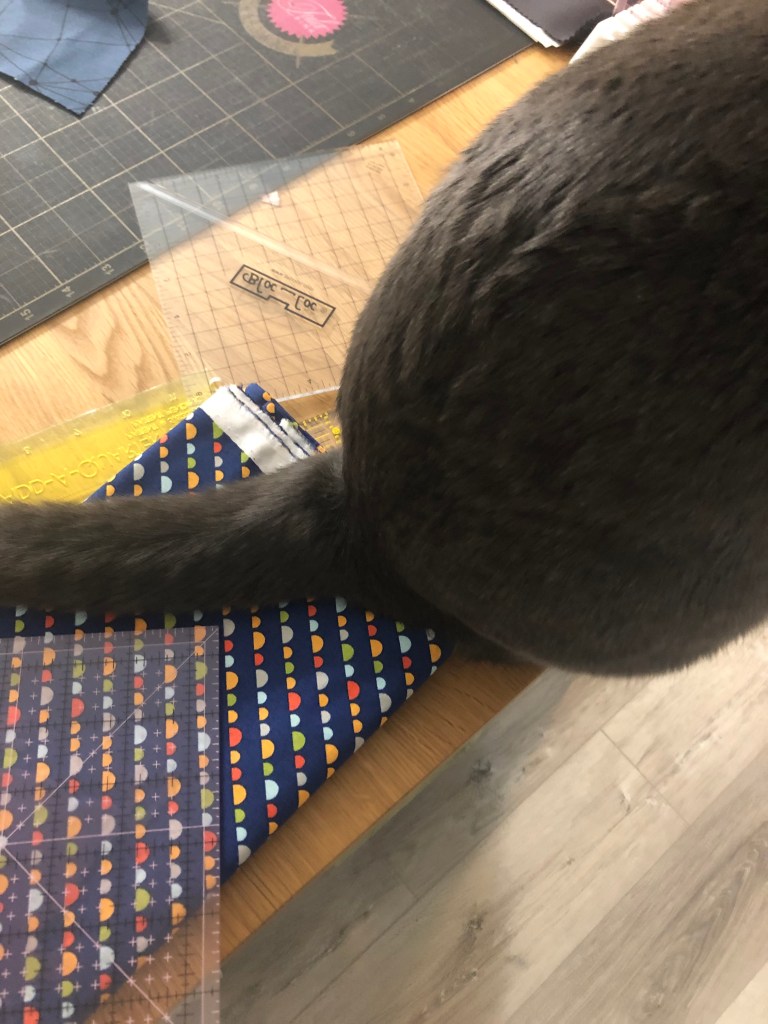
My helper cat supervised while I was cutting and sewing. She approves this book whole-heartedly.
She also put her seal of approval on the binding…..thanks Eevee…..
And on the finished quilt. I don’t know how she does it, but she managed to find the folded quilt top and sleep on it in the 5 seconds I put it down before pictures…*sigh*
See that little face? She knows exactly what she’s doing! As quilters, we know if the cat approves then the quilt is a good one.
I need to be honest, it was really, really hard to pick just one project from the book. Pam has done an amazing job curating a variety of sewing projects to appeal to every sewist. From bags to pillows to quilts, you are sure to find your next favorite project. I already have a list going of what I am going to make, and for who. Christmas gift giving is mostly taken care of at this point, and all from Pam’s book!
so, in order to celebrate and share teh amazing projects with you, I am giving away an ECopy of Purr-Fect Patchwork!
The giveaway is open to every one!
2 WAYS TO WIN
To win an e-copy of Purr-Fect Patchwork, please leave a comment below telling me a funny story about your cat (or other pet if you don’t have cats) Winners will be announced and contacted after the end of the Blog Tour, by August 30th. WINNER!! number 20, congratulations!Jiff289!!
For a chance to win a grand prize bundle from Pamela Morgan you must visit each of the blog tour stops and comment. Pam has a grand prize bundle of goodies for one lucky winner, including her book and a bunch of sponsor goodies you won’t want to miss!
Want to buy your own copy of Purr-Fect Patchwork? Shop Here!
It inevitably ends up that, as I am submitting designs for new collections, that not all will make it into a free pattern. If it is a design that I really like, I will occasionally save it for future collections. Other times, I love it so much in its current form, that I SIMPLY CANNOT WAIT. That’s right, I said that in all caps. By now y’all know I am VERY passionate about my quilting.
For those must-make projects, I like to submit them as patterns for AQ Magazine. I have been working with the AQ team for many years now, and the experience has been so positive and fulfilling that I will continue to work with and support the company. My quilts have been published in over a dozen issues, online as web exclusives, used as member exclusive rewards, and turned into kits. The team at AQ are friendly, thoughtful, and just overall fun and wonderful to work with.
You can find these quilts in the paper back-issues or online if you are a member. I highly recommend and AQ membership. They keep all of the back issues online and can access them at any time, as well as receiving the newest issues as they release.
The January 2020 featured a quilt I made using the Tula Pink collection Monkey Wrench. It was a super fun and bright collection that featured monkeys, cockatiels, and frogs (FROGS!!!!) Monkey’s Lunch is super quick and easy to put together. The photographer to AQ Magazine went on a roadtrip for this shot, and I love it!
Monkey’s Lunch – January 2020 Photo courtesy of AQ Magazine
July 2020 featured my quilt Amethyst. This piece was made for the 2014 Hoffman Challenge and was quilted by Joan Nicholson of Maple Leaf Quilters. the quilt finishes 40″ x 40″, a perfect accent wall size. It was inspired by a piece of amethyst, which got me thinking about crystalline structures and how they come together, and this piece was the result.
Amethyst – July 2020 Photo courtesy of AQ Magazine
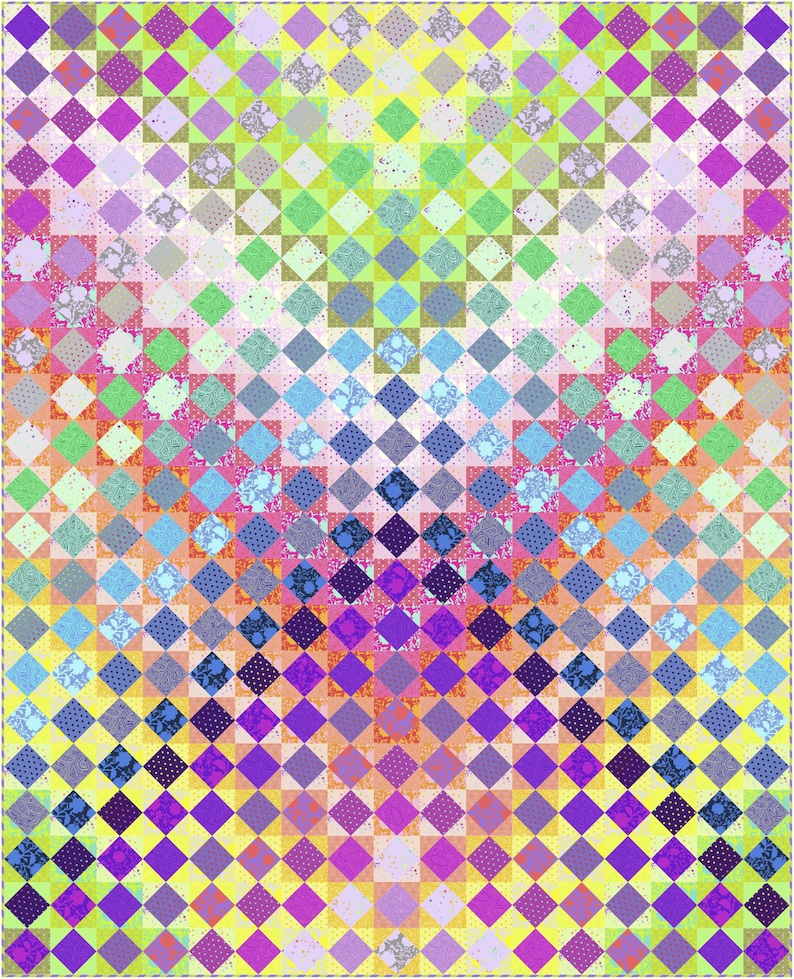
In the November 2020 issue, you will find one of my absolute favorite quilts of that year; Kaleidoscope. This design has been floating around in my maybe folder for a while now, and when Tula Pink released True colors, I knew I finally found the perfect fabric match for this design. Kaleidoscope is foundation paper pieced and template pieced. It is definitely an advanced project, and oh so stunning! I had it send off and custom quilted by Teresa Silva of Quilting Is My Bliss. She did an absolute stellar job and I couldn’t be happier with the results. Teresa’s quilting is well worth the cross-border shipping.
Kaliedoscope – November 2020 Photo courtesy of AQ Magazine
I kicked off 2021 with Family Hearts. When I came up with the design, I had been thinking a lot about family, and what it means. Now more than ever people are recognizing the importance of family. And Family means different things to different people. Some have the family they were born into, and for others family are the people you have chosen and have chosen you, family through love. I am so fortunate to have both in my life; my family through blood and my family through love. I don’t know where I would be without those people, and the support and love they provide me, and accept from me in return. I wanted to make a non-linear family tree to represent the connections I have with my people, and thought that hearts were the perfect way to do it. I chose a rainbow spectrum of colors, using a combination of Handwork and Sunprints by Alison Glass for the fabrics.
Family Hearts – January 2021 Photo courtesy of AQ Magazine
Starlines came next, and was the featured quilt for the cover of the March 2021 issue! This quilt was a real departure from my usual colorful quilts, and I am so happy with it. Starlines features Linework by Tula Pink, with just a spot of bright color to liven it up. I love the green floral from True Colors and will happily use it in everything I can. I designed this on a very cold and snowy day, and in my minds eye the quilt is a serene winter landscape, with the hope of spring just around the corner. I fussy cut the different motifs from the Linework fabrics, and groups the pops of color from the fabrics together, with the warm spectrum on the left and the cool spectrum on the right. I think my favorite print from the collection is the Lemur.
Starlines – March 2021 Cover Photo courtesy of AQ Magazine
The next quilt released only last month is another personal favorite, Delphinium. This is another design I have been playing with on and off for a while. I have a practice quilt, much smaller and in completely different colors, that I have been slowly working on, but the choices didn’t feel quite right. When I saw the Norma Rose collection by Natalie Barnes, I KNEW it was the perfect collection for Delphinium. Vibrant colors and subtle textures combined with the Ruby and Bee solids from Windham Fabrics, everything about this quilt fells bright and alive. The quilting was a labor of love, and completed by my good friend and expert quilter, Miriam March of Whispering Pines. We spent the better part of the day choosing the quilting and layout placement for each motif. This quilt will be the centerpiece quilt in the living room of my new home (yep, moving once again, and for the final time!)
Delphinium – May 2021 Photo courtesy of AQ Magazine
There are more quilts slated to release in later issues this year, and well into 2022! I cannot wait to show you what I have come up with!
Today I thought I would dive right in to one of the most popular fabric designers I have the pleasure of working with; Tula Pink!
Every 6 months or so, Tula releases a new collection with FreeSpirit Fabrics, and I have so much fun taking those fabrics and turning them into quilts for you to enjoy. The entire process takes about a week per pattern, between designing, tweaking, writing, illustrating and technical editing. Myself and the tech editor at FreeSpirit do our absolute best to make sure you get a pattern that is clear, easy to read, and straightforward to make. I get to really branch out with the skill level on these ones; I aim to have a beginner friendly pattern and an advanced level pattern. The advanced level assume prior knowledge and experience in things like paper piecing, fussy cutting, templates, applique, ect. The beginner level patterns I try to make straightforward, and introduce at least one new skill for quilters to develop and start gaining confidence.
As I have about 3 releases of quilts to cover, I will take a day for each collection. I am prolific when it comes to the fabrics and designers I love 😉
Today we will dive into the glorious explosion of Tula Pink True Colors.
The release of Tula Pink’s new True Colors collection made all my wildest rainbow dreams come true. With a full spectrum of 42 hues to chose from, it is entirely possible that I may have gone overboard when designing for this one. I enjoyed every second of it, and poured so much of my love of all things color and fabric and texture into it, that True Colors will always be one of my favorite lines. The best part? It is a supporting line, so will be around for at least the next 2 years!
The first quilt for the True Colors collection was finalized while I was on my quilting cruise; Woven Radiance. I wanted to utilize every single print in the collection in a non-traditional rainbow layout. I took inspiration from my previously designed Radiance quilt. This quilts name is a nod to the previous. I assure you, the two are nothing alike and I may be the only person to see the inspiration on first glance.
The next offering for True Colors left me undecided on a background. I wasn’t the only one torn between colorways, so we went with both! A simple substitution of background hue breathes a different life into this quilt, which I called Stardust. The lighter version uses the fairy dust print from True Colors in Whisper for the background. The dark version used the Tula Pink Solid Diva. I may reimagine these with the new Tula Pink Solids, I think Legendary would make this quilt…..wait for it……LEGENDARY! haha!! See what I did there? yes? Okay! moving on….
In my mind, this quilt represents light in all it’s full prismatic glory, gently bathing the world in color as it rains from the stars.
I loved True Colors so much I needed to express it in quilt form. I also wanted a quilt that could possibly be made with a jelly roll. While the jelly roll aspect was a fail, the quilt itself was a WIN. I just can’t seem to make a quilt small enough to suit jelly rolls…….but that’s okay! More fabric for you to love!
Floating Hearts uses a combination of strip piecing and stitch and flip piecing. The best part is all the leftovers could be turned into a mini quilt or throw pillows if one was so inclined. And since I also can’t seem to do anything the easy way, the colors flow one into the next. My brain was a gooey pile of rainbow spaghetti after editing this one, but so totally worth it! The release of this pattern was delayed because of the background print. We had to wait until the announcement of the next collection before releasing this one, so it had been sitting in the ready folder for FOREVER. Okay, okay, not forever, but it really felt like it!
I don’t always remake my old patterns, but the next two quilts are updated colorings of my quilts for the previous true colors collection in 2016.
Confetti was first designed when Tule Pink All Stars released. The Stripes, Pom Poms, and Tula Pink Solids were meant to continue on into future collections, and I wanted a quilt to show off the supporting prints and carry them forward. I have an ongoing love affair with stars, and I’ll take any chance at creating one with fabric in different and exciting ways. I wrote Confetti as a beginner friendly quilt. The building blocks are HST. My whole vision was no two Confetti quilts would be the same. Cut the triangles, throw them in the air like confetti, then pick them up and start sewing them together at random. While I don’t usually encourage throwing your fabrics all over the place (who wants to recount squares or lose one behind the sofa) I do encourage letting go and grabbing at random to create the sections.
Each of Tula’s lines has an exclusive pattern that you can only get in the quilt kit released by FreeSpirit Fabrics. For True colors, my design was chosen for the kit! Solar Flare is an updated version of the original true colors quilt kit, Prism, that was Craftsy Exclusive. ALLLLLLLLL the way back in 2015. 2015!!!. I loved that quilt, and now I love it even more with the expansion of colors.
You can find the exclusive quilt kit at your local quilt shop or online.
Solar Flare Quilt Kit
This isn’t the last quilt in True Colors, but it is the last for today. The next True Colors quilts are spectacular, but both are part of different posts, and I cannot wait to introduce you to them!
As always, please tag me on Instagram when you make your quilts. I love to gush over other quilters makes from my designs!!
oops! Between everything happening around here I completely forgot to announce Team Timeless, and introduce my first tutorial with them!!
Team Timeless is a group of 4 designers chosen by Timeless Treasures. Each month, a new designer will showcase a Timeless Treasures collection and present a tutorial for it.
My month was May (again, oops!)
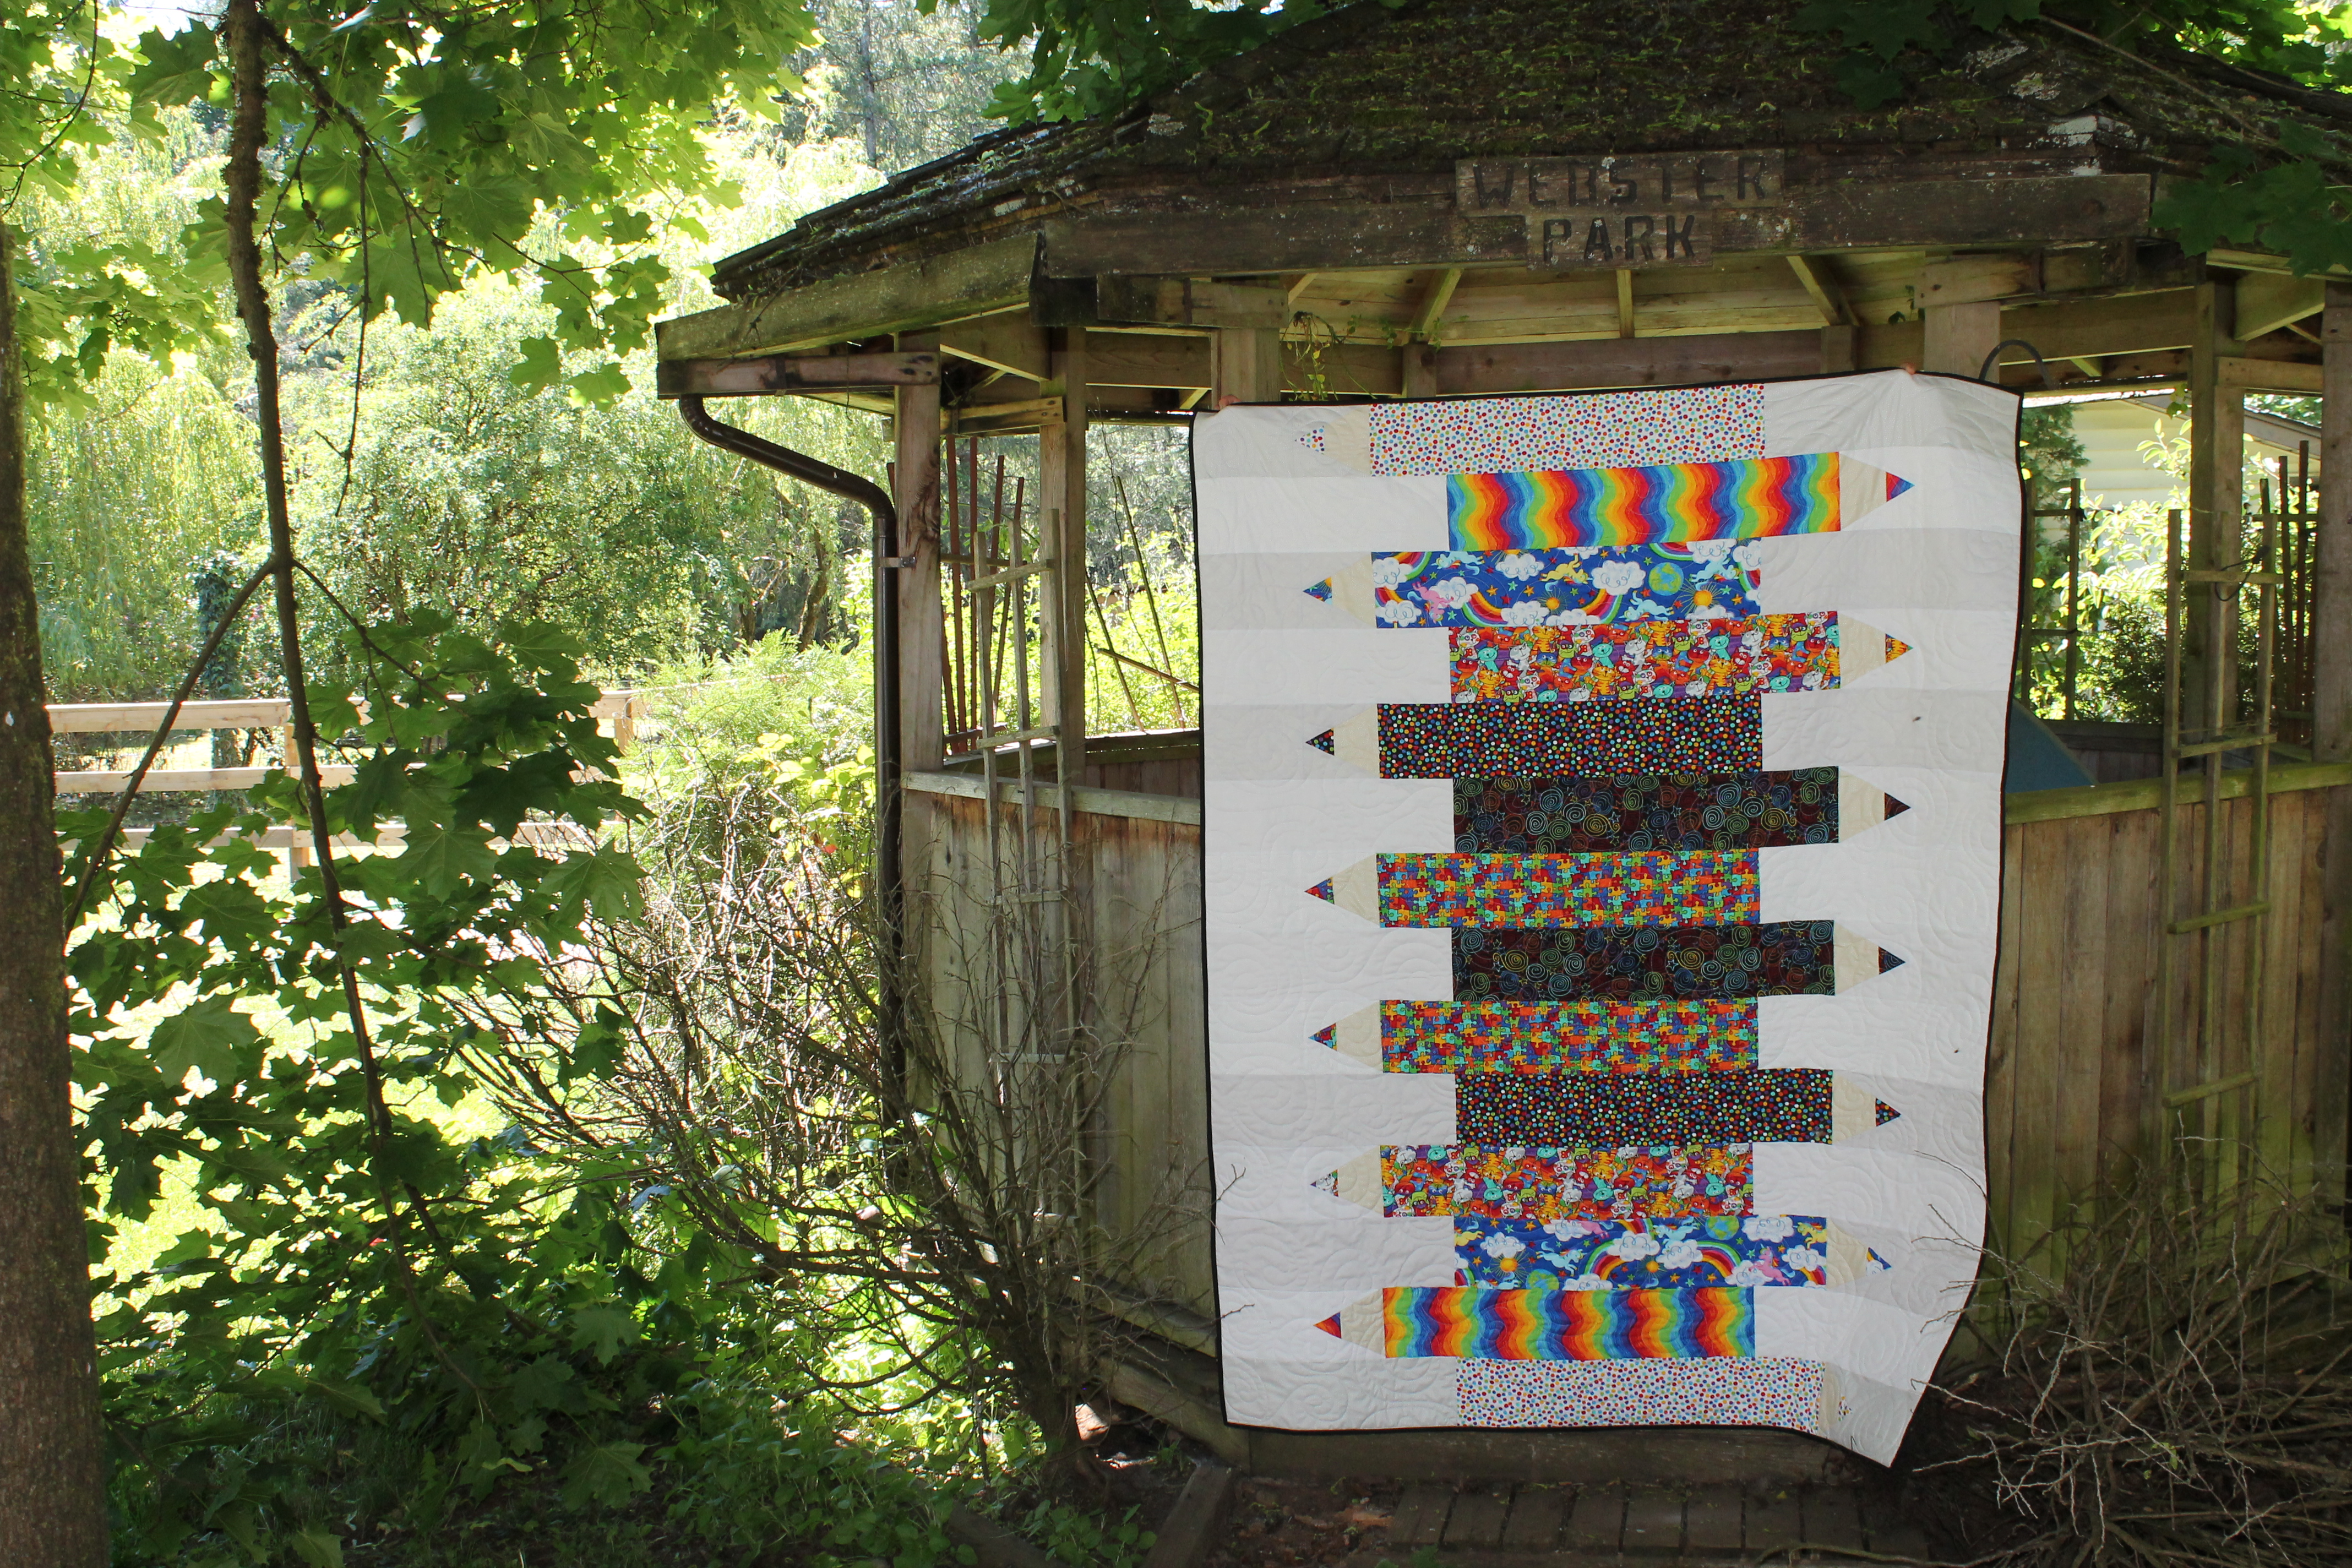
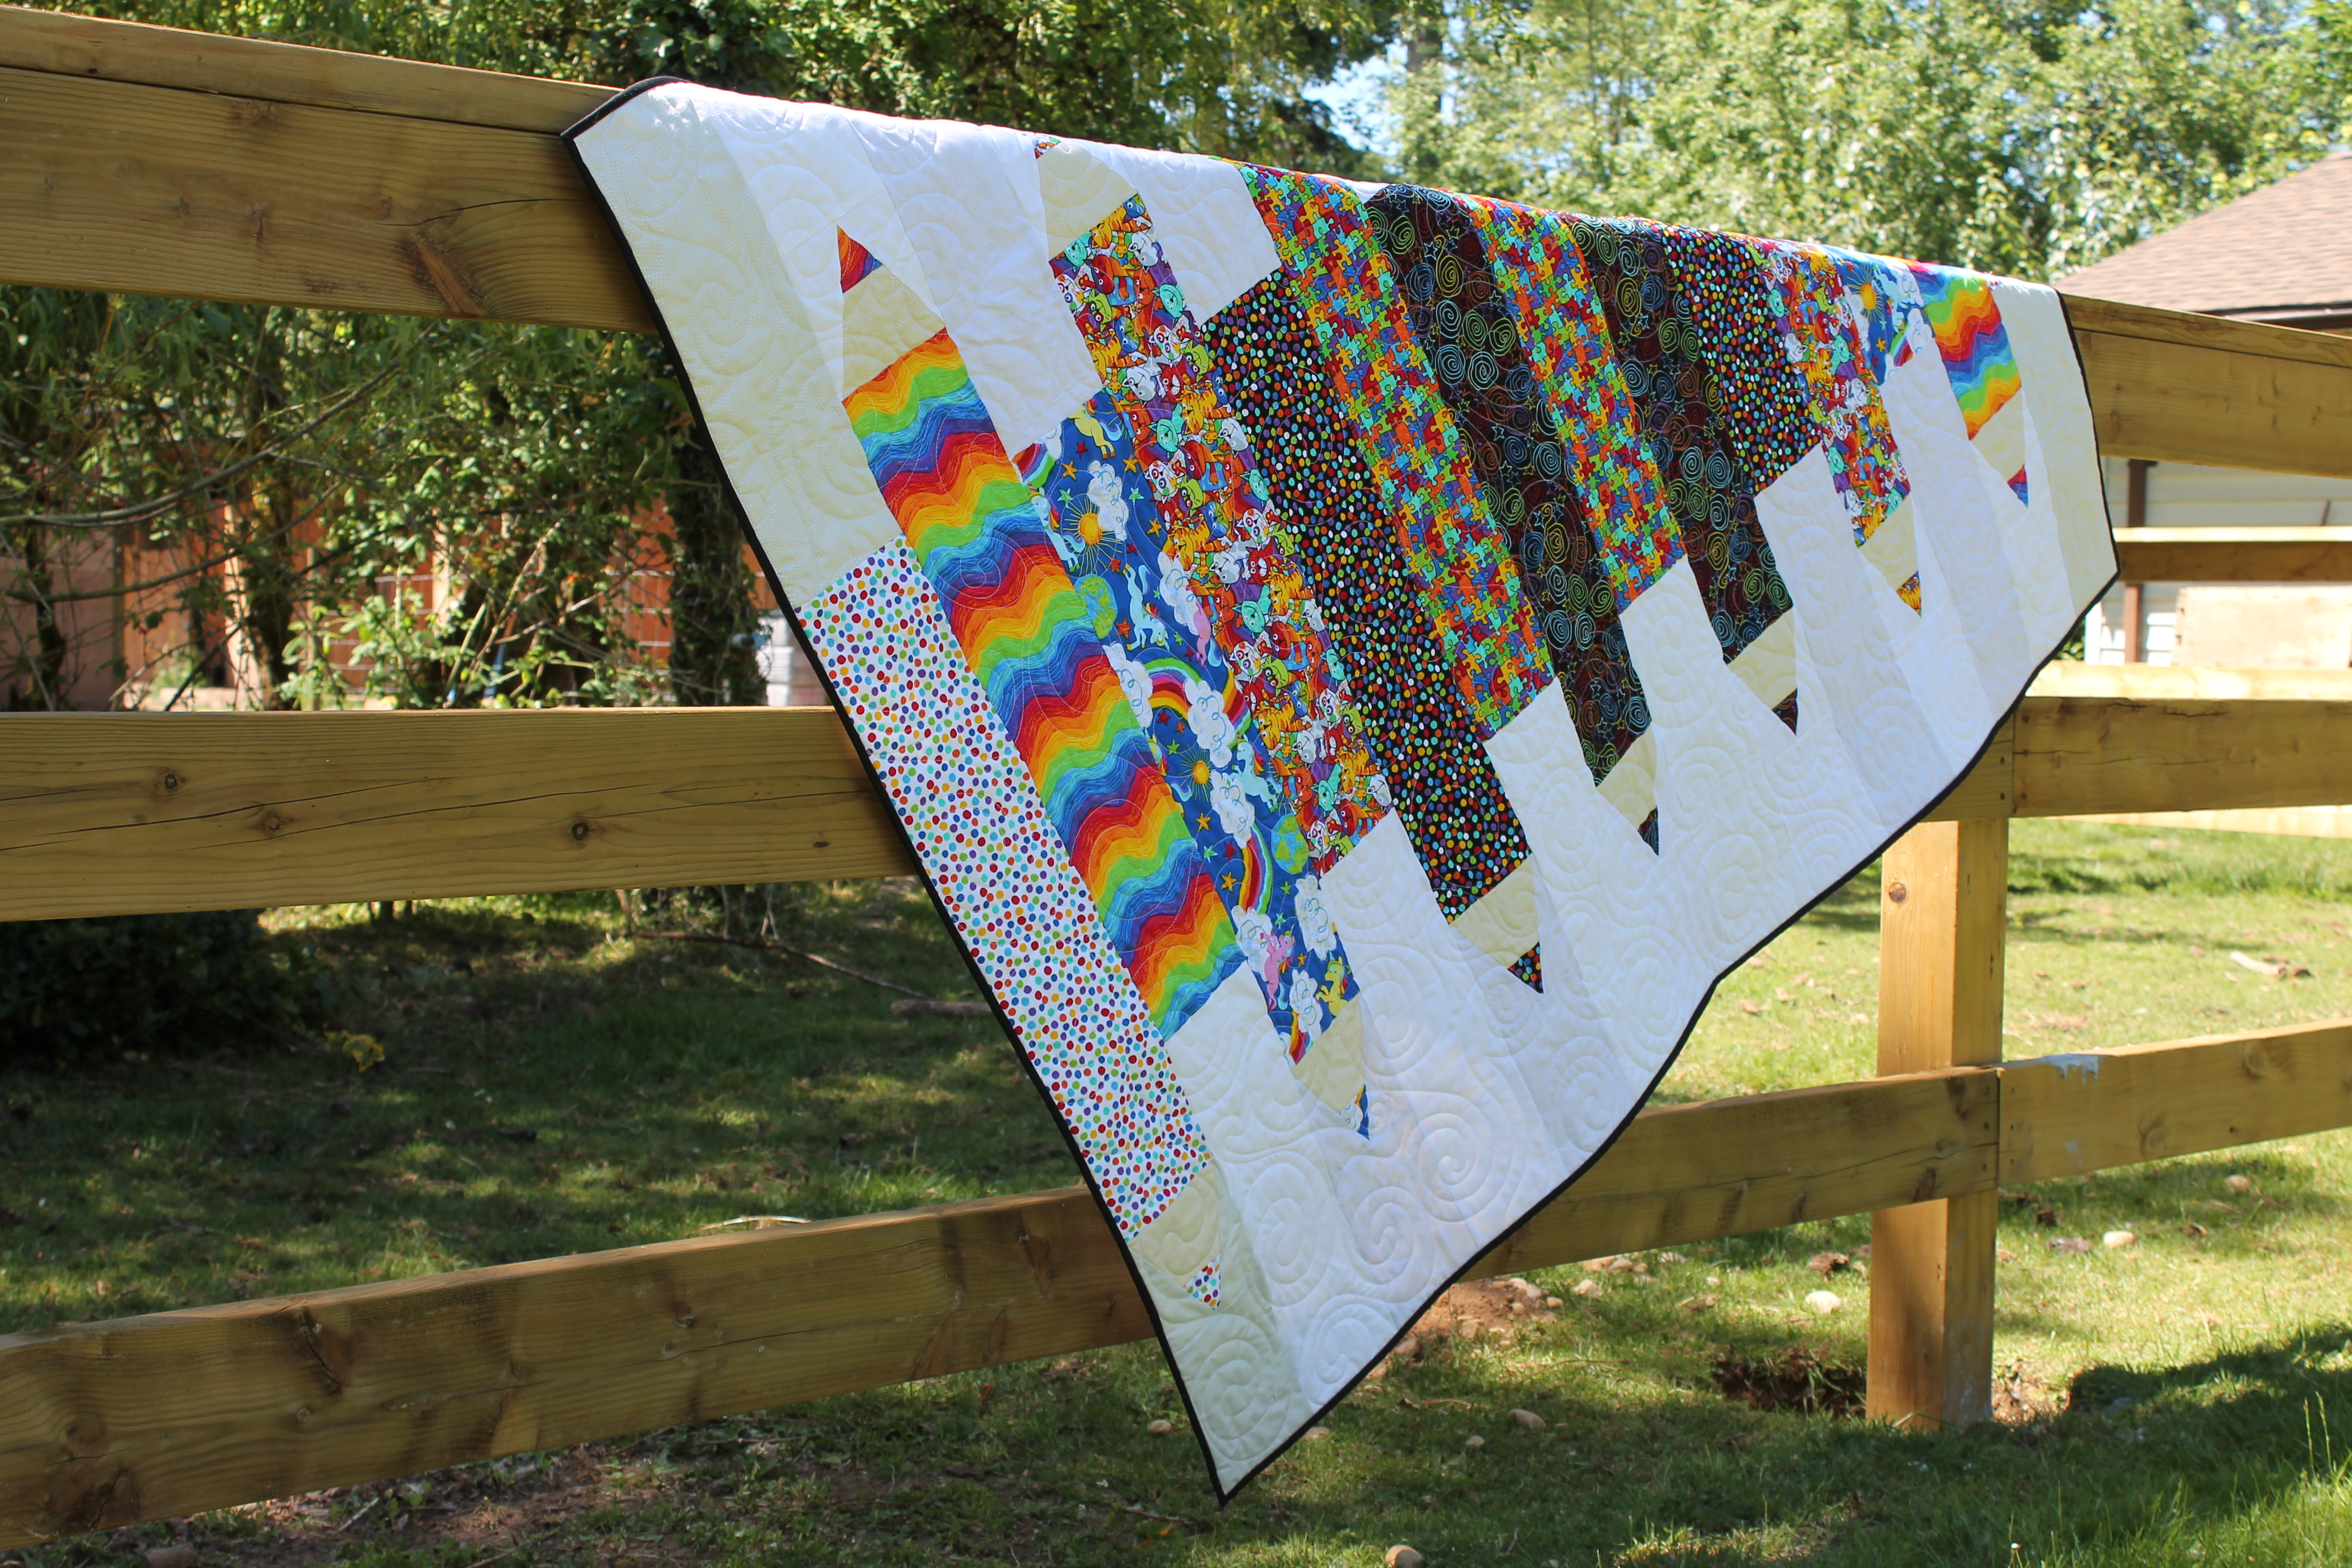
I got to play with these bright, colorful prints from Crayon Party collection. So of course, I had to make myself some big bold crayons!
I called this quilt Scribble, inspired by my littlest kidlet. He loves to color anything with everything! Scribble is made using half yard cuts of both prints and backgrounds.
My best friend’s farm was the perfect setting for photos. and afterwards, I donated this quilt to her school fundraiser. She holds a lot of quilts for me whenever I ask, it was the least I could do!
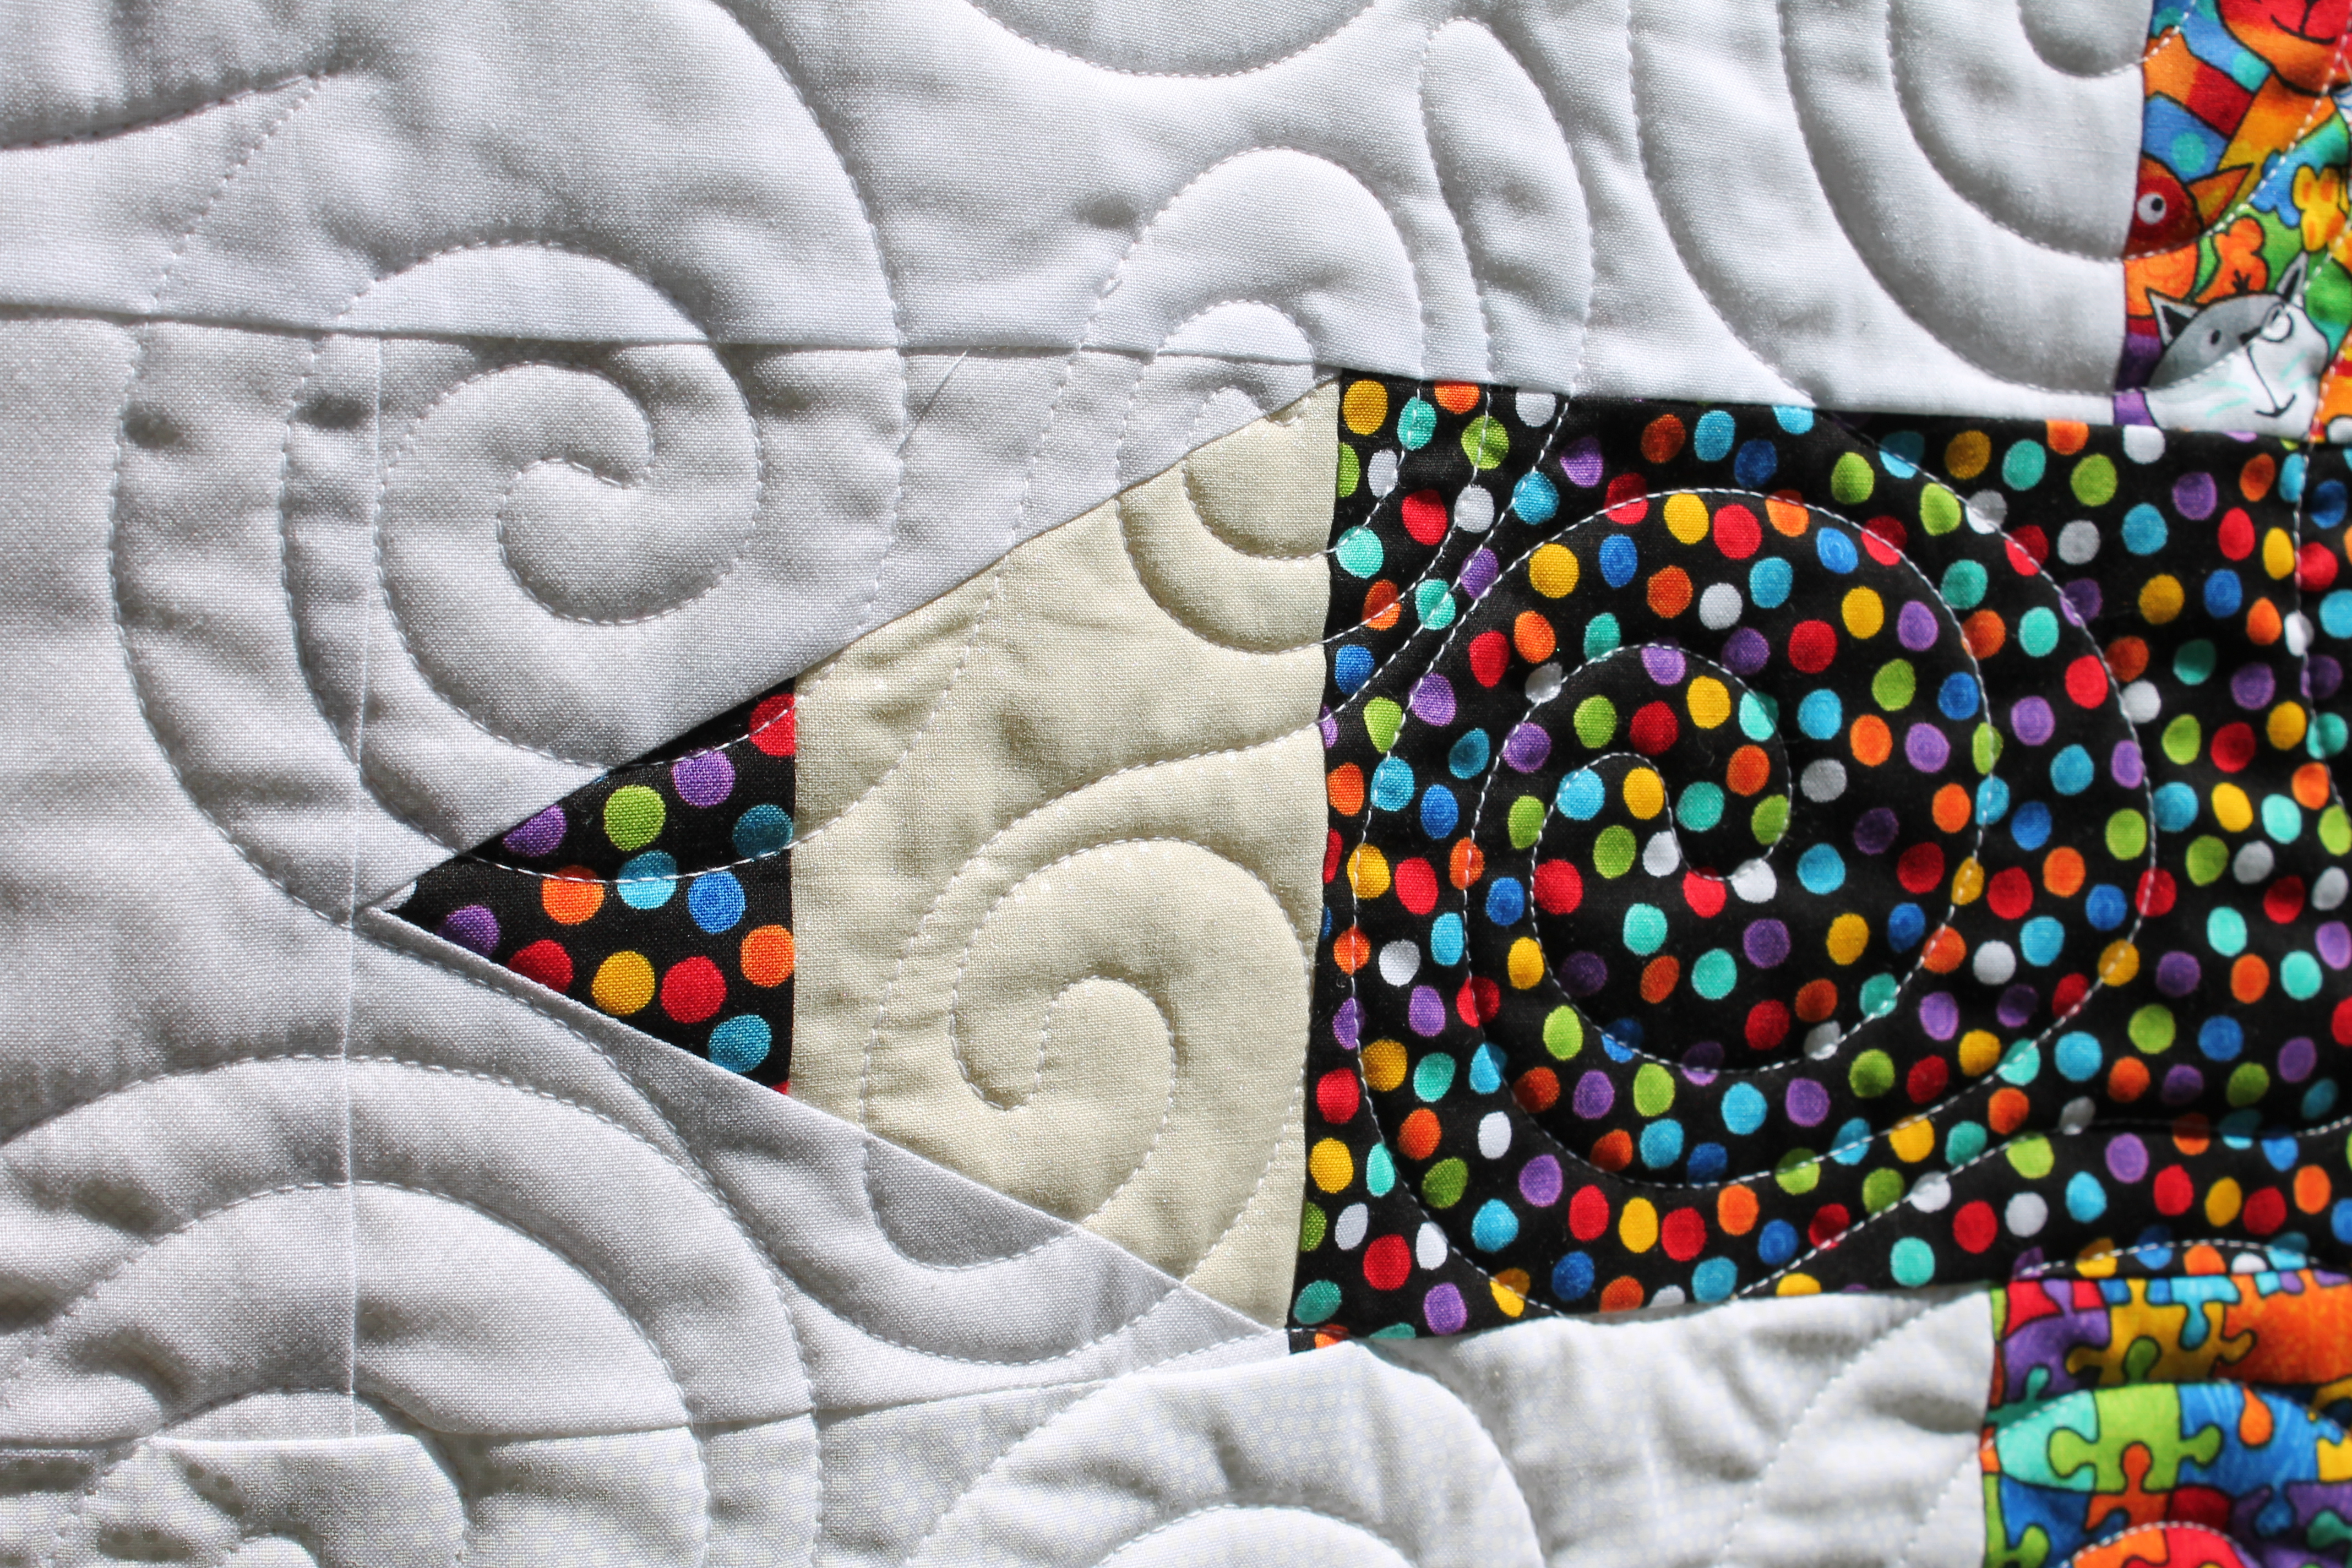
I quilted it with all over swirls and scribbles, like a doodling pencil line.
Zip on over to the Timeless Treasures blog to find the free tutorial to make your own Scribbles quilt. Perfect for the little ones starting school this month! It goes together quick and easy. And while you are there, check out what the other designers are up to as well.
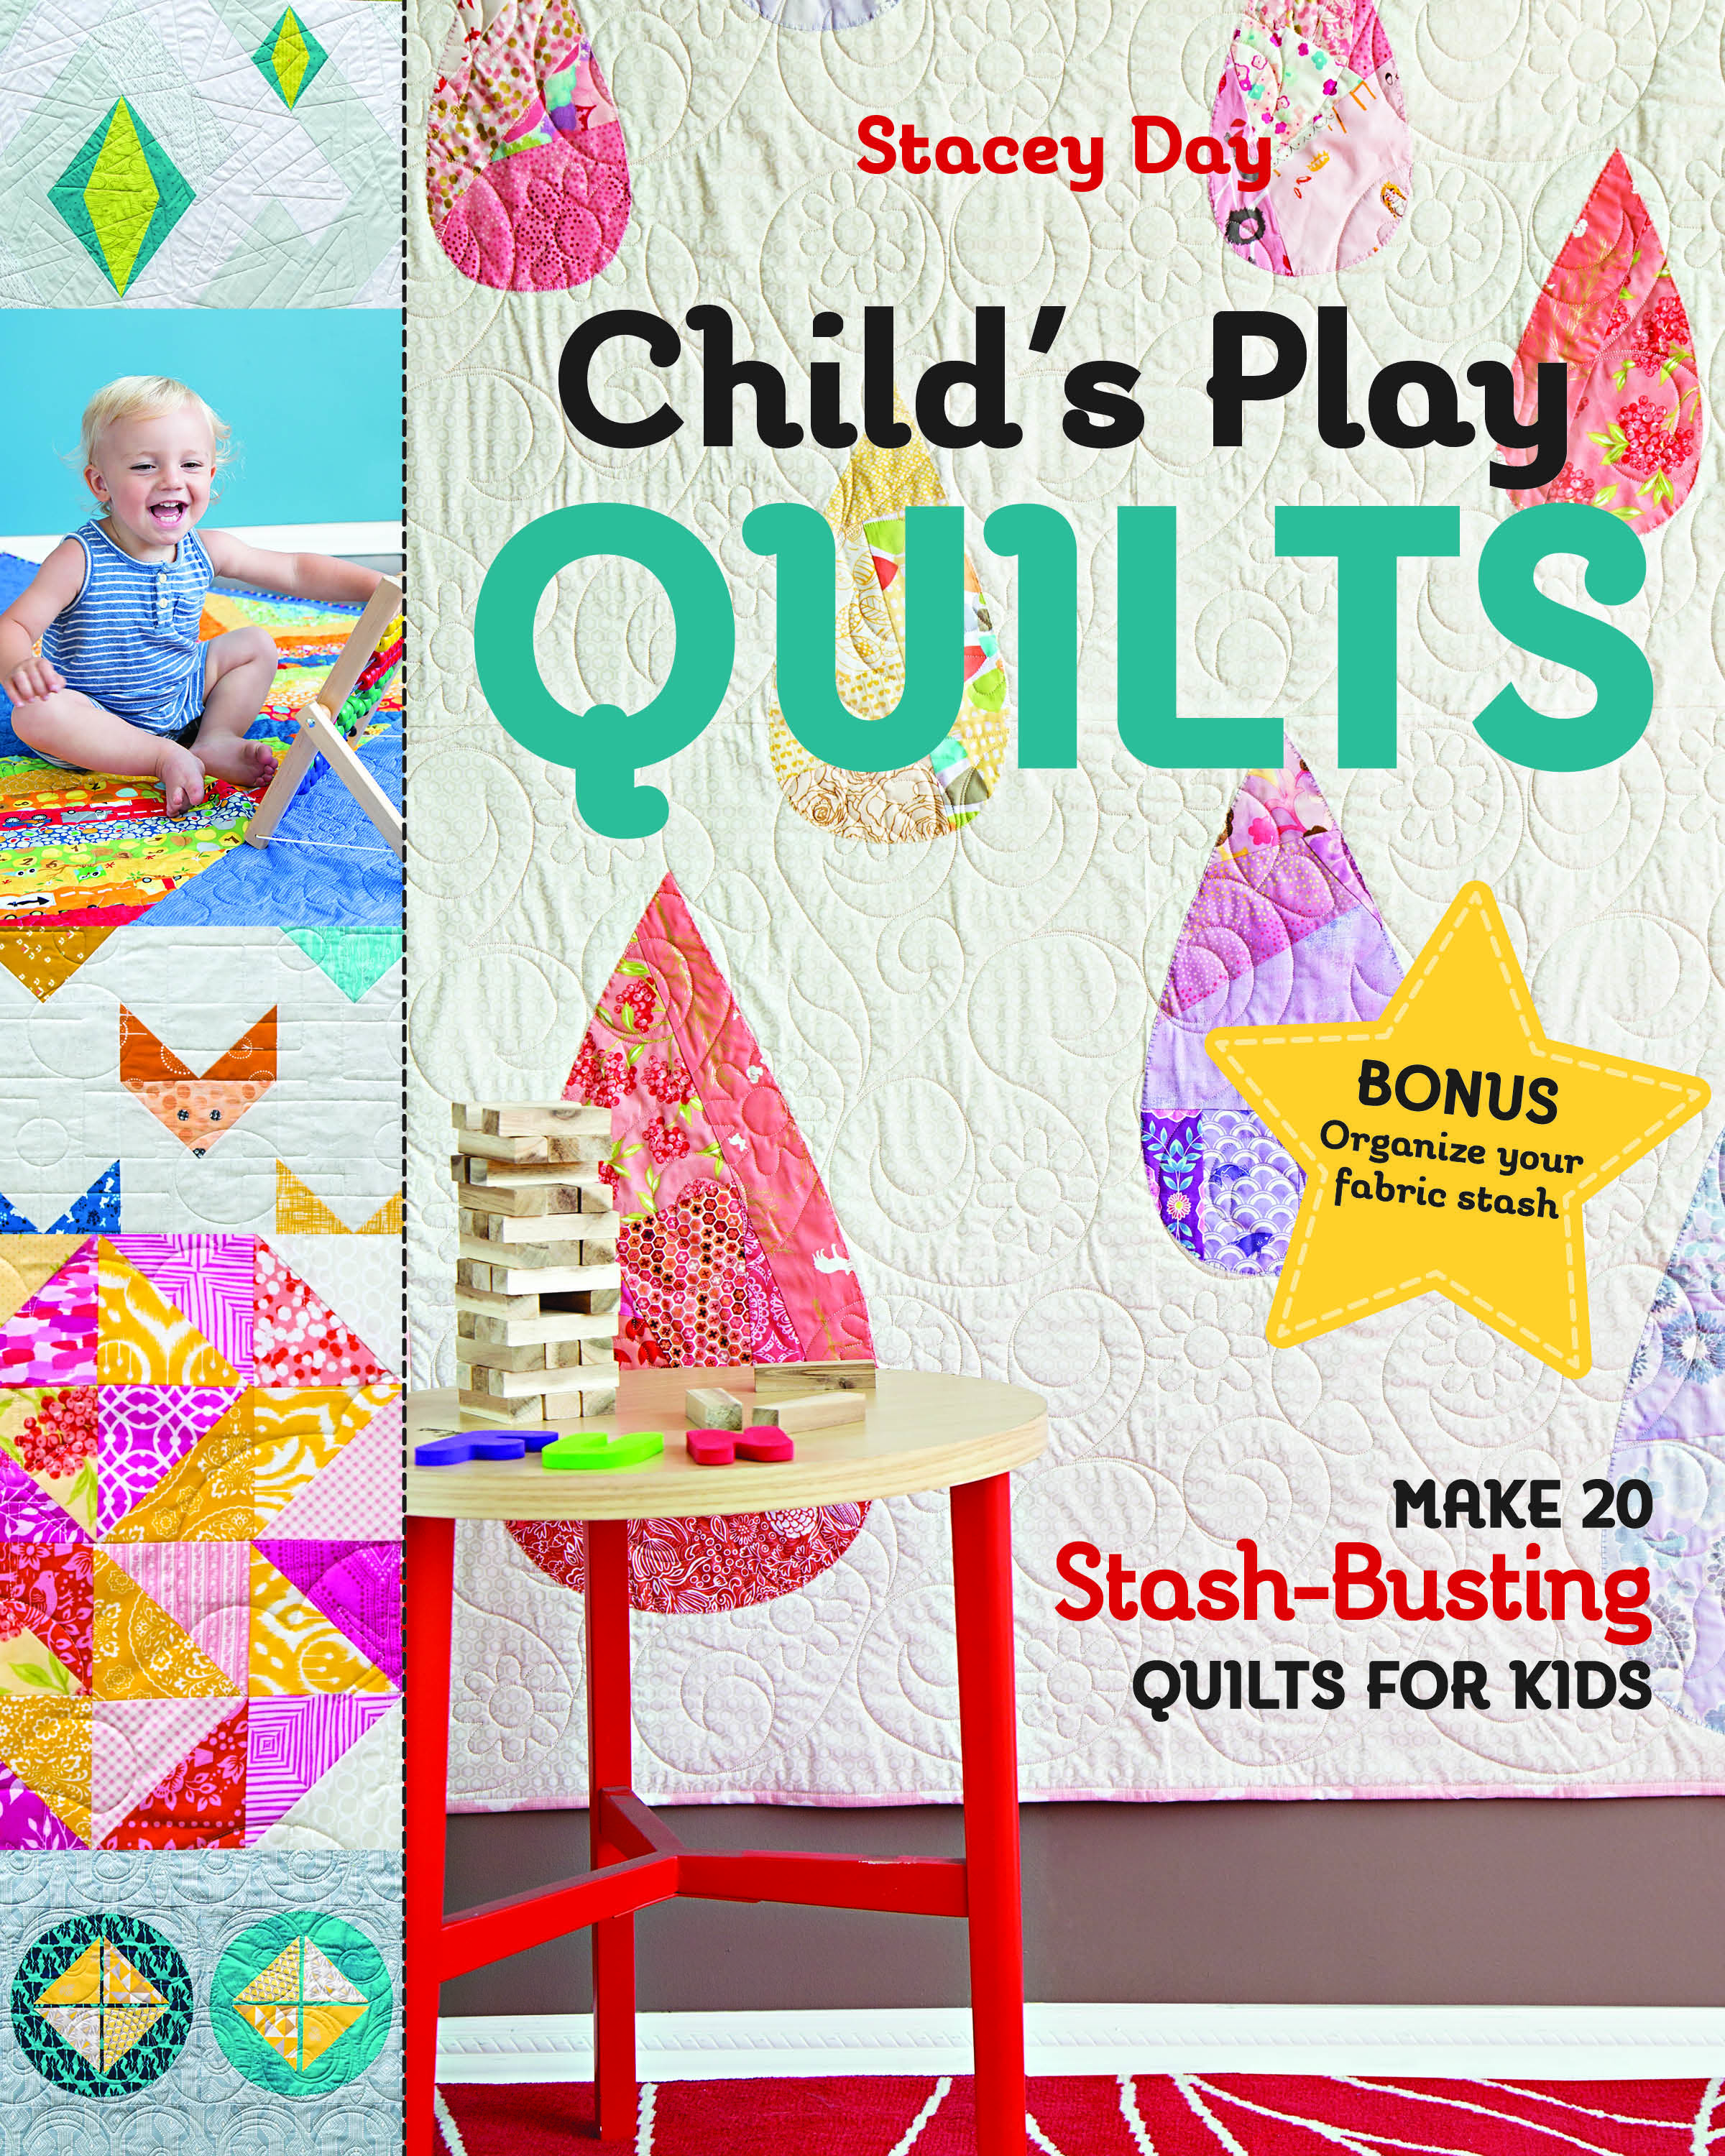
Welcome to the official launch and the kickoff of the online book tour for my brand new book, Child’s Play Quilts!
It has been quite a journey from rough sketches to finished book. 40 quilts, 20 patterns, 2 years, 1 new baby, and countless hours later, I finally have a hard copy in my hands. I will fully admit to shedding tears of joy. It has been a surreal experience up until this point. I love the finished result and I know you will too! Every little bit, from the fabric choices to the designs, the batting to the quilting and binding, every element has been carefully curated with children in mind. I wanted my quilts to be fun, friendly, and colorful!
Rainbow Brights. Photo courtesy of C&T Publishing
There are 20 patterns, split between pieced and applique. I have also included a large section of sorting and organizing your scraps and stash, making it quick and easy to pull fabrics and to create a balanced collection of print and color. The color section is direct and gives my formula for successful fabric pulls. A huge thank you to Anne Sullivan of @play-crafts who took some wonderful photos to illustrate that chapter.
Pinwheel. Photo Courtesy of C&T Publishing
The next two weeks are going to be filled with fun and photos of quilts from the book, made by a wonderful group of people whom I have come to know over the years I have been quilting. Each individual volunteered to feature a quilt, and many have made their own versions. Each has been amazing and I can’t wait for you all to see them.
Starry Nights. Photo Courtesy of C&T Publishing
I am also giving away two signed copies of my book, one here on the blog and one on Instagram. Make sure to follow along each day to enter!
Here is the schedule of participants. They are a truly talented group of people, so you won’t want to miss out. Click a name to visit their website or Instagram feed on their day, and be sure to come back and leave me a comment. You can leave one comment each day, and each is an entry to win a book. Of course, if you simply cannot wait to win a book, I also have signed copied available in my Etsy shop, which you can find by clicking here.
Thank you all so much for your support over the years. I am truly grateful for each and every one of you, more than words could possibly ever express. This has been an incredible journey to make it here.