Officially a Craftsy Designer!

Woo hoo!!

A couple months ago I submitted a design for the Red, White, and Free collection by Sandy Gervais for Moda. To my surprise and delight, it was accepted and I was able to turn it into a pattern. The nice people over at Craftsy liked it and turned it into a quilt kit! WOW!!

Presenting Celebrate Old Glory!

IMG_3886

Celebrate Old Glory

I love how it turned out! All those stars and squares swirling around! The fabric was a lot of fun to work with too! Vibrant colors, and fun prints that didn’t overwhelm each other. I really like the flag print on the back, don’t you?

IMG_3890


I quilted it using an all over meandering swirl. I chose a taupe thread, which blended nicely with the fabrics and let them take center stage. The binding is actually a panel that I cut on the diagonal. It made for an interesting binding that didn’t overwhelm the quilt.

IMG_3889


I am really over the moon about this quilt! You can get your kit here. It is an intermediate quilt, but if you are a confident beginner and take your time, I think you will be just fine! Be sure to tag me on Instagram @staceyinstitches and upload a picture of your finished quilt to my Flickr group, Stacey Day Quilts!

Thank you!

Thank you!

Happy Stitching!

StaceyDay_Logo


The Reclaimed West Blog Tour *Winner Announced!*

A huge thank you to everyone who visited for The Reclaimed West Blog Tour.

I wanted to reply to everyone’s comments, thank you all so much for your kind and encouraging words! I drew the winner of my free pattern, and the lucky number is……#25! Beezus, who said “Congratulations Stacey”. Yay!

Reclaimed West Winner


Welcome all to my day on the Reclaimed West Blog Tour. ( If you are here for the Blogathon Canada tour and giveaway, click here after reading all about this wonderful tour and entering this giveaway, and if not, check out both for some great fun!!) You can find all the tour dates and blogs here on the Timeless Treasures blog. They are a super group of very talented ladies, so check them out!

Reclaimed West Logo

reclaimed west collage

I cannot even begin to describe my feelings to you all, having a design chosen as part of The Reclaimed West Tour. So a little back story might be in order.


I own almost every Judy Niemeyer pattern there is. She is one of my biggest influences, and it shows constantly in my work. I have made her Amazon Star in three sizes, 18″, 40″, and the full 104″. My Sapphire Star quilt, made from her Glacier Star pattern, has been juried into multiple shows across North America and even took home a ribbon from the Canadian Quilters Association. I have a private running challenge with my Grandma over who is going to finish her Pepper Dish first, and I was even able to provide an extra copy of Birds of Paradise to someone after the call went out on Quiltworx Facebook page. I love Judy and Judels work, and will even get up extra super early on sale days just to get the latest patterns.

Being a part of the launch of her new fabric line, The Reclaimed West, is a huge deal for me. Understatement of the year maybe….

I could ramble on and on about how beautiful the fabric is, the richness of the colors, the striking prints (only Judy and Judel could romanticize cows to the point where I would willingly sew with them), and the soft silk feeling of rolling around in a pile of…I mean…sewing with the fabrics.  Instead I will show you with the introduction of my new pattern:

Star of the West

Star of teh WestWhen I saw that Timeless Treasures was looking for submissions for the line, I fell out of my chair and immediately got to work playing. I knew that I wanted to do something to show the influence Judy had early on when I first started quilting, but at the same time keep true to the aesthetic that has evolved into my own style. So I started playing with the layouts and negative space. And playing…and playing… and playing.

I realized I was over-thinking things, and settled on a simple feathered star block. Then I found a color layout that I loved, and added the geese border. I wanted to reclaim that old favorite of mine, the lone star and flying geese, by adding some negative space and drawing out a little modern in the overall design. I created something that I loved, and sent it off with hope in my heart.

Stitching Enhanced


After I picked myself off the floor a second time, when I got the email saying my design had been accepted, I got to work drafting and writing. In true Judy style the quilt is foundation pieced. I love foundation piecing, it makes pointy points! Then the big day arrived with a box of fabric on  my front step. I crawled on up and opened it and immediately started sewing.

I finished in record time (for me) and then I was stumped. How to quilt it? The finished size is 64″x 64″, not unmanageable on my machine. But I was stuck. I simply could not decide. I definitely wanted to pay tribute to the beautiful quilting found on all of Judy’s quilts, but also wanted to keep within the modern traditional. Enter Ann Olson of Ann’s Quilt and Stuff. She took my top and turned it into a masterpiece. She delivered exactly what I was looking for, free motion triangle fillers, straight lines, and these amazing triangle feathers in a tribute to the gorgeous feather work found on an original Judy quilt. I cannot even begin to thank Ann enough.

IMG_4038

Enhanced 2

From start to finish, this quilt has been an incredible journey for me. To be a part of the blog tour with all these amazing quilters (almost all of which are certified Quiltworx instructors or successful business owners, or both) has been a joy and a privilege.


Star of the West is available from my Craftsy shop. The pattern is a PDF download, full color diagrams and pictures. The foundations are included in the pattern, but require legal size paper (8 1/2″x 14″ paper) to print. I am also giving away one of my patterns to a lucky commenter today! Just leave a comment at the end of this post. I will draw the winner on Friday, November 21 at 8pm (the conclusion of the tour). Timeless Treasures is also giving away an awesome Reclaimed West prize package here! You get an entry a day. Just visit the blogs of the day and follow the link back to enter each day.

blog-tour-prize-package

Thank you for stopping by and allowing me to share my quilt with you. Please visit again!

Happy Stitching,

StaceyDay_Logo


Tidal Lace Blog Hop and Giveaway *giveaway closed*

Welcome to my stop on the Tidal Lace blog tour! I first met Kim through the Quilt Design a Day group and we got to know each other over time. I was thrilled when Kim approached me and asked if I wanted to make something for her debut line of fabric from Windham. Of course I said yes! I had a design in mind almost immediately.

 TL-BlogHopFIN002

 I love Tidal Lace so much. The colors, the texture, the OMBRE! Woot! Ombre. I thought a long time about all the wonderful things I could say about Tidal Lace. Kim did an outstanding job in her debut collection, and it shows. The prints are soft, delicate, and so very very versatile. The colors are a feast for the eyes, and overall Tidal lace it suited to so many different things, which you will see in the coming days as you hop from blog to blog. I absolutely adore the starlight blenders and the tidal lace border print. Oh, that border print! I have plans for that print, which may or may not include fussy cutting a whole lot of skirt panels. We will see.
Tidal Lace Wheel, borrowed from Kim with permission

Tidal Lace Wheel, borrowed from Kim with permission

When I saw Tidal Lace for the first time, I was really struck by it. I knew Kim’s inspiration-days sifting through antique lace with her grandmother, family vacations to the ocean, and how she connected the memories into the collection.  The stories really stuck with me. Most of us had someone in our lives, a mother, grandmother, favorite aunt, that taught us to sew or planted the seeds of creativity that later sprout and flourish. In my family, quilts were given for any occasion-new babies, weddings, moving out on your own or just because. My own grandmother instilled an appreciation of quilting into her children and grandchildren. I have memories of visiting my grandma at the local quilt shop, where she would let me play with jars of buttons and scraps, and of sitting in her basement making our first quilt together. I still have that quilt, and I remember how happy I was to be able to spend so much time with grandma.
IMG_5909
 I also started thinking about quilting, and how as quilters we use fabric to make connections and create memories. We create to express love, friendship, joy, and also in times of hardship and sorrow. Quilting forms threads, connections, between individuals, friends, and family. The sharing of ideas and inspirations, whether its blogging, instragram, or a casual conversation at work or in the grocery store, strengthens those connections. Every handmade treasure we gift, swap, share and show add more threads, until the connections form a delicate lacework that strengthens with each pass. Many of us have formed strong bonds of friendship with people we may never meet, all centered around the craft of sewing and quilting. We are part of a community, based on sharing and inspiring. I am honored to be able to express myself in fabric and thread, and be able to share the experience with others.
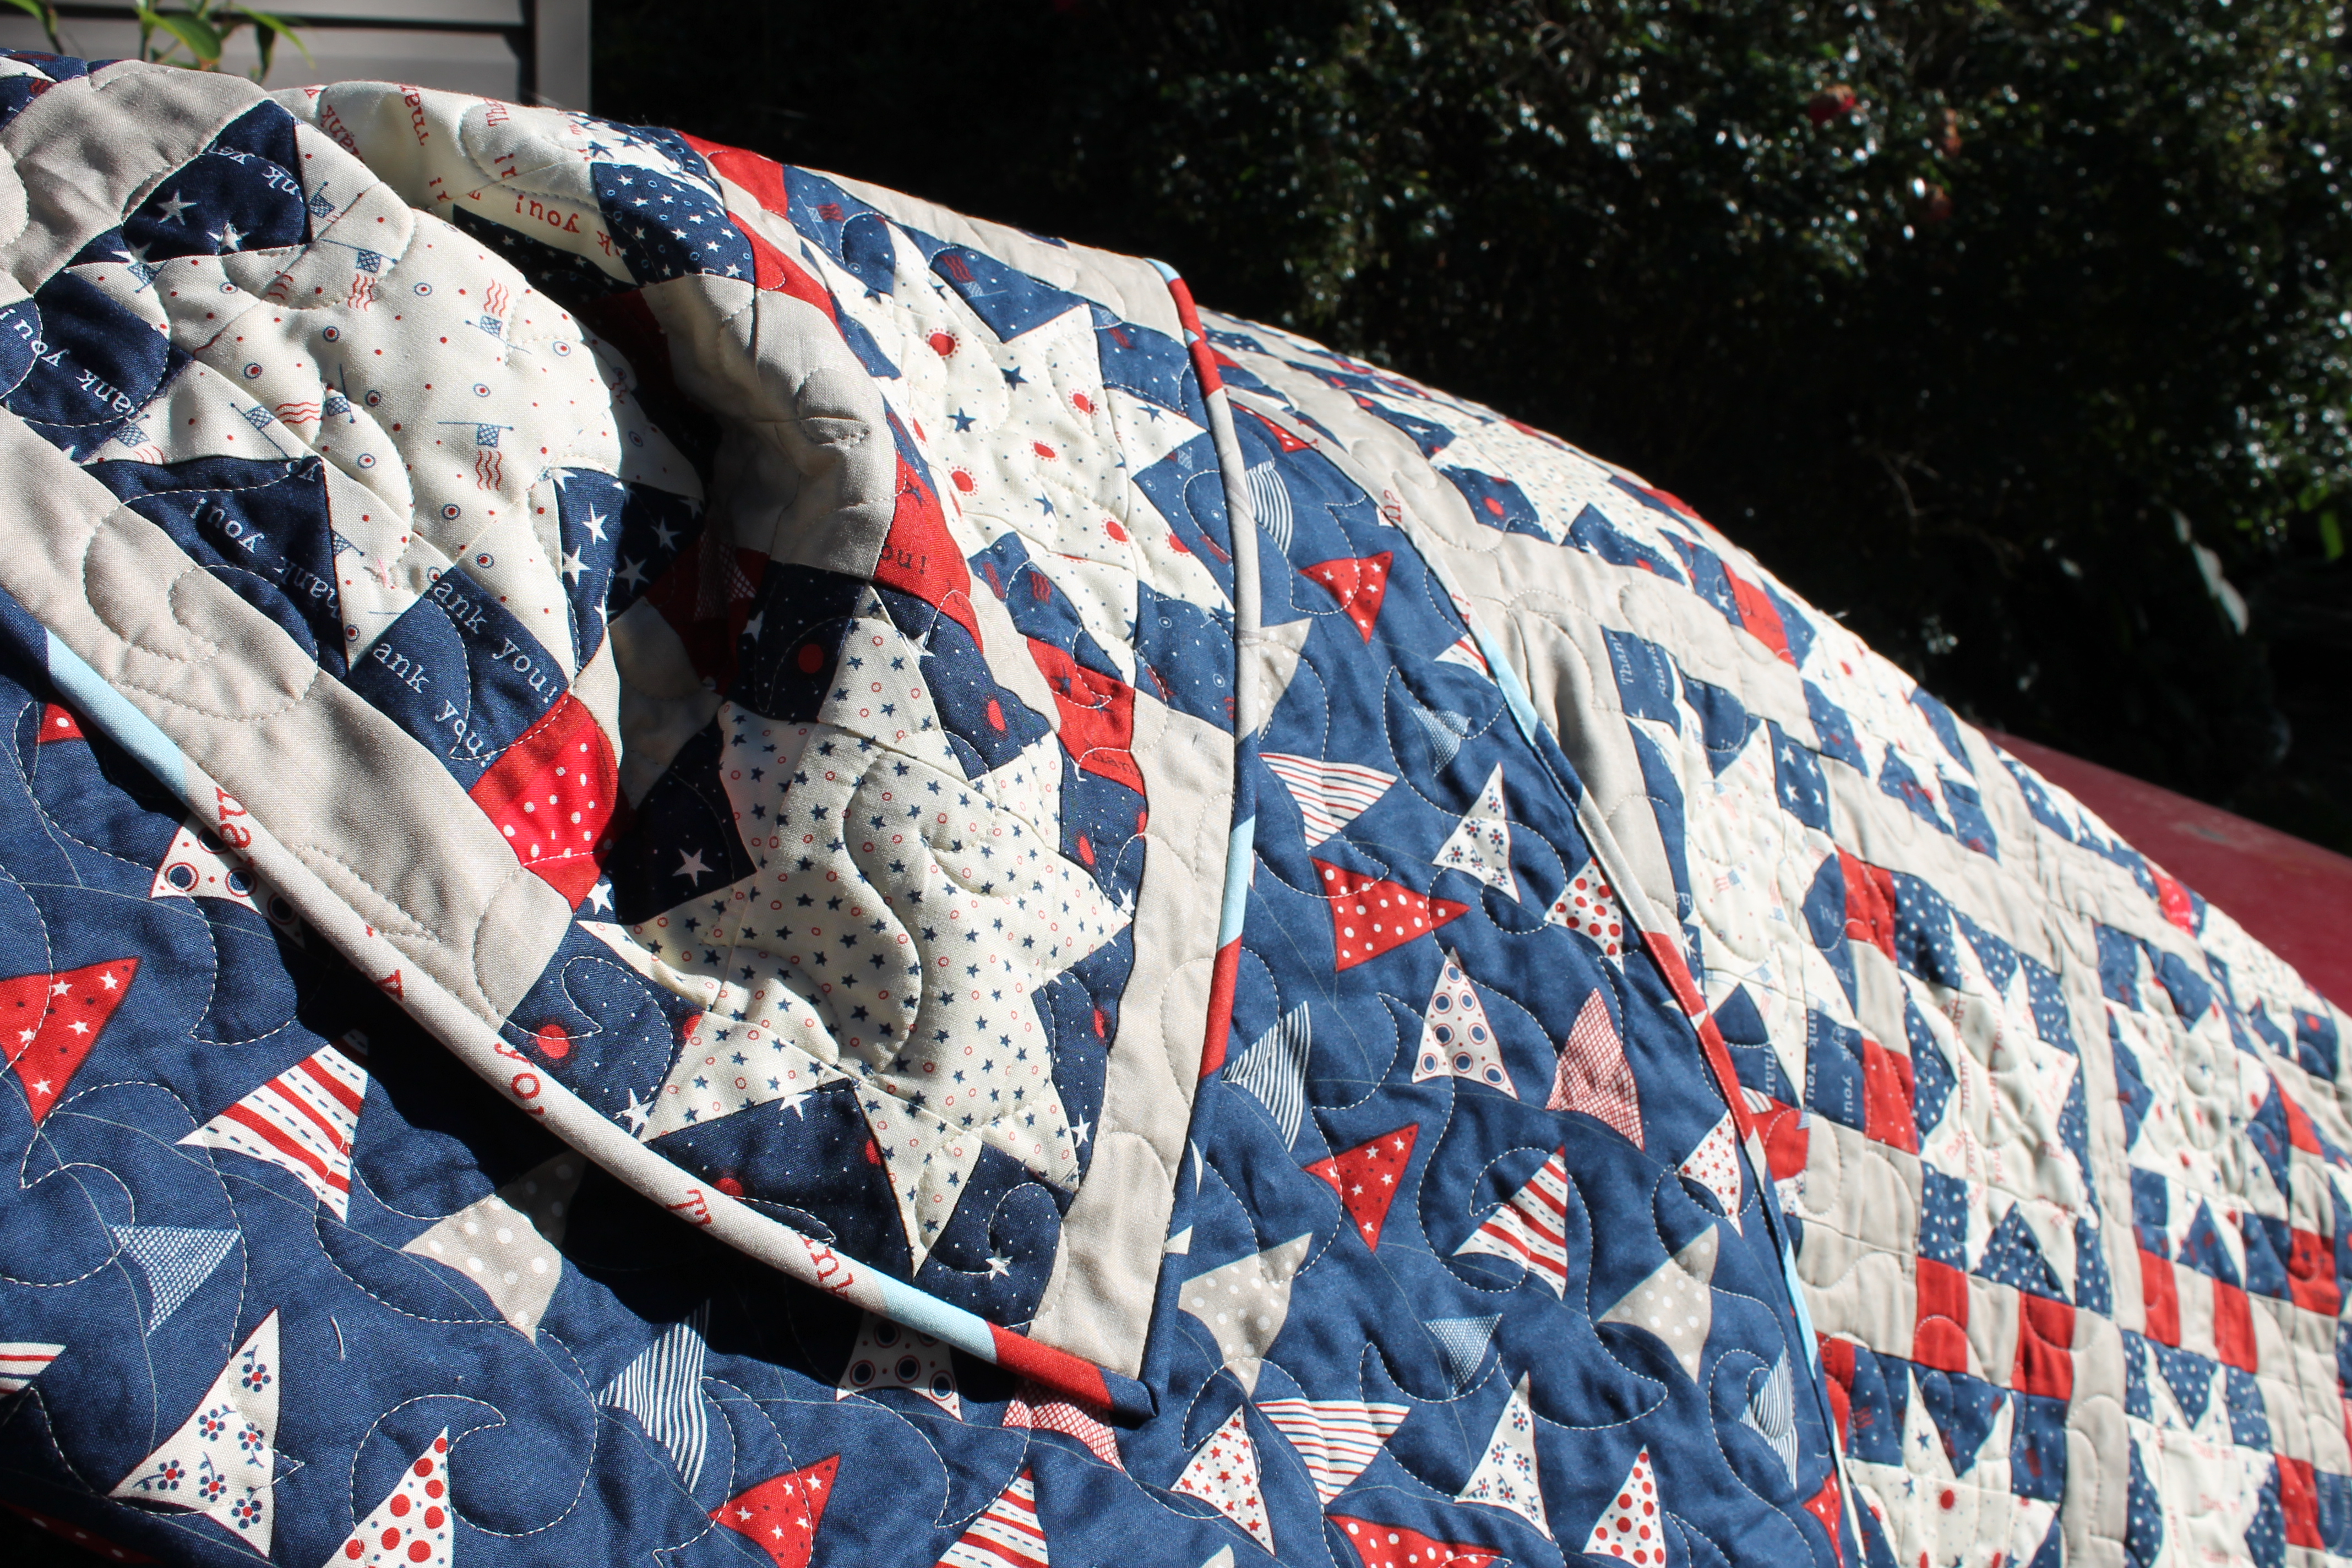
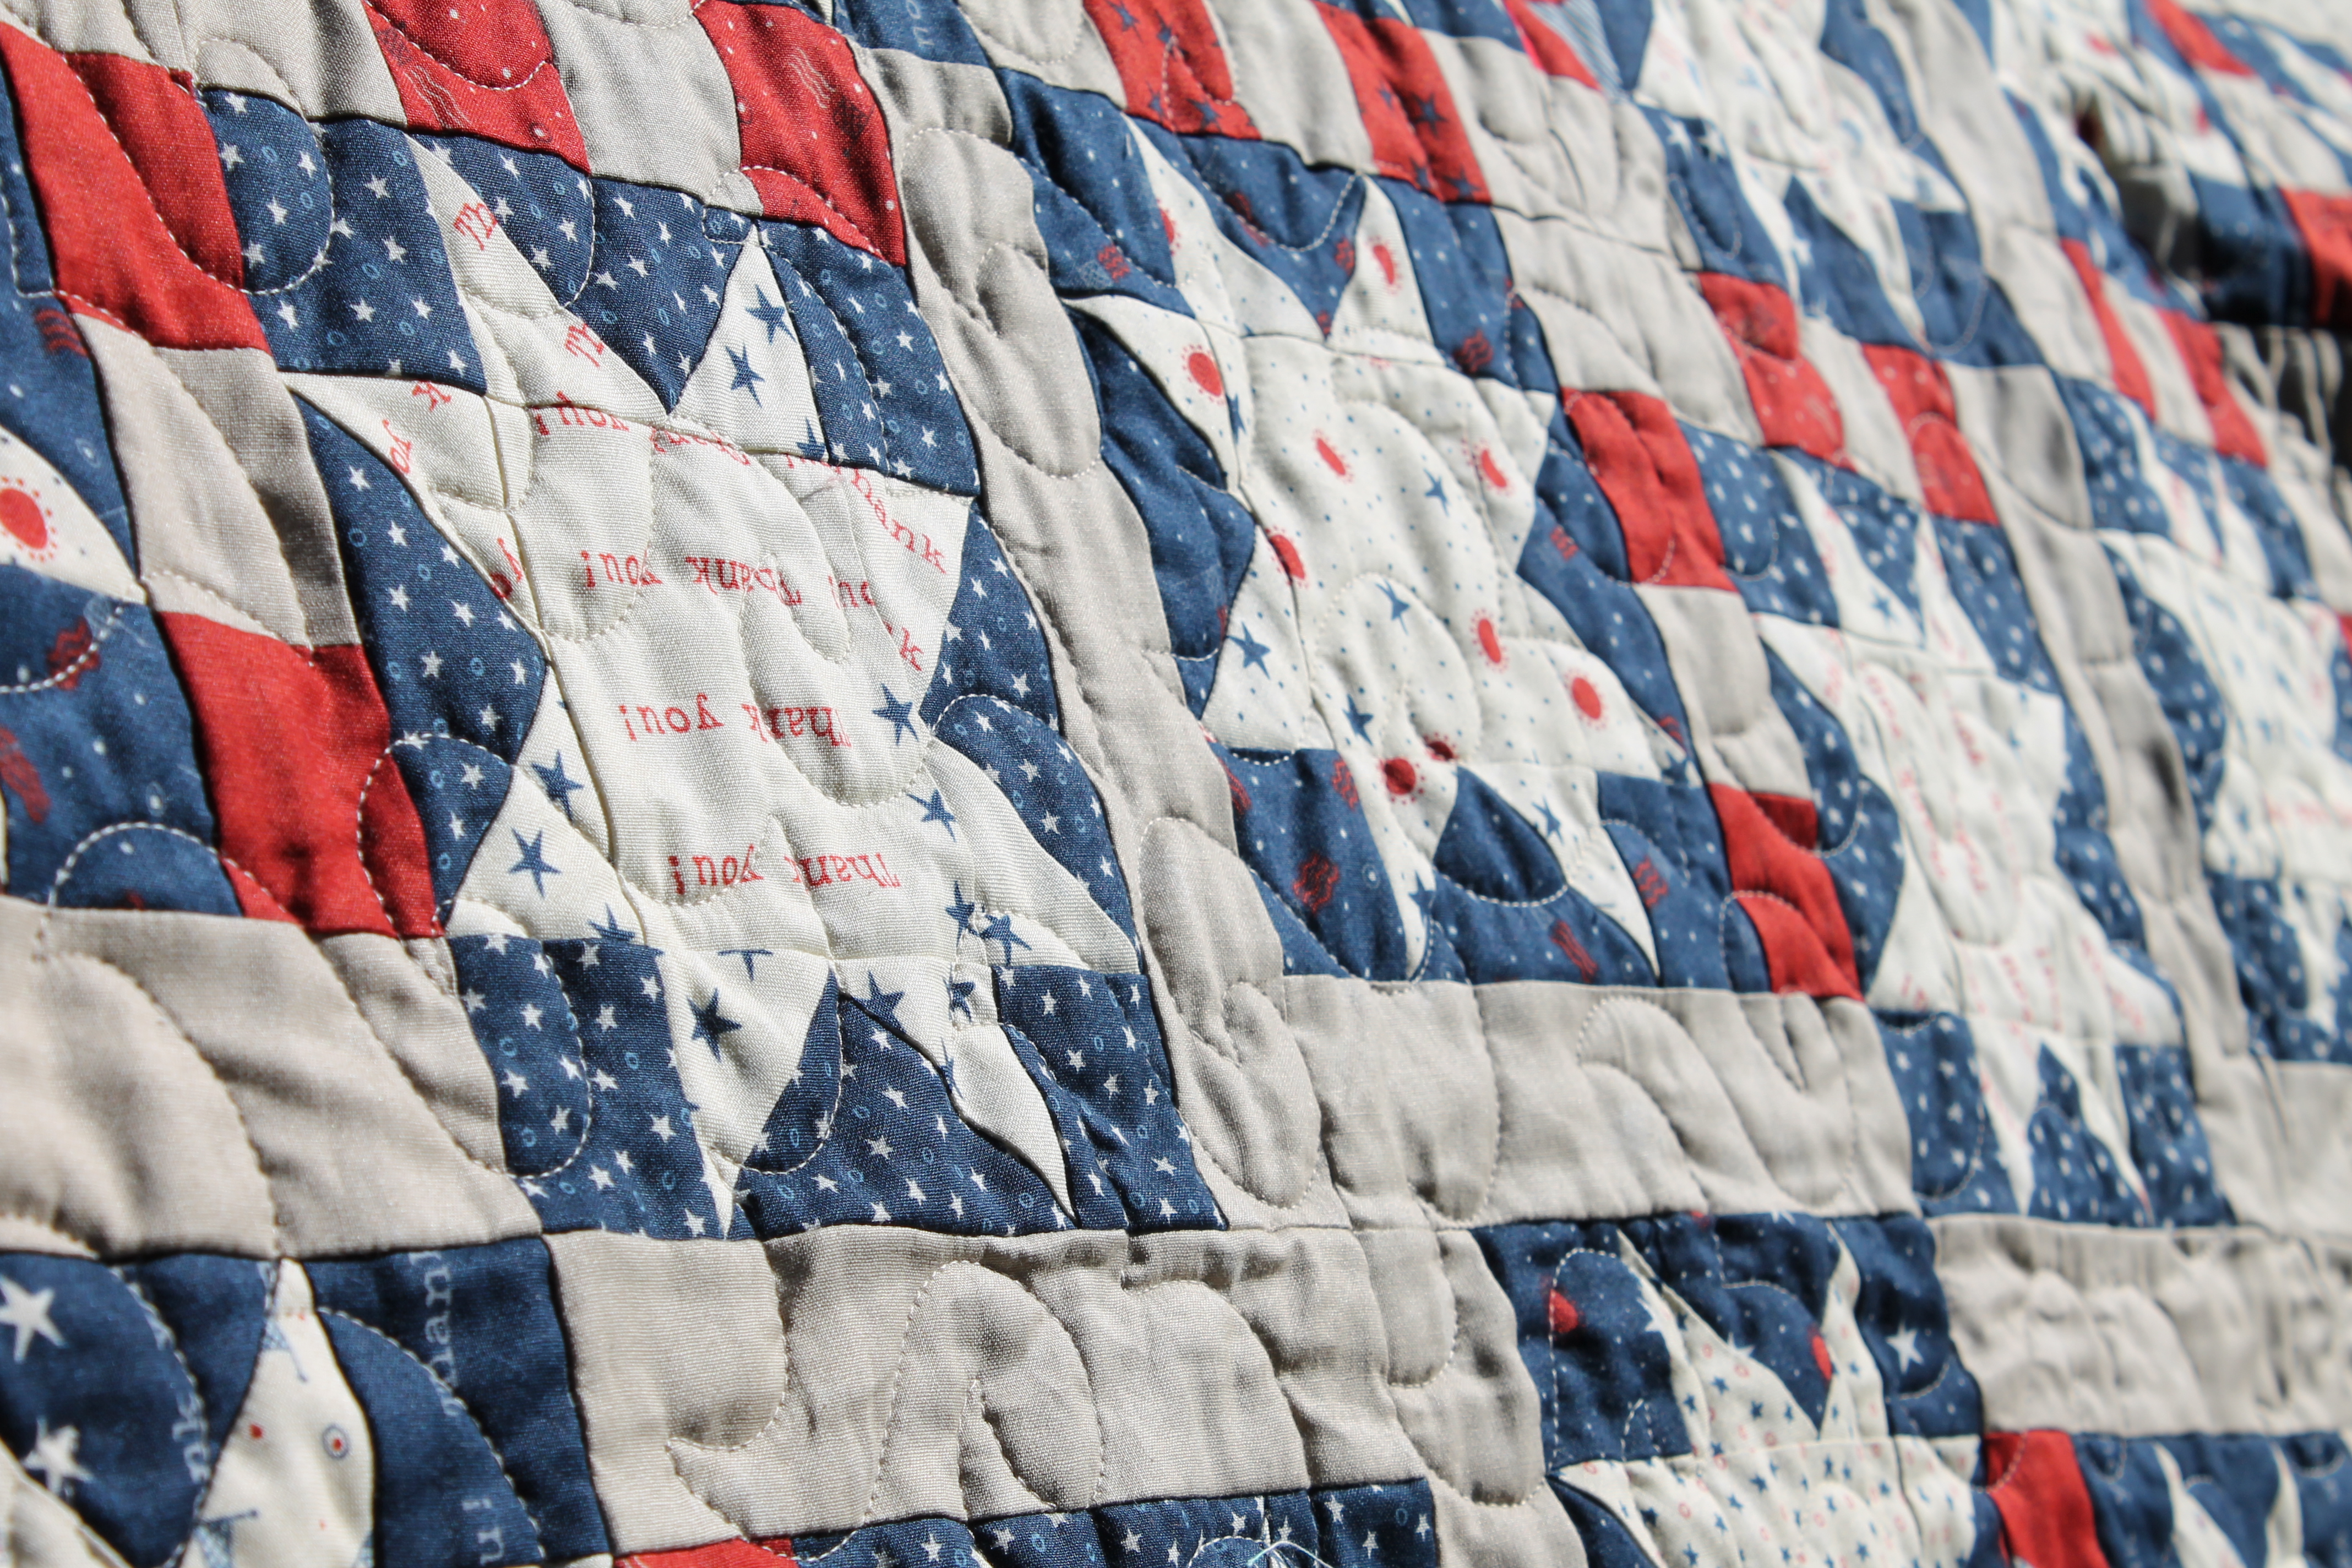
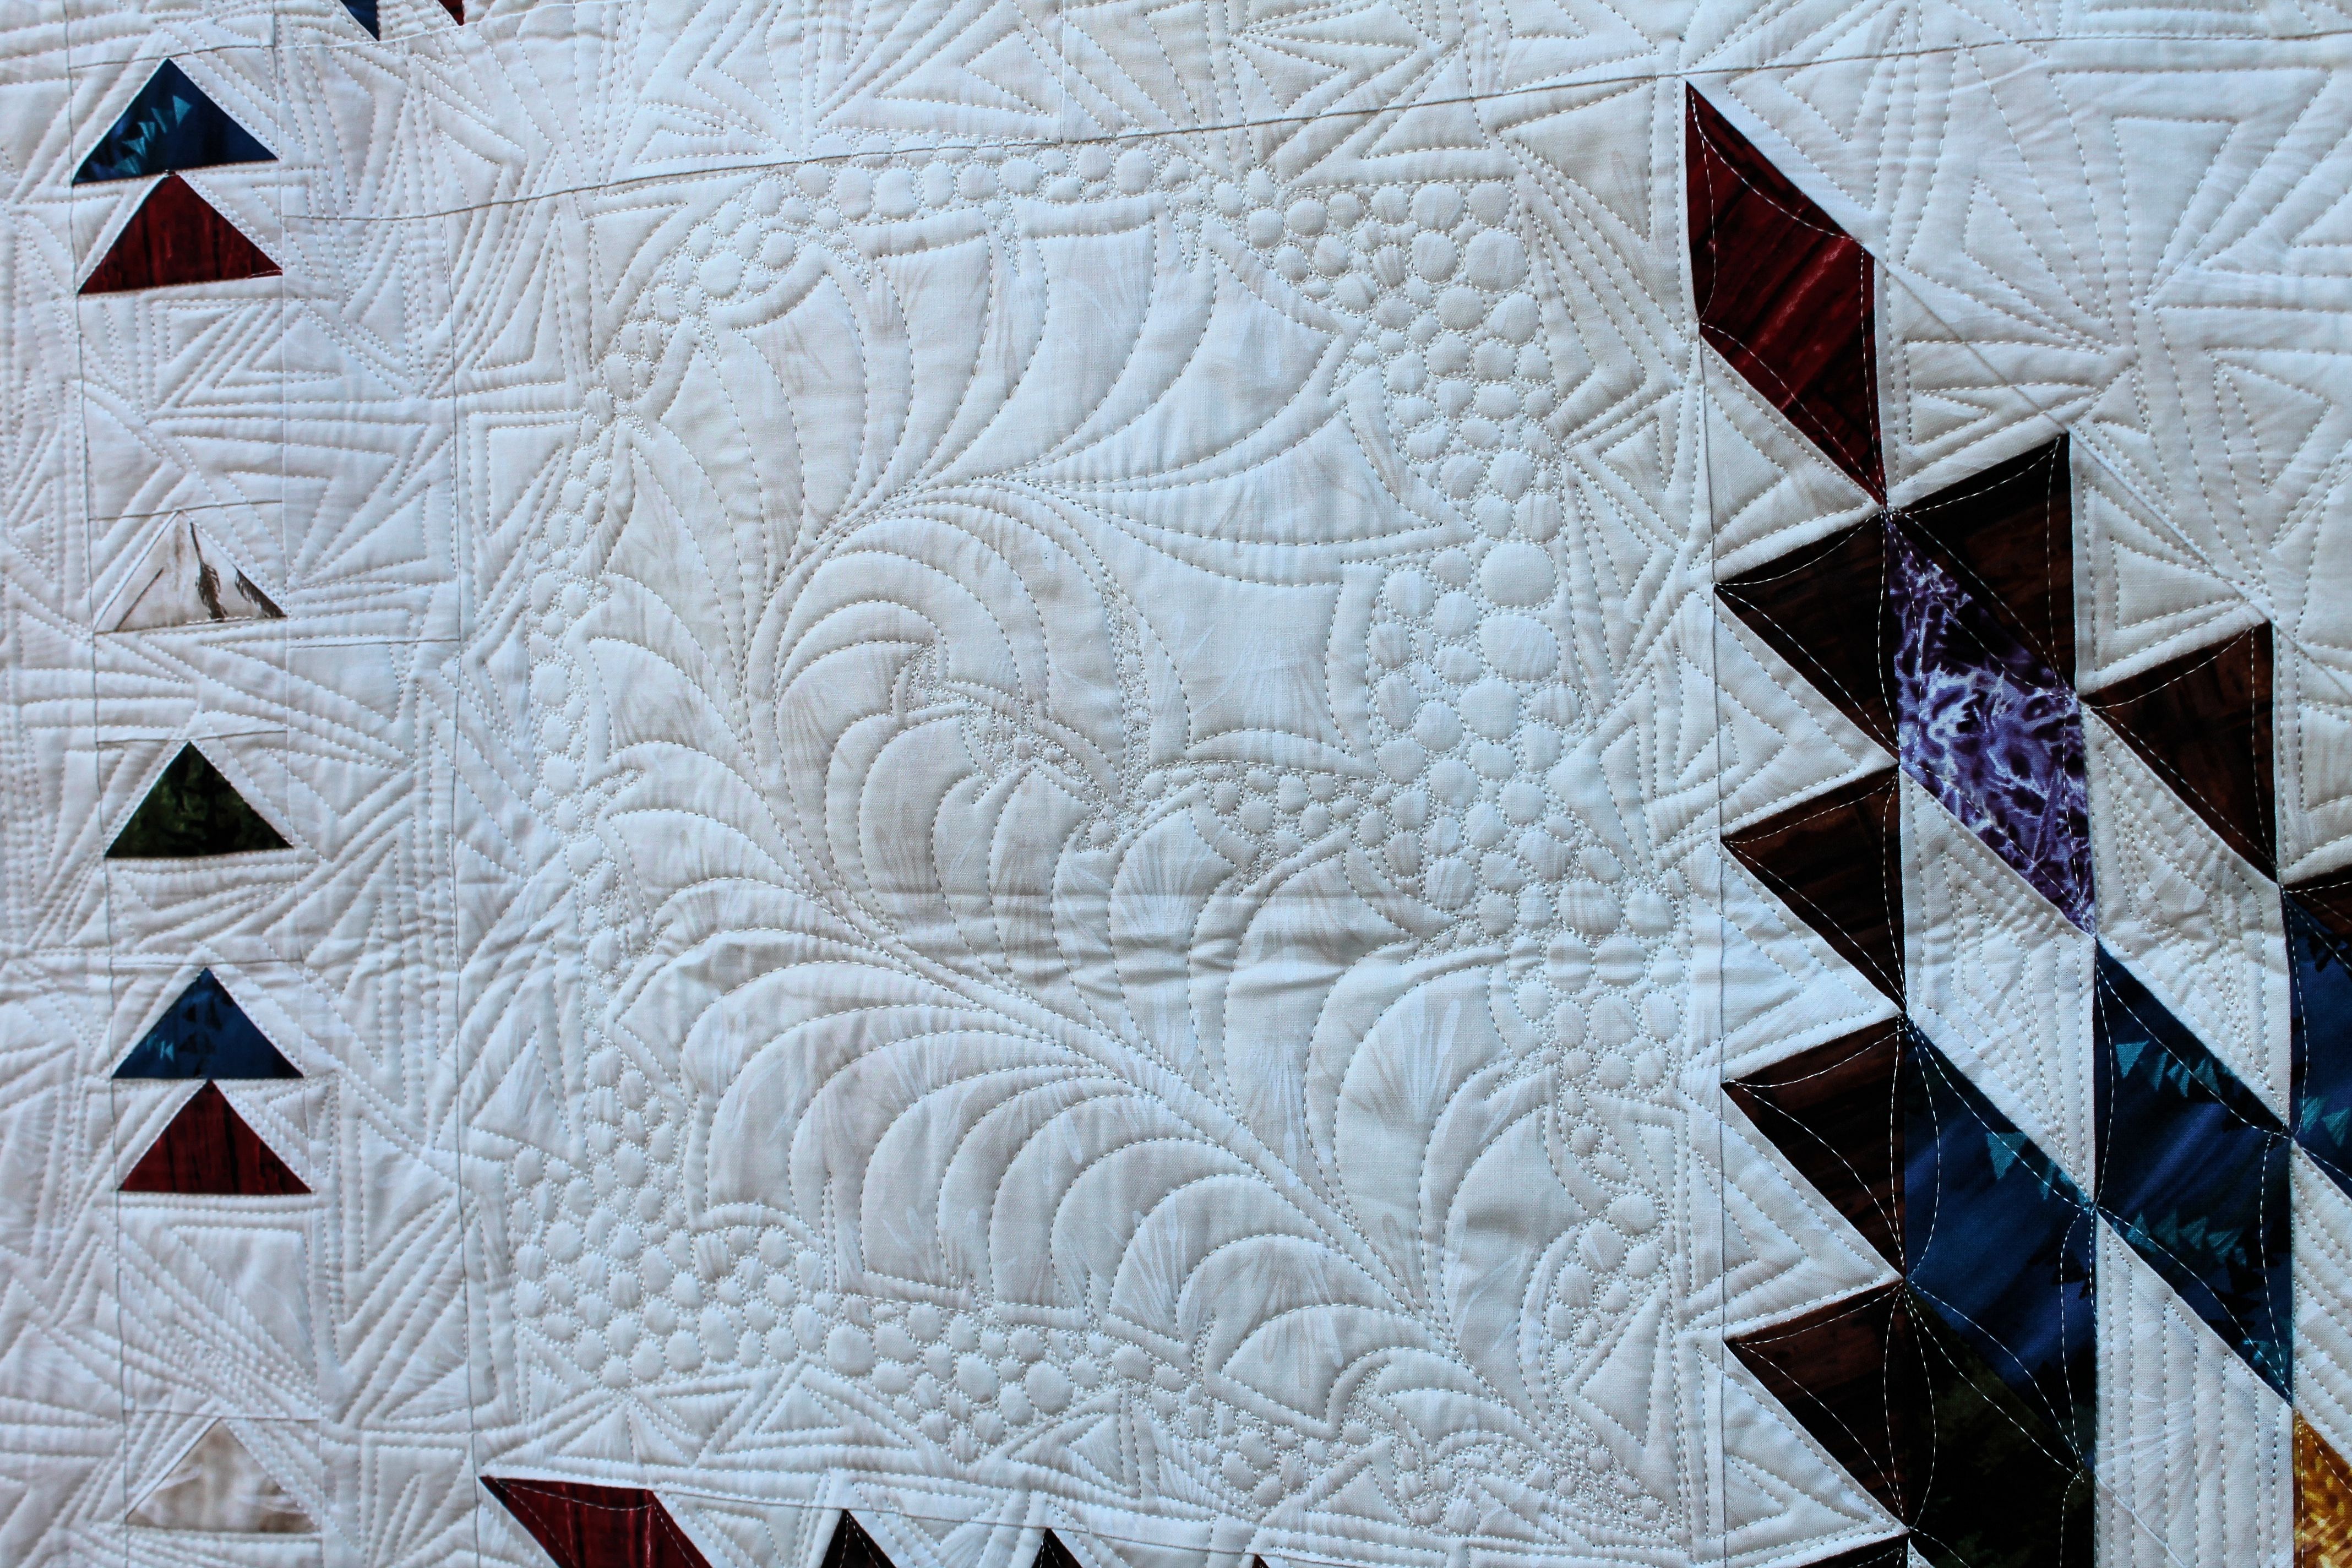
I used Tidal Lace to create a queen size quilt. I wanted something that would be simple, letting the fabrics shine and take advantage of the amazing border print. The pattern, which will have four sizes, 
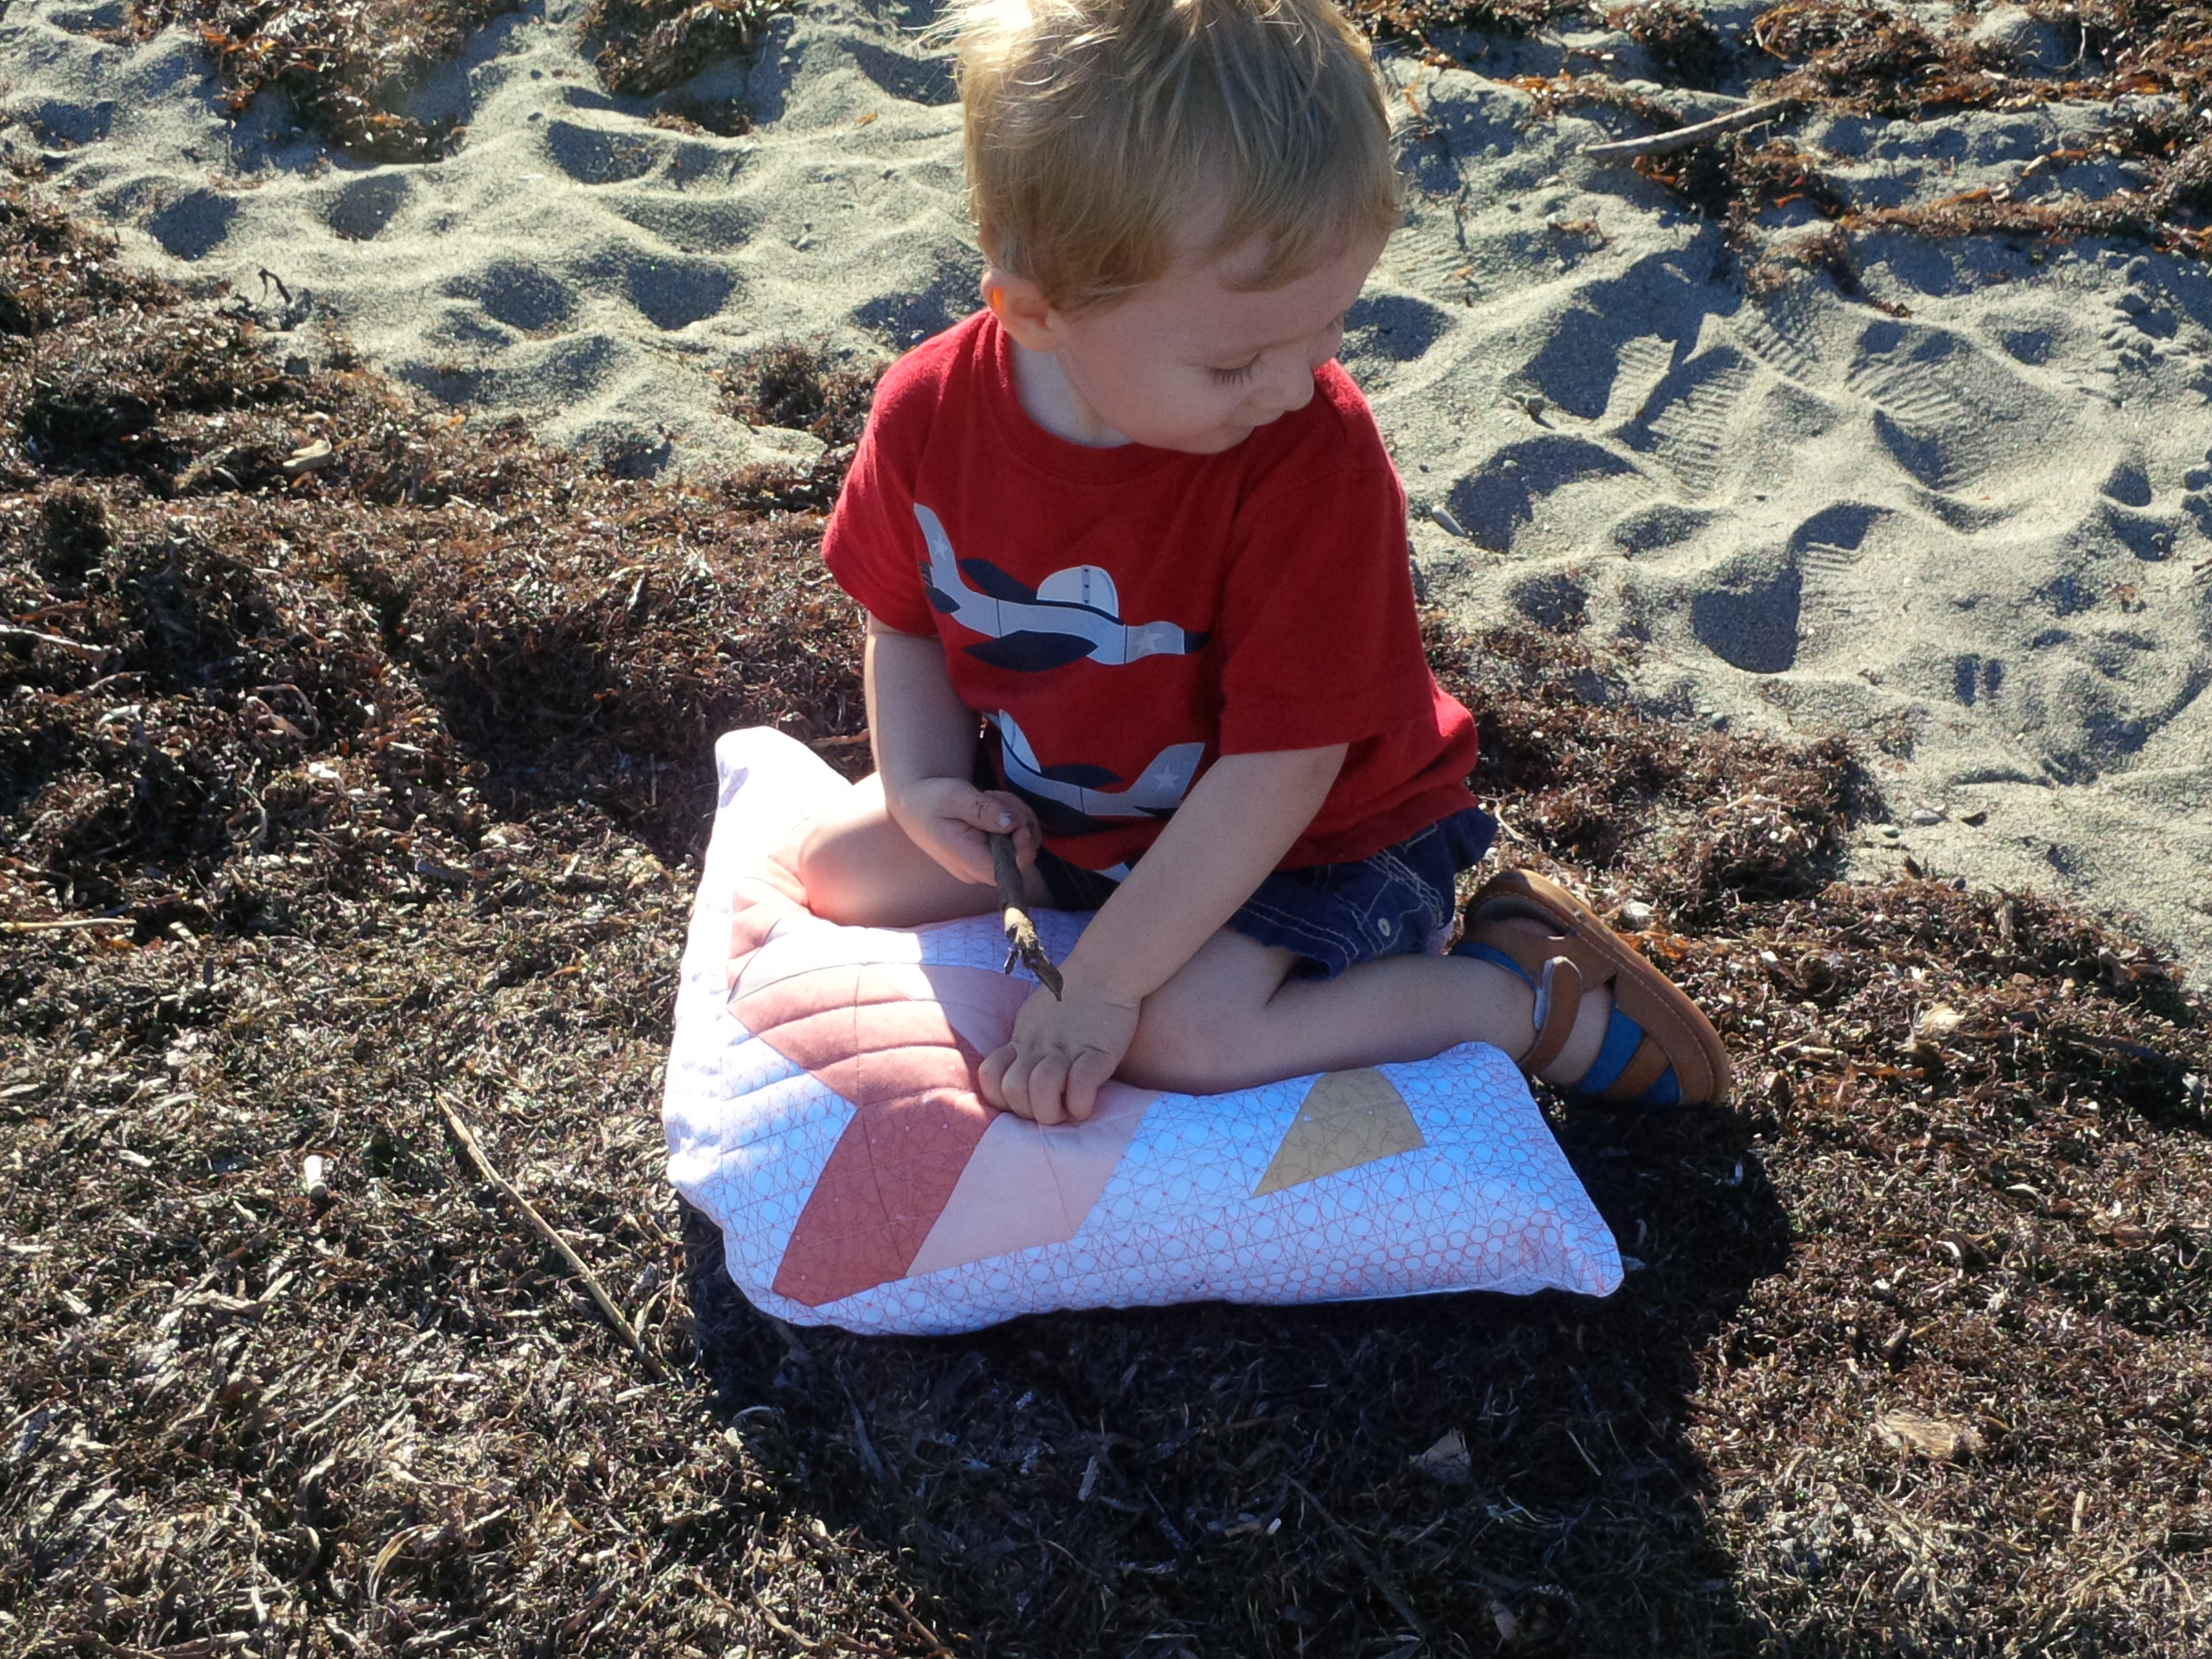
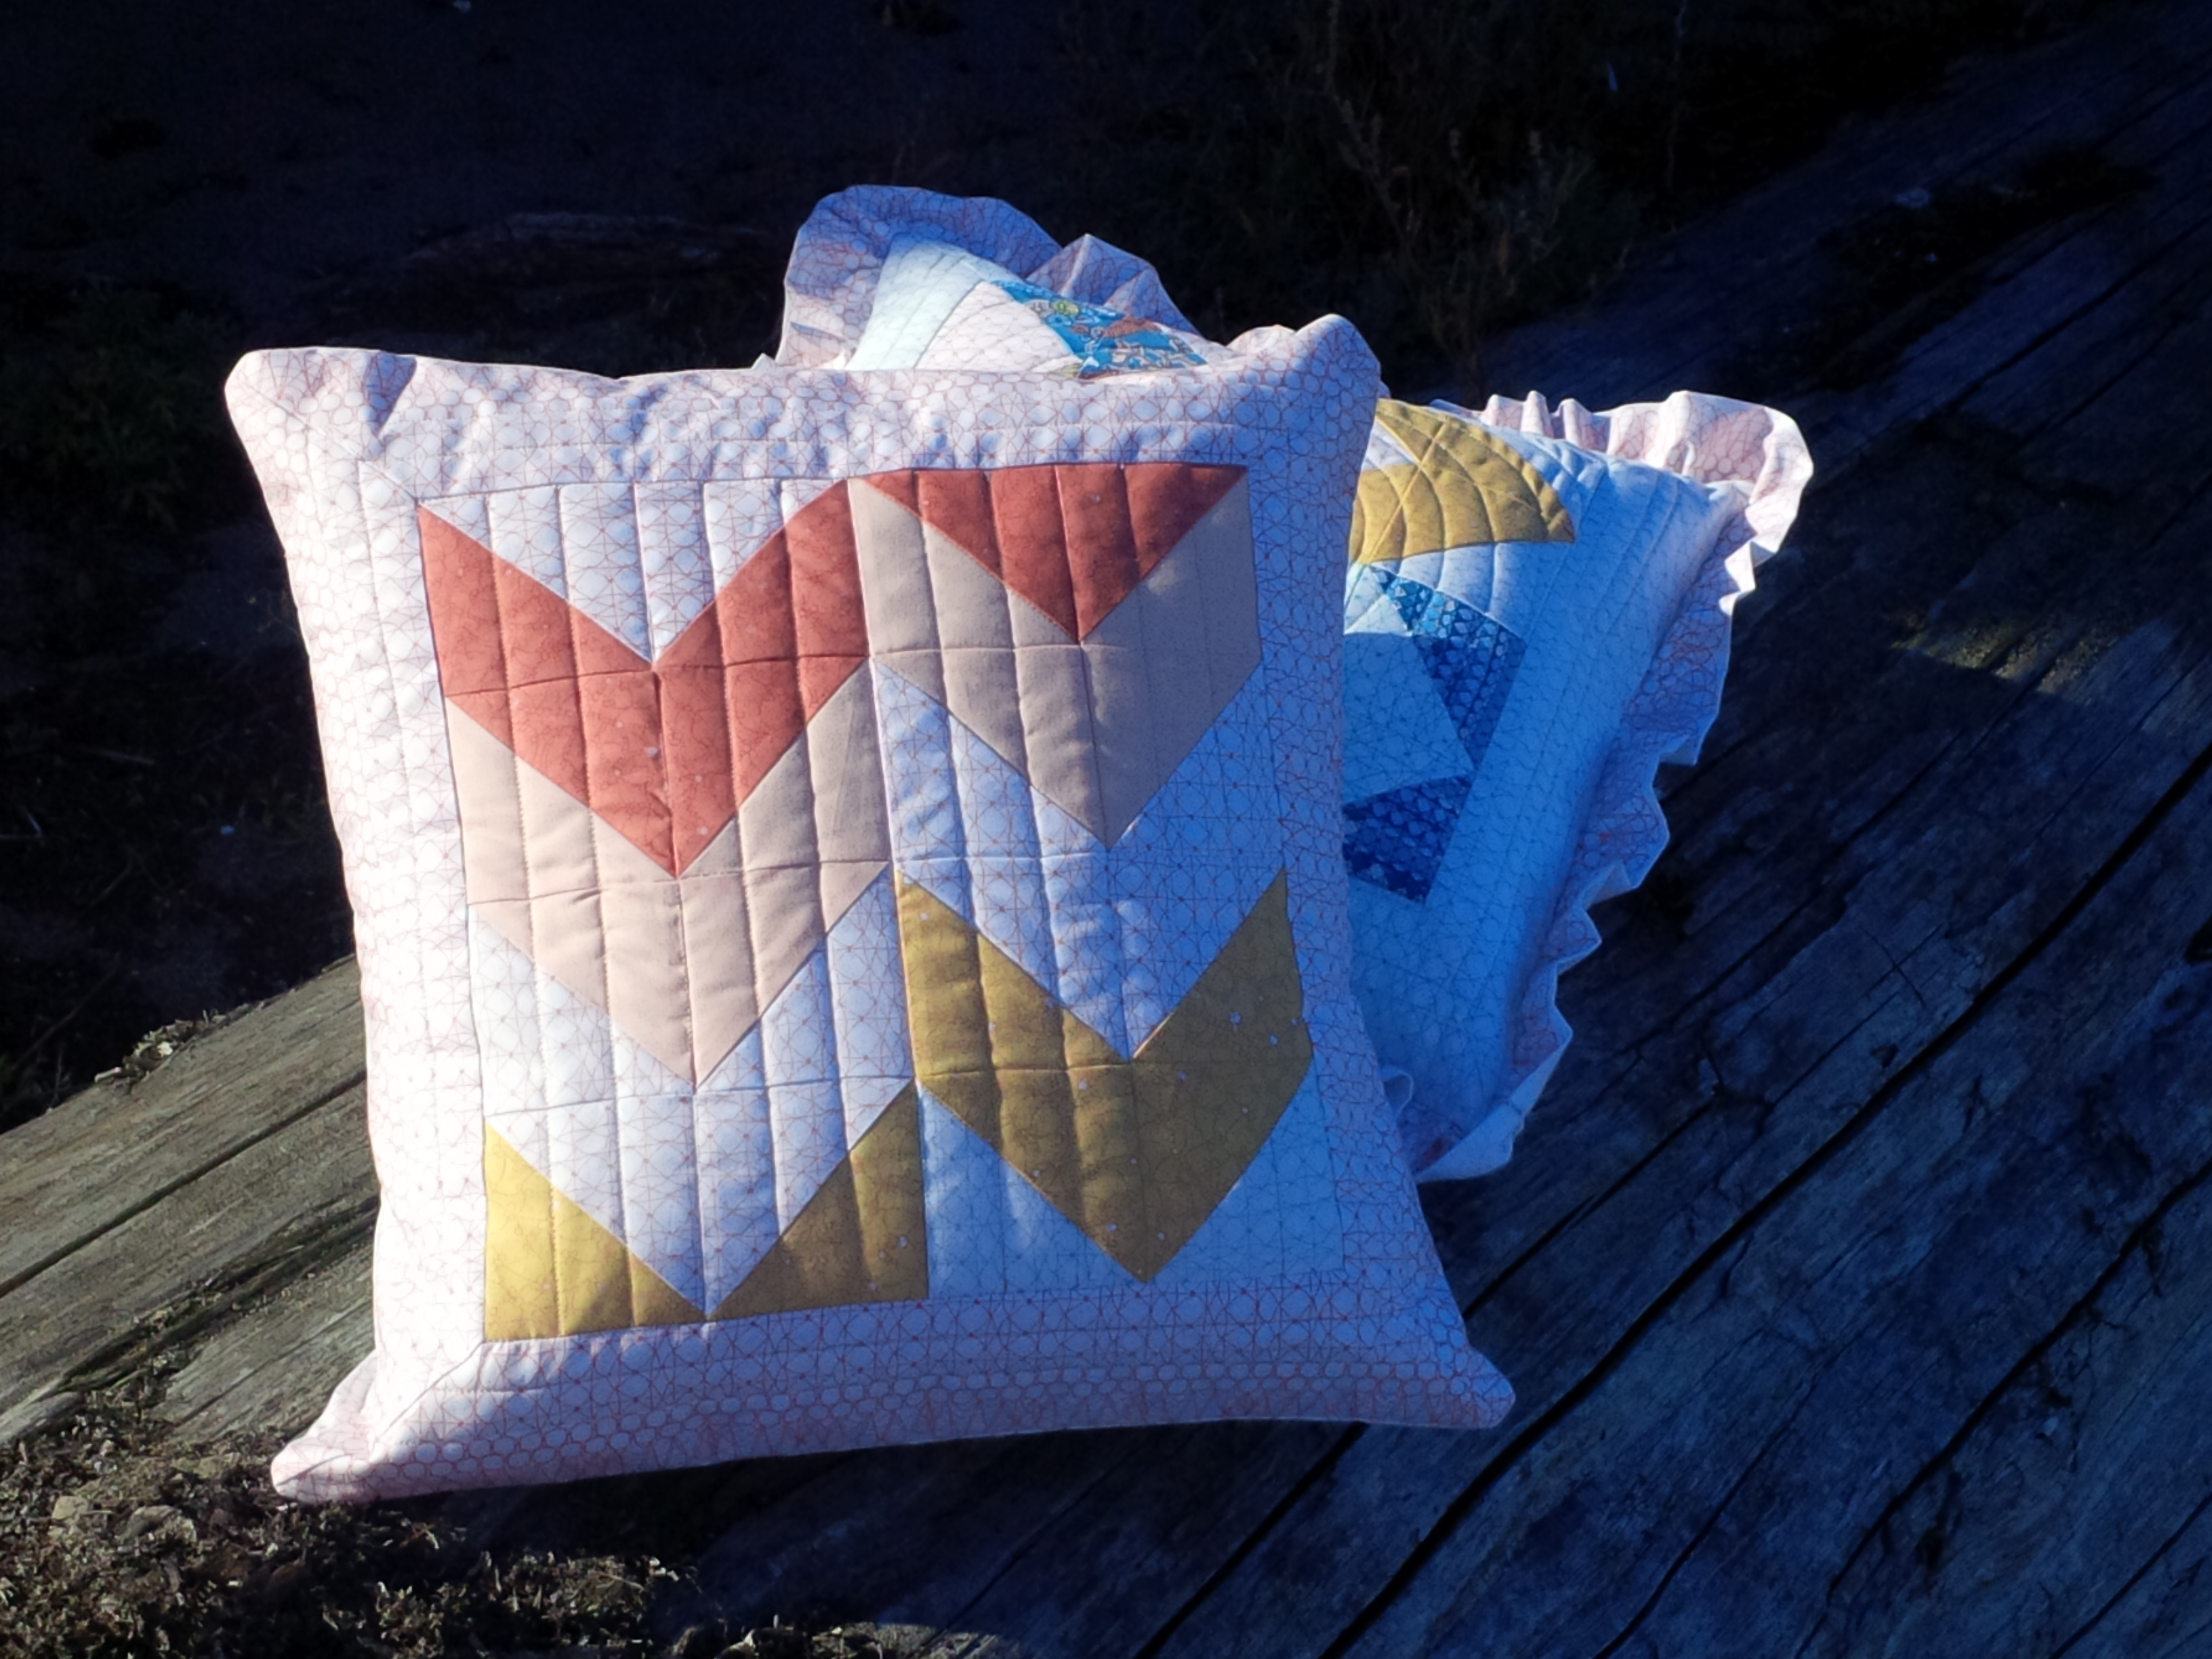
will be coming around the same time as the collection is released is now available from my Craftsy shop. In the meantime I really wanted something to share with everyone. There were a lot of leftover half square triangles left over from the quilt, so I chose to make pillows to match the quilt. They whip up quick and we had a lot of fun at the beach taking pictures.
IMG_20140914_163530

H helping out

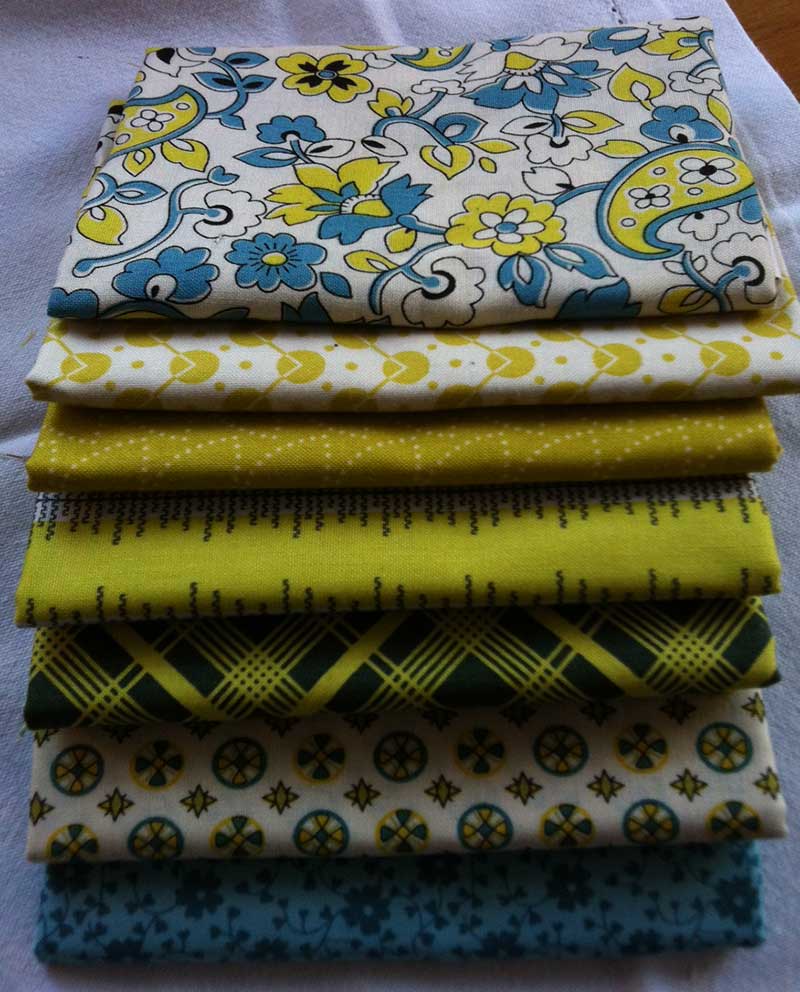
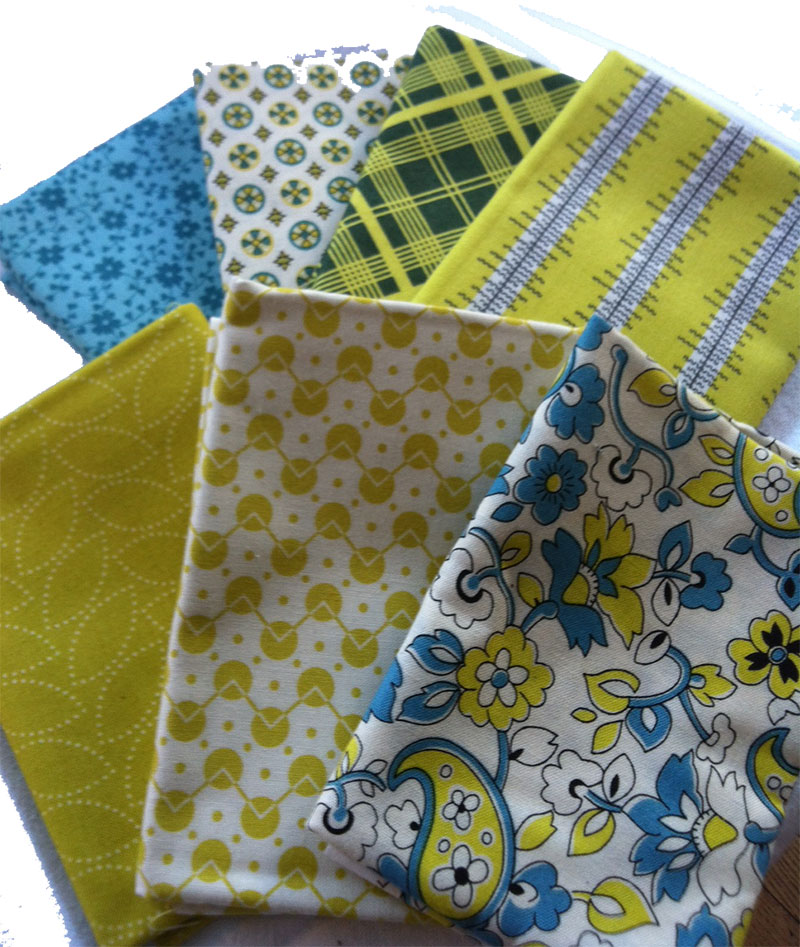
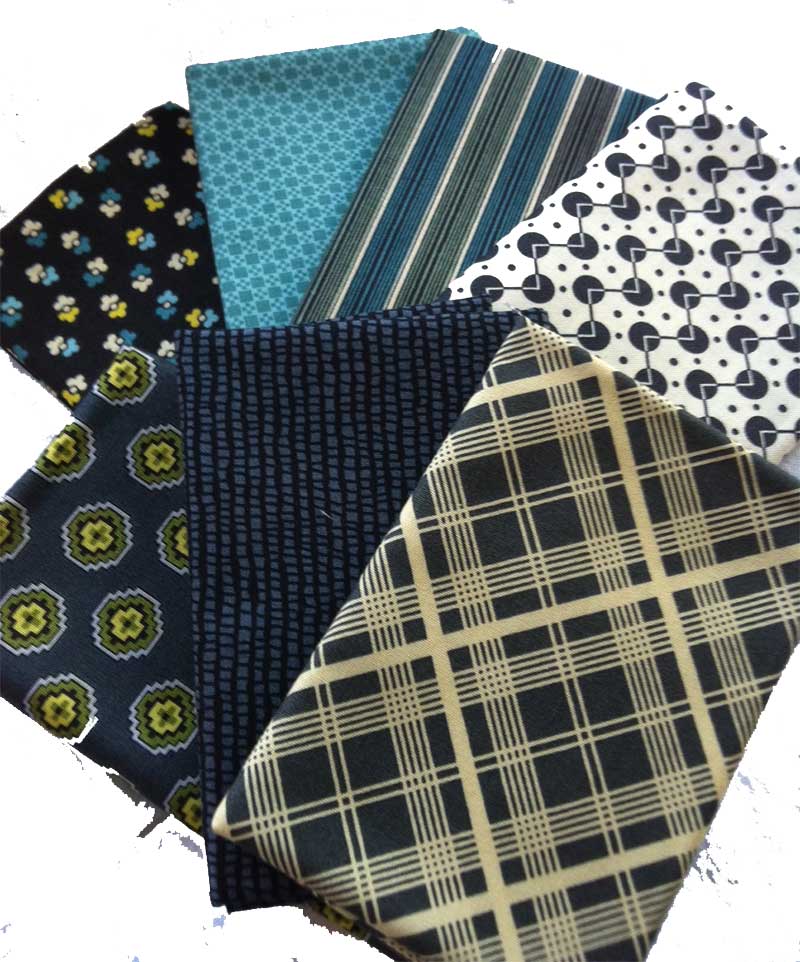
After the tutorial there is a Fabric Giveaway! Windham was generous enough to provide a full fat quarter bundle of Tidal Lace for each blog to give away! When you’re done here, hop on over to Anne @Play-Crafts and check out her awesome pillow! The full hop list can be found here, be sure to visit everyone and enter for your chance to win a bundle. There is a whole lot of talent packed into this hop, and I can’t wait to see what everyone else has planned for Kim!

The Tide Pool Pillow Tutorial

IMG_20140914_163034

Fabric Required:

An assortment of HST corner scraps-16 background and 16 prints. If you are cutting from scraps you want 8 squares 4″ of assorted prints and 8 of the background, cut in half to make 16 HST’s of each
4 strips of fabric 18 1/2″x 3″ for borders (I used the background print)
2 rectangles, 14 1/2″x 18 1/2″ for pillow back
1 square of batting 19″x19″
1 square of plain fabric or broadcloth 19″x 19″
*optional* a 6″x 90″ pieced strip for the ruffle (I used the narrow border print)
 an 18″ square pillow form

Instructions

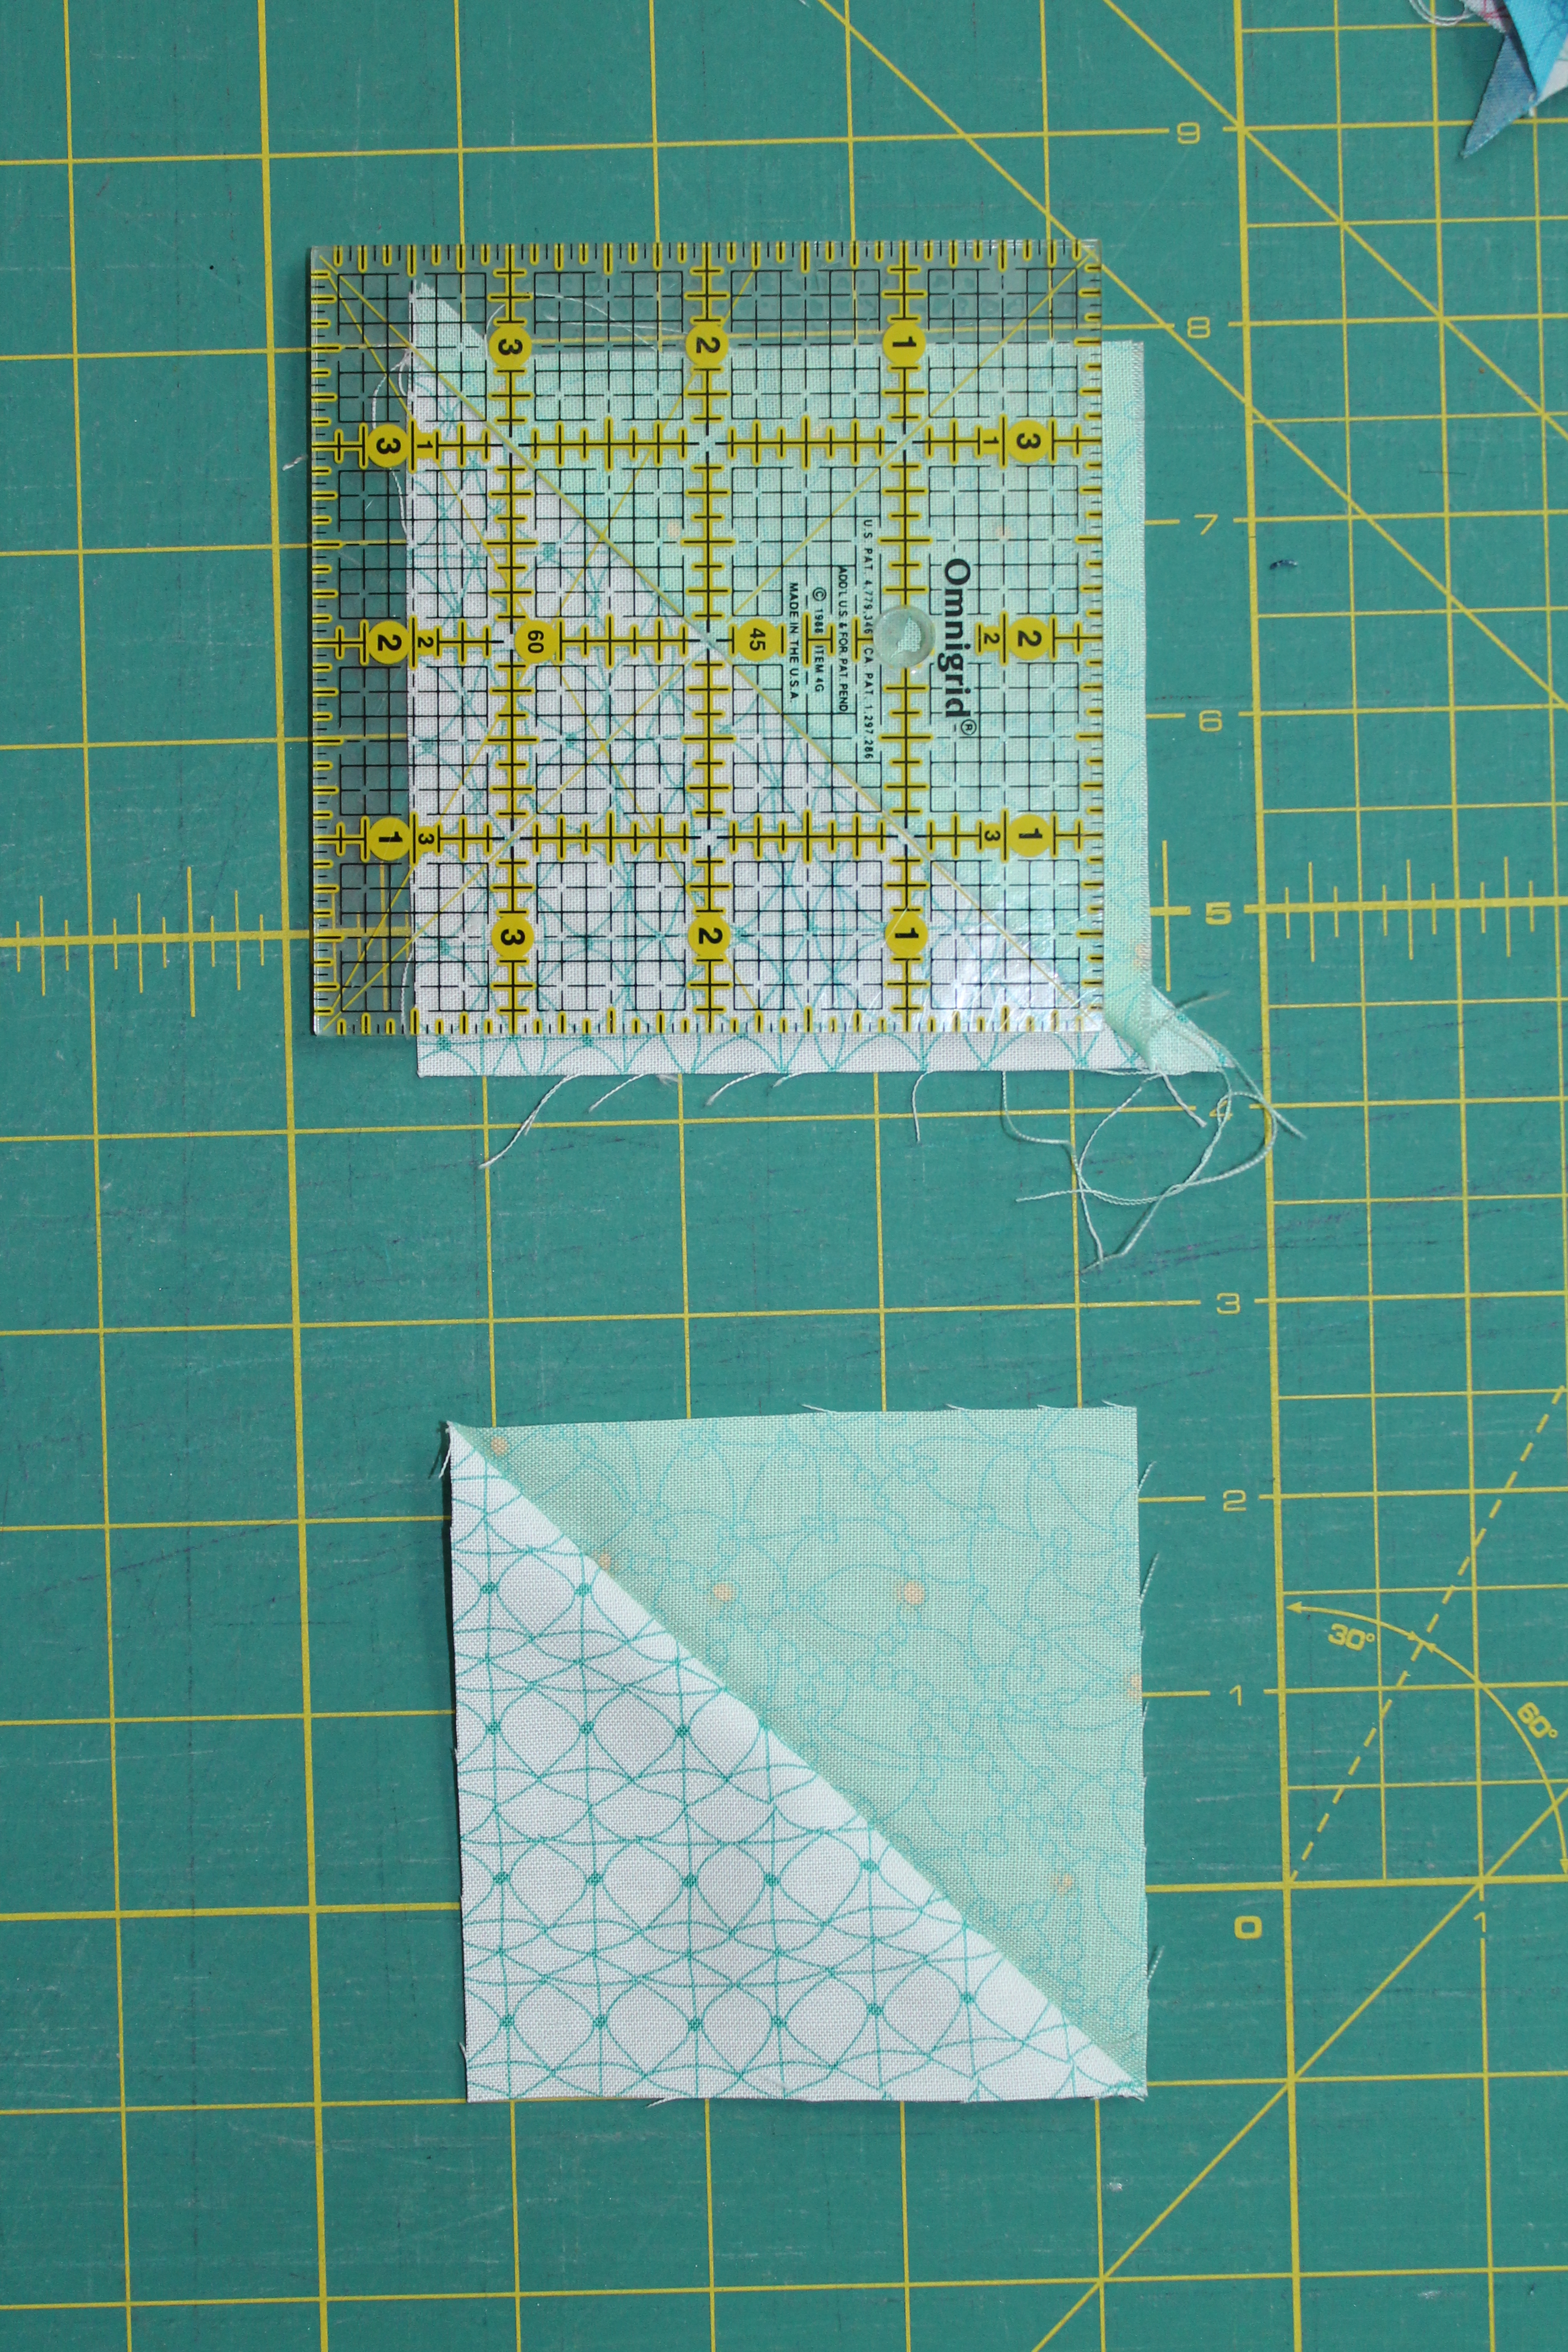
1. Sew the print HST’s right sides together with the background HST’s to make 16 HST squares. Press and trim the squares to 3 1/2″.
 Trim squares
 2. Arrange the squares on your design wall or cutting table so that the HST squares form chevrons. Play with the layout until you are happy with it.
HSTsquares arranged

HST squares arranged

3. Sew the HST squares into pairs and then into the chevrons. Double check the layout on your deisgn wall

Double Check!

Double Check!

4. Sew the chevrons together to make the center of the pillow. Press well, square and trim.

5. Mark the seam allowance in the corner of the pillow center. Pin the border strips right sides together to the pillow sides, matching centers. Sew the border strips to the side of the pillow the marked corner of each seam allowance. Press the strips out, pin the top and bottom and sew in the same way, stopping and starting at the corner.

IMG_3850

6. Draw a line from the corner of the seam allowance to the edge of the strip. This will be the stitch line for the your mitred border. Do this for both sides for the top and bottom strips.

IMG_3852IMG_3853

 7. Fold the pillow right sides together on the diagonal so that the ends of the border strips are matched up. Push the seam allowances out of the way and sew down the line, starting at the seam allowance and stitching the edge.

IMG_3858 IMG_3855

8. Trim the seam to 1/4″. Repeat sewing for the remaining three corners, trim, and press all the seams open. Press the pillow top well.

IMG_3859

9. Layer the pillow top, batting and the broadcloth square to make a small pillow sandwich. Baste and quilt as desired. Trim and square the finished quilt sandwich.  * Now would be the time to make the optional ruffled edge. I use this tutorial,. If you don’t have a ruffler for your machine, a line of basting and then a gentle gather does the trick.*

IMG_3860

10. Take a 14 1/2″x 18 1/2″ rectangle. Fold one end over 1/2″ to the wrong side, and then 1/2″ again, so that the raw edge is covered. Repeat for the other rectangle. Topstitch next to the fold. Layer the pieces right sides together on the pillow front, so that the finished edges overlap by 4″. Stitch around the pillow 3/8″ from the raw edge. Trim the corners and finish your edges either with a serger or a zigzag/overlock stitch on your domestic. Turn the pillow to right side out through the opening in the back, stuff with an 18″ pillow form, and enjoy! The pillow finished slightly under 18″ square, giving the pillow some loft when the form goes in. 

IMG_20140914_163438

IMG_20140914_163358

Voila! I hope you enjoyed the tutorial!

On to the Giveaway!!

To enter, just leave a comment below on this post! Tell me what you would create to make a connection with someone, which is your favorite, or just how much you love the collection (because, come on, who wouldn’t love the collection!)

Tidal Lace Wheel, borrowed from Kim with permission

Tidal Lace Wheel, borrowed from Kim with permission

The winner will be drawn Sept 23 at 8pm PST. Make sure to visit the other blogs to see their awesome projects and inrease your chances of procuring this lovely bundle of joy!

Happy Stitching

StaceyDay_Logo

New Beginnings

It all started innocently enough. A random compliment of a friends closet. How tidy and organized it was.

“You should come over and do my closet” I (half) jokingly stated.

” Sure, I love to organize things!” She replied

We continued with our play-date.

Fast forward to Monday. She was going to be free, did I want to do something? “We could go to a movie, or organize your closet. Or whatever”

I chose whatever.

” Alright, I will be there at 8!”

*knock knock*

” So where is this closet?”

*Gulp*

I didn’t take a before picture. I don’t think it would have come close to conveying just how much was stuffed into those little square shelves. While I went to grabs us a couple of drinks (no, not those kind, though by the end of the night I could have used…. like…eight) she started pulling fabric. And pulling. And PULLING. I really did not know how much I had in there! And dangnabbit woman, you were fast! There was no time to turn back. in 5 minutes a lifetime of collection was out and in my face.

I

Have

A

PROBLEM

A big, scary problem. One we probably all have, but don’t realize it until it’s staring us in the face from every flat surface in the room.

PURGE BABY PURGE! 003

That picture marks the halfway point of the night. HALFWAY!!!!

PURGE BABY PURGE! 002

It was an intervention. A cleansing of the soul. It broke my heart to see some of the beautiful pieces hidden that could have been used. Forgotten, forlorn fabrics that were never going to see the light of day because I had grown out of them. Sentimental pieces, one never even cut into, from my very quilt shop excursion with my grandmother. All stuffed into a closet and largely ignored.

This was the hardest thing I ever had to do. That includes childbirth. We sat on the floor, and she kept me focused. We talked about the fabrics, and the reasons why it needed to be done, why some never were used, and how it got to this point. For the most part, it was such a huge job that I never got around to sorting it, and it piled and accumulated until it was a scary closet monster.  I also think I did not want to face the reality of how much fabric I have actually purchased over the years.

PURGE BABY PURGE! 006

Here is the walk of shame. All the pretty, beautiful fabrics that I realistically would never use in a project. As a quilter, my tastes and vision have morphed and changed so much that many things I thought were perfect for such and such a quilt, are no longer appealing. I vividly remember the feeling of discovery, how it was a gorgeous piece with so much potential. I can still appreciate the fabrics, their potential and beauty, but the ugly truth is I can no longer see myself using some of them in a quilt.  Some people might think “gee, whats the big deal?” But I think most of you will understand. That is why I chose to share with you.

I owe a debt of gratitude to my friend. She kept me on track and strong. Hard realities with compassion and understanding. Tonight we are going through and sorting the bags further. Some of the fabric will end up in my etsy shop. The majority will be given away to a worthy organization called Victoria’s Quilts Canada. Victoria’s Quilts is a non-profit group of volunteers that take donations of fabric and quilt making supplies and turns it into quilts for people who have been diagnosed with cancer. So far this year they have given away 2223 quilts. This year. Since its inception in 1999 they have freely given almost 34,000 quilts to cancer patients.  There is Victoria’s Quilts in the States as well, which was founded in 1998.

IMG_00000066

Here is the after picture. Organized, and a lot less full. I still need some storage solutions for my heirloom quilts as you can see across the top. UFO’s are in clear bins and clearly marked with the project name. There are still many to go through, and decisions to be made about unquilted tops, and the finished quilts languishing in the closet. Some have already found forever homes. That makes me happy, because our quilts are made to be enjoyed.

Stacey

The Wedding Quilt

A coworker of mine has been gearing up for her best friends wedding all year. She has been all over the place planning parties, a stagette, showers, and helping with the details of the big day. They have been friends since high school, and she wanted to do something really special as a wedding present. She asked me come up with a quilt that would capture her friends crazy and quirky nature, while still complimenting her wedding colors.

I suggested a free-pieced low volume log cabin block inspired by a WIP posted by Anna at Play-Crafts.  She took one look and loved it, so we went out and picked up a stack of low Volume fabrics. Some Batiks, a lot of Comma, and some random pieces, with some colorful pops and a gorgeous Disco Dots backing in teal, and we had a quilt!

The Wedding Quilt for KT

The Wedding Quilt for KT

The blocks are 12″ finished. I cut a ton of random strips from the low volume fabrics, and built them up log cabin style randomly around the center piece. KT sent me her favorite pictures from the last year, and I used Iron on photo transfer paper to attach them to the blocks. Next time I may print right onto the fabric, as the transfers have a very bad habit of melting near heat, and they did not want to secure properly.

Lovely engagement photo!

Lovely engagement photo!

I quilted the entire thing in straight lines in a windmill pattern, so the lines are all in different directions, skipping around the photos.  The blocks were sewn together randomly so there is technically no up or down to the quilt. This way no matter how the quilt is laying she can see the pictures.

Thw quilting

The quilting

I double stitched the binding. I like the look of 2″ binding, it turns over snugly and has a low profile around the edges. The black really sets off the quilt.  I have a really easy technique for finishing the binding, I am working on a tutorial.

Binding

Binding

I had so much fun making this quilt. All free pieced, no borders, no rules! A very freeing experience, and I think is one quilt option that will make another appearance in the near future!

Happy Stitching!

Stacey

August 108

StaceyinStitches Bloggers Bundle!

After a couple months of emails and picking fabrics, I am thrilled to announce that Pink Castle Fabrics has added the StaceyinStitches Bloggers bundle! It was so much fun going through all the fabrics and picking out just the right colors for my bundle, Glacier.

Glacier was inspired by….you guessed it! Snow! I wanted to have a Canadian feel to the bundle, and lets face it, when one thinks of Canada, ones thoughts turn immediately to snow. When we go traveling and the locals find our your Canadian, the first questions is usually snow related. When you think of snow, most people think white white white, but one visit to Glacier National Park and you will never see snow the same way.  Most of the ice pack was formed before there were too many pollutants in the air, and the purity of the crystal clear ice to deep teal colors in the packed layers of  snow are a testament to that.

I hope you all hop on over to Pink Castle Fabrics and check it out. They have some wonderful bundles! If you ever travel to British Columbia, be sure to plan a trip to Glacier National Park. It will take your breath away!


Giveaway Weekend Sponsored by Flare Fabrics *Winner Announced!*

*Drumroll Please*

Its Giveaway Weekend!

I am super excited to announce our very first Sponsored Giveaway!

As most of you know, Flare Fabrics is one of my favorite online stores in Canada. Not only does Marlene carry a mouth-watering assortment of batiks, which are my favorite fabrics to work with, but a great variety of modern and bold cottons as well. To make a great shop even better, Flare Fabrics offers free shipping on any order within Canada! They are just entering their 3rd year in business, and to help celebrate and spread the word Marlene from Flare Fabrics is offering not one, but TWO fat quarter bundles of  Chicopee by Denyse Schmidt to giveaway here at Stacey In Stitches! Each bundle consists of 7 coordinating prints in the Morning Palette.

Chicopee-by-Denyse-Schmidt2 Chicopee-by-Denyse-Schmidt1

I am posting the giveaway early, because today is also Visit Your Local Quilt Shop Day! Hurray! If you follow Marlene’s Blog or receive the newsletter, you will see that Flare Fabrics is also offering extra surprises with an order of $25 or more all day on January 24th.  There is a little bit of something for everyone. I especially like the Odds & Ends section of the shop, which contains an assortment of Hand Painted Bali Panels from Indonesia.  This Dragonfly Panel in particular has caught my eye! I highly recommend heading on over to check things out and support a great Canadian Online Shop!

Okay, I can hear you all giggling with giddy excitement at the chance to win some beautiful Denyse Schmidt prints. So here is all you have to do:

1. Follow Stacey In Stitches however you like! Via RSS, your reader, whatever! Just leave a comment saying that you do!

2. Head on over to Flare Fabrics and either “like” them on Facebook or sign up for the newsletter ( which always has great stuff in it as well as regular Giveaways!) and leave a second comment letting me know which you picked!

IF you are already a follower of either Stacey In Stitches or Flare Fabrics (or both), just leave a comment (or two) =)

Easy Peasy! That’s TWO chances to win one of the TWO bundles.  I will keep the giveaway open until Sunday afternoon at 5pm Pacific. Please make sure that there is a way for me to reach you if you win! The giveaway is open to everyone in Canada and the United States.

Thank you to Marlene from Flare Fabrics for sponsoring the Giveaway Weekend!

Winner of Bundle 1 is: #34 Janet Yaska

Winner 1

Winner of Bundle 2 is: #2 Pretty Lady Baby

Winner 2

Congratulations! I will be contacting you both shortly!

Chicopee-by-Denyse-Schmidt6 Chicopee-by-Denyse-Schmidt4

Bottled Rainbows Quilt by Maureen Cracknell Handmade

Today I would like to share a quilt from Maureen Cracknell Handmade. Maureen’s blog is one of my favorites. She always has something creative, fun and inspiring to share with us. That she does it with 3 children makes it even more amazing!

Maureen Cracknell Handmade, Bottled Rainbows

Image courtesy of Maureen Cracknell Handmade

The Bottled Rainbows tutorial is one that many modern quilters know. It inspired one of our VMQG Challenges last year, and the resulting quilts are always beautiful and colorful. Maureen took Bottled Rainbows to the next level by using shapes and motifs instead of just squares and rectangles. You can read more about Maureen and her Bottled Rainbows Quilt here : Maureen Cracknell Handmade: My Bottled Rainbows Quilt : :. I love her construction techniques. You can also find the original Bottles Rainbows Post and Tutorial here.

Thank you Maureen for allowing me to share your work!


Cathedral Window QAL

Yesterday marked day one of the Cathedral Window Quilt A Long Blog Hop! Sara of Sew Sweetness gave us our first tutorial, the Layered Cathedral Window,  and I love how her block turned out! I have decided to use a consistent color scheme throughout the QAL. I am going to be using Limes, Aquas, Teals and Yellows. There are 9 blocks in this QAL, so I hope I have enough fabric! Ha ha ha, like that’s really a problem for me…

Here is my finished block! I ended up ripping 2 portions apart and placing the fabrics in a different order, but I am so happy with the result. There is some definite movement in this block! I love the lime green! It is an almost impossible to find Robert Kaufman Blender. I ordered it from Australia 2 years ago (the only place I could find it) for $20/meter! But I love it so much! I will use it in all my blocks, though maybe I should have picked a different color, Cathedral Windows do use up a lot of fabrics! There are 5 layers to sew through on each side of this block. I pressed my seams open using my heaviest iron, lowering my board, applying a TON of pressure, and STEAM. The result is a nice flat block with no seam bubbles! Hurray!

A huge thank you goes out to Bree at My Crafty Crap for hosting this QAL, and to all the sponsors for the wonderful prizes! You can find the QAL rules, blog roll, and prizes there.

I can’t wait for the next block!

Happy Sewing!

Rainbows For Maranda

I am part of a couple mommy groups, and one of the other mommies came across this. I contacted Patricia, and the little girl is in her friend’s Brownie Troop.

I know I get some international readers, so I would like to encourage everyone to take part. It will cost you nothing but a stamp! Lets help make a little girl’s dream come true!

Could everyone, including you big kids, draw a simple picture of a rainbow and mail it to Patricia Verhelst Box 355, Radville, SK S0C 2G0 Canada, by next week and I will send them all in together. There is a little girl in Saskatoon who is sick who wishes to get a rainbow from everyone in the world. Please write your name and where you are from on it. Lets make a wish come true if it was your child you would want that! Thanks everyone and please copy and paste this to help spread the word!This little girl’s name is Maranda, she is 10 years old and I’m really hoping everyone will do their best to make her wish come true!

During my clinical training, I did a month long rotation through the BC Children’s Hospital. Even three years later, that month has stuck with me, even more so now that I have a child of my own. It takes something so simple to make these kids happy.The odds seem so stacked against them, yet they shine through the adversity with bravery, strength and smiles for those who care for and about them. I will always remember my time there, and I know it shaped part of who I am professionally with my patients and at home.
Please, share this with your friends, family, and other bloggers!

Here is the address again:

Patricia Verhelst

Box 355

Radville, SK

S0C 2G0

Canada